
What’s in My Camera Bag – Yellowstone in Spring, Summer, and Fall
Things are looking good for upcoming Yellowstone seasons and it could prove to be one of the best years to photograph this iconic US National Park. In addition to visitor numbers being perhaps lower than usual, guides, lodges, and other on-the-ground service providers are keen to showcase why nature tourism plays a critical role in the conservation of natural habitats.
If you’re headed to Yellowstone in the “non-winter” seasons this year (or any year!) you’ll want to have the right camera gear to give you the capabilities for the immense diversity of photo ops possible in this spectacular region.
Please note, photographic styles vary, as do conditions on the ground. While this is meant to be a guide for choosing your camera gear, you should consider your own photographic interests first and foremost.
Ultra-wide Angle vs. Wide Angle?
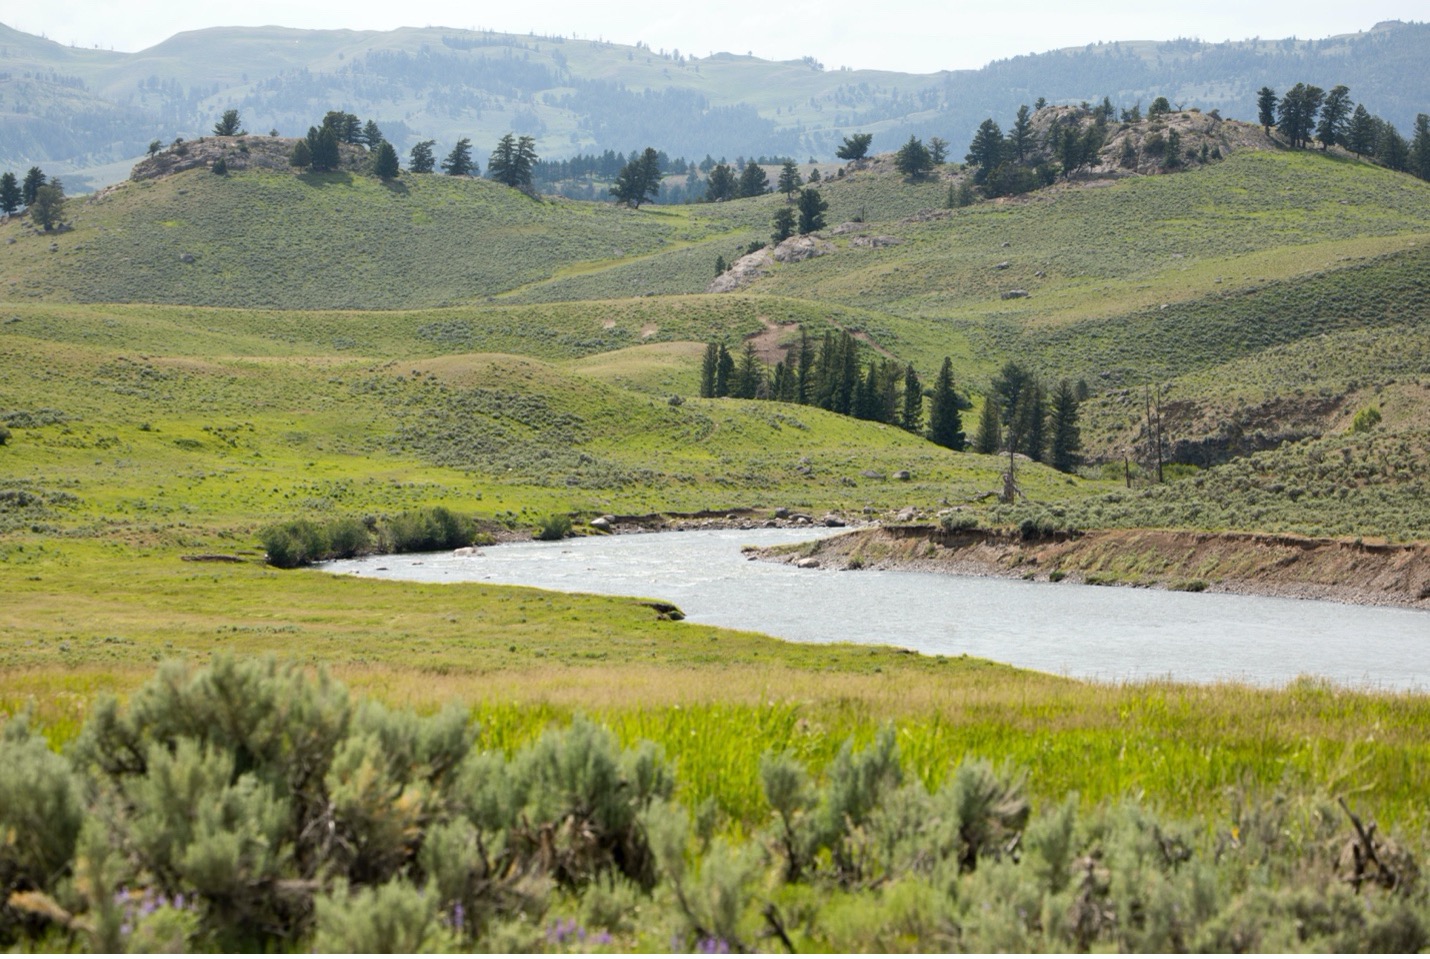
The scenery in Yellowstone is no doubt one of the key highlights. The question many photographers ask is whether a “normal” wide angle (e.g., 18-55mm for crop frame, 24-105mm for full frame) is enough to capture the grandeur and beauty of the vast valleys, thermal features like geysers, and impressive mountain ranges.
In short, yes, this class of lens is fantastic for general landscape and travel photography. The zoom capabilities are particularly helpful, as you can zoom in to frame shots as you see them, while also using these lenses to double as a macro lens for wildflowers, insects, and other “life in the undergrowth.”
However, for the discerning photographer, an ultra-wide angle lens (e.g., 10-22mm for crop frame, 16-35mm for full frame) will be helpful and ought to be considered. These lenses are wonderful for those unique perspective shots, as well as features like geysers that might be just too big for a normal lens.
So in summary, a classic wide angle lens is mandatory, a ultra-wide angle is a bonus. (I often refer to this as an X-Factor lens when helpful but not totally critical).
If these crop vs. full frame terms are not familiar to you, please check out my article on crop vs. full frame terminology.
Zoom Telephoto
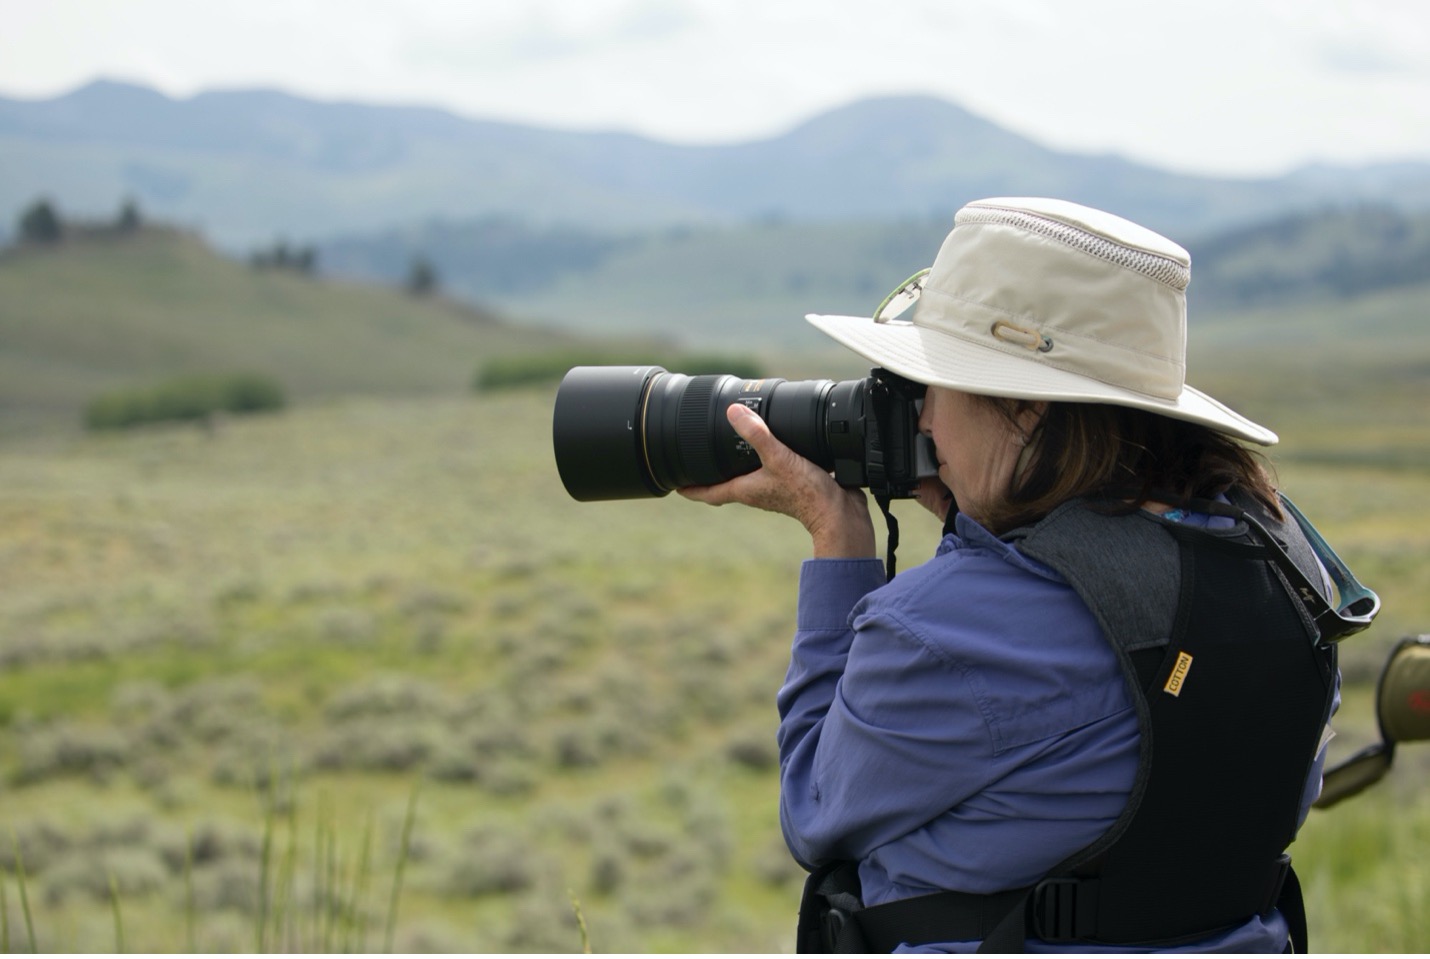
The zoom telephoto class of lenses is the workhorse for wildlife photography. While technically anything over 100mm and capable of a zoom range could be considered a zoom telephoto, what I’m really talking about here is your 70-300mm (for crop frame) and 100-400mm (for full frame). In addition, there is a growing suite of lenses even bigger than these in the 200-500mm and 150-600mm range that are particularly helpful for Yellowstone.
It’s not that wildlife will be far away, but it certainly could be in the vast landscapes of this National Park. But perhaps more helpful is the fact that with a zoom telephoto you don’t need to be as close as possible, which helps you manage crowds and other eager photographers in the area.
A bigger telephoto gives you more flexibility. I would not recommend anything less than a 70-300mm as your go-to wildlife lens, and frankly if you are considering picking up one of the bigger versions (e.g., 200-500mm) you won’t be disappointed.
To me, the venerable 70-200mm isn’t a must-have for this trip. If you choose to bring it, it will be helpful for bison photos (which are often closer than other wildlife) and landscape shots. It won’t be your go to for the majority of your wildlife photos.
Super Telephoto
Super telephotos are generally the pro photographer’s choice of lenses, as they offer supreme range as well as top quality optics for super sharp photos. However, they are often bigger, heavier, and significantly more expensive than zoom telephotos due to the pro-level nature of these behemoths. I’m talking about the 400mm f/2.8, 500 f/4, and 600mm f/4 class of lenses.
While not necessary, they will give you an advantage. In addition to their base telephoto power, they also work very well with teleconverters that can multiply their extent by 1.4 or 2 times.
Just be ready to potentially be a magnet for other photographers and guests, as you will always look like you’ve “found something” when out photographing.
X-Factor Lens
I usually try and pack one “x-factor” lens with me on each trip. These are lenses that are not critical, but could provide highly unique photo ops that really make a trip album or portfolio pop.
The three I usually consider are an ultra-wide angle, a nifty fifty, or a macro lens.
I could advocate how each of these could be really wonderful to have along, but we all only have so much room, right?
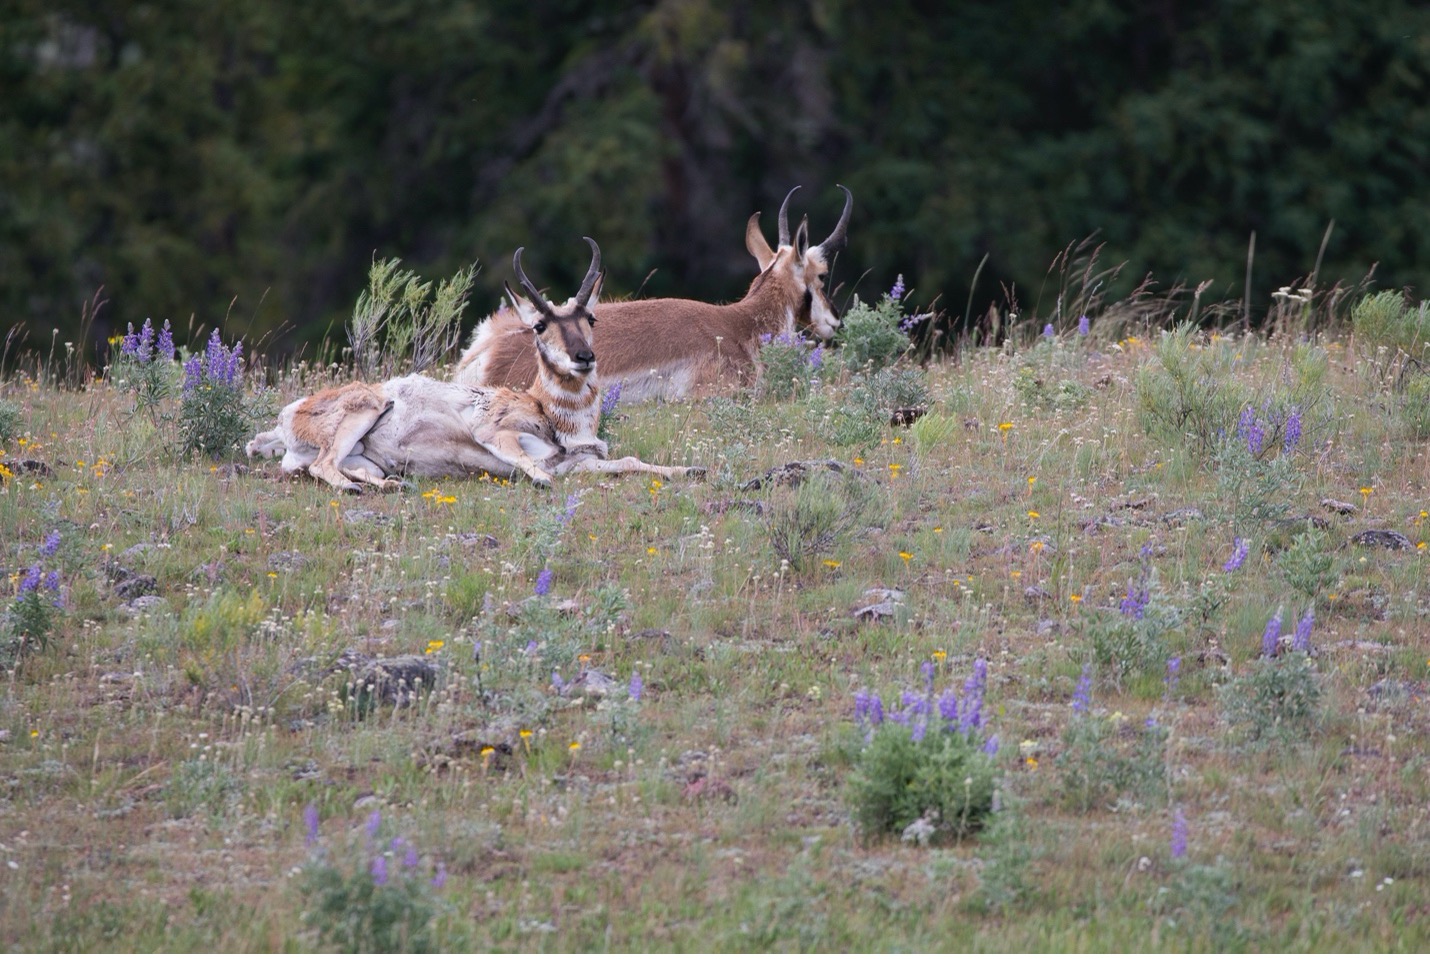
Thus, for this time of year in Yellowstone, I would recommend bringing a macro lens if you have one. If you do not, check out my article here on How to take Macro Photos without a Macro lens. It’s surprisingly doable.
However, if you do have a macro lens, you will likely be delighted at the photo opportunities of the smaller things in the landscape. From wildflowers, to insects, to even the small nuances of fall colors and pigmentation on leaves, it’s a wonderful way to capture a part of Yellowstone that rarely shows up in portfolios or albums.
Batteries
While Yellowstone can get quite cold in the winter, zapping batteries, the rest of the year can be relatively mild. If you encounter temperatures in the 30s or 40s, which could pop up in early mornings during spring or fall, the best strategy is to keep spare batteries in your pocket so that they receive a little bit of body warmth. This is enough to keep them charged and ready.
I recommend bringing at least two spare batteries in general.
Extra Camera Body
The benefit of having an extra camera body is two-fold. One is that it acts as a backup in case anything happens to your primary camera. And second, it allows you to have two different lenses “at the ready.”
However, as you can imagine, it add weight and heft to your setup. If you are the kind of photographer who often has two camera bodies with him or her, it’s a good idea to keep that consistent with a photo adventure in Yellowstone.
But if you do not often operate this way, I don’t think this is the time to start. Plus, smartphones offer a fantastic second camera that is slim and portable, giving you the ability for high quality landscape shots while your main camera body has a zoom telephoto on it for wildlife photos.
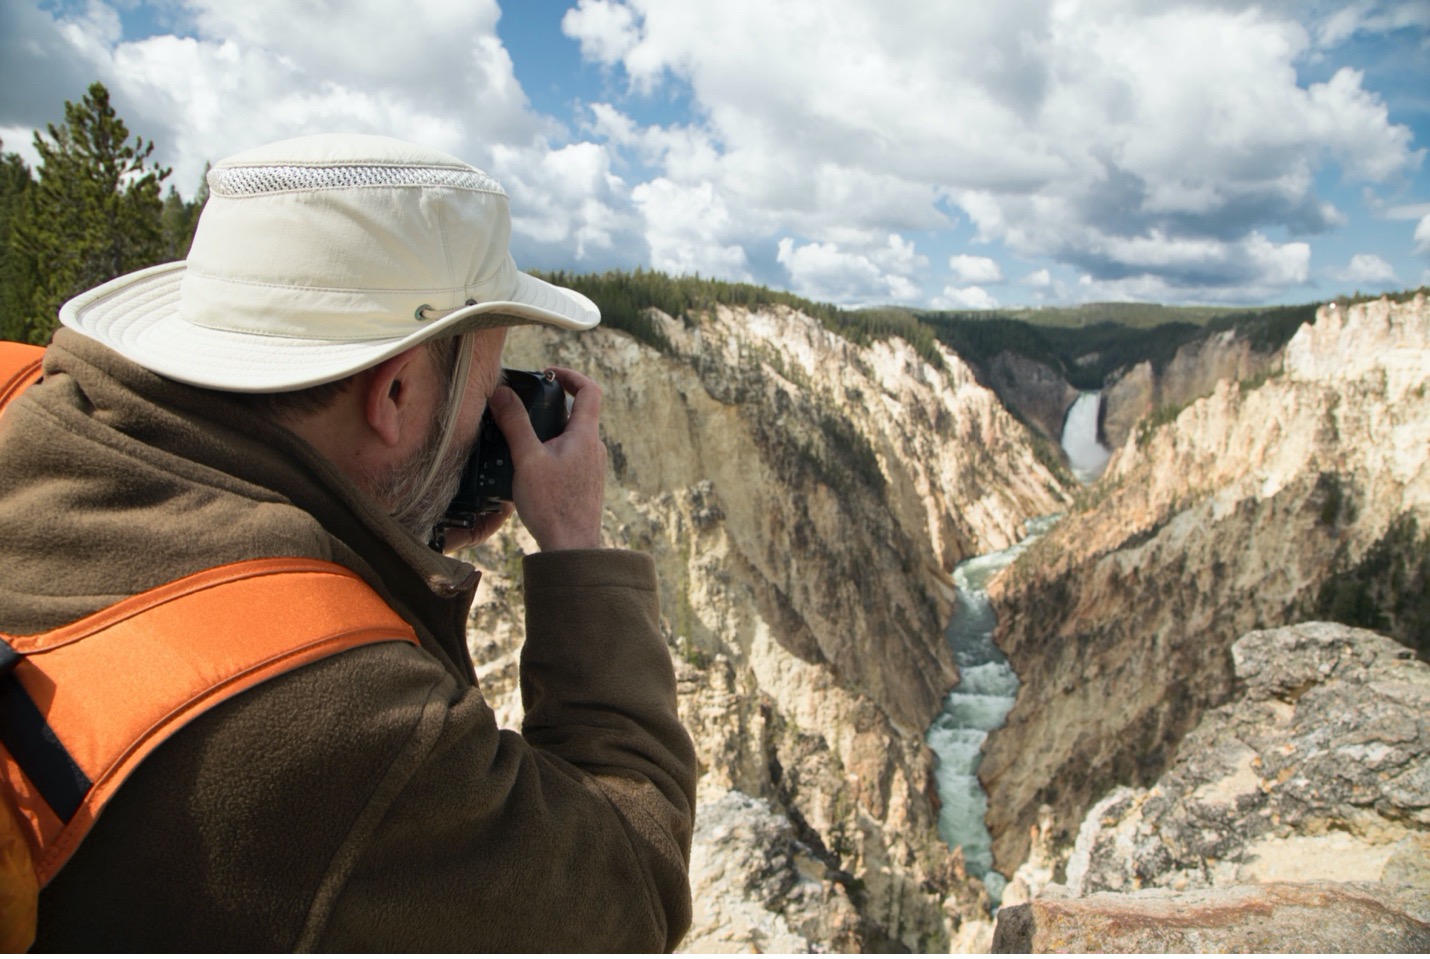
Tripods and Stabilization
A tripod is a nice addition to your kit for Yellowstone, not because of the critical need for slow shutter photography, but more because of the style of photography one often engages in during a photo trip in Yellowstone.
Wildlife watching and photography often involves patience. As you are waiting for a specific animal to come into view, or approach closer, having a stable platform on which to rest your camera is really nice.
In addition, if you are photographing something very far away, which is often the case with wolves, you can benefit from the stability. This stability allows you to shoot on very low ISOs, which will allow you to crop in more than you’d otherwise be able to do. You can also use a magnified focus using your LCD screen to get perfect focus on wildlife that is only a small part of the frame (e.g., again, with distant wolves that may not show up perfectly with auto-focus).
And then as a bonus, you are indeed equipped with the tool needed for slow shutter photography if you wish to, say, photography your lodge at night, or showcase moving water at the many rivers and streams throughout Yellowstone.
I hope this has been helpful, and as always, if you have questions or have other pieces of gear you’d recommend for a photo expedition in Yellowstone, please do leave a comment below!
Cheers,

Court
Leave a reply