Tips for Photographing Wild Tigers in India
India offers something that few other places and the world can even come close to—photographing the largest of the world’s big cats, of course! While tigers are found elsewhere in Asia, India provides the absolute best chance to photograph them in the wild in a truly extraordinary way.
Roving around ancient forests in 4×4 jeeps, elusive tigers can be found near watering holes and lakes in relative abundance. Sure, there is definitely some work to do to find them, but the chance is far greater here, in India, than anywhere else on the planet.
If you’re headed to India on a specialized tiger photo safari, or it simply is on your wish list for a coming year, there’s no time like the present to hone your techniques to maximize your photography when face to face with the largest cat in the world.
Start with the right wildlife lens
Your choice of lens is rather important for any nature and wildlife safari. For photographing tigers, it’s even more paramount.
Having versatility in telephoto power along with the ability to blur the fore- and background is extraordinarily helpful. But as you’re likely thinking, it’s difficult to get both. Usually you can have a great zoom range, like 150-600mm at the expense of not-to-premium apertures, like f/5.6-6.3 or similar.
On one hand, you could go with the classic 70-200mm f/2.8 or even go for the sizeable 300mm f/2.8, which gives you the large aperture to enable that beautiful blur, or bokeh. However, at 200mm you are making a gamble that the tigers will be close. More often than not, they actually are. However, it’s rather key to have something in the 400mm range as an insurance policy against the also likely distant tiger (or heck, family of tigers!).
Telephoto power also gives you loads more versatility in the type of photos you get. Big, edge-to-edge photos of tigers is always a goal of mine.
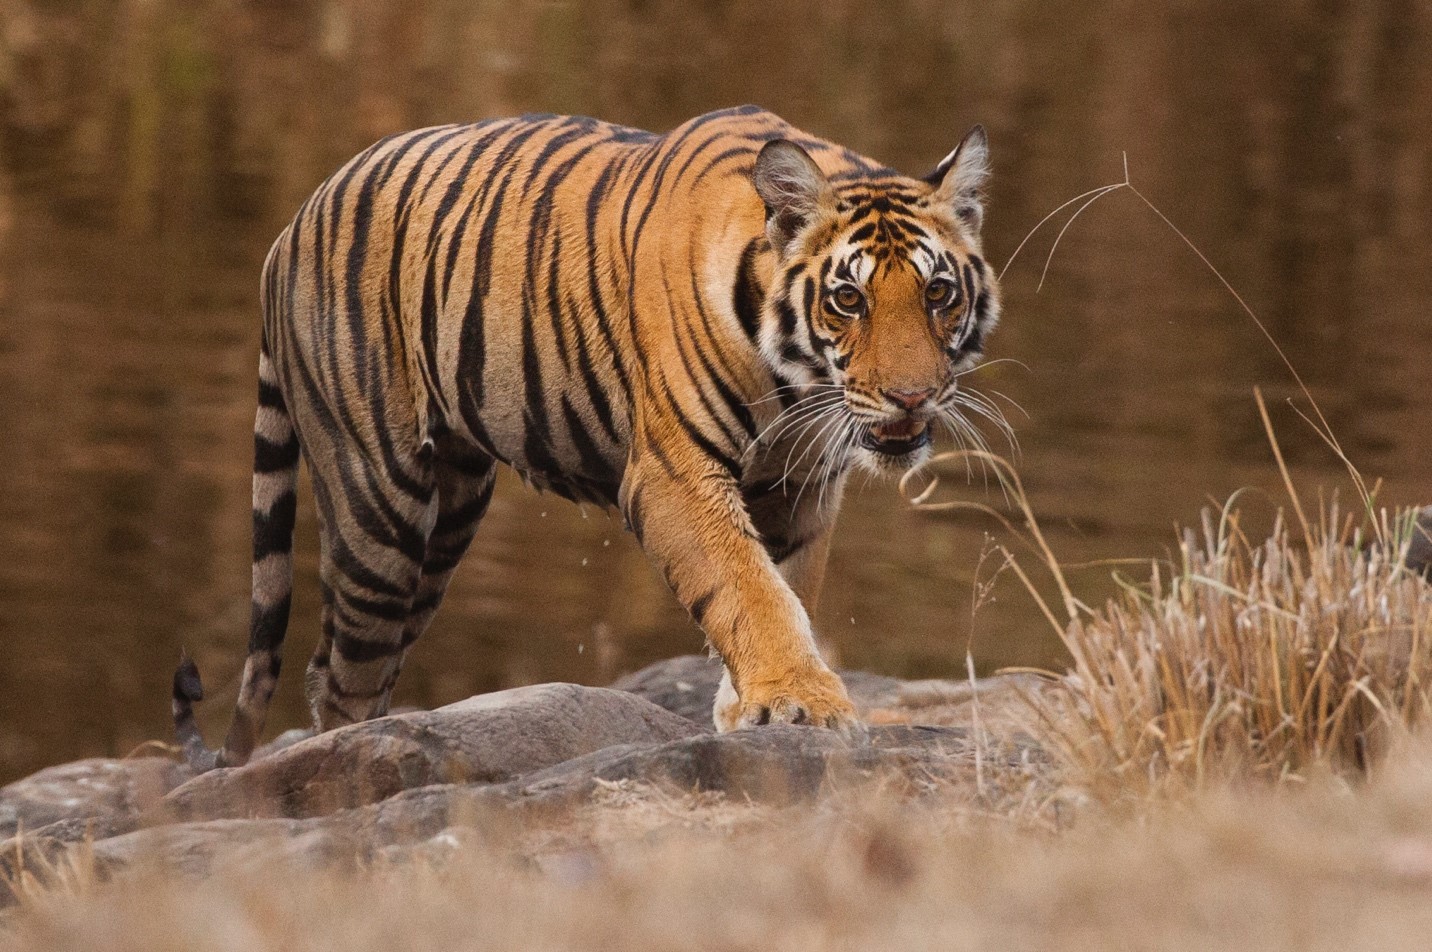
My personal recommendation is to err on the side of a great telephoto range and maximum distance at the expense of aperture.
That is, I would go for the 100-400mm, 200-500mm, or 150-600mm category of lenses vs. a smaller telephoto lens with a better maximum aperture (like an f/2.8 or f/4).
It’s important to note that just as they are often seen at a distance, they are also seen close…either through the brush or approaching as they saunter down the trail. Having the ability to “zoom out” is vital to great tiger photography.
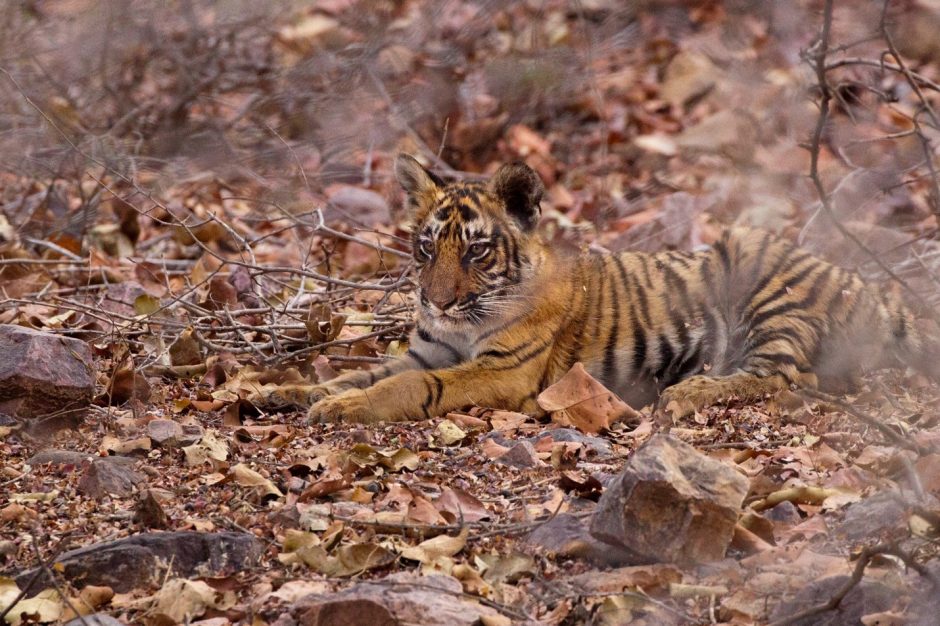
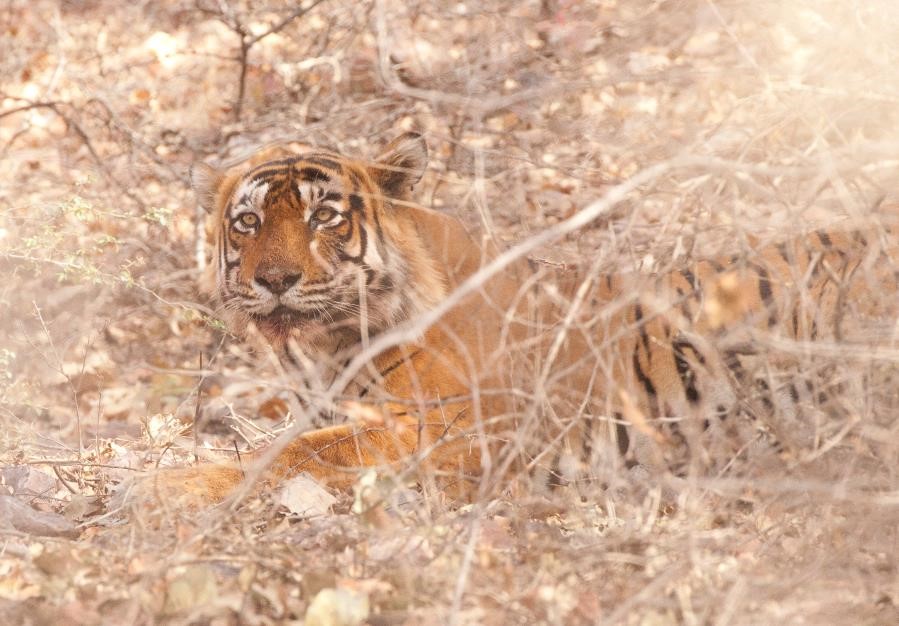
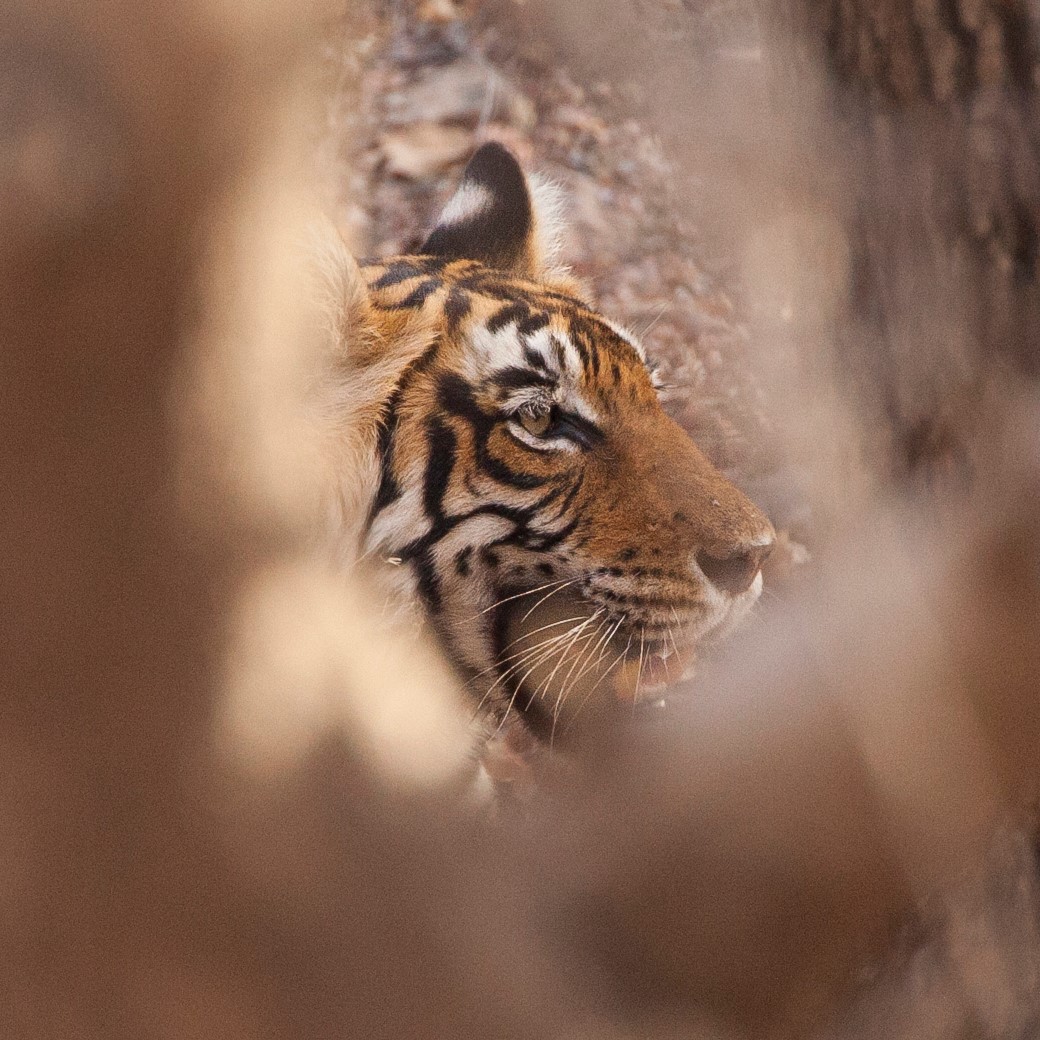
Use the brush and vegetation in your composition
One of the main reasons tigers are often seen at relatively close distances is that it’s just difficult to see them otherwise. There is often considerable brush throughout their habitat, and if they are a hundred yards into the jungle, there are a hundred yards of dense vegetation in the way.
Sometimes you get perfectly clear shots of tigers walking on paths, emerging from water, or similar. Othertimes you need to work with the landscape and just deal with the obstructions.
Rather than get frustrated, use the vegetation to your advantage.
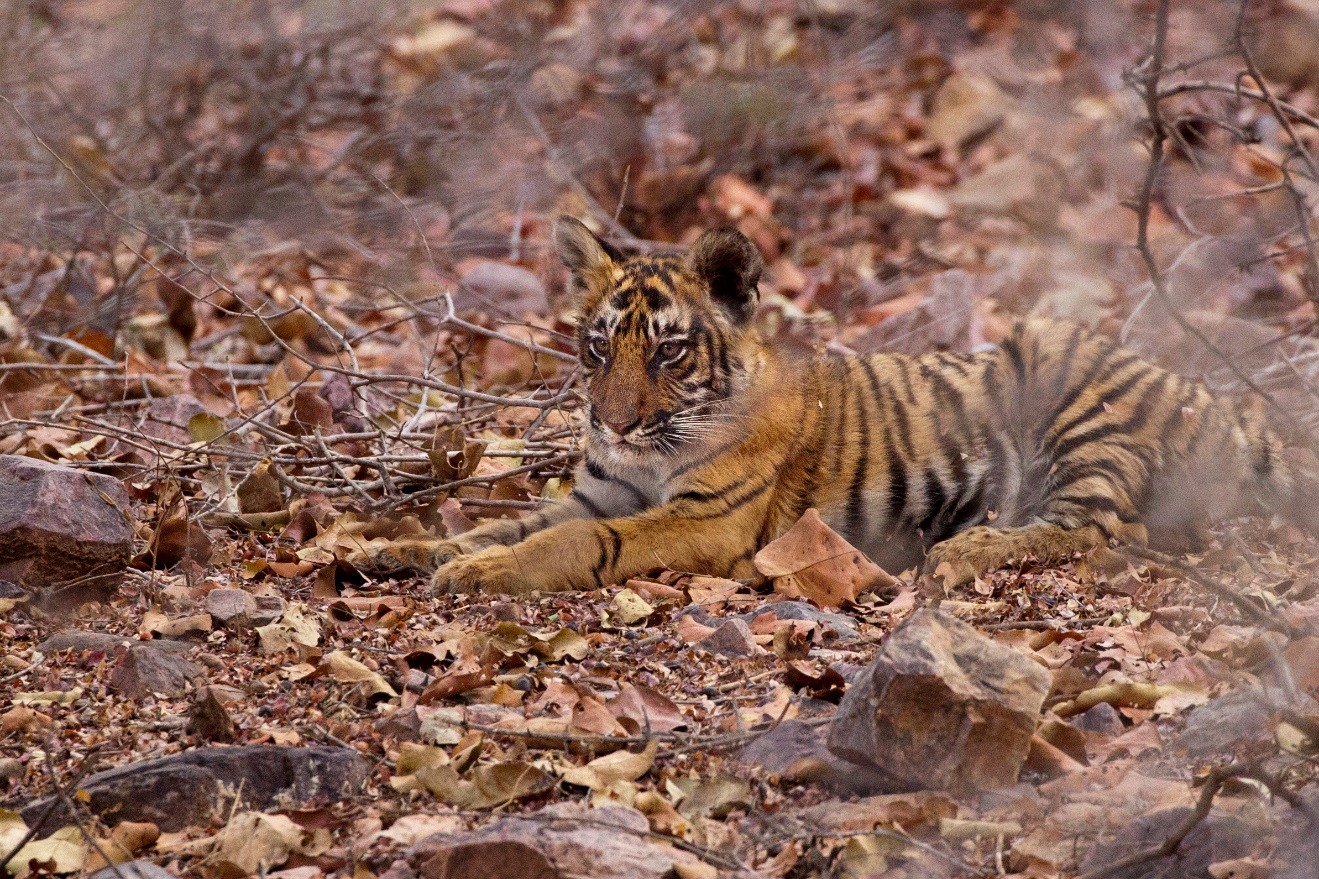
What I like to do is to use it to help frame the photo. Use the gnarled branches to encircle your subject, or place the limbs and leaves around the outer edge of the photo to create a pseudo vignette look.
When you do so, you are at the mercy of where the branches are in relation to your tiger. If the branches are close to the tiger, they will likely be in moderate focus. However, if the branches are considerably distant from the tiger, you will get a nicely blurred look to the branches.
Again, you don’t really have the liberty to choose, but it’s important to know that both are possible. And when I do get nicely blurred branches, I use that to my advantage and create a mysterious look to my photo, as if the tiger is the only thing in tack sharp focus.
Get your advanced settings ready
I’m not talking about shutter speed and aperture here, although these are of course important, too. I’m primarily talking about your drive mode, focus mode, white balance, and metering mode
Let’s start with your focus mode.
Most cameras allow you to choose between two or three focus settings. These determine whether the camera focuses continually, as you hold down the shutter button, or if it just focuses once and allows you to “lock in” focus.
I personally prefer the “one shot” method, such that I hold my shutter down half way, the camera auto-focuses, then “locks” the auto-focus at that exact distance until either let up on the shutter, or press it fully and take the shot.
Continuous auto-focus (sometimes referred to as “servo” auto-focus) does have its merits, and far be it from me to discourage you from trying it or even using it routinely if it jives with you and your style.
However, I find that for most wildlife photos, I am able to lock the focus and then recompose the shot before the animal moves “significantly” prior to taking the shot. If you use continuous auto-focus, you are pretty much beholden to keeping the animal in the middle of your frame, where your auto-focus point is, for if you recompose, the camera will readjust focus continuously.
Nevertheless, it’s worth experimenting, as it can be a useful tool in certain scanarios.

The next biggie is your drive mode
Drive mode, or drive “motor” dictates how many photos are taken with each click of your shutter button. Most cameras default to one click, one photo. However, for most wildlife photography, I have my drive mode at the highest FPS, or frames per second, it will allow.
This means that as I depress the shutter, the camera continues to take photos until I let up on the button. This results in anywhere from three to 10 photos per second for most cameras, and even more for fancier, newer ones.
In short, this could be the difference between a great shot and a magazine cover worthy one, as slight differences in the animals posture, movement of the eyes, or any number of other things can change in a split second. The more photos you’re able to take, the better chance you’ll get “the perfect” shot. No negotiation here from me—I always have the fasted drive settings on.
White balance is worth thinking about
Yes, if you shoot in RAW, you can chance your white balance (WB) settings on the computer with little to no harm. However, I find that drastic changes in the color of your photo often turns me off. That is, even if I’m attempting to correct the WB after the fact by manipulating it on the computer to make it more accurate to what I saw in real life, I’m less likely to do so if it changes the RAW capture significantly.
For these reasons, I do keep my camera on “cloudy” white balance often while on safari…this goes for any safari in a warm environment, as a cloudy white balance adds a bit more yellow to the photo, which I believe emulates the warm environment best.
For additional tips on setting your white balance and other considerations around it, check out my previous article here.
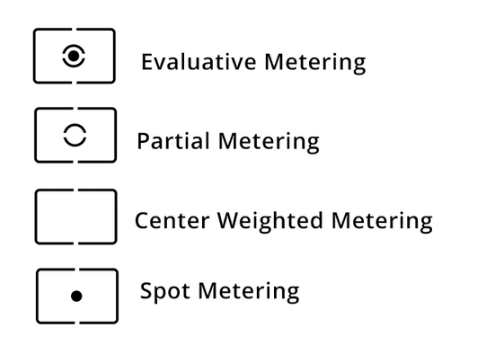
Your metering mode is a key consideration
I’ll be honest, I usually do not change my metering mode often. However, when I need to, it can be very helpful. And simply being cognizant of what metering mode I have my camera set on is key to how I take my photos.
Simply put, your metering mode is your camera’s way of choosing how much light and dark to let into the scene. This applies to any setting except for full manual, where you are the one choosing your aperture, shutter speed, and ISO, to reflect the amount of light you want.
If you use aperture priority, shutter priority, or even full manual with AUTO ISO (my preferred technique), the camera makes slight adjustments based on what it “thinks” an average amount of light is.
Where metering modes come in is which part of the scene your camera uses in its calculations—the whole scene, just the center, a little bit of both?
It’s best to consult your camera’s manual to see what options you have on the table, but for reference I rarely take my metering off of “evaluative” metering, which tells my camera to consider the entire scene, but to make a smart assessment based on the majority of the middle of the scene (instead of worrying about what is in the corners).
So there you have it—lots of tips and tricks for maximizing your tiger photography! As I said, tiger photography is one of the most exciting, dare I say pinnacles, of a wildlife photographer’s career. They are elusive, they are beyond wild, and they are one of the most majestic and photogenic critters on our planet.
But don’t just take it from me…hear from Expedition Leader Aditya Panda. Aditya is an award-winning naturalist, wildlife conservationist and seasoned photographer with more than 15 years of field experience throughout India.
If you have other tips or questions beyond this article, please be sure to leave a comment below!
Go forward and give it a shot!

Court
6 Comments

Nabarun Guha
February 18, 2022 at 7:22 am

Court Whelan, Ph.D.
February 21, 2022 at 9:50 am

DR NABARUN GUHA
April 25, 2022 at 11:01 pm

Court Whelan, Ph.D.
April 29, 2022 at 11:44 am

Phillip
June 25, 2023 at 9:59 pm

Court Whelan, Ph.D.
June 26, 2023 at 10:52 am
I am going on a tiger safari in Ranthambore National Park and would like some advice re the photography equipments.My choices are as follows:
Choice 1:
Nikon D7200 with Nikon 300mm f4 pf for an equivalent FOV of 450mm plus Nikon 70-200mm f4 on the Nikon D780.
Choice 2:
Nikon 70-200mm f4 on a D7200 body plus the Nikon 200-500mm on the D780.
I would of course be carrying the Nikon 24-120mm f4 with me.
Choice number 1 would enable me to travel much lighter but would I miss some shots if I don’t take the Nikon 200-500 as in choice 2.
Hi Nabarun, wonderful to hear of your upcoming Tiger safari! Well, you may not like my answer, but I highly recommend bringing all of these lenses. Choice #1 is the best, in my opinion, but I guarantee you’ll regret it if you don’t have the 200-500 with you. That is a fantastic lens, and for those shots where you need some extra power, it’s going to be a huge asset. I think I’d start out each day with Choice 1 setup, but be prepared to throw the 200-500 on either body. In some cases, you’ll have ample time with a cat or cats, and you can switch things out multiple times. For instance, you may be approaching from far away and want your 200-500 on your D7200 for maximum reach. However, as you get closer, you may want to put it on your full frame for a slightly better photo. And then having the 300 f/4 on your full frame is a sensational option, too, as it will give you decent reach, good f/4 for bokeh, and the quality of full frame (vs. having your 70-200mm on your crop frame to achieve the same distance). As you can see, it’s all about versatility and flexibility. I highly recommend bringing your full kit for the challenging yet highly rewarding venture of tiger photography. Good luck and enjoy it!!
Thanks for your reply but regrettably i wont be able to carry both the 300mm pf and the 200-500.So should i take the 200-500 or the 300mm f4 pf?The 70-200mm will be constant because in an indian tiger safari the cats are known to come pretty close and needed as well for the habitat shots.I could mate the 300mm f4 pf with the d7200 with a 1.4tc giving a fov of 630mm for that extra reach?
I think if you have the 70-200, I’d go for the 200-500 personally. When possible, the 70-200 will give you that amazing bokeh, and then for the more distant cats, the extra focal length will be key.
Hey Court! I’m debating between taking either a 400mm f2.8 or 600mm f4 for a trip to Bandhavgarh and Kanha. Do you find that the extra reach is really needed in India or is that lowlight f2.8 more valuable?
hi Phillip, great question here! Gosh, it’s a tough one. I think i’d be a tad more in favor of the 400 f/2.8, primarily because brush and trees tend to be a limiting factor. That is, if you needed the 600, there’s a good chance that the tiger/wildlife is in the brush and dense vegetation and thus that extra 200mm isn’t going to be crucial. However, the shallower depth of field could come very much in handy. Sure, it’s nice to fill the frame with the tigers face, but you can also do that with some cropping in post.
Trust me, I LOVE the 600mm, but I think the 400 f/2.8 wins out this time. I might recommend bringing a 1.4x converter just in case you are in a big open field and need to photograph at distance and just need to eke out every last bit of range.
Hope this helps! Enjoy it!!