
Three Ways to Maximize your Smartphone Landscape Photography
We now all have cameras in our pockets every day, regardless of whether we’re going on an errand around town or on a proper multi-day photo adventure. Smartphones have stormed the photography world and are becoming one of the best, and easiest ways to capture amazing landscape photos.
While these absolutely allow for a “point and shoot” mentality, a handful of simple tricks can turn your photos from good to great, or from great to exceptional.
Let’s dive in…
Turn on your “Grid” for Composition
I can’t go more than 24 hours without talking about the rule-of-thirds in photography, as it’s just that important. By now, most folks have heard of it, but whether they’re using it routinely is a different story.
Simply put, you should break your scenes into thirds…this can be left to right or top to bottom. And you should offset interesting features of your scene so they appear at one (or more) of the four intersecting points of the rule-of-thirds grid. It has to do with time-honored mathematics and aesthetics that just can’t be argued against. In other words, trust me :).
Fortunately, you don’t have to imagine a grid on your camera screen—smartphones allow you add this! Typically this can be found in your System Settings under your Camera menu and looks something like this, which is taken from an iPhone.
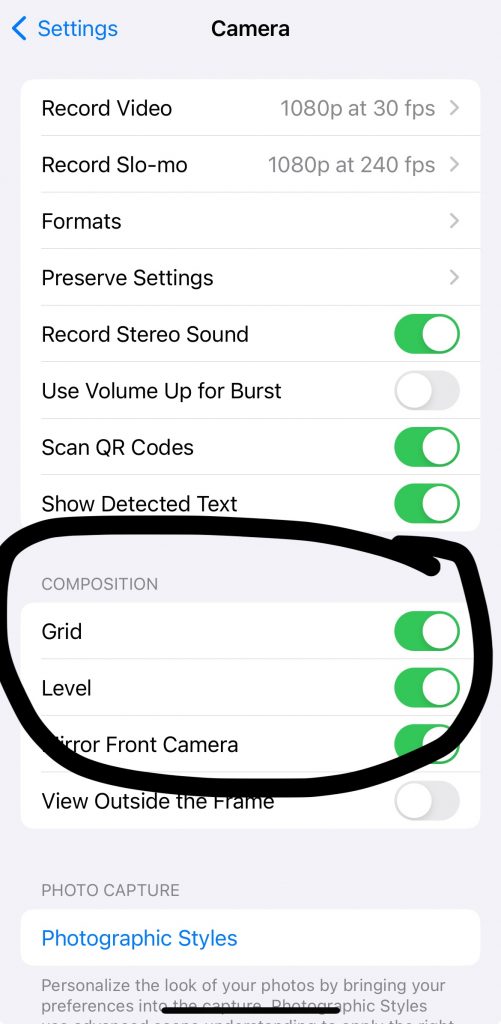
This grid is indeed the rule of thirds grid and is always a great starting point for great landscape photo composition. However, rules are meant to be broken…sometimes…and you can and should absolutely break these rules. But, you need to know that you’re breaking them and justify this to yourself (in your head) as you’re doing it. If you just go shooting willy nilly with composition, you’re never going to be extremely pleased with your photos.
Start with the rule-of-thirds and turn on your smartphone’s grid.
Adjust Exposure Routinely
Exposure is just a fancy way of saying how light or dark a photo is. If you increase exposure, you brighten your shot. And you guessed it, if you decrease exposure, you’re darkening it.
Yes, you can adjust your photo on your phone after you take your shot, but it will never look as good as if you do it prior to taking the photo.
I highly advise adjusting exposure as you’re framing and setting up your shot and you can do so in one of two ways with most smartphones.
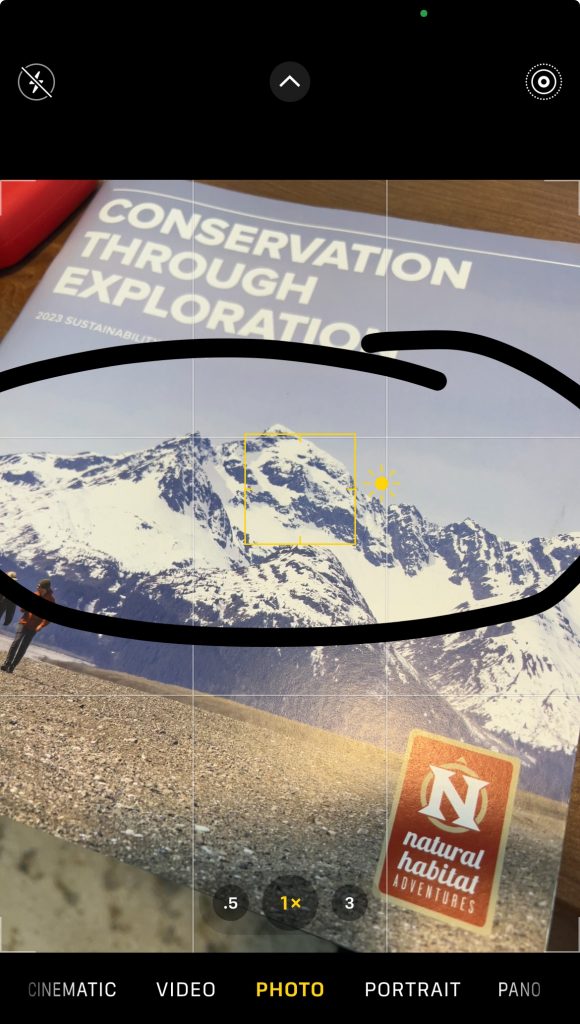
First, you can tap on your screen and then swipe up (near the focus box that appears, example below) to brighten and swipe down to darken. It’s quite easy!
Or, you can go into your camera settings and adjust it via one of the sliders. Caveat here…this is an iPhone, so Android and others will look slightly different, but it’s always essentially a very similar process, no matter what phone or operating system you’re on.
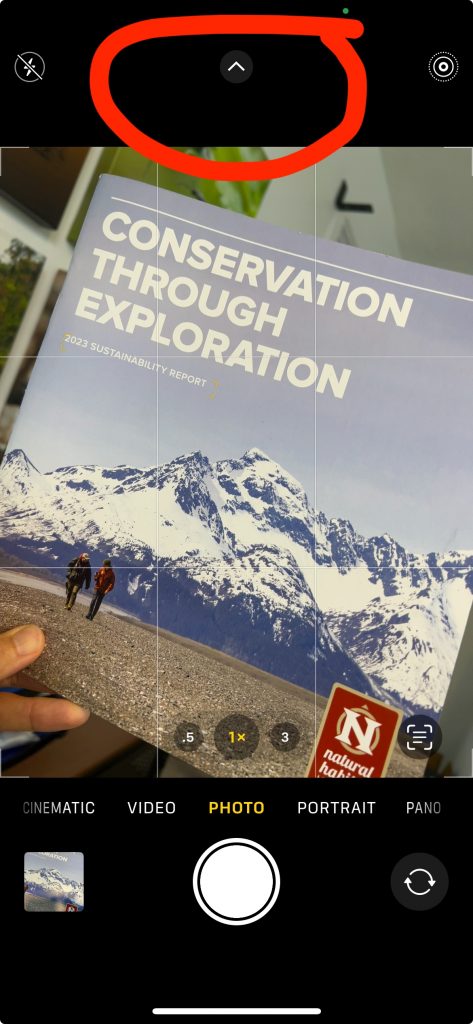
On iPhones, you simply hit the little caret at the top of the screen, which pulls up the camera settings.
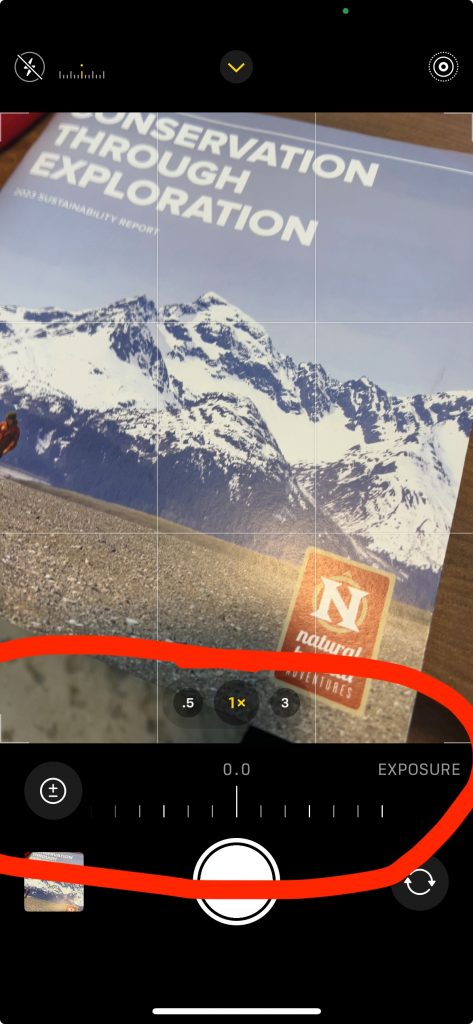
For exposure, you want to tap on the little + and – symbol, which then allows you to slide your finger to adjust exposure.
As you can tell, tapping on the screen and adjusting is a bit quicker and easier. Regardless of the way you choose to do this, taking this step can be SO helpful for getting amazing shots.
Use a Landscape-friendly Aspect Ratio
We are viewing photos mostly on phones these days, even if you’re posting to a website, blog, social media, or online magazine—most of the time people are still viewing on phones. Thus, we have a unique new aspect ratio we can employ.
Aspect ratio just refers to the dimensions of your photo…whether it’s 2×3, 4×5, or in this case 9×16. Back in the days of the origins of photography, it was determined that photos should be a 2:3 ratio, as this is mostly the dimensions that the human eye sees in…about 2 units tall by 3 units wide. This is why we usually see 4 x 6 photos, or in galleries 24 x 36, etc. It’s natural.
However, in recent research, it’s been determined that our eyes are actually a bit closer to a 9:16 ratio…that is, 9 units tall by 16 units wide. This is why most modern TVs are actually this 9:16 ratio…it’s most like what the eye sees!
Well guess what…your phone is very like a 9:16 ratio, too! Thus, when you take photos on your phone, have you ever noticed that when you view the photo it doesn’t extend to the edges? This is because phones usually, by default, are 2:3 or 4:5 ratio like in the below example. Why? I have no idea!

Thus, if you want to get the most bang for your buck, and have your landscape photo extend to the full size of your phone frame, AND have the photo resemble most like what our eyes see (after all, we’re trying to recreate what we saw in a beautiful scene), set your photos to 9:16 ratio (or 16:9 ratio…it’s all the same thing).
This, again, is done in the menu of the camera itself on an iPhone…not in the actual phone system settings.
A Bonus Tip – Alternate Shutter Button
This one really isn’t a landscape-specific tip, but it’s a game changer for me. Instead of trying to tap the shutter button on the screen, did you know you can also just hit the “volume down” button to take a photo? Yep, that’s right, you have an actual mechanical button to take a photo now!
I hope these tips have been helpful and I hope you get to use them on a great photo session soon, even if that’s just a walk around a local park. But better yet, there’s nothing quite like a photo trip to get you to practice for hours a day while having a blast.
Until next time, get out there and take some shots!

Court
Leave a reply