
How to Take Aerial Photos of Rain Forests
If you spend any time exploring and photographing within the tropics belt of the world (essentially, anything between the tropic of cancer and tropic of Capricorn) chances are you’re going to encounter the opportunity to take glorious aerial photos of rain forests.
This might be from one of Costa Rica’s famous hanging bridges, or from a small bush plane while flying over Uganda’s wild Congolean jungles. Or perhaps even one of Borneo’s epic viewing platforms deep within the Danum Valley—one of the older rain forests on the planet.
While the scenes and countries might be different, the techniques are the same throughout…this involves proper focus, aperture, and composition. Shutter speed and ISO are of course still important, but they aren’t really part of the creative element like the first three are.
Let’s dive into those three key components.
Focus
When you are photographing a massive area, it can be challenging to think about where exactly to focus. Should you find a foreground element, or perhaps everything is seemingly miles away?
This is where the idea of hyperfocus comes in. The technical term, and method, is quite complicated and involves some intricate calculations and equations having to do with focal length, distance from lens to the subject, and distance from foreground to background—things that aren’t exactly easy to calculate for big scenes like these.
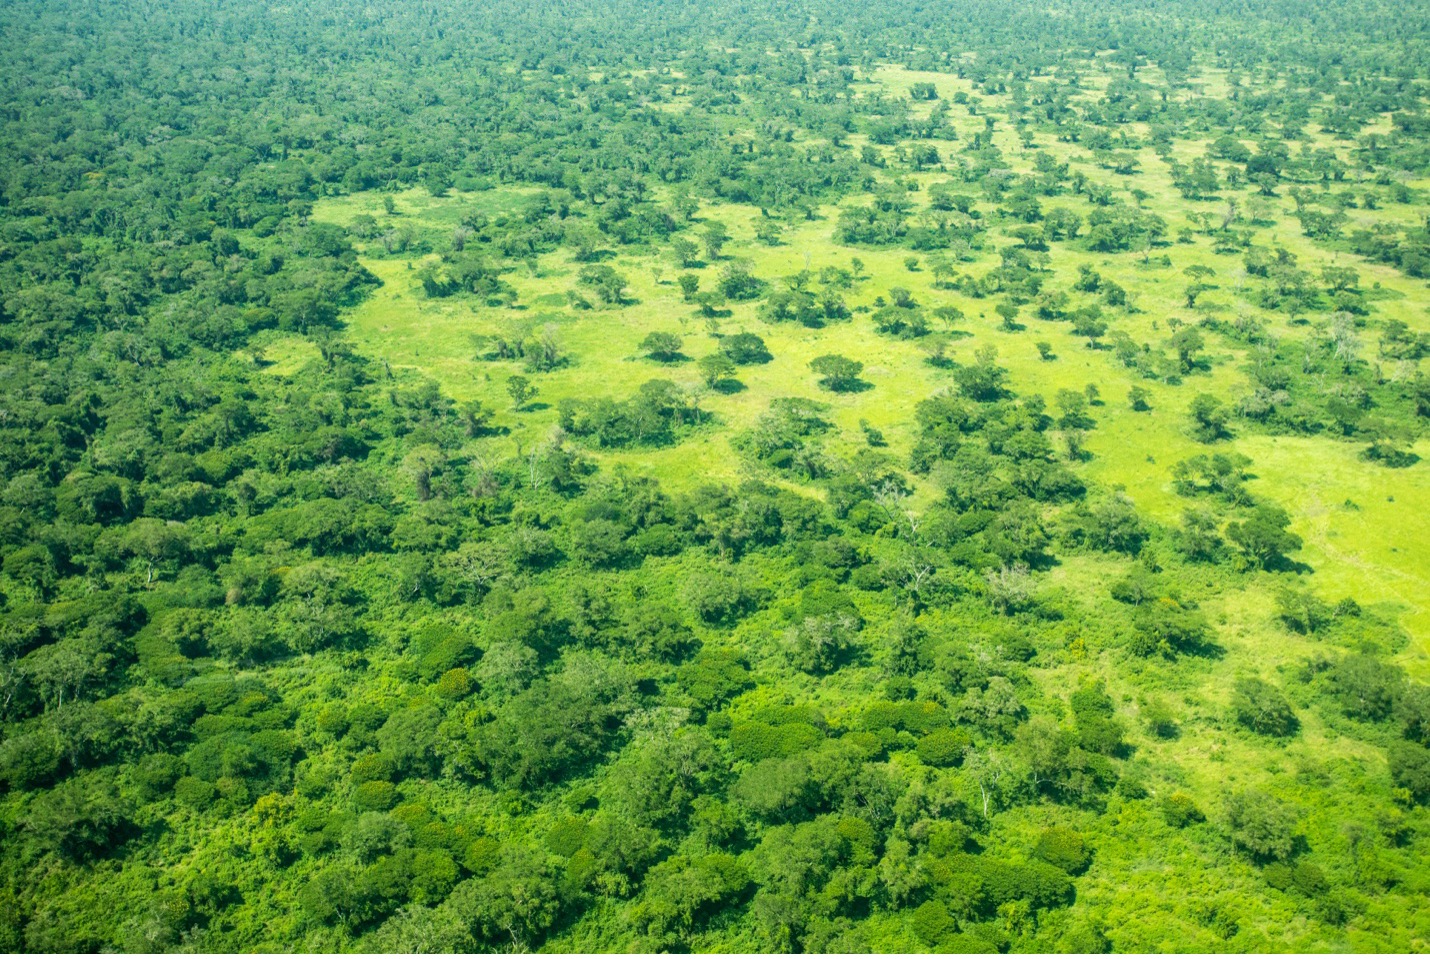
However, the simple takeaway is that for massive landscapes, where you want it all in focus, the best focal point to choose is about 1/3 of the way into the scene. That is, about 1/3 of the distance from the actual ground distance from front to the back of the frame. Not 1/3 up from the frame…we’re talking actual mileage here. In other words, if those furthest trees were 300 feet away, you want to focus at about 100 feet away.
For instance, in the scene below, you’ll want to pick your focus somewhere around the red square shown.

However, to make sure you have the proper depth of field, you must also consider aperture…
Aperture
Hyperfocus is great and all, but if you don’t have the right f/number, you’re still not going to achieve a wide depth of field and get that all in focus look you’re probably going for.
At very least, you want to be on Aperture Priority mode for these shots, so that you can dial in the exact aperture that you want.
Typically speaking, aerial shots are taken in the day and usually with good lighting conditions, as you’re likely above the trees. However, this isn’t always the case, so be prepared for some flexibility here. Nevertheless, a good starting aperture would be f/8—also a number that most cameras, including point-and-shoots, can achieve easily. However, if you can get to f/11 for an even bigger depth of field, that would be ideal.
The key thing is that you don’t want to go above f/8 or f/11, because the amount of detail in your scene is on the extreme high end with such aerial shots. You’ll likely notice the size of these types of photos is larger than usual (in terms of megabytes). As a result, there is this thing called limited diffraction, where the more depth of field you push your camera toward, the less resolution you’ll actually get. That is, the pixels actually lose some of their sharpness.
It’s a complicated topic, so you’ll just have to trust me on this one…aim for f/8 or f/11, but not f/16 or f/22 no matter how tempting.
Composition
With big aerial shots like these, which involve a decent bit of uniform patterns (i.e., the layers of trees), you might not think composition plays a strong role here. However, composition is always a key part of your photography and is perhaps especially important in scenes like these that don’t have a clear subject.
But what to do?
Well, the trick is to use the small, subtle parts of the aerial scenes as individual elements that you can align to traditional compositional tools like the rule of thirds, leading lines, etc.
Notice how even this relatively plain scene has a couple key elements? You’ve got the dark patch of trees near the middle, as well as what appears to be a river toward the lower third, surrounded by different vegetation compared to the surroundings.
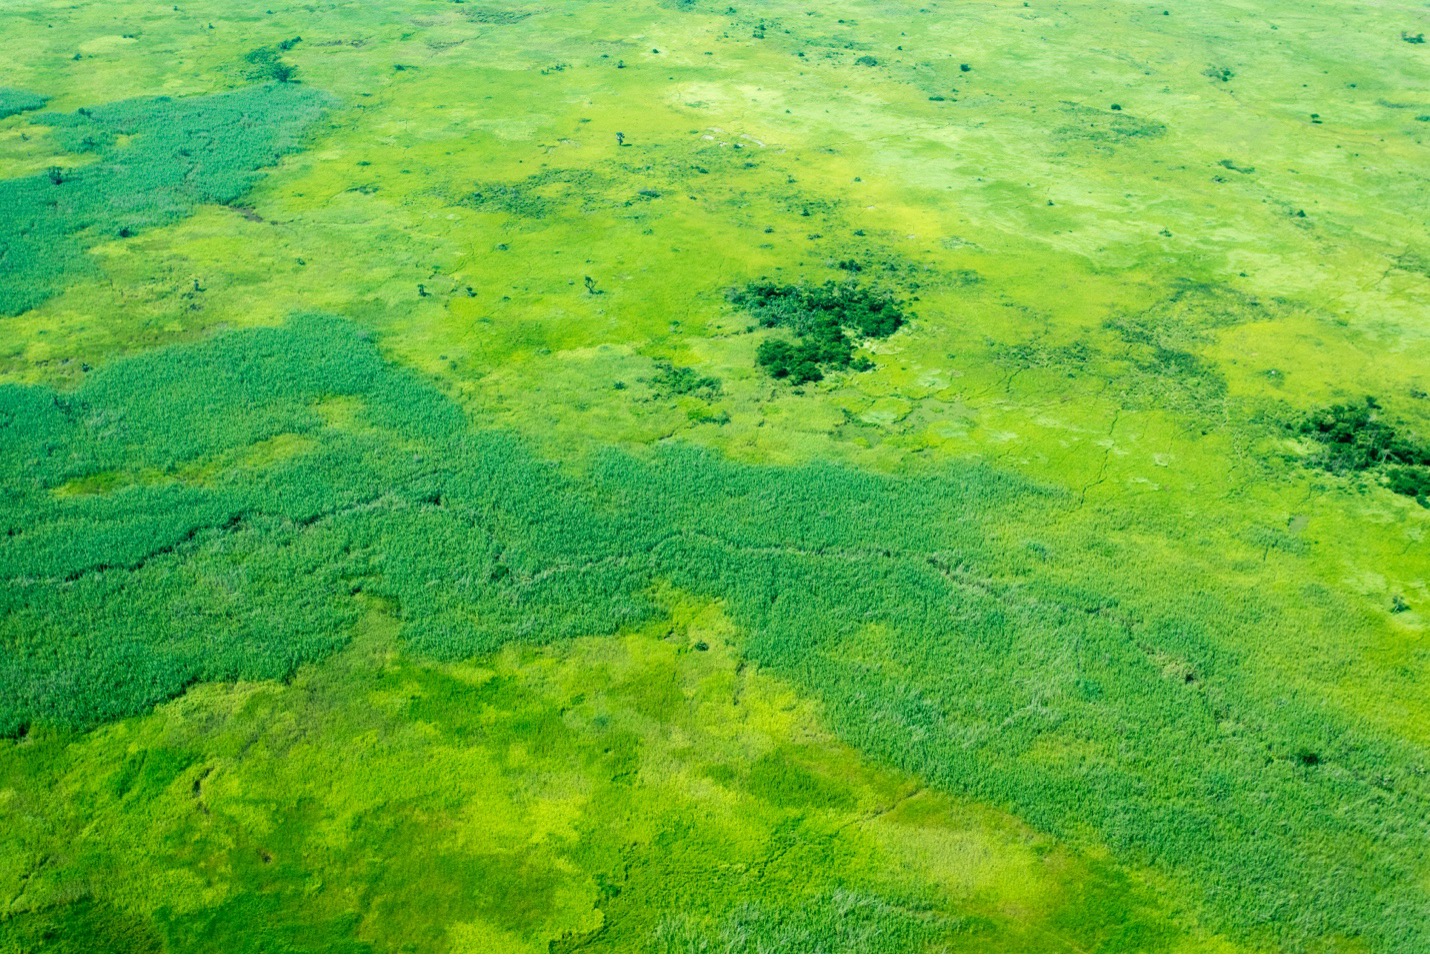
If we overlay the rule of thirds grid on top of this scene, you’ll see that there is a method to my madness. While not perfect, you can see how the dark circular patch is positioned relatively close to the upper right intersecting point. And the small river is snaking around the bottom third of the frame.

A simple takeaway is to always try and put any noticeable element in your scene off-center and break your scene into thirds instead of halves or quarters. The human eye likes thirds.
You can even see how very uniform scenes can still have subtle elements that can stand out as compositional tools.
See how we can pick out noticeable trees, perhaps of different color or texture, and place them at key points in the frame. Or, frame the shot to get a bit of layering, where there is a somewhat clear foreground of trees as the lower third?

It’s of course very subtle, but it’s these small, yet important considerations that can take a photo from good to great.
And there you go! Some lessons on aerial rain forest photography for your next adventure in some far-flung corner of our planet. I truly hope you are headed to one of these extraordinary places like Costa Rica, Borneo, or Uganda soon, as they offer some amazing rain forest photography opportunities and so much more!
All the best,

Court
Leave a reply