How to Get this Shot – Glaciers in Summer
Photographing frozen water in the summertime just feels odd…but the photos can be oh-so-right.
Believe it or not, there are several places that exhibit spectacular glacier photography each summer, like Greenland, and Alaska. And if you think about it, counting the southern hemisphere, you can add in Patagonia as well!
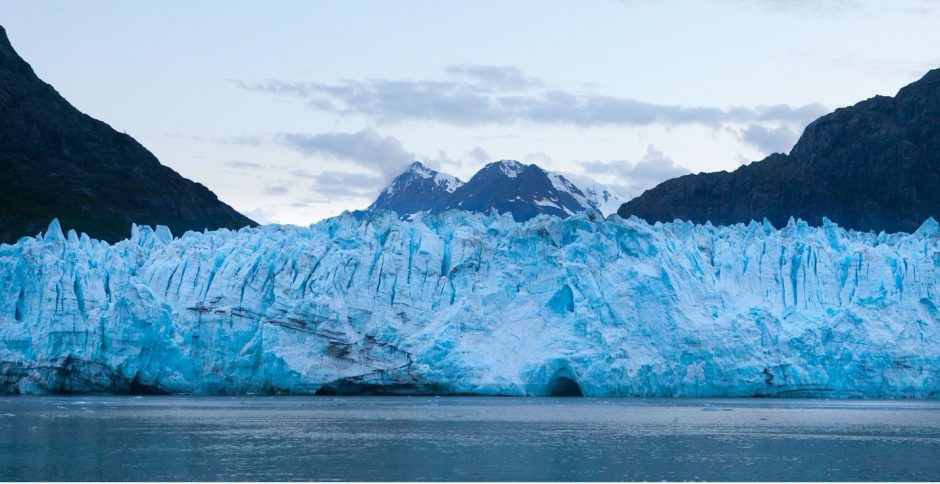
Follow these tips to get a powerful shot just like this one, and you can also apply these tips and tricks to any glacier photography you are headed toward this summer.
- First, you’ll of course need to get yourself in front of a spectacular glacier like this. I’m particularly fond of the glaciers in Alaska’s Inside Passage and Kenai Fjords National Park.
- Next you’ll need to pick out the right lens. For a shot like this, you can of course tell that it’s a rather wide shot. That is, it looks like a landscape shot and that I have a classic wide angle lens on my camera. While this is true, and this was shot at 52mm, you want to equally be prepared to use a telephoto zoom as well. The thing is, you can never really get super close to glaciers because of the risk of the “glacial foot” popping up from underwater. These can extend hundreds of yards, and thus you may be surprised how often a telephoto lens comes in handy for shooting glaciers.
- Once you are in location and have your camera and lens ready, it’s time to think about the camera settings. On one hand, it’s obvious that you want to get a wide depth of field and everything in tack-sharp focus. However, because you have a lot of depth in your scene, you can oftentimes get a sharp glacier with a nicely blurred background if your vision and artistry dictate. My recommendation is to begin with f/8 and then experiment both above and below. Try f/11 for maximum sharpness but then also try f/4 or f/5.6 to see if such a shallow depth of field allows for some artistic blur either in the fore- or background. Usually I’m in it for the big depth of field, so I’m shooting at f/8 at least, but it’s worth considering alternatives because glaciers do lend themselves to other-worldly artistic shots (i.e., artistic blur).
- For a shot like this, I’m using a classic rule-of-thirds composition with the lower third being the water, middle third being the core of the subject, and upper third being the context for the shot…the mountains and sky. Let’s be honest, the glacier is the star of the show, so sometimes I’ll exaggerate the composition a little to make the middle third disproportionately more of the scene, accentuating the beautiful ice.
- Now you’re ready to take a test shot or two.
- Next is the critical piece of the equation…you’ll want to really analyze the lighting you’ve got going on. Oftentimes, when shooting on anything but full manual, the camera will adjust for the lighting and make the bright white glacier overly dark. This happens most often when the glacier is the majority of your photo. The reason is that your camera is metering for an average amount of lights and darks, and when most of your shot is a bright white sheet of ice, the camera thinks it should be darker, and thus turns a bright white glacier into something rather dingy. To compensate, go to your exposure compensation and overexpose by 1/3, 2/3, or 1 full stop. Continue to take test shots until the glacier appears as you want.
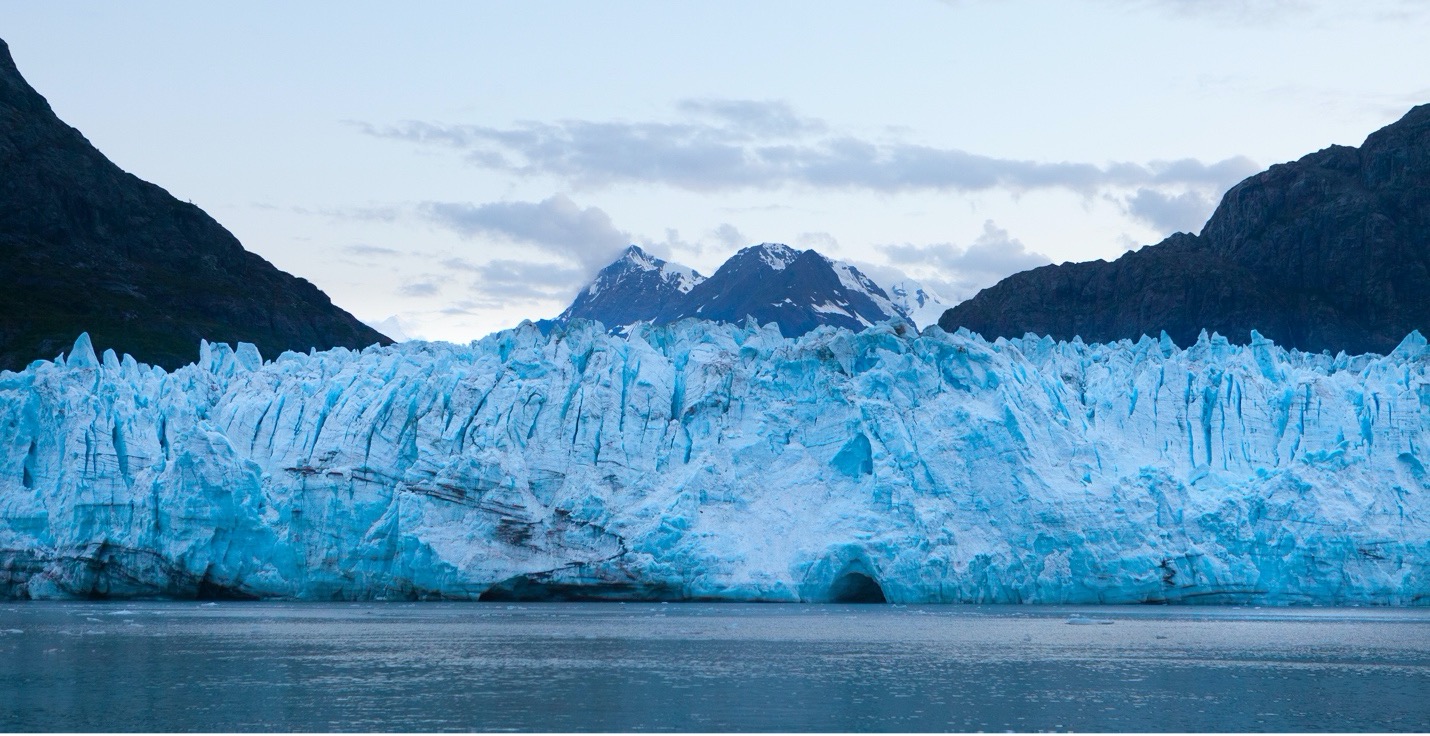
- Once you nail the shot, start experimenting a little, particularly with zooming in. As you’ll often see, the glacier takes on a wildly dramatic look the more you fill the frame with its colors and textures. Keep on experimenting and shooting with new compositions and new zooms.
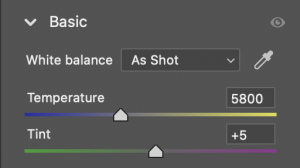
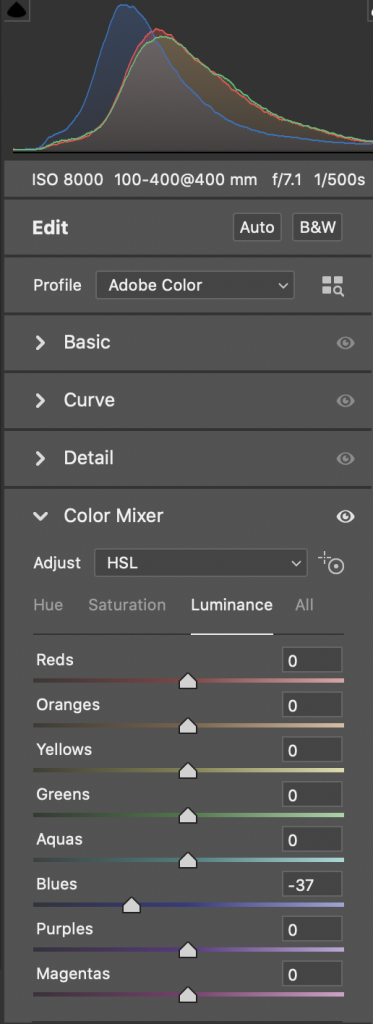
- Speaking of colors, you’ll likely want to edit your shot to bring out some of the blue hues you probably saw in-person. These blues tend to be rather subdued in the camera, so a couple quick fixes can make the problem go away. The three ways I do this is first to adjust the white balance slider to see if you have the right color temperature. Remember that it’s a spectrum from blue to yellow, so if you slide toward more blue you’re really going to make a “cooler” photo…this lends itself very well to icy photos.
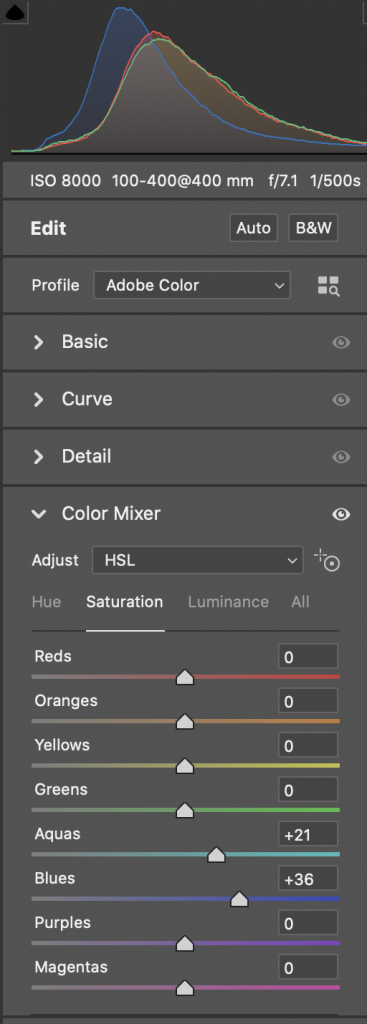
- Next, I’m going to decrease luminance on the blue color slider, and then add a bit of blue saturation in the same slider (different tab). Voila! More blue in a subtle, realistic way.
And that’s about it – now you’re ready to get some great glacier shots on your next adventure…perhaps you’ve got one planned for this coming summer!
Cheers, and be well,

Court
Leave a reply