How to Get the Hero Shot – Grizzlies
If you’re like me, I’m enamored with the extraordinary homepage images that appear on Natural Habitat Adventures’ main website. If you have seen these already, you know that every couple of months a new, sensational image is selected for the main www.nathab.com page.
These aren’t your average photos—they’re some of the most compelling, extraordinary photos in the world.
As a reminder, this new series is designed to give you the details on how these shots were captured…the location, the settings, and the creative vision needed for the highest caliber of photos.
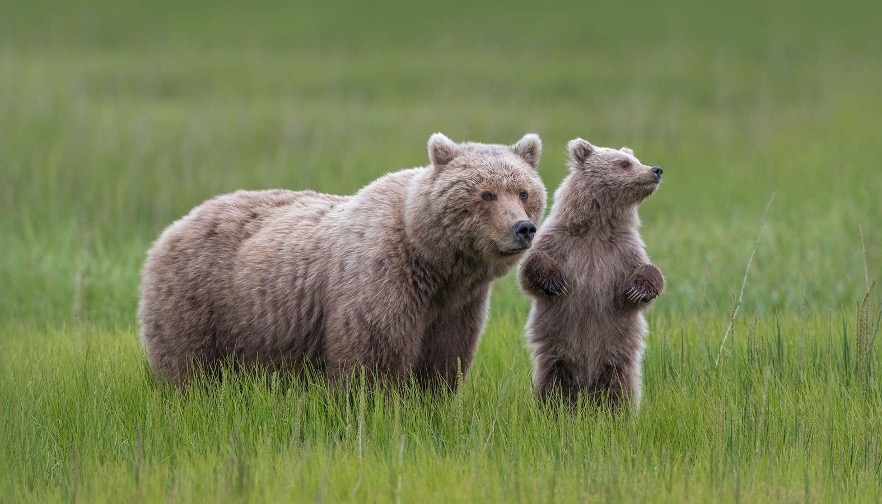
Today, we’re looking at an iconic grizzly bear photo that features not only a perfectly fuzzy mom and cub, but a sweeping field of grasses that epitomize their natural habitat.
First, the location
It’s not just everywhere that you can find such a scene, and even in prime bear habitat, such a photo is still very special. You need to be relatively closet to bears and in amongst the sweeping grasslands common to the Katmai, Lake Clark, and Kodiak areas of Alaska.
There are not too many other ways to do a trip like this other than going with a reputable tour operator that specializes in grizzly photography tours. I of course recommend Natural Habitat Adventures and guide their bear photography adventures with them frequently to these iconic landscapes.
The technicalities and settings
The real brilliance to this shot, other than finding such an extraordinary animal and stunning scene, is knowing how best to capture the splendor and allure in-camera.
The first thing that comes to my mind when I see this photo is the fantastic juxtaposition between the tack-sharp bears and the nice blur in the background. This is a very professional look and something most wildlife photographers strive for.
It’s achieved in a couple different ways…
First, you want to have a lens capable of big apertures, aka small f/numbers. Typically to get this degree of blur you will need to be at a telephoto range of 300mm plus, while shooting at an aperture of f/4, or perhaps even f/3.5 or f/2.8. A key thing to keep in mind is that the more telephoto you use, the more blur you’ll get with the same aperture. That is, a 400mm f/4 shot will give you more blur than a 300m f/4 shot. Thus, increasing your telephoto is another way to increase and feature that great sharp/blur contrast between the wildlife and surroundings.
The other way is to ensure you get adequate background blur is that the distance from the subject to the background is maximized.
For example, in this photo, you may not realize it, but these bears are on a small hill, such that the grass in the background is actually further away than you’d think. Notice how there seems to be a line of sharpness just below the cubs paws? This is the line of the hill.
In other words, it’s not linear…the grass doesn’t just continue steadily behind the bear…there is actually a gap created by the hill, emphasizing that nice blur. You can’t always “design” such a shot, but it does help to know how the background grass is blurred so nicely. It’s due to that space being between the subject (bears) and the background (grass beyond the hill).
Other settings
The other settings like shutter speed and ISO are somewhat negligible. You will need to shoot fast enough to freeze motion, but there is no real creativity here. Typically when using an image-stabilized telephoto, you can get away with 1/300th of a shutter speed to be perfectly safe.
Now, if the animals are moving, that’s a different story. You can either be extremely accurate with snapping the shot right as the animals pause their movements, or you can dial in a faster shutter speed to accommodate. For slowly moving wildlife, 1/600 or 1/800 will “play it safe.”
Be ready to shoot at moderate to high ISOs in these environments, although daylight is common for Alaska summers. Thus, ISO 400-2000 is about the most you need, most of the time.
Choosing your composition
Here’s where things get interesting. Notice how in this “original” photo below the wildlife is smack dab in the middle of the shot. This flies in the face of the rule-of-thirds, doesn’t it?
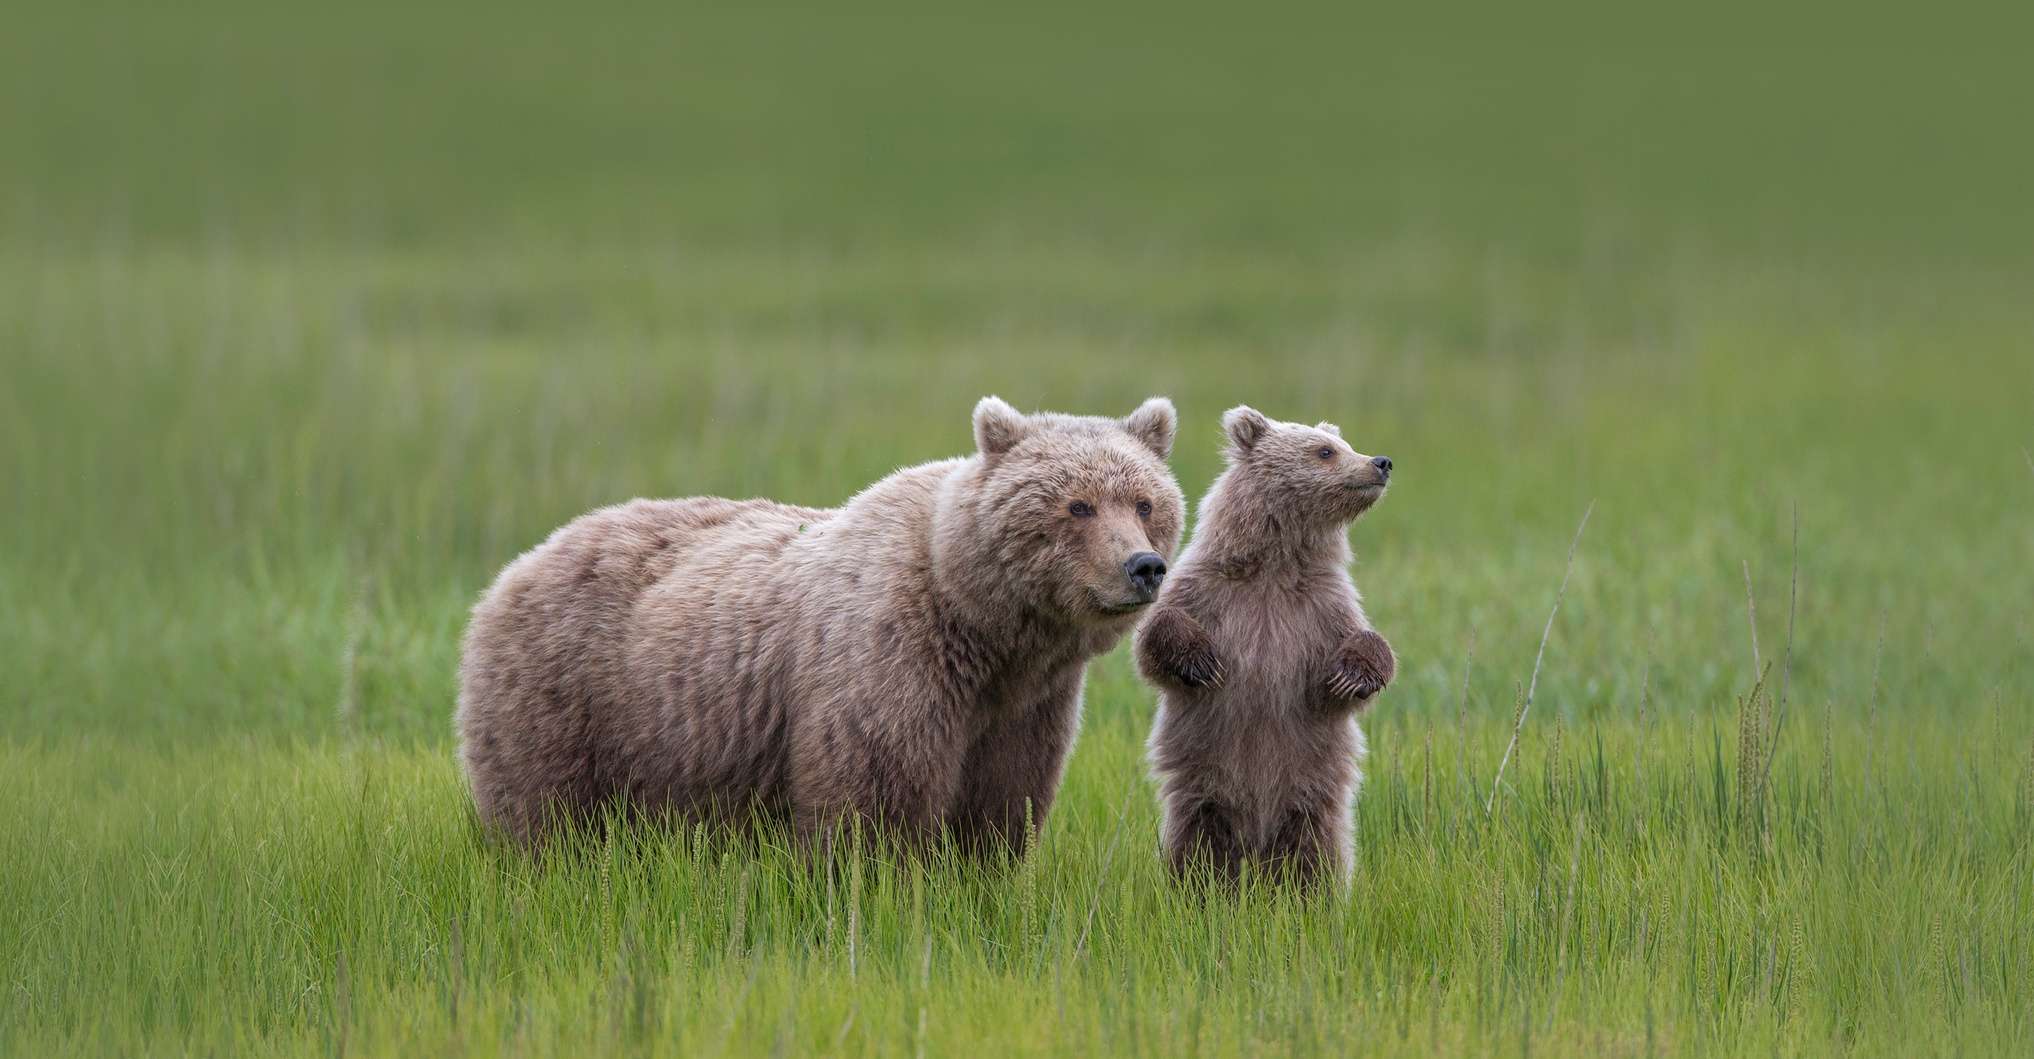
Well, kinda…
Two things going on here. One, when you have a uniform background like this sea of green grass, you can be more flexible (i.e., forgiving) with creating an artistic look by forcibly placing the wildlife in the dead middle of the frame. The symmetry generated by the uniform background makes the intentional middle-of-the-frame placement ok, and in a way, quite pleasing.
The other thing, though, is that when you get extraordinary wildlife views and photo opportunities like this, it’s worth zooming out a little to allow for cropping and composting in your post-processing work. Because this photo is such an extraordinary moment and stunning shot, you want to give yourself maximum flexibility to place this photo wherever it can go…in slideshows, in magazines, in stock photography, in fine art, you name it.
Because each of these scenarios require slightly different emphasis (e.g., with magazines you may need to crop vertically, and for slideshows you may need to place text somewhere the photo), zooming out is a prudent and wise move. With today’s amazing cameras, the slight cropping won’t deteriorate the quality of the photo by much at all.
Post processing considerations
As usual, the very best photos require very little post processing. This photo is no exception. You can actually tell that there is so little manipulation, further solidifying its quality.
Nevertheless, a couple small moves can go a long way in making a fantastic photo a truly once-in-a-lifetime image.
For this photo, I would first considering emphasizing that sharp/blur contrast with a sharpness treatment on the bear (minimal) and a blur treatment on the background via the paintbrush tool in lightroom.
The other thing I’d experiment with is emphasizing that extraordinary lighting. It’s subtle as-is, but just that little bit of light bathing the top and back of the bears helps to make this a really great photo. Adding a touch more lightness to this area helps make it pop. Just a small run of the exposure or brightness brush in lightroom is all that is needed. And while you’re at it, you may want to lighten both of the faces of the bears slightly, too, to help reveal their expressions and connect the viewer with the eyes of these sentient animals.
And that’s about it, friends!
Notice how I’m really not talking about how great of camera was used, or a specific telephoto lens. This is the kind of shot that anyone can get when in the wilds of Alaska searching for and photographing amazing brown bears. It’s all about the eye and the vision of the photo.
Hopefully these tips and technicalities will help you get this sort of shot if you’re headed to Alaska sometime to photograph bears!
All the best,

Court
Leave a reply