
A Beginner’s Guide for Photographing Polar Bears
When in the presence of spectacular wildlife, photography is irresistible. Fortunately, you don’t need to be a seasoned photographer to get stupendous photos of polar bears when you see them in their natural element on the shores of Churchill, Manitoba. There are some tried and true techniques that we’ve learned over the years that can take your photographs from good to amazing.
Today’s article is written for the beginner photographer, but the lessons ring true for anyone photographing polar bears. We’re going to cover some of the key techniques that absolutely anyone can use, whether you haven’t picked up a camera in a while, are photographing with your smartphone, or simply just haven’t photographed big wildlife before.
Let’s dive into it!
Photographing the Entire Scene
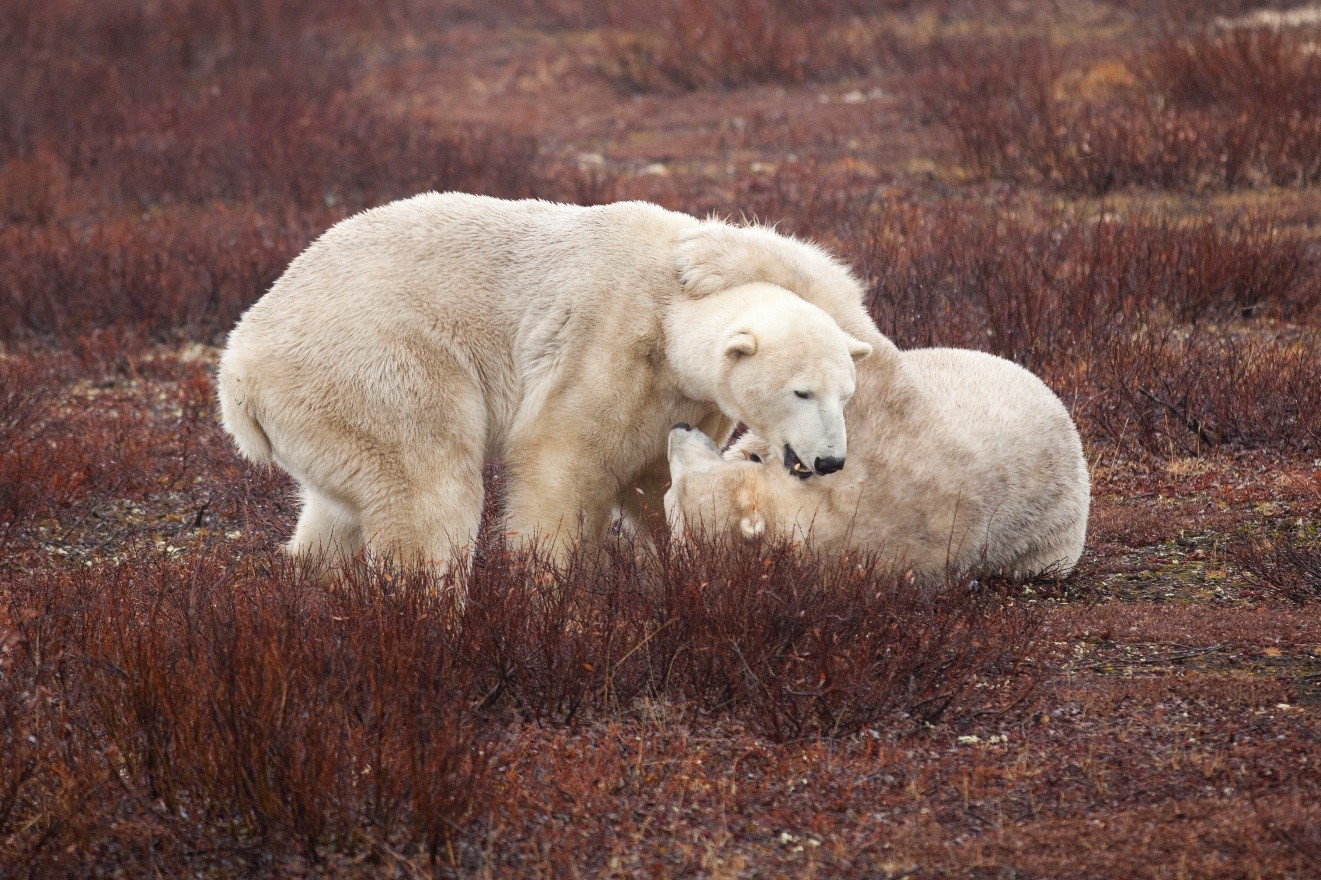
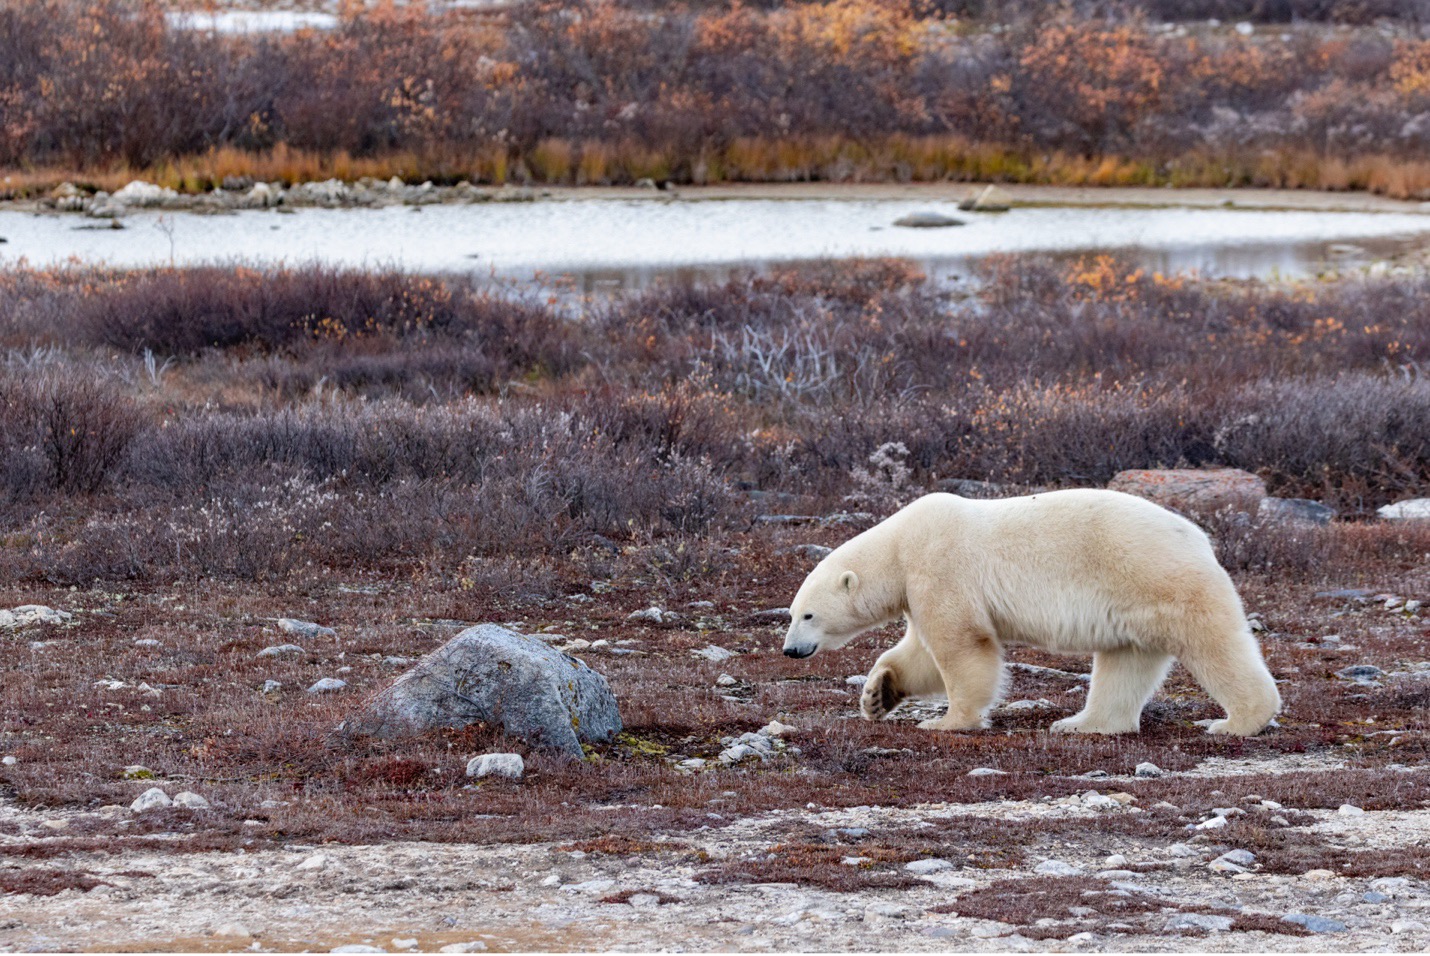
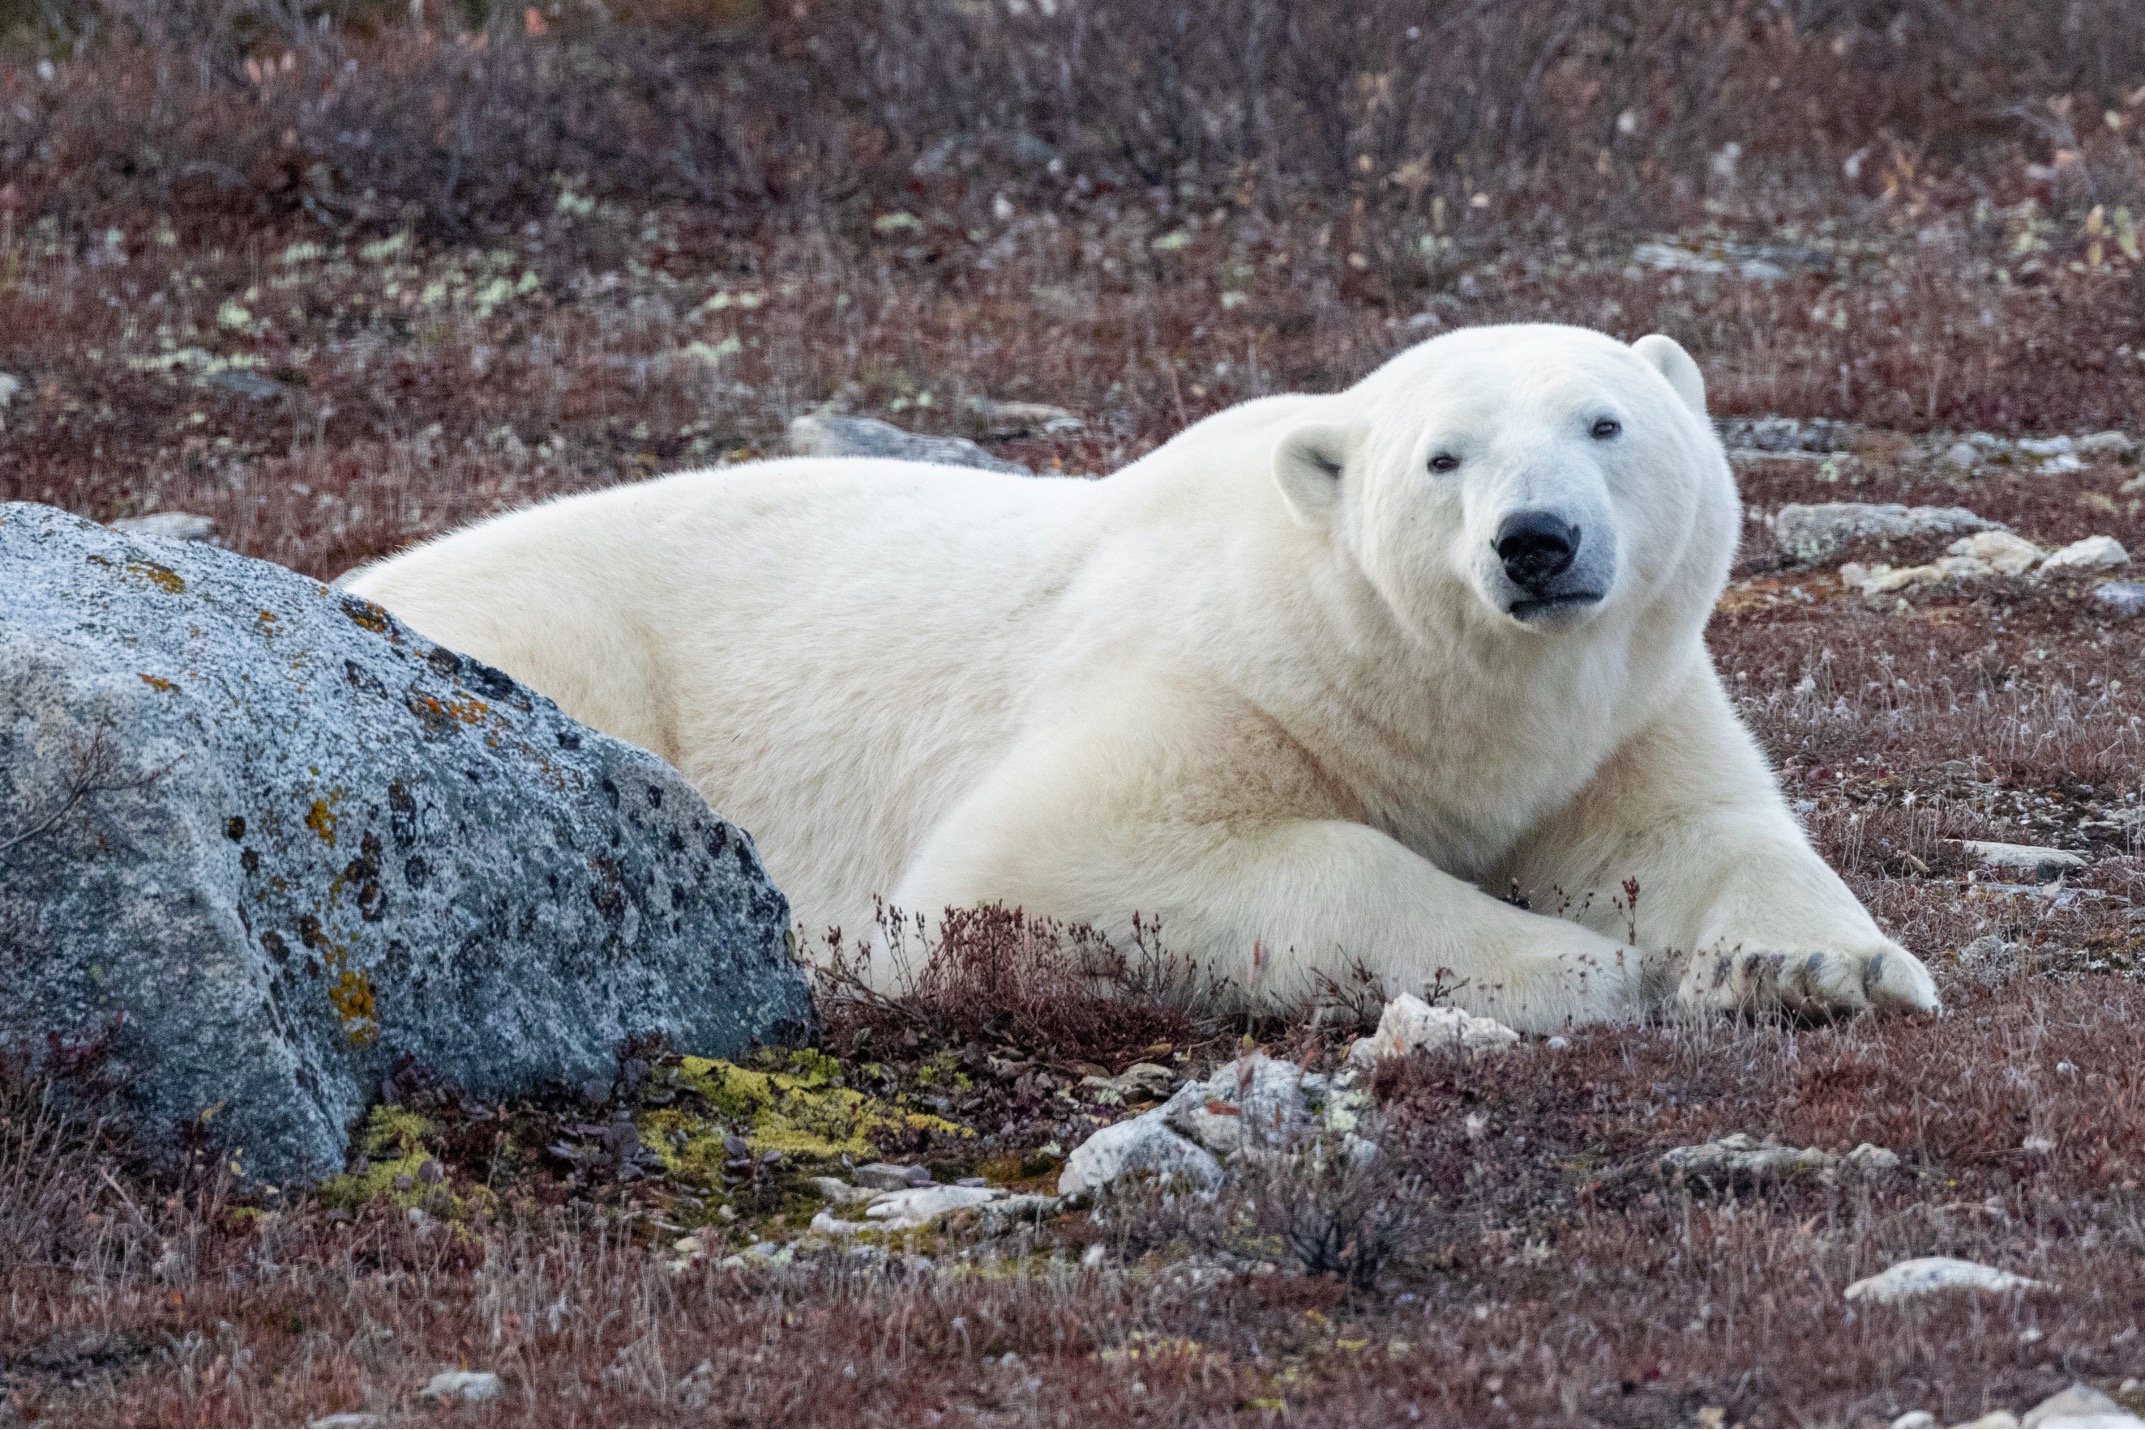
It’s oh so tempting to use our telephoto zoom power these days to “fill the frame” with polar bears. That is, getting “the big shot” like the one below.
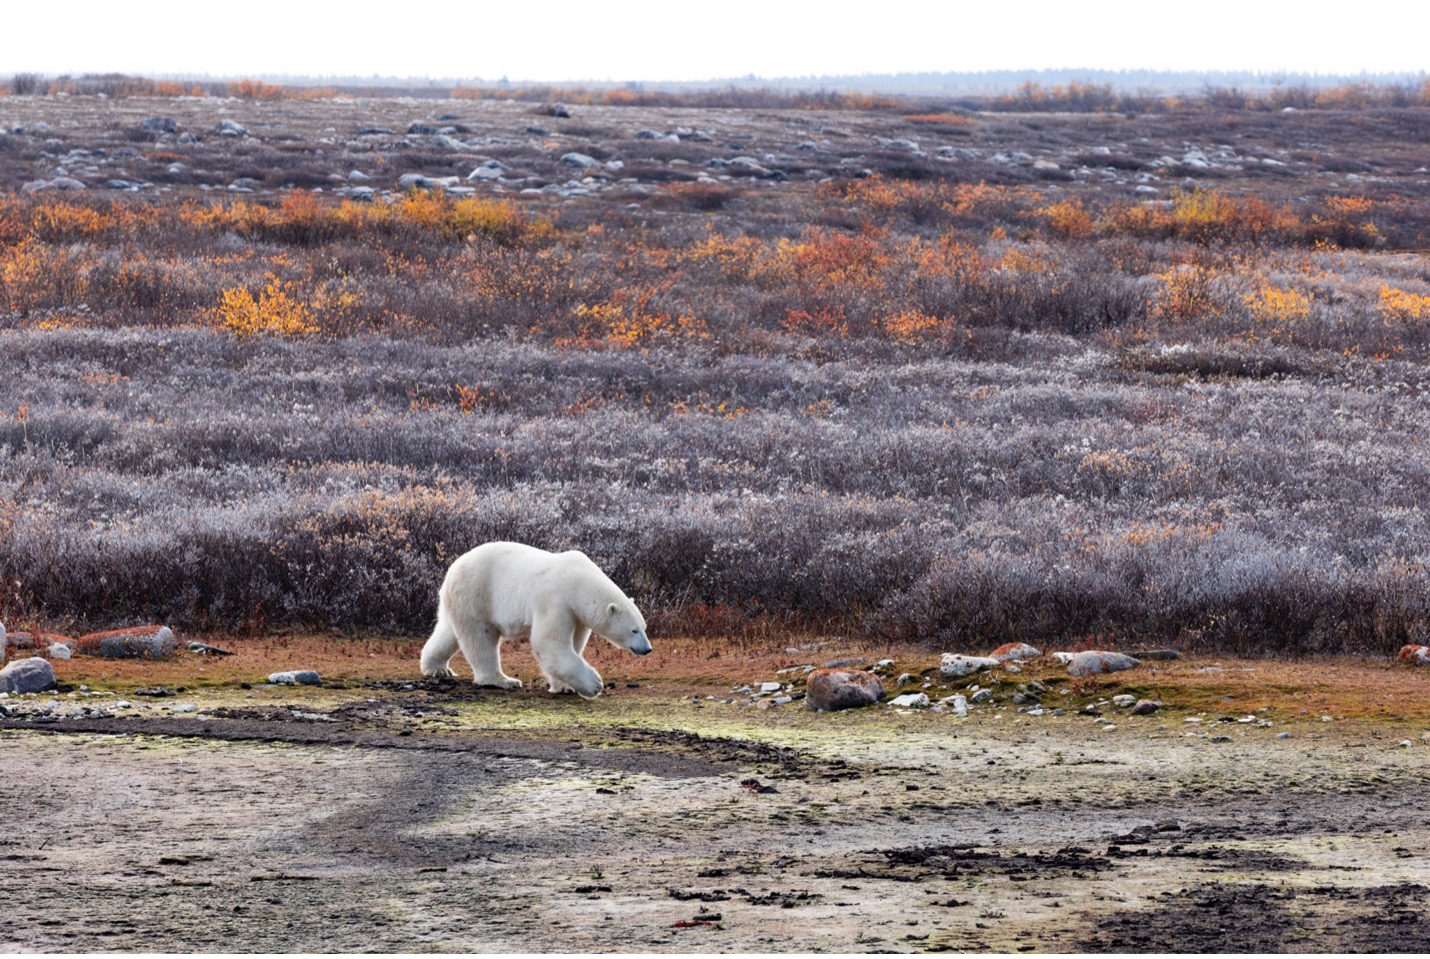
However, it’s important to remind yourself to zoom out and ensure you are getting the entire scene when special wildlife moments present themselves. That is, when you have a truly special encounter with a polar bear, consciously decide to take a few “zoomed in” photos, and then deliberately zoom all the way out so that you have plenty of photos showcasing the polar bear in its habitat.
The reason this is so important is that we are rarely satisfied with these types of “wide” photos when reviewing them in the back of the camera. They are small photos, and if the bear is only a small dot on the screen, I get it—how can you be enamored if you can barely see it?
Well, after years and years of photographing polar bears, trust me—some of the best photos are those where you see the entire scene and it truly won’t be apparent until you’re home and can view them on a full size computer screen.
Thus, make sure you deliberately take both styles of photos…big, filling-the-frame shots, and landscape-scale photos of polar bears in those special moments.
Following the Rule-of-Thirds
This is perhaps the single quickest way to elevate your photography. Simply follow the rule-of-thirds and watch how much better your photos become.
If you haven’t heard of this before, or haven’t read up on it for a while, it’s worth a few minutes on our composition page for the full explanation. However, in short, the rule of thirds breaks your scene into three parts top to bottom and three parts left to right—like a tic-tac-toe board.

Your mission is to use elements of the landscape and divide your scene into thirds. Sometimes you can do this vertically and sometimes horizontally. Not every scene has components that can be broken down by thirds both horizontally and vertically, so I usually suggest people begin by putting strong lines (e.g., the horizon) at those thirds. Then, if you see a dominant change in, say, vegetation, put that transition line on a third, too.
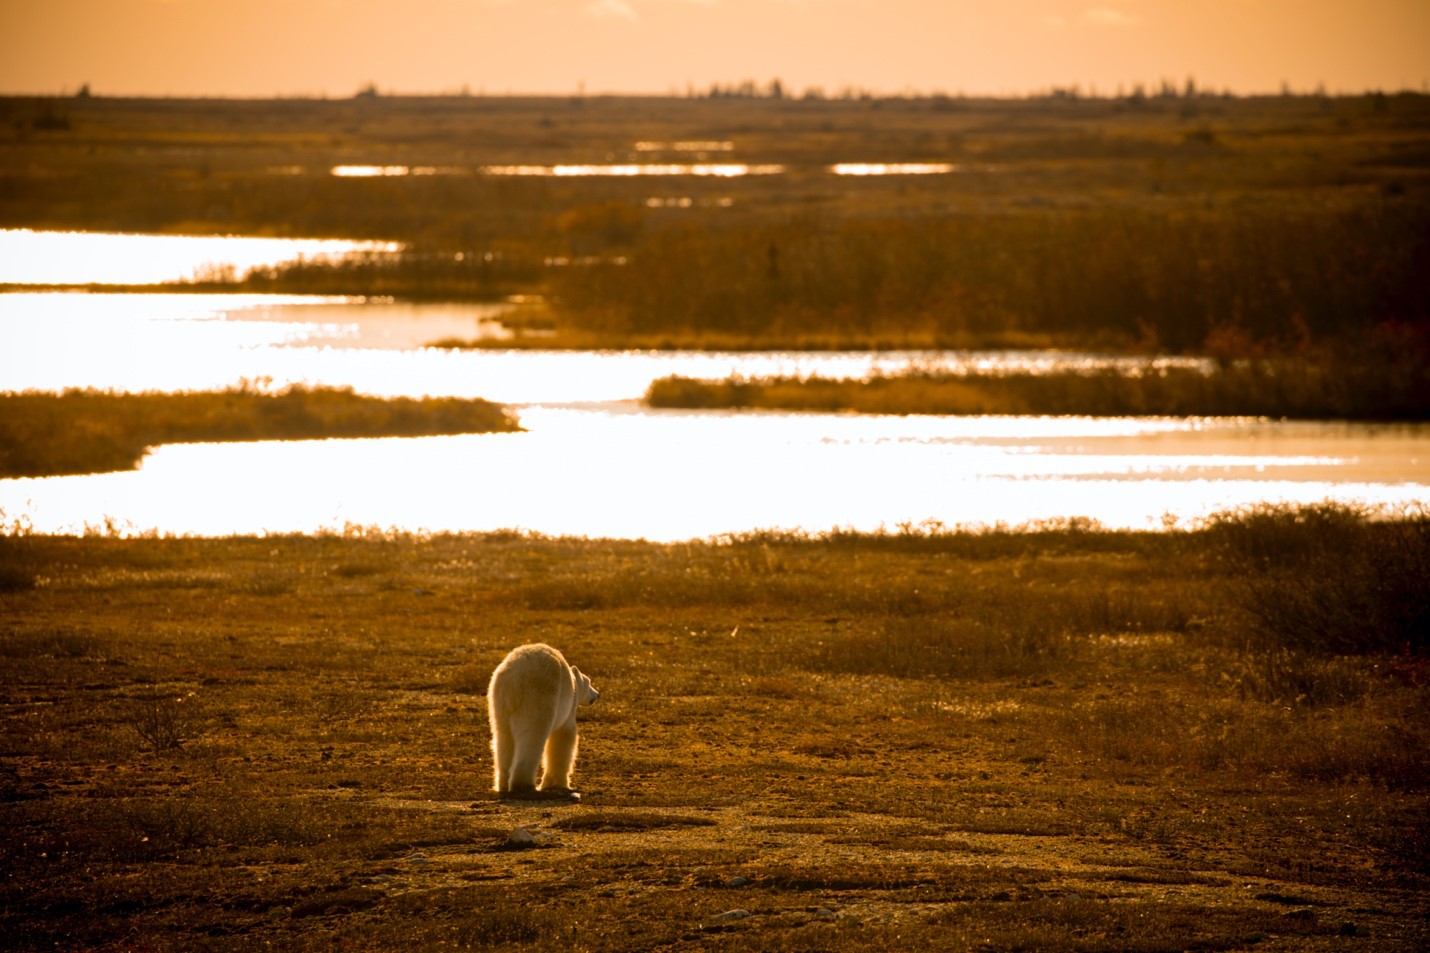
Take a look at the below photo and visualize how you’d break this scene into thirds.
It’s up to you what parts of the scene you put where. This rule doesn’t say that the horizon should always be at the upper third or lower third—simply, it just should be at one of the thirds. Now let’s see how a rule of thirds grid would fit over this.
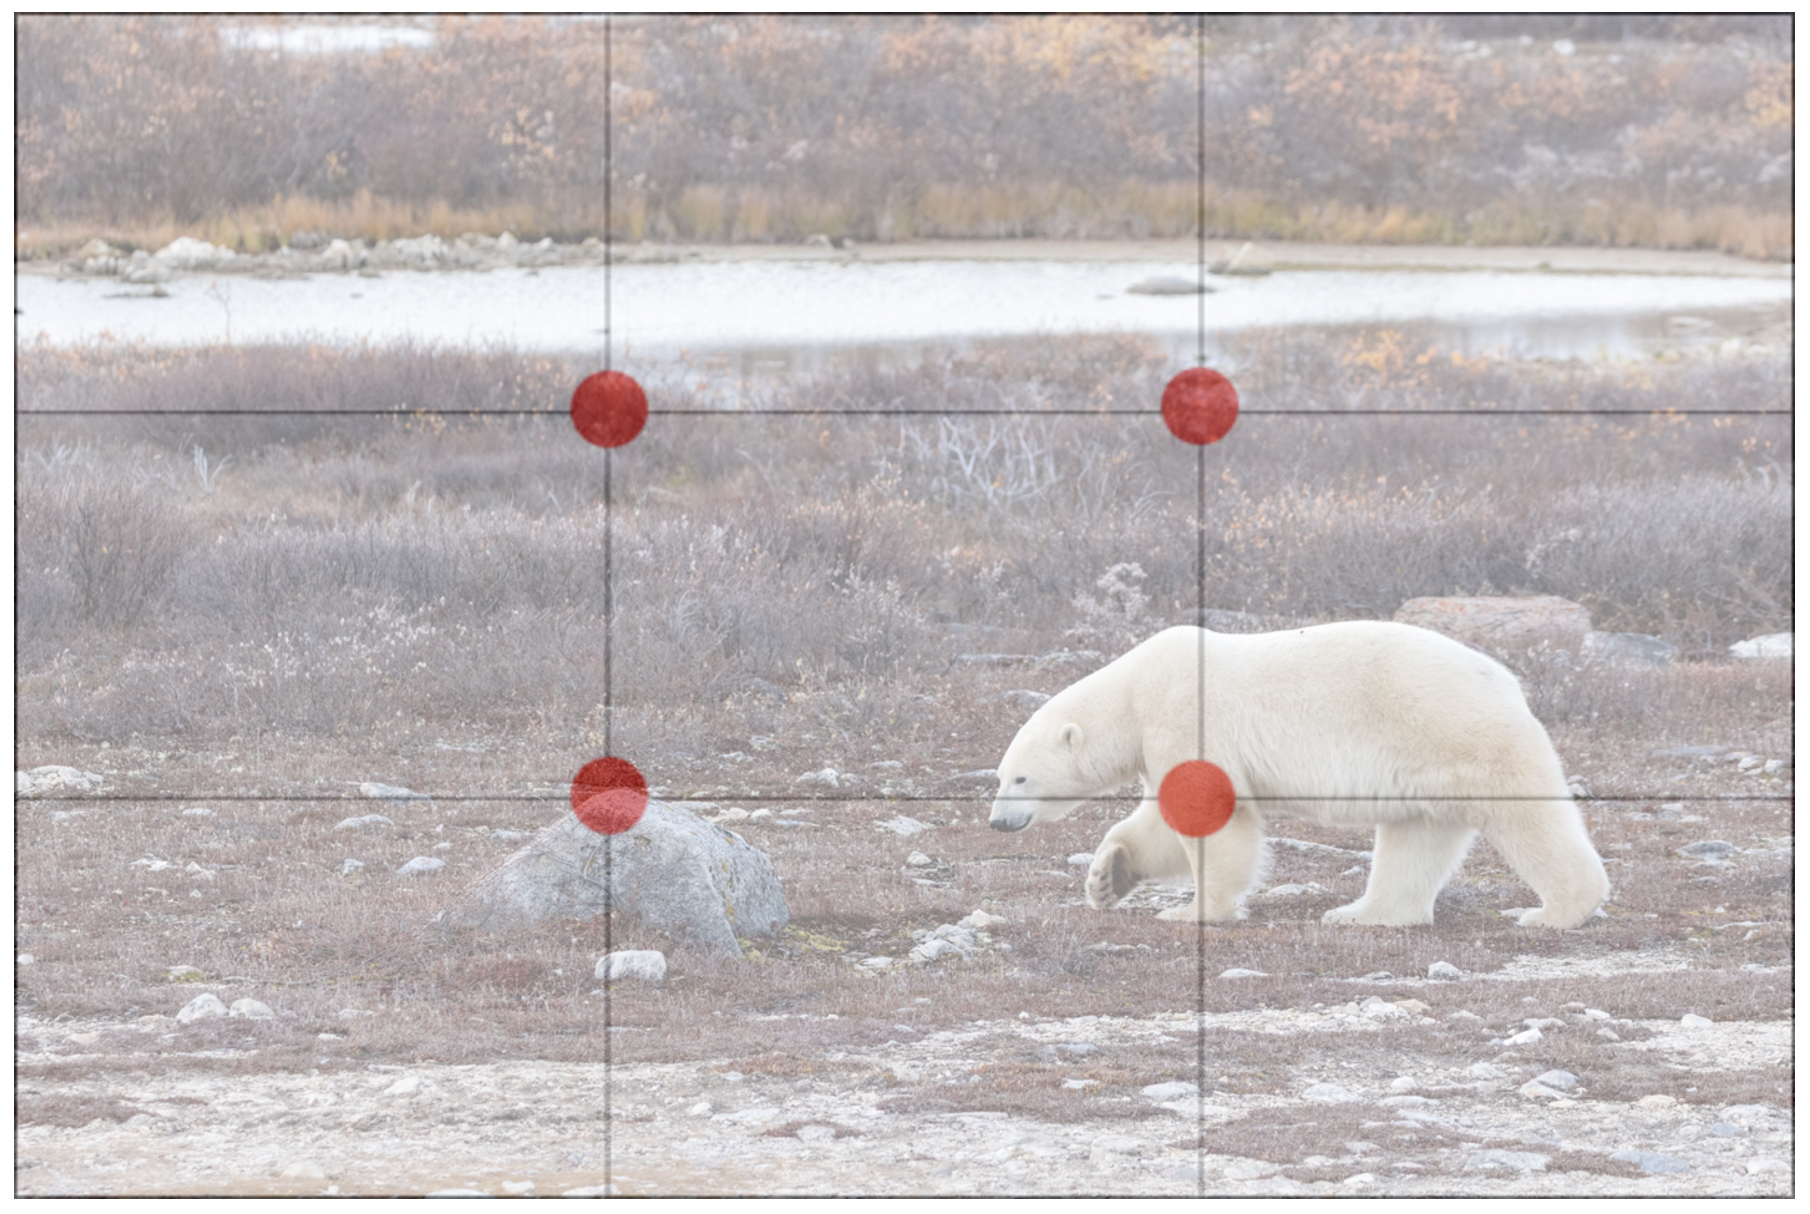
If you are feeling good about this general concept, try going one step further and use the four intersections to place your subject. See how in the above photo the bear is precisely at the bottom right third?
For instance, rather than putting the polar bear in the center of the frame, try offsetting it and position it perfectly where one set of the horizontal and vertical lines meet. And if the bear is looking in one direction, be sure to leave the open space of the frame in that direction (left side, in the case of the above photo).
Exposure Compensation
Exposure is just a fancy way of saying “the lighting” of a scene. For instance, if you have an over-exposure, this means that your scene has too much light and is too bright. An under-exposure is just the opposite—your scene is too dark.
In today’s world, we can use photoshop, iphoto, lightroom, and other programs to make small adjustments. However, no matter your editing proficiency, it is ALWAYS best to get exposure correct in-camera, instead of relying on computer programs.
In general, I recommend keeping your exposure meter at zero for most of your photographs. This way, the camera evaluates how light or dark it thinks your photo should be and sets aperture, ISO, and shutter speed accordingly. Cameras are getting better and better at this, but sometimes they don’t evaluate the scene, and your creative planning, appropriately.
Here is what an exposure meter looks like in your camera’s menu.
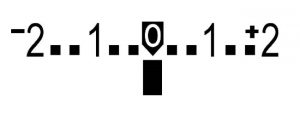
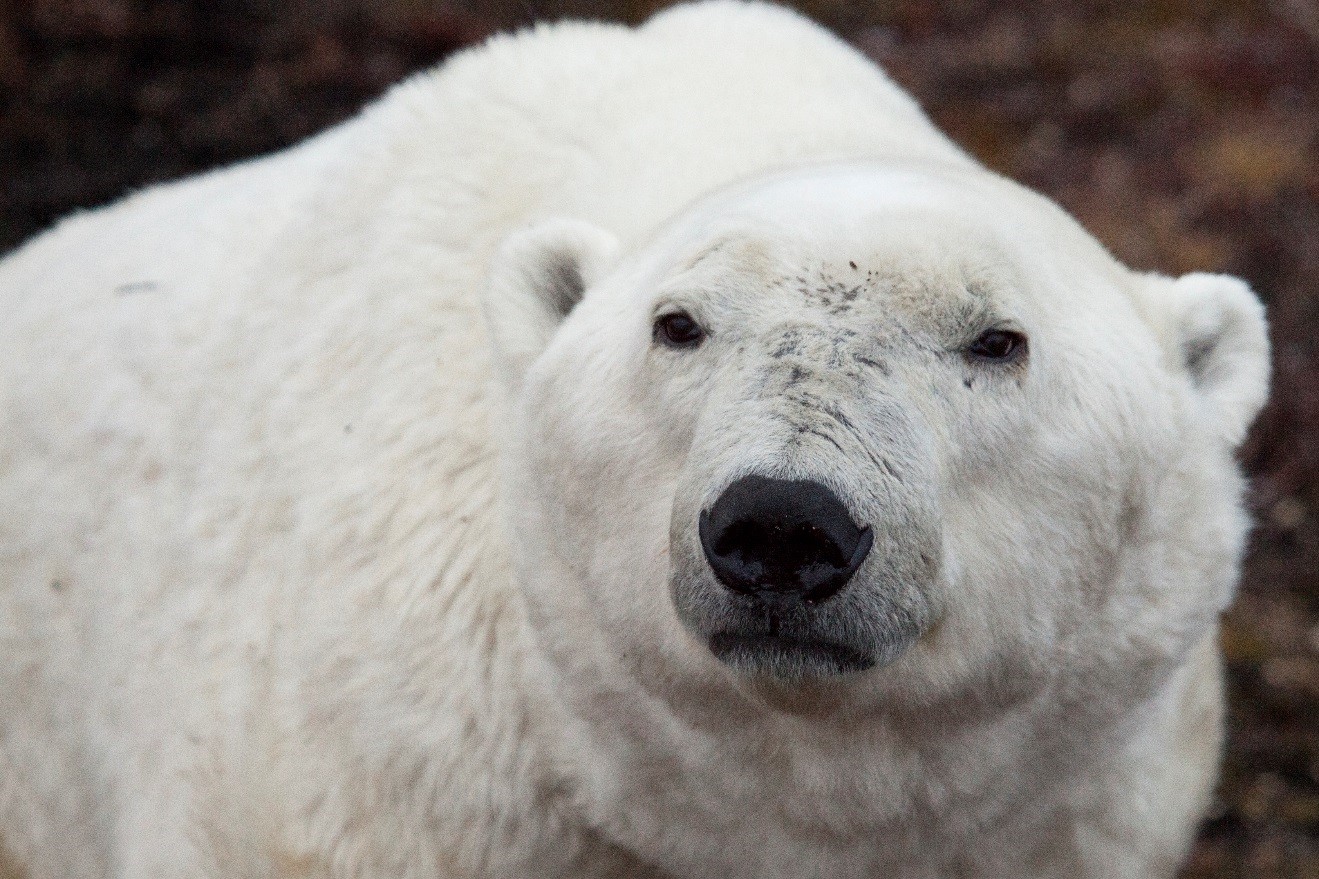
This is particularly common with polar bears in bright or snowy conditions. The camera thinks there is too much white in the scene, because there’s a big white bear, and thus darkens the photo. The result? You get a gray, dusky bear—not the brilliant ivory-white bear you see in front of you!
The solution? You may need to actually over expose your photo to tell the camera “hey, I want this photo to be “too” bright…it’s ok if you disagree.”
The way to do so is to first ensure your camera is not on full-auto (pro tip: if you are shooting on full-auto, try P mode, which is basically the same, but allows you to edit exposure).

Then, find the small exposure icon and increase your exposure to the + side by one or two notches. Most cameras require you to push the +/- button and dial the back wheel clock-wise to increase exposure. However, it may be best to quickly look up how to adjust exposure for your make and model (youtube is a great resource here).
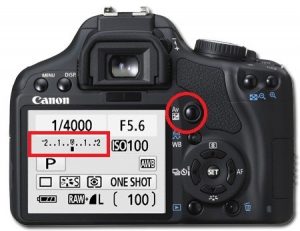
I generally will overexpose my polar bear photos by anywhere from 1/3 to 1 full stop. Each “notch” on the exposure meter is 1/3rd of a stop.
Setting Your Own Shutter Speed
Wildlife action can occur at a range of speeds. You might see some cozy sleeping bears with little movement and you might see some walking bears with moderate movement or even sparring bears with quite a lot of movement!
If you choose to have your camera on an automatic setting like full-auto or P modes (remember, P is for program, and the camera still sets focus, aperture, shutter speed, and ISO for you), you will likely be ok with “normal” amounts of movement like resting or walking bears. However, at a moment’s notice, the action could become quite rapid and you should be prepared to set your own shutter speed.
You can do so in a few different ways.
The easiest is to locate the “sports” mode on your camera, usually denoted by a little “running man” icon. This reconfigures your camera settings to prioritize a fast shutter speed. How fast? Well, that’s up to your camera. But usually this is enough to capture most rapid movements.

If you’d like to fully take the reins on shutter speed you can locate the “shutter speed mode” on your camera. This is usually on your camera’s top settings wheel alongside manual mode, aperture mode, and a few other custom modes.
By using this mode, you will be telling your camera the exact shutter speed you need, and it then chooses the aperture and ISO necessary to achieve that.
This is really helpful for extremely fast moving action like sparring bears. Or, if you are reviewing photos and find that any of the automatic modes are not fully freezing motion, you may wish to try this mode.

In general, I like to shoot at 1/1500th of a second or even faster if trying to freeze motion of fast moving, large wildlife. However, you may wish to try both 1/1000 and 1/2000 in the moment, as both can produce different and interesting results.
At 1/1000, you may still see a slight blur to movement, such that a bear’s paw may be slightly blurred, giving a movement effect that we like to see—it adds a bit of intrigue to your photo! And at 1/2000, you might find that the photo is even sharper depending on exactly how fast everything is moving.
The key here is to know where to find these settings in your camera so that if such a situation presents itself, you can master the shutter speed function of your camera and get a stunning set of shots.
Preventing Your Camera from Fogging in the Arctic
This can be a problem no matter how experienced you are. And it can really hinder your photography if you are in and out of heated vehicles or buildings.
I’m talking about the situation when your camera gets super cold and then enters a warmer, more humid environment. It then condenses the air into water on the lens, thus fogging it and preventing any good photos for the next 5-10 minutes as you warm it up.
The best way to prevent this from happening is to ensure that you put the lens cap back on your camera while still outside and not taking it off until your camera has had time to slowly warm back up (while you’re cozy inside). Depending on how cold it was outside you may need even more time than this, but generally 5 to 10 minutes of having your lens cap on is enough for polar bear adventures when you’re in and out of the polar rovers.
If you’d like the full digest on this topic, I have an entire article written on the subject here.

Getting Away from Full Automatic Mode
This can be a daunting concept for many, but trust me, I’m here to walk you through it and you will love the results.
First, it’s important to know that I’m not actually getting you off of automatic, I’m just adjusting the amount of automatic settings the camera provides.
By setting your camera on P mode (stands for Program), you are still having the camera choose auto focus, auto aperture, auto shutter speed, and auto ISO. These are the main components to any shot, so we’re not touching that for now. However, by going to P mode, you are “allowed” to start tinkering with some creative settings. Specifically, you have access to white balance, exposure compensation and drive mode. This will open up quite a new world for you as you explore new, creative options to photograph wildlife. Full-auto locks access to these and prevents you from making such adjustments.
Let’s talk a bit about drive mode for a second.
Adjusting your drive mode allows you to take more photos per second when set to “high” or “fast” mode. This can be wildly helpful when photographing rapid sequences of movement (like a polar bear standing up from a sitting position).
But it can also be a detriment when taking landscape photos (imagine taking 7 of the exact same shot because you held the shutter button down a tad too long). Thus, you want to be versed at toggling back and forth between a normal and fast drive mode. This is also known as “frame rate” within camera menus.
I also encourage you to learn a bit more about the effects of changing your white balance in this video tutorial–this is particularly helpful for the cool blue effect you’ll want for arctic polar bear photography!
Wow, we covered a lot! I certainly hope this wasn’t overwhelming, but the great thing is that you can take this in chunks and practice each section independently.
The main point is that through a few considerations, you have the ability to significantly elevate your polar bear photography on your next wildlife adventure.
If you have any of your own polar bear photography tips, please do leave a comment below!
Until next time,

Court
Leave a reply