3 Key Camera Settings for Desert & Canyons Photography
The national parks of the Southwestern US are no doubt a treasure. They’re endlessly photogenic, extremely accessible, and right in our (sorta) backyard.
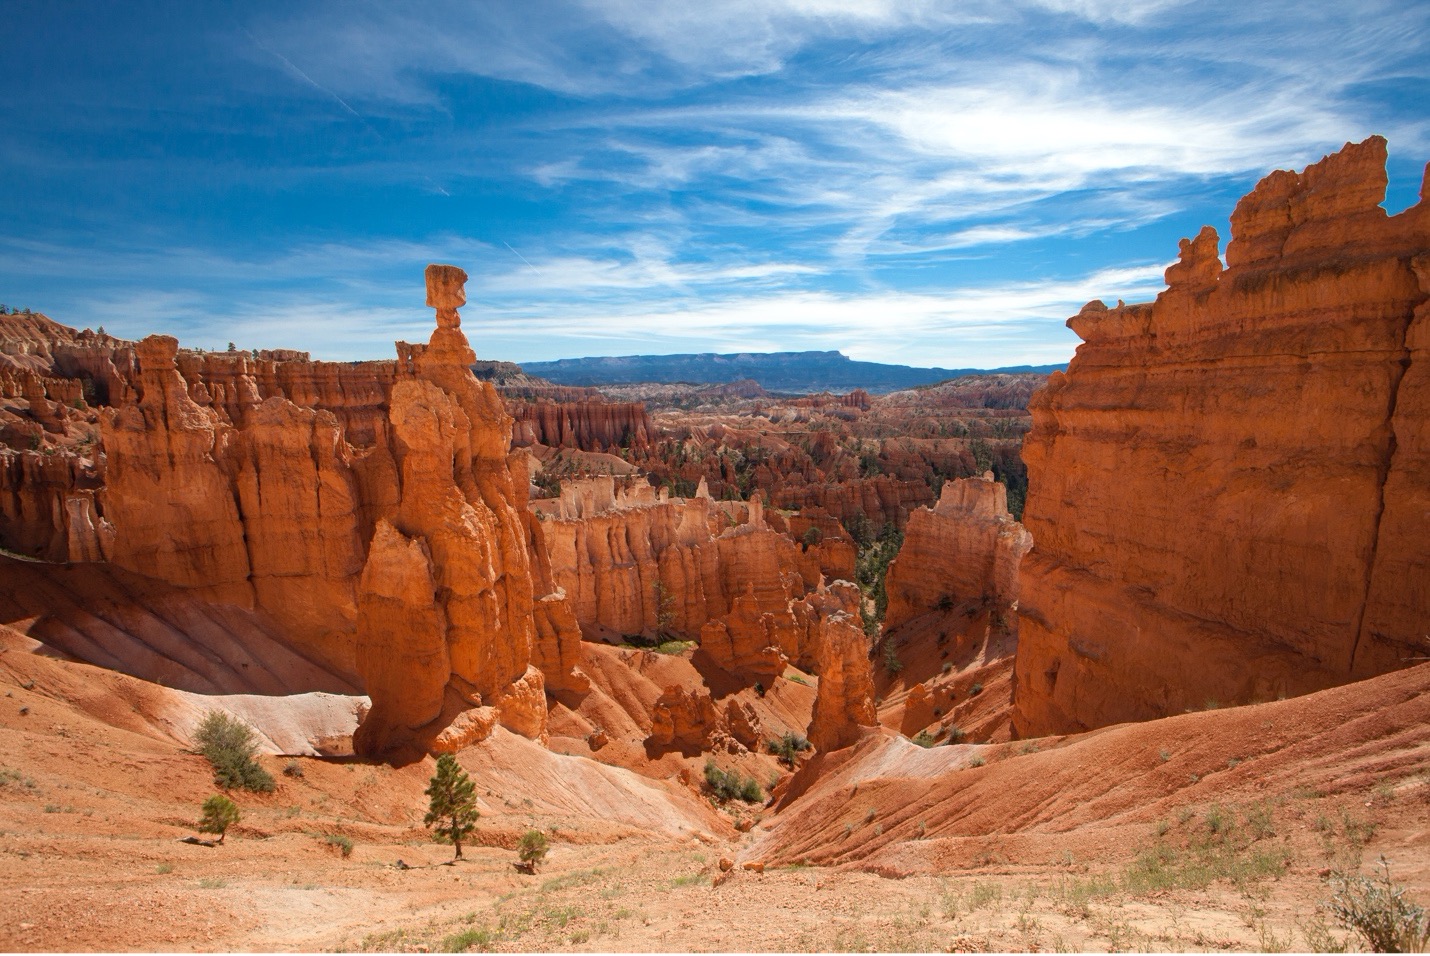
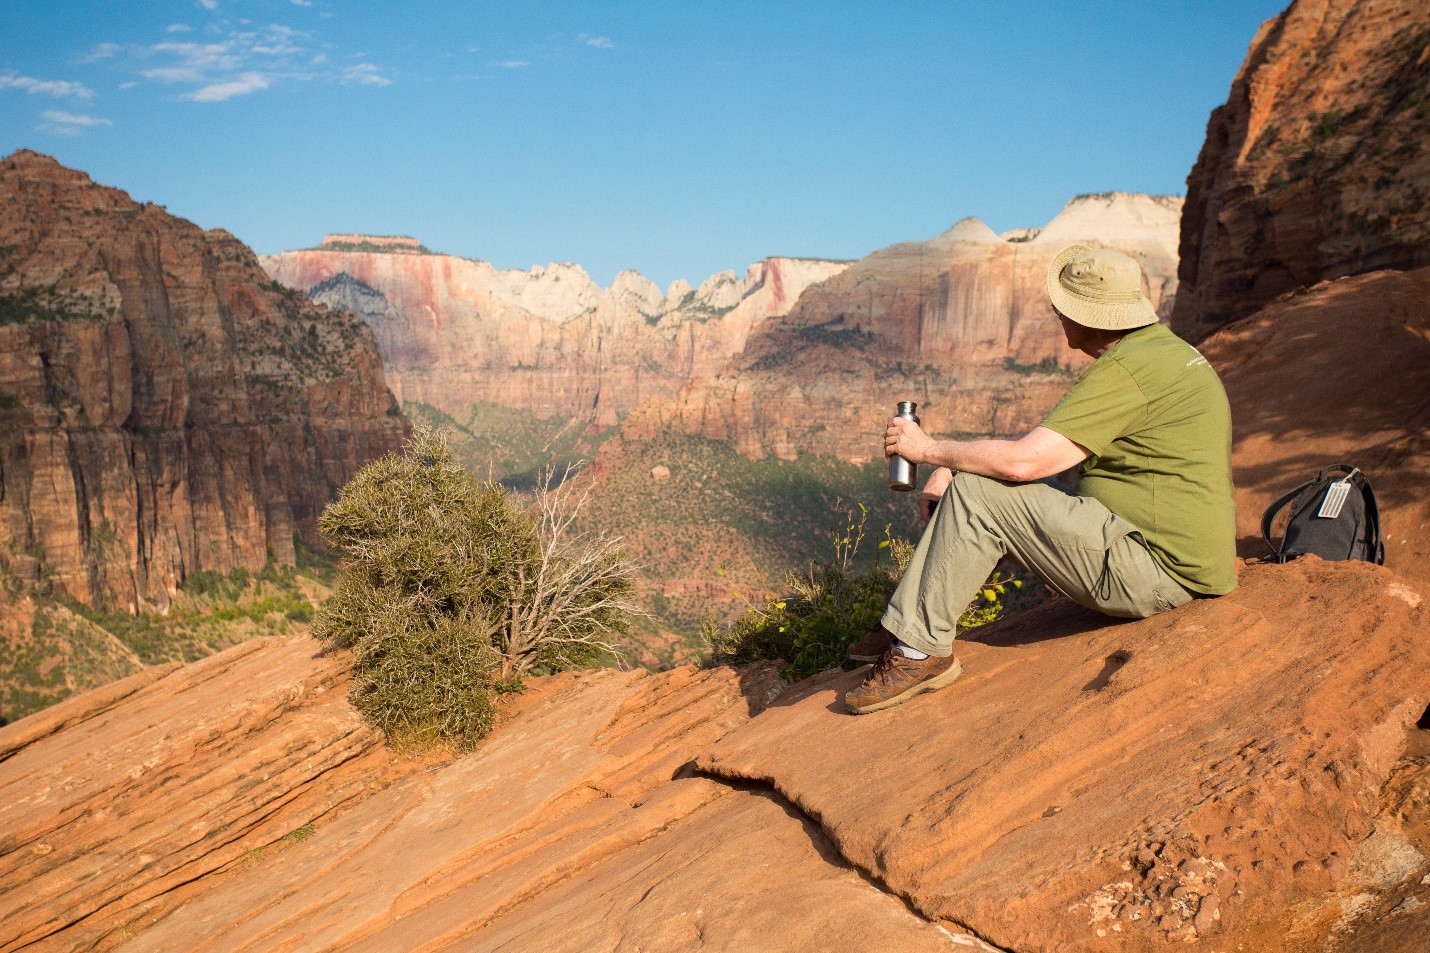
While many of these places, like Bryce Canyon, Zion, and Grand Canyon National Parks have a “you have to see it to believe it” vibe, with the proper techniques and some pro tips you can make the most of your photographs and return home with glorious memories of these wild, spectacular vistas.
Get a Deep Depth of Field
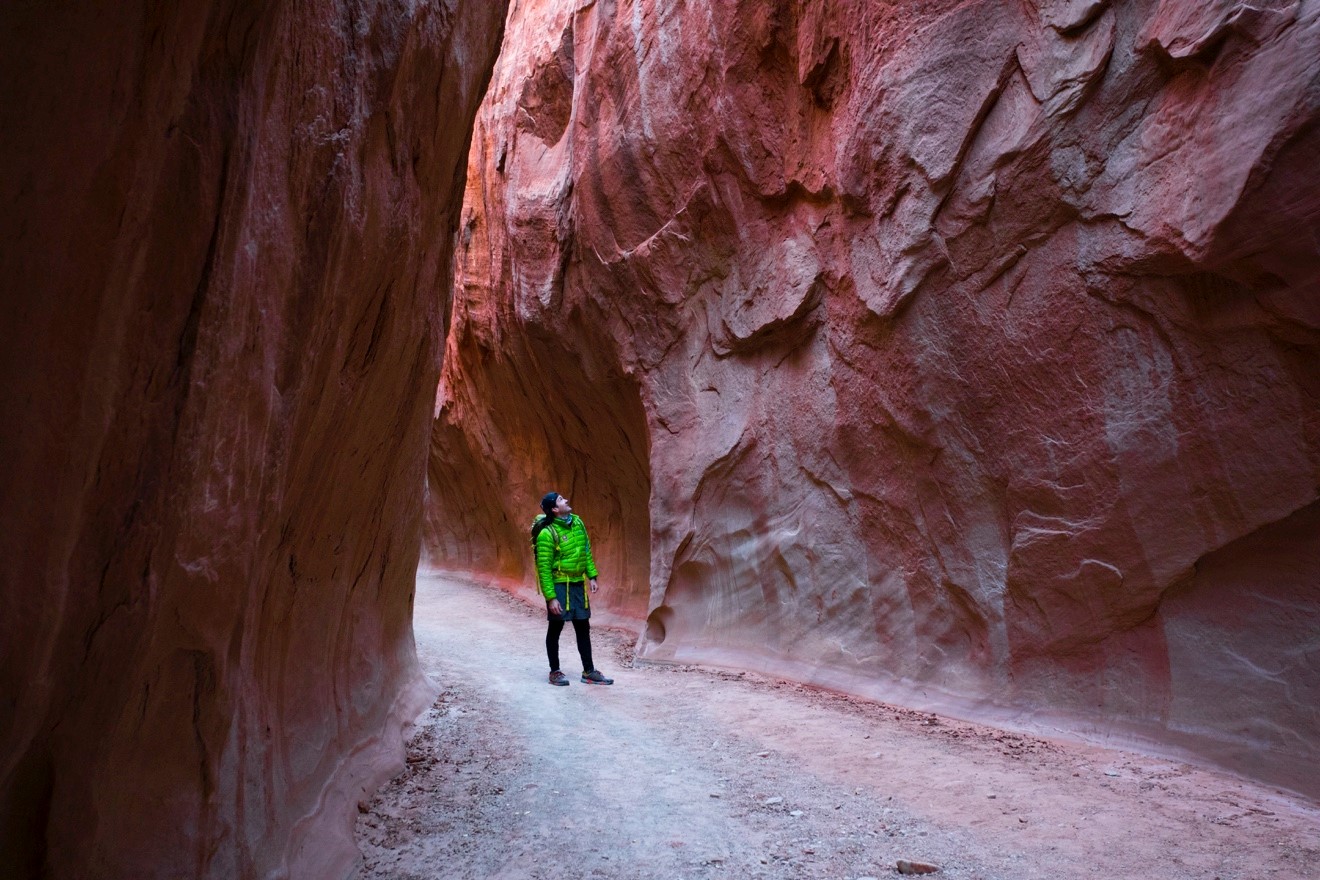
For big landscapes you want to have a big depth of field. This basically translates to having more (most) of the scene in sharp focus. The opposite–a shallow depth of field–is pleasing for things like portraits, but not so great for landscape photographs.
If you photograph with advanced settings and have a handle on controlling your camera’s aperture, start with shooting on aperture priority mode and at f/8. This is an “average” setting for big depth of field.
However, if you have something relatively close to you, like a person, tree or a bush, in front of an otherwise massive landscape, get ready to shoot at f/11 or maybe even f/16 so that everything is in focus—both near and far.
If you haven’t quite graduated from full auto, fear not. You can go into your “scene settings” and pick “landscape mode.” This reshuffles your camera settings to maximize your aperture and give you the biggest f/number your camera can handle.
Set your White Balance to “Cloudy”
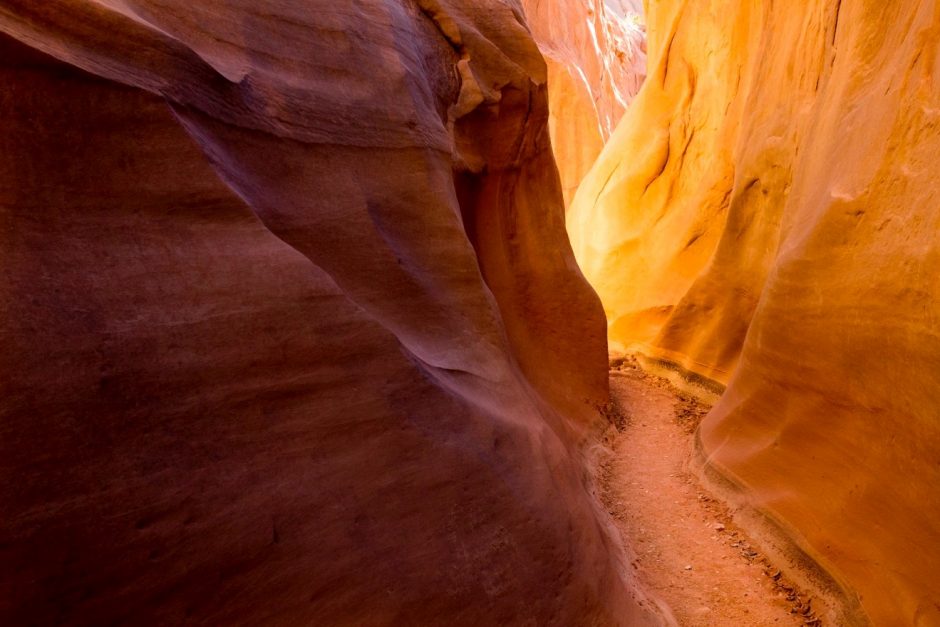
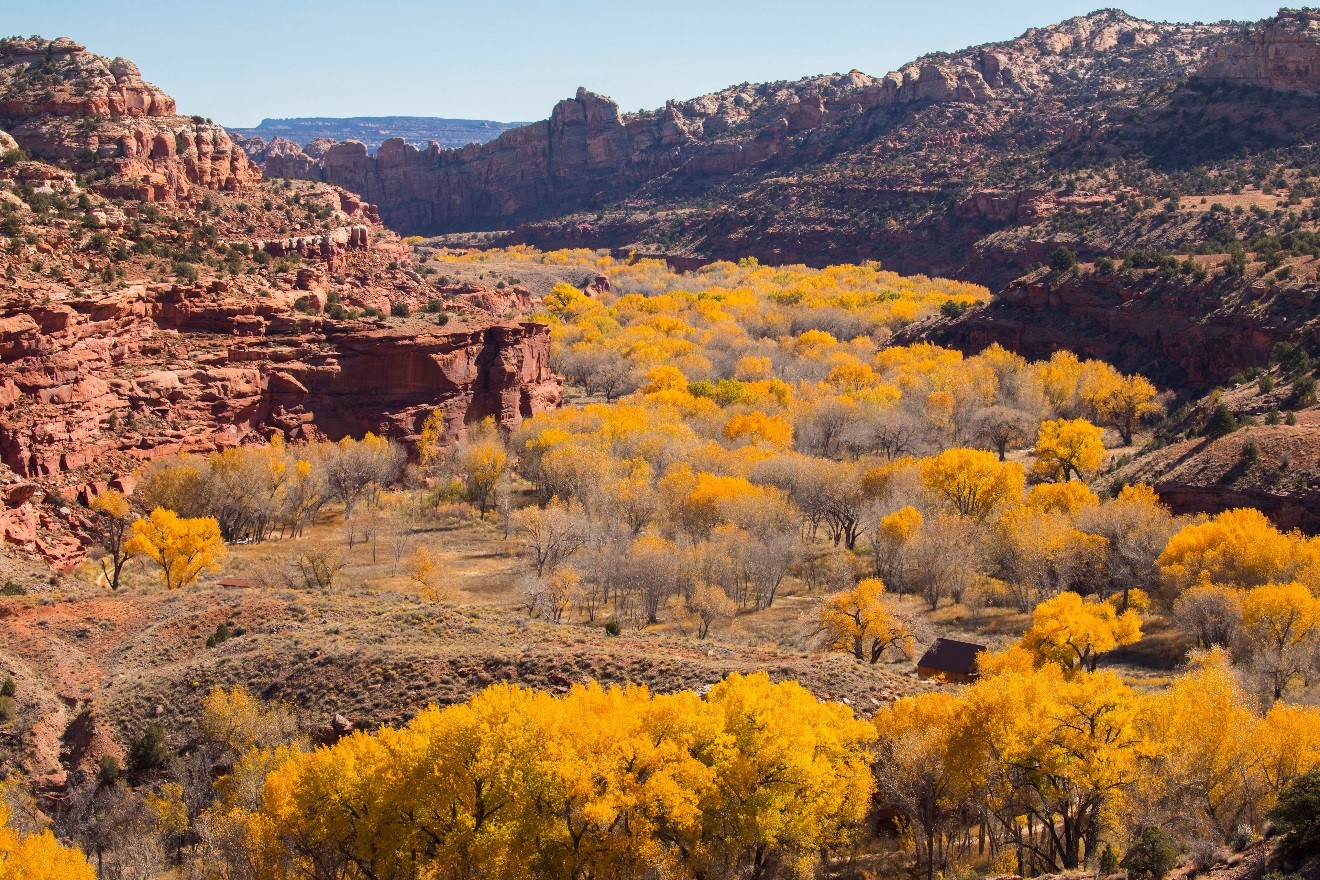
Arguably my favorite thing about photographing deserts in “Canyon Country” is the eye-popping color in the rocks. The reds, yellows, oranges, and even purples and magentas at times is stunning.
There is a trick to maximizing the colors here. And what’s even better is that you’re not over-saturating your photos in photoshop or lightroom…it’s just the natural way your camera perceives color…specifically, how it perceives pure white.
Your camera’s white balance is on a spectrum from blue to yellow and depending on which preset you have chosen, your camera will essentially inject more blue or yellow into the photo.
If you set your camera on “daylight or direct sunlight” it will inject more blue and “cool tones” into your photo. I use this mostly for snowy, arctic environments.
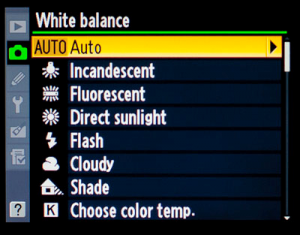
But when in the red-hot deserts (they’re actually way more mild that you’d think, temp-wise), I like to set my camera on cloudy or shade for its white balance. This injects more yellow into the photo, bringing out the warm tones of oranges, reds, and yellows.
If you’ve not tried this before, it’s almost like magic!

Auto white balance (AWB) works ok, but it usually errs on the side of being more “cool” and blue. Thus, manually changing your white balance to cloudy is my go-to at the start of any Canyons Photo Adventure.
Aim for Low ISOs
If you’re new to ISO, it is akin to film speed back in the days of film photography. The higher the number film, the more light sensitivity the film has. This lets you photograph at higher shutter speeds, which is helpful in low light or with fast moving wildlife.
Today’s ISOs are very similar. The bigger the ISO, the more light the sensor perceives and thus the faster the shutter speed your camera can use.
The downside of higher ISOs is that the higher you go, the “grainier or noisier” the photos will be. For most cameras, anything over ISO 1600 starts to really show this scratchiness.
Because of the generally abundant light in the deserts of Utah, Arizona, and the Southwest, you do not need to photograph on high ISOs. However, sometimes cameras are set by default at moderate or even high ISOs.
Make sure you take the majority of your photos at ISO 200 or 400 for best results.
Bonus Tip: Shoot in Raw
To really boost the quality of your photos some editing goes a long, long way. Simple edits like boosting contrast and saturation will really help the colors pop. In addition, when photographing in challenging light scenarios like in between rocks or in slot canyons, being able to lighten or darken your photos afterwards is a huge help. Plus there are all sorts of newer editing capabilities like clarity and dehaze that can really make landscapes come to life. If you plan on editing your photos, it behooves you to photograph them in RAW format in-camera.
New to RAW? Check out this full article on RAW vs. JPEG here.
If you are planning to be in the glorious Canyons of the American Southwest I wish you the grandest of times!
Start prepping with this Webinar:
It’s a truly special part of our world, and as a photographer, I have no doubt that you are going to fall in love with this region and likely be back many more times! There is so much to love and so much to explore.
Go forward and give it a shot,

Court
Leave a reply