How to Photograph Polar Bears
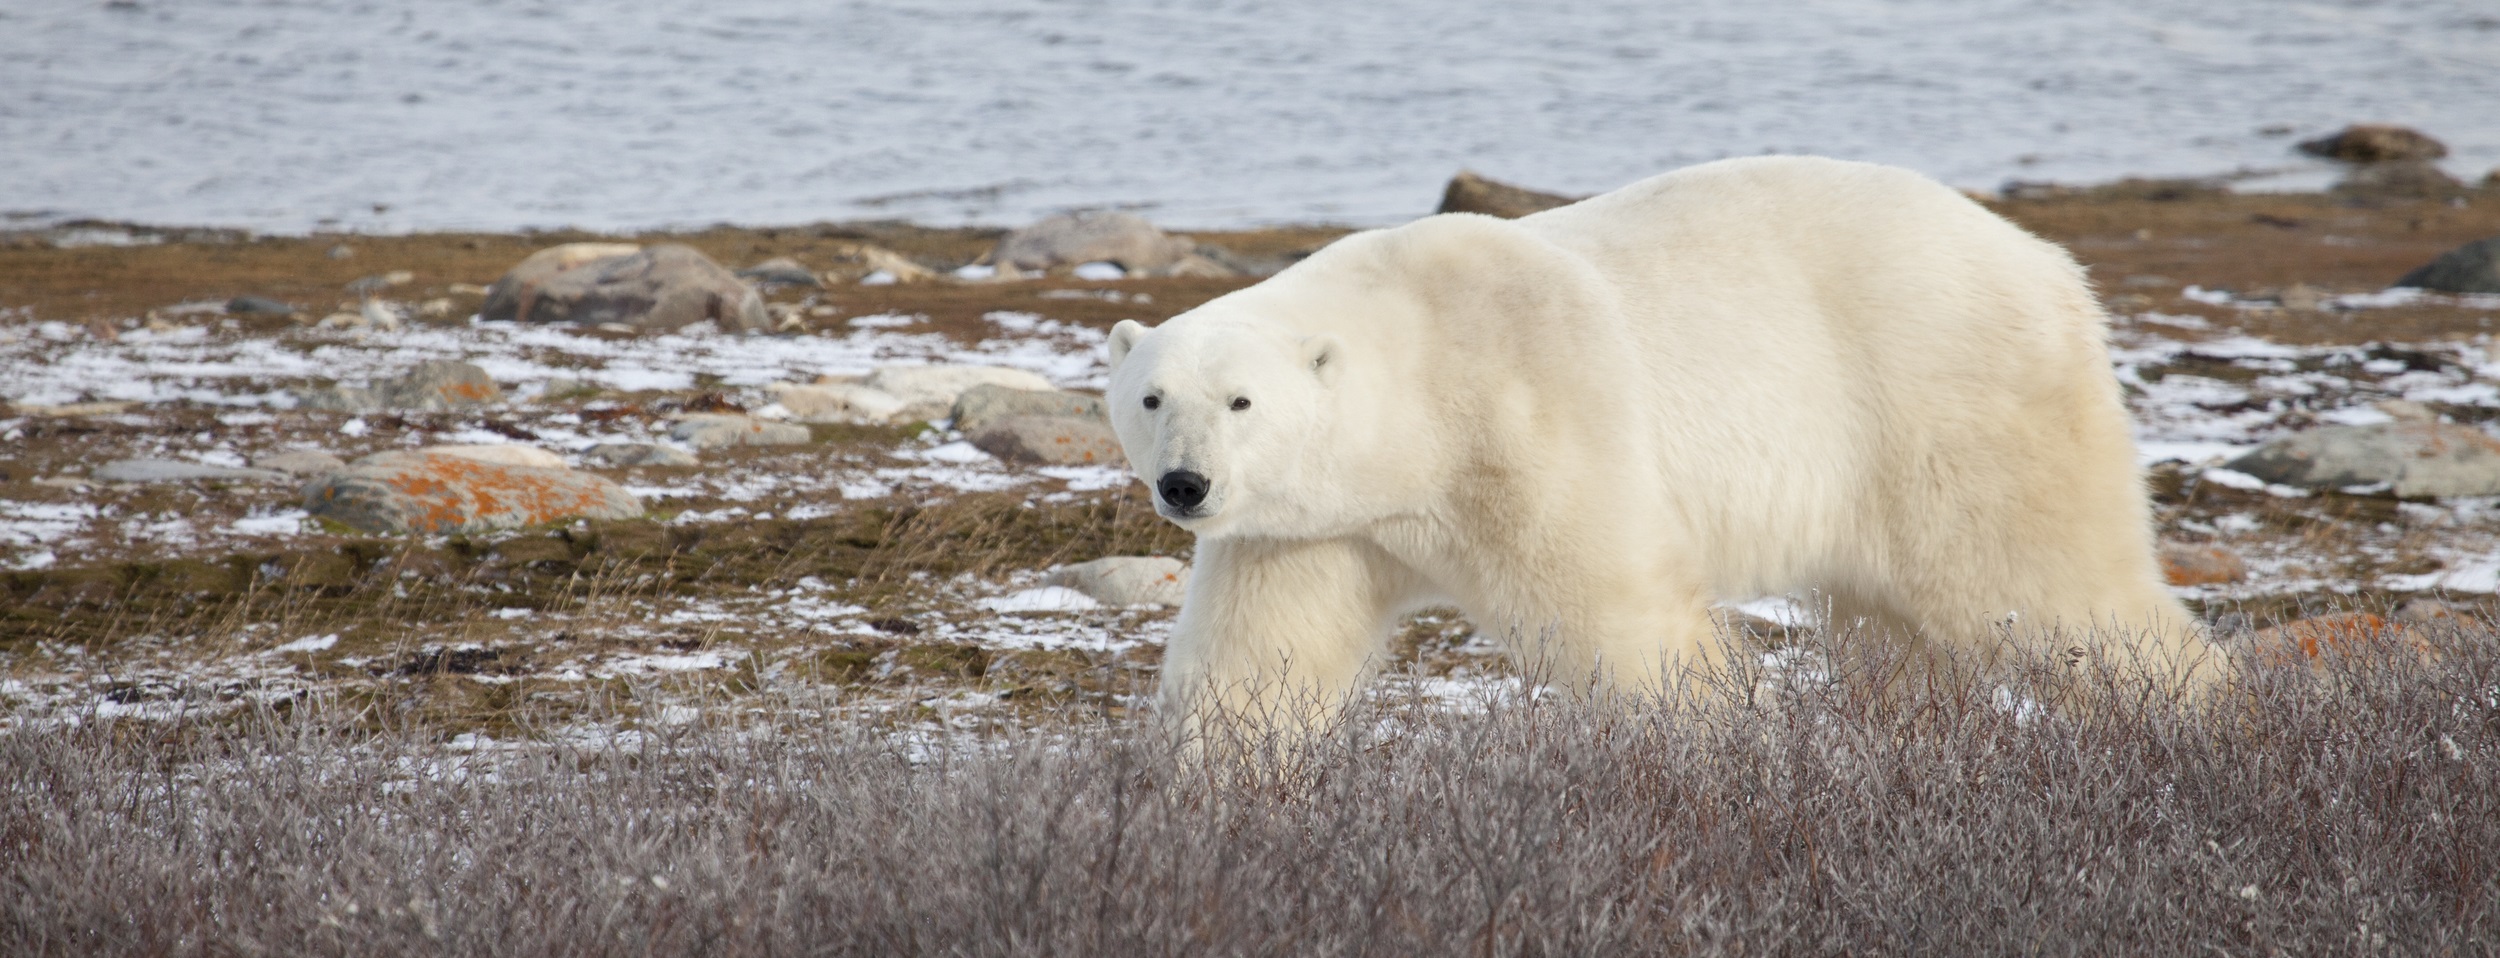
Photographing polar bears is richly rewarding on several levels. Not only are they an icon for the wilderness and austere arctic environment, but they also symbolize both the grandeur of nature and the fragility of it all in one.
The “King of the Arctic” as they are called is certainly an appropriate name, and on an expedition to observe and photograph them you will quickly see just how fitting this title is. While it may be hard to take a “bad” photograph of these majestic animals, you’ll want to make your time with them count and below are a few tips for making sure you get shots that you’re happy with.
Be sure to have the right gear with you
My personal rule of thumb with camera equipment is that the best camera out there is the one you have with you. That being said, you’ll want to make sure that your camera has both wide angle and telephoto capabilities. Fortunately, you don’t have to go to the extreme at either end of this spectrum to get amazing shots. The zoom range of most point and shoot cameras will be excellent. And plus, lighting is not often an issue when shooting on the tundra, so cameras with exceptionally good low light sensitivity aren’t required.
For those of you with DSLR cameras needing to choose which lenses to take along, you’ll want to have zoom capabilities in the range of 300mm to 400mm, and wide angle capabilities in the range of 18mm to 24mm at the widest.
Polar bears can be spotted at a variety of distances, from right up next to your rover to several hundred yards away. Plus, you’ll want to take other photos like landscape shots and storytelling shots like of your group, inside the rover, or of sled dogs.
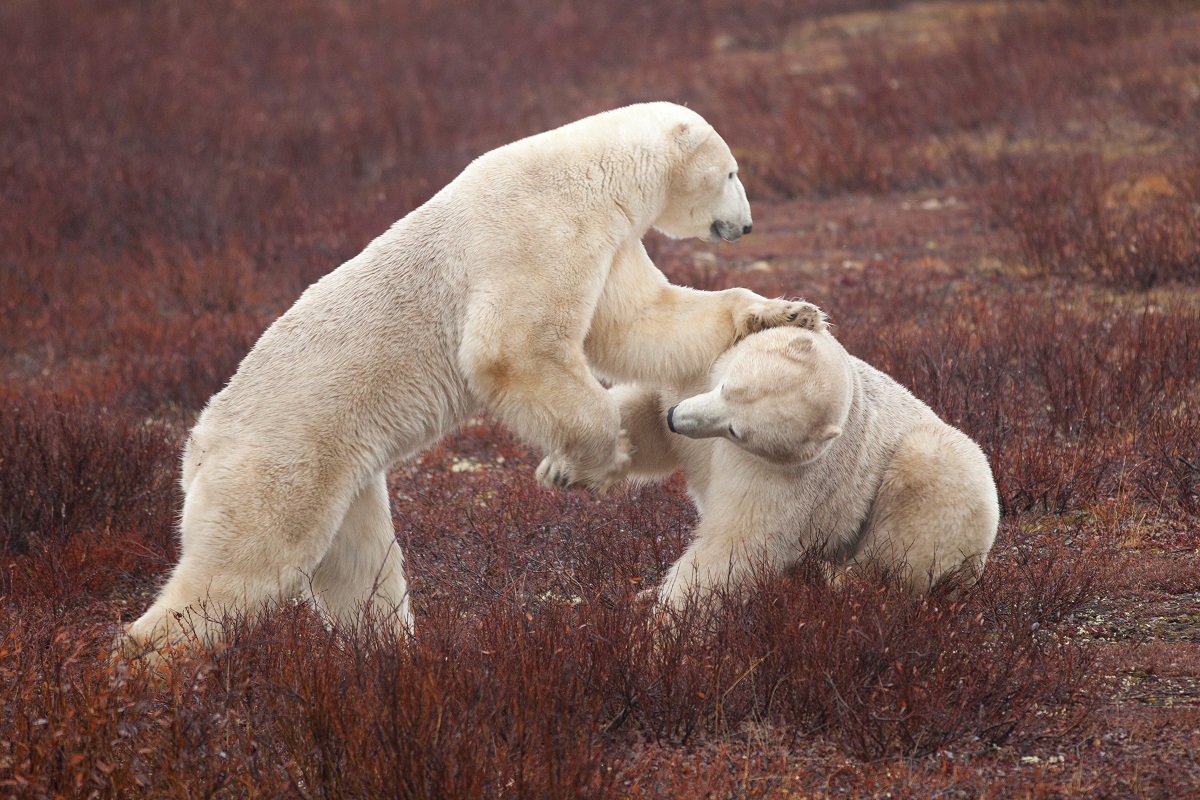
Be ready to shoot at fast speeds
You never know what you’re going to be treated to when it comes to observing and photographing polar bears. If you are lucky enough to witness this “play-fighting” as seen above, you’re going to need to shoot with a very fast shutter speed. You can read more about this in the full article, but for speeds specific to photographing sparring polar bears, you should set your camera on the little running man ![]() for “sports photography”, or basically anything fast moving. This tells your camera to prioritize settings for a fast shutter speed.
for “sports photography”, or basically anything fast moving. This tells your camera to prioritize settings for a fast shutter speed.
Alternatively, if you are comfortable setting a fast shutter speed on your own (usually by setting your camera dial to “Tv” or “S”), something at least 1/500th of a second is ideal. You may have to adjust your ISO to accomplish this.
Anticipate the lighting conditions
There are two primary challenges to photographing in arctic environments. One is getting the right lighting exposure and the other is getting the right white balance. Fortunately, these are relatively easy to overcome as long as you are paying attention to the light and snow conditions.
When the snow comes to an arctic environment, you’ll want to pay particular attention to how your photos look when shooting a white bear on a white background. Because of how cameras “meter” or choose lighting based on the scene, you may get shots that look very gray and dark. To mitigate this, consider manually overexposing your photos by 1/3 or 2/3 of a stop. Your camera’s menu to do this probably looks something like this, and each dot between the numbers is 1/3 of a stop:

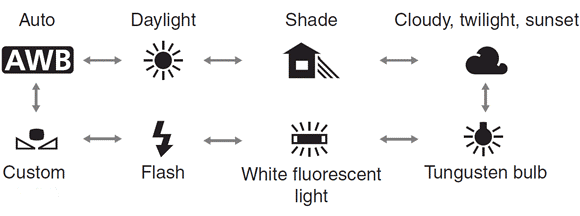
The other issue I mentioned is your cameras white balance. Cameras are designed to “judge” what pure white is given the lighting of each shot. Ever wondered why the photo of that dinner at a restaurant turned out so yellow? Well, this is your camera somewhat incorrectly adjusting what it sees as pure white based on fluorescent lighting. As you can imagine, the type of light coming from a bulb is very different than what’s coming from the sun. Similarly, what’s coming from the sun on a blue sky day is different than what shines when the sun is behind a layer of thick clouds.
One option is to let your camera choose this white balance for you. The other is to survey the scene (whether it’s cloudy or sunny) and choose it yourself. As a rule of thumb, setting on a “cloudy” setting will inject more yellow into your photo, while a “daylight” setting will inject more blue. The best thing to do is to play around with this a little before your expedition.
Your camera’s white balance settings probably look something like this:
While it’s easy to change the look of your photo after the fact on your computer, it is often much more rewarding to get it right within the camera. Plus, it will more realistically represent what your eye is actually seeing in real time (rather than trying to adjust days or weeks later to what you think you saw as far as the color of light).
Few destinations offer as many thrills for the nature traveler—and as many creative challenges for photographers—as Churchill, Manitoba. Watch the Nat Hab Webinar below to learn more tips and tricks I’ve learned!
Go forward and give it a shot,
Court