How to get this shot – Whale Tail in Alaska
Photographing whales is just as grand as it sounds. You take a multi-ton marine mammal, mix it with the excitement of breaching, diving and tail slapping, add in a little of Alaska’s spectacular scenery, and you’ve got the recipe for some of the most fun you can have photographing wildlife in the world.
But with the grandiose possibilities of capturing that “perfect shot” come some real challenges. Being underwater for most of their behavior, it’s difficult to predict exactly where and how they’ll display. This presents specific problems for the photographer, as you have to focus, compose, get the right settings, and take a few shots all in a split second.
Or do you? This post is all about how to make your camera work for you in these instances and render a challenging photo opportunity into something you can’t wait to try and try again!
Finding whales
Step one is of course to find humpback whales. To get great whale photographs in a relatively short amount of time (i.e., in a day or two…if you had 5 weeks like a Nat Geo photographer, you could be more flexible), you’ve got to go to where humpback whales are most concentrated.
My favorite places are Alaska’s inside passage, Alaska’s Kenai Fjords National Park, and Mexico’s Puerto Vallarta. In Alaska, the whales are there in the summer (feeding, mostly) while in Mexico they are there in the winter (breeding and birthing, mostly).
Getting the right camera settings
Set yourself up for success by getting the right camera settings before you even get on the boat.
While there are of course many variations to these settings, I’m going to give you the general picture here and you can experiment with variations on your own if you choose.
Because you’ll be in great daylight, you can afford both a high shutter speed as well as a big f/number for a big depth of field.
I typically aim for something like 1/1250th of a second and f/8, which often gives me an ISO of around 400 or so. With newer cameras you can opt to increase your ISO to get either a faster shutter speed or a bigger f/number (or both) depending on conditions. For instance, a breaching whale has more movement than a diving (tail up) whale.
Focusing and drive motor
How in the world do you focus on a moving object when it’s above water for only a split second… and nail the shot!? That’s the million dollar question, and some of it has to do with practice, skill, and luck. However, you can stack the deck in your favor by 1) setting your focusing zones to “auto” across your entire frame 2) setting your focusing mode to continuous focus (or servo, depending on camera brand) and 3) setting your drive motor to the fastest frame rate possible.
What this combo does is to allow the camera to continually focus as you depress the shutter, and then by having your focusing zones automatic across the entire frame, the camera will pick out the focus point closest to the camera and automatically focus on it. All you need to do is have the whale in your frame and the camera does the rest.
Getting the whale in your frame can be challenging, but a trick I use is to zoom out a bit to get more of the ocean in the frame, allowing a higher chance that the whale will emerge in that part of the ocean.
And let’s be honest, the only real way to ensure success is to track a whale that is breaching or diving multiple times to have some way to predict where it’s going to emerge.
How to compose
Nailing composition is another reason to zoom out when photographing humpback whales. The chance of getting a great composition in-camera is highly unlikely given all you must do to get a focused, sharp shot in the first place. While it’s tempting to strive for as big of a shot as possible, and fill the frame when you’re able to, I urge you to zoom out and plan on cropping in photoshop or lightroom later.
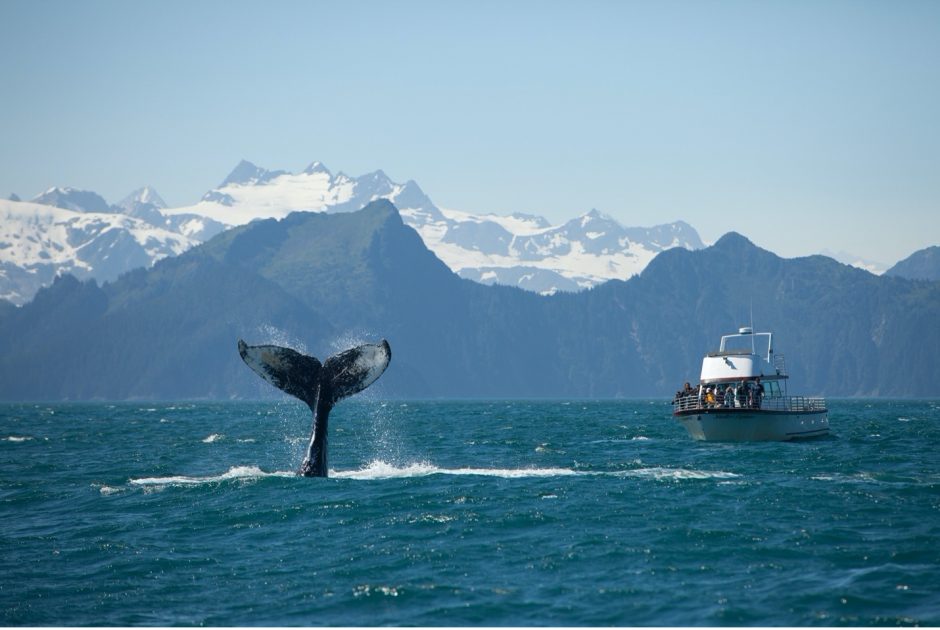
The photo example in this article is a prime example…there would be no way for me to compose the photo like this, with the boat and whale tale perfectly balanced if I didn’t crop on the computer after. For this reason, I often use my 70-200mm lens to “force” myself not to zoom all the way in.

Final considerations
A solo whale tale can be beautiful, but framed by snowcapped mountains of Kenai Fjords and a fellow whale watching boat for that “picture yourself here” moment is way better.
These moments don’t happen often, which is why being ready with all your settings dialed in is key. You have to be ready to take the photo with very little notice. Spending any time fuddling with settings could be the difference in getting the shot or completely missing it.
And there you have it–all that you need to get this shot and get going on great whale photography the next time you’re in a prime humpback whale watching location like Alaska or Mexico. If you have your own tidbits you’ve gleaned over the years, please do leave a comment below!
Cheers, and be well,

Court
6 Comments

Jan Brett
February 12, 2022 at 7:35 am

Court Whelan, Ph.D.
February 21, 2022 at 9:43 am

Niamul Anan
February 28, 2022 at 11:10 pm

Court Whelan, Ph.D.
March 1, 2022 at 11:23 am

Martin Sean
March 9, 2022 at 2:26 pm

Court Whelan, Ph.D.
March 11, 2022 at 1:31 pm
Been trying this in Mexico for 3 yrs. (where gray whales are not nearly as active/fluking) and I give up. The combination of extremely bright sun, moving object, and zoom lens made it impossible. This year I just took a point/shoot and iphone and did better! Maybe need to move to humpbacks!
Hi Jan, ah yes, with gray whales, it’s a bit of a different approach since the only real reliable photos are of them approaching the boat and spy hopping. Thus, it’s a little more predictable and I’d recommend using more traditional photo techniques. That is, not changing that focusing settings and even dialing the shutter speed back a little. But since YOU are moving in your panga with gray whales, I’d still aim for something around 1/1000th of a shutter. But, since you are photographing them much closer, and thus filling the frame more, I’d stick with f/8 or f/11 strictly on aperture. If you can’t get that, be prepared to up your ISO, as the bright daylight makes high ISOs much more forgiving. I hope this helps, and keep up your quest! The journey is most of the fun :).
Though, I’m not a photographer. I think this blog will really going to help me a lot. It motivates me to take perfect photographs. Thanks for sharing with us.
thanks for these kind words, Niamul! Cheers!
Wow what a great and clear guide! I managed to capture a very good shot in Antarctica by following these very same instructions a few years ago.
thanks, Martin! I really appreciate the feedback!