
How To Get This Shot – Silky Australian Waterfall
Have you ever been in a hotel lobby and seen a photo like the one above? A picturesque waterfall with the water’s movement blurred to give the image a feeling of relaxed calm. (There’s a reason you also see these photos in the dentist’s office.)
These photos are known as ‘long exposures’ and, thankfully, this type of shot is not all that hard to get. It just takes some knowhow beforehand to set yourself up for success. An important note: you don’t necessarily need a pro-level camera either as the phone in your pocket can work pretty well (more on that below).
Step 1 is finding yourself an impressive waterfall worthy of your artistic talent. My aquatic model for this image is Russell Falls in Mt Field National Park in Tasmania. It’s one of the most famous waterfalls on the island or even Australia for that matter. It worth a stop on any Australian adventure.
Strategies to Spin Some Silky Water
To make your waterfall silky smooth, you must slow down your shutter speed & induce motion blur in the water. The exact shutter speed will vary with your lighting conditions, equipment, and even flow rate and size of the waterfall. Generally, you’ll want to start at ½ sec and work our way to 5 sec, checking your image for focus as well as overall “silkiness.” (It’s up to your own artistic eye how velvety you want your waterfall to look.)
When doing a long exposure of a water feature, what do you focus on? Most people mistakenly will focus on the subject, in this case the waterfall, but by the very nature of this type of photo, the water will be blurred and out of focus. Instead, what you want your camera to focus on is something that won’t be moving during the duration of your shot. This usually rules out trees and bushes as waterfalls often create their own wind with keeps leaves & branches gently swaying. Look for exposed rocks or a fallen log that is near the falls themselves. This will mean that most of the static objects in the same focal plane of the falls should be in focus and it will sell the skill of your shot rather that it just looking like a blurry image all over.
While it can depend some on your exact situation, you’ll likely want to have a wide-angle lens to fully take in the scale of your target waterfall. This will help you zoom out and frame the falls with canyon walls or plant life on either side.
Another important factor is the weather. While some waterfalls constantly flow with immense power (think Niagara or Iguazú), not all are so predictable. Many waterfalls are seasonal or very susceptible to recent rains. Before planning your trip to photograph a waterfall, look at the recent weather to see if your target cascade is running at peak performance.
There are a few different strategies that you can use in the moment to get a silky waterfall shot depending on how prepared you are; fully geared up, traveling minimally, and just with a phone camera.
Fully Geared Up
The gold standard of photography; you’ve planned out your location and you’re ready to bring all the gear you’ll need to get the shot you’ve been envisioning. What does that look like?
As stated above, you’ll want a camera where you can change the shutter speed and is able to zoom out wide enough to include a full composition with the waterfall. With slower shutter speeds, any little movement from your body or hands will ruin the shot, so a tripod will come in very handy. To take it to the next level, use a remote trigger or set your camera’s timer so that the act of pushing the shutter button doesn’t shake the camera.
Next, unless it’s overcast and darker, you’ll want to use a Neutral Density or ND Filter. This a piece of tinted glass that goes in front of your camera’s lens by either screwing directly on or attaching to an adapter. Why is this useful? Well, by the very nature of slowing down your shutter speed, you’ll also be letting more light in and likely overexposing your image. Either the sky will be blown out or your white waterfall will be so bright that you’ll lose all definition. Adding an ND Filter will artificially darken your image and allow for a better exposure. They come in a variety of ‘stops’ or darkness levels as well as sizes, so ensure you have the right size for your lens and best darkness for your situation. You can check out more info on filters here.
Traveling Minimally
As I’m usually guiding or doing other things on a photo trip, I don’t usually have the space or time to bring a tripod. You can often still get a successful image while traveling with minimal gear, but you must make some concessions. Without a tripod, handholding the camera and introducing camera shake means you’ll need to take A TON of shots (don’t worry, digital film is cheap) and spend time looking to see if you managed to capture a sharp enough image. That’s what I did with the featured shot above.
A somewhat useful size & space work-around is choosing to bring a monopod instead of a tripod. This will help with holding some of the load of a camera which reduces movement and has an added plus as it can double as a hiking pole (if you get a sturdy one).
If the viewing area has a railing, tree, or boulder, propping yourself and the camera up against a solid object works wonders for shaky hands and the number of images you’ll have to take to be successful. You’ll just be limited on the compositions you can make.
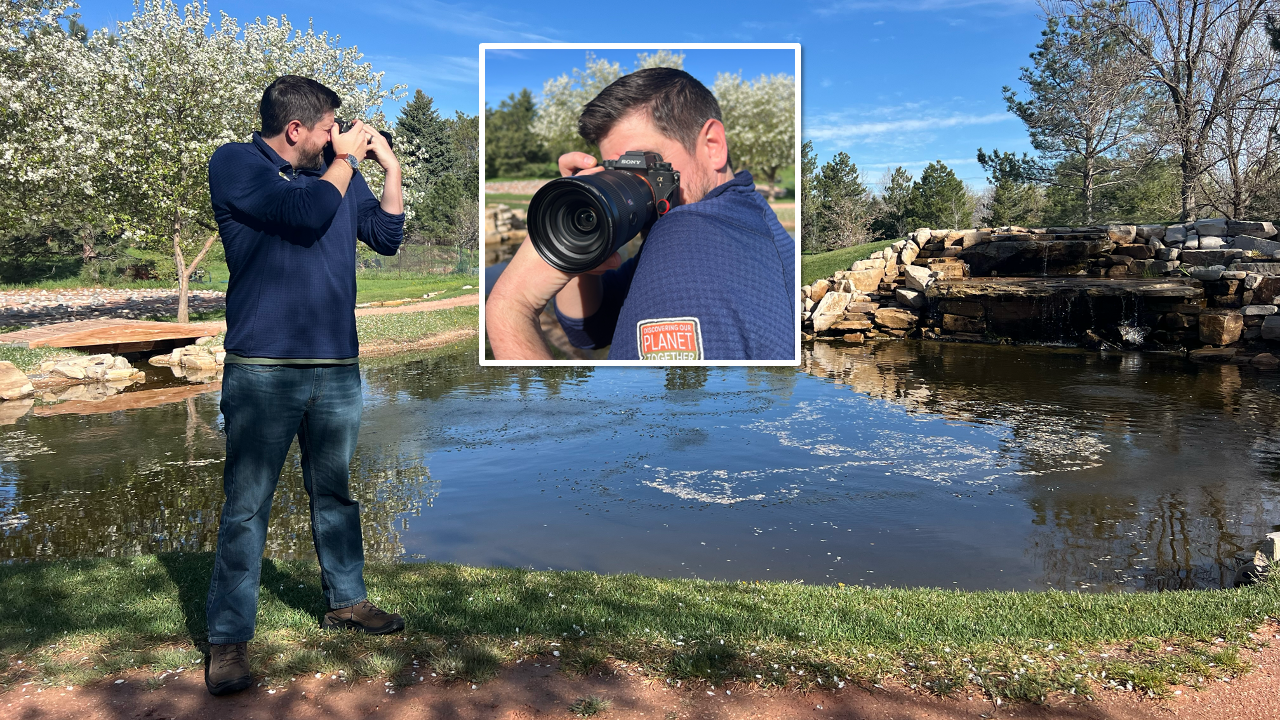
If a monopod or sturdy fence aren’t available, you can solidify your stance in what I call the “Human Tripod.” To reduce your body’s movements, first try to hold your breath when shooting the series of images. Next, keep the camera close to your body, stand upright, and twist your body to rest your camera against your shoulder like in the example photo below.
As far as how I took my image of Russell Falls, these were my settings while handholding the camera, without an ND filter, using the human tripod stance, and taking ~10 shots:
- Camera: Sony Alpha 1 Mirrorless
- Lens: Sony FE 16-35mm f/2.8 GM Lens
- Focal Length: 20mm
- Aperture: f/16
- Shutter Speed: 1/3 sec
- ISO: 125
If you’d like to see what other gear I bring with me on my photo trips to Australia, check out my recent blog post on what’s in my camera bag.
I cannot stress enough to use your camera’s viewfinder to zoom in and see if you got a sharp image before you leave the waterfall. Nothing is worse than putting all this effort in and then getting home and seeing on your home computer that none of the dozens of images you took worked out. (talking from experience!)
Phone Camera
As the saying goes, the best camera is the camera you’ll have with you. For most of us, that means a phone camera is an important tool in our photographic arsenal and shouldn’t be ignored. Interestingly, in recent years both iPhone and Samsung have added features to their pre-loaded camera apps to allow for slow shutter shooting and can achieve an image in this style with surprisingly good results.
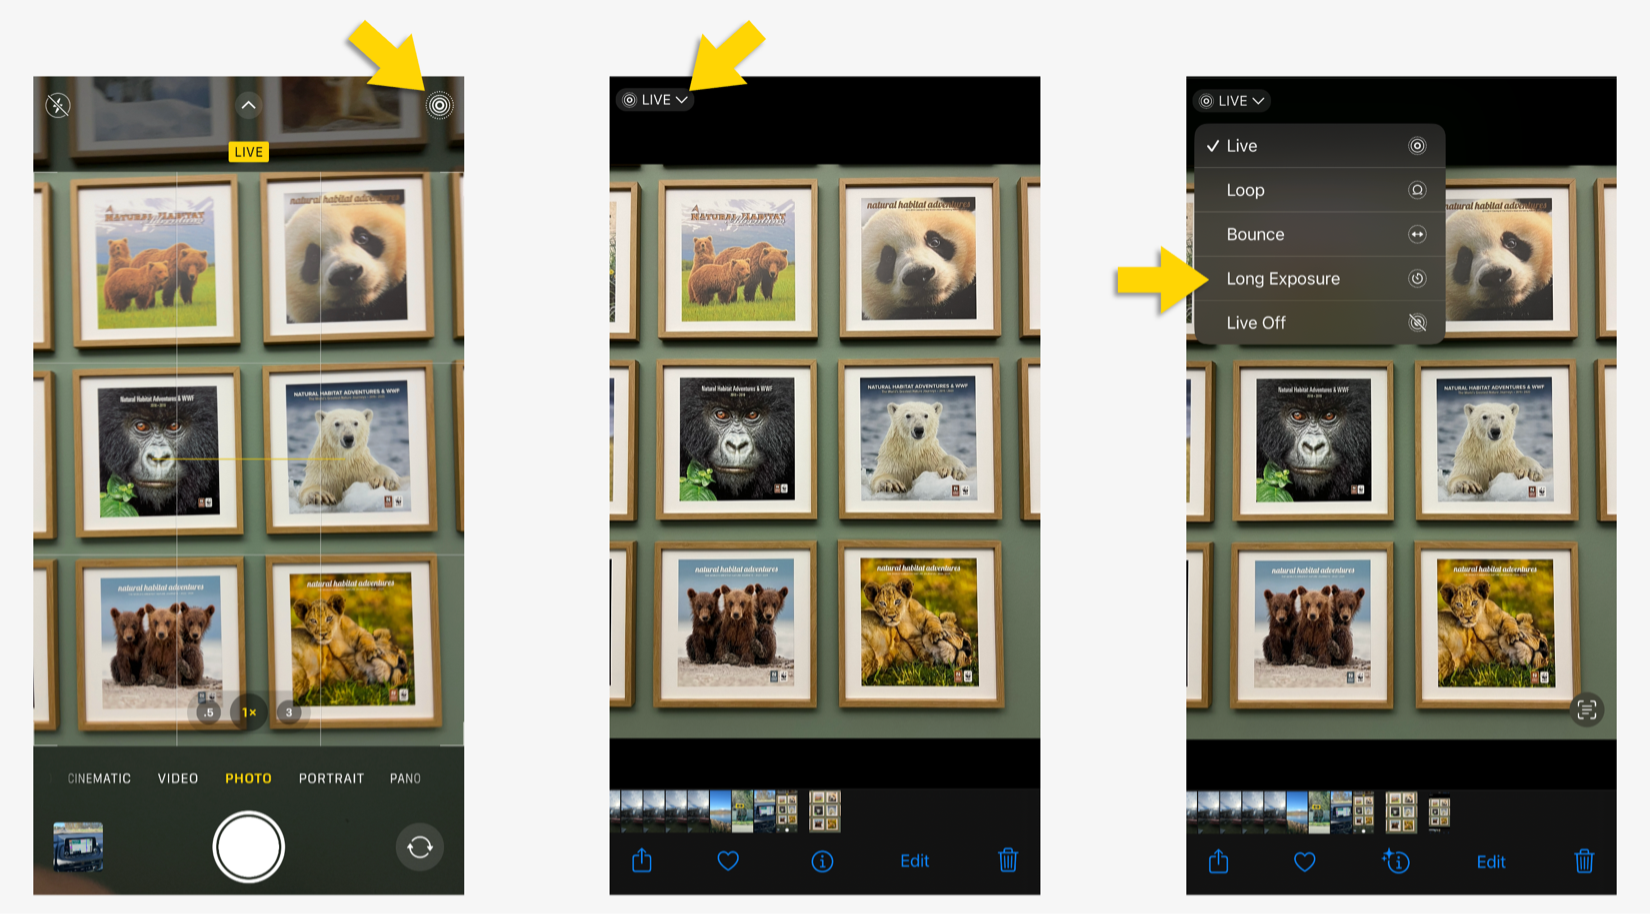
If you’re an Apple user, open your iPhone’s camera app and ensure that you have Live mode enabled. You’ll find the Live mode icon (which I think looks a bit like a radiant sun) in the upper right corner of your phone screen. In you have an older phone, Live mode became available starting with some iPhone 6 models, so it’s possible you may not have this feature. With Live mode enabled, take a photo like you normally would, but ensure you hold the phone VERY still for about 3 seconds. Next, open your photo album to view the photo you just took. In the upper left corner, you’ll see a small button labeled “LIVE.” Click on it and then select “Long Exposure” from the drop-down menu. It will take a minute to load, but then you should be left with a great silky waterfall image! Important: take care to turn off live mode after you’re done as a live image is essentially a short video and will take up a much larger portion of your phone’s storage vs a normal photo.
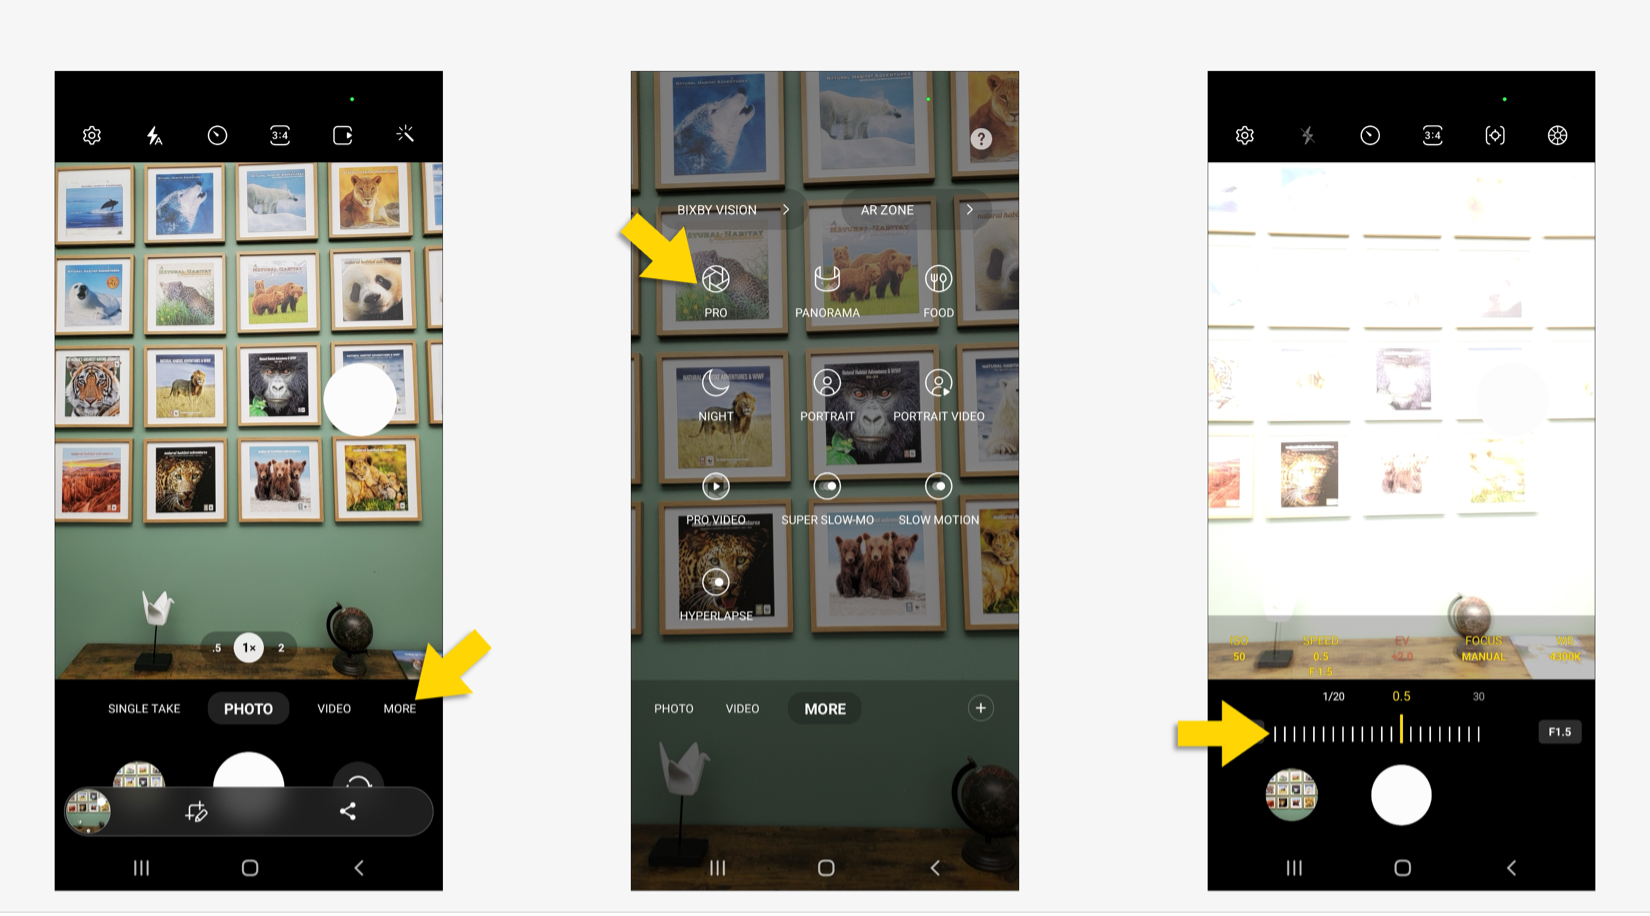
If you’ve got a Samsung phone, the order of operations is straighter forward and much like using a traditional camera. From your camera app, you’ll need to click on “More” in the bottom right of your screen. This will show a variety of options, including Pro mode. Click on that and there you can change your shutter speed. Slow your shutter speed to at least ½ sec and hold your camera very still as it takes the shot. You’ll need to experiment with exactly what shutter speed works best for your situation. If your image looks like it will be too bright, put your sunglasses over your phone’s lens as a makeshift ND filter, and check your images in your photo album and you should find a silky-smooth waterfall shot!
As you can see, with the right knowhow, you can get a dreamy waterfall image that will impress your friends back home and maybe even snag a coveted wall spot at your local doctor’s office. Now all that you have to do is find a great water feature to capture. Might I suggest Russell Falls in Tasmania?
Happy Photographing,

Mike Hillman
Leave a reply