How to Get this Shot – Perfectly Sharp Monarch Butterfly
Photographing butterflies has been a passion of mine for quite some time and I could probably credit the monarch for getting me into photography in the first place way back when. Thus, they still hold a very special place in my heart…as wonders of the world and as photographic subjects.
Thus, when I’m down in Mexico each winter photographing the spectacle of millions of monarch butterflies on the photo tours I guide, I want to make sure I do them the justice they deserve.
One of the key factors in making a butterfly seem to pop off the page is to ensure that it is tack-sharp. That is, the entire butterfly is in crisp focus, allowing the viewer to marvel at each component of these tiny insects, from the wings, eyes, and perhaps even the flower it’s perched on.
However, to really nail the shot there are certain considerations. Read on to learn about how to capture a perfectly sharp monarch butterfly, or any butterfly for that matter, and showcase all the detail for a pop-off-the-page photo.

Finding Butterflies
The first thing you’ll need to do of course is get yourself in front of some monarch butterflies. While the most rewarding way is no doubt to embark on a photo adventure to the overwintering monarch colonies in Mexico, you can easily find monarchs in North America throughout the summer and early fall.
Butterflies, including monarchs, prefer bright, sunlit areas with copious amounts of flowers. That’s because as insects they are cold-blooded and need to stick to warmer, sunnier areas, and adults they need to sip nectar from flowers. If you are in a forest or natural area, keep an eye out for “light gaps” where sunlight reaches the forest floor (perhaps from a recently downed tree). If you have access to a meadow or butterfly garden, even better.
Your Shot Settings
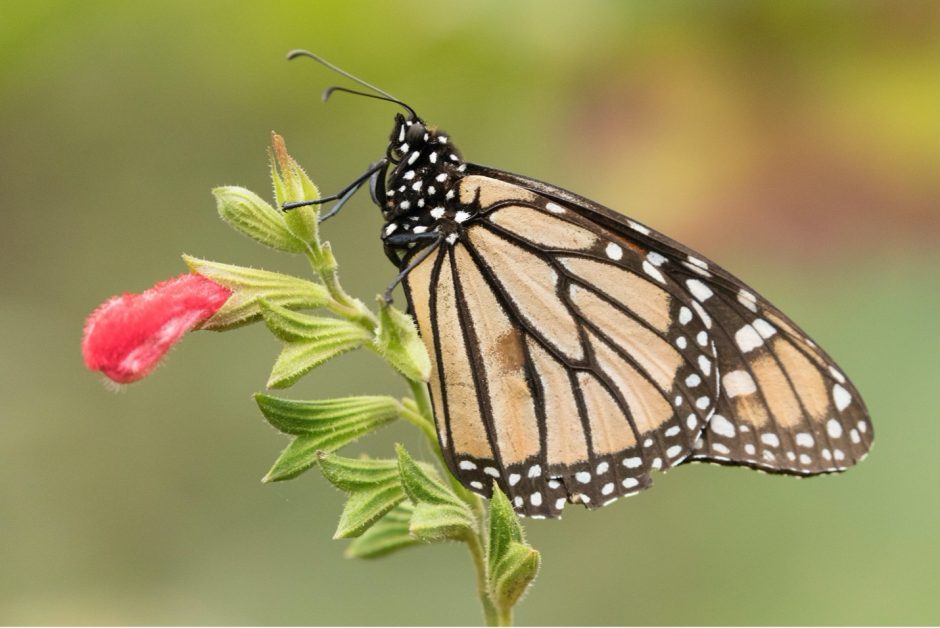
This is one of the most important parts to nailing focus and exactly how much you have in focus is up to you. For this photo above, it’s actually a relatively narrow focus at f/5.6. Typically to get an entire insect in focus using classic macro techniques, we’re really looking for f/11 or even f/16. However, this a) usually requires a flash and b) limits your ability to get that nicely blurred background.
Part of the brilliance for this type of shot is the juxtaposition you have of a perfectly focused butterfly with a nicely blurred background. In fact, that blurred background makes the butterfly look even sharper.
Because butterflies can be quite quick to fly and move on from their perch, you may think you need a fast shutter speed. But in reality that’s only if the butterfly is moving. Often they sit still for brief periods of time such that you can use a low ISO (e.g., ISO 400 or lower) and shoot at whatever setting you need to freeze your own hand movement. Typically I like to go for 1/100th of a second or faster.
So in summary, aim for something like 1/100th or 1/200th of a second, f/5.6, and ISO 100 to 400. Be ready to switch your aperture to a bigger f/number like f/8 or f/11 to experiment.
I break down the basics of macro photography in the video below:
Your positioning
This is another key part of the equation here. One of the biggest tricks to this photo is ensuring that the butterfly is perpendicular to you. Because butterflies are laterally flattened, you get this really nice flat surface where even a shallow depth of field like f/5.6 can get the entire butterfly in focus. Now, if the butterfly were directly facing you, there’s no way to get it all in focus.
But, when you can position yourself perfect perpendicular to the butterfly, so that the glass of your lens is parallel to the wings of the butterfly, you can maximize your “slice” of focus and get a wonderful photo where the butterfly is in focus, but that shallow depth of field allows the background to just melt away.
If the butterfly rotates around the flower, you should rotate, too. The key to this photo and to get the entire butterfly in focus all rests on your ability to have nearly the entire butterfly equidistant from your lens.
Be Patient and Experiment
Butterflies can be flighty. Yes, pun intended. But the key is to be patient. It may take you an entire hour of looking and waiting to find the right shot. But when you do, see if you can take several photos and experiment with your depth of field, ranging from f/5.6 to f/11. You may need to increase your ISO to accomplish an f/11, but that’s all part of the trial here.
While you’re at it, experiment with the positioning of the butterfly and see what I mean about if the wings are perfectly perpendicular vs. even slightly askew. You can also go the opposite direction and photograph the butterfly head-on and you’ll see that it creates much more of an artistic photo where only your focal point is in focus (the eyes and head, typically), while the rest of the butterfly (wings) is blurred. Not a bad shot…just different.
I also recommend putting your camera on “burst mode” so that you can take multiple photos quickly. Even the slightest change in the butterfly positioning can make a big difference in the photo…this goes for the body, wings, and even antennae (which are the hardest to get in perfect focus, exemplified in this photo).
In Conclusion
The great thing about this technique is that you’ll find it has applications throughout all wildlife and macro photography. You can use the same lesson here for flowers even. Just make sure all the petals and parts of the flower are equidistant from your lens and they will all be part of the “slice” of focus you choose. And of course this works with all other butterflies as well.
If you’re keen to take your skills to the next level, watch this webinar:
I hope you enjoy the experimentation here and get to photograph some monarch butterflies…preferably in the overwintering sanctuaries of Mexico!
All the best,

Court
Leave a reply