How to Get This Shot – Marine Iguanas in Layers
No adventure to the Galapagos Islands would be complete without hundreds of photos of marine iguanas. These little reptiles are not only everywhere, but they are charismatic, photogenic, and represent so much of what the Galapagos Islands stands for as far as a laboratory of evolution and wild biology.
If you are headed to the Galapagos soon, or plan to one day, you’ll no doubt want to nail the shot of marne iguanas to showcase their character, oddness, and sheer numbers! Continue on for a deep dive into how this photo was made.
First, you’ll need to get yourself in front of as many marine iguanas as possible
Fortunately, this isn’t too difficult when you go with a fantastic tour company like Natural Habitat Adventures or Lindblad Expeditions.
They are known for not only their many years running exceptional Galapagos expeditions, but also for their worldwide prowess in wildlife adventures…both things you want in your tour operator for the Galapagos, as nature and biology is as much a part of any trip as is the highly photogenic nature of the islands.
Next, you’ll want to choose your scene properly
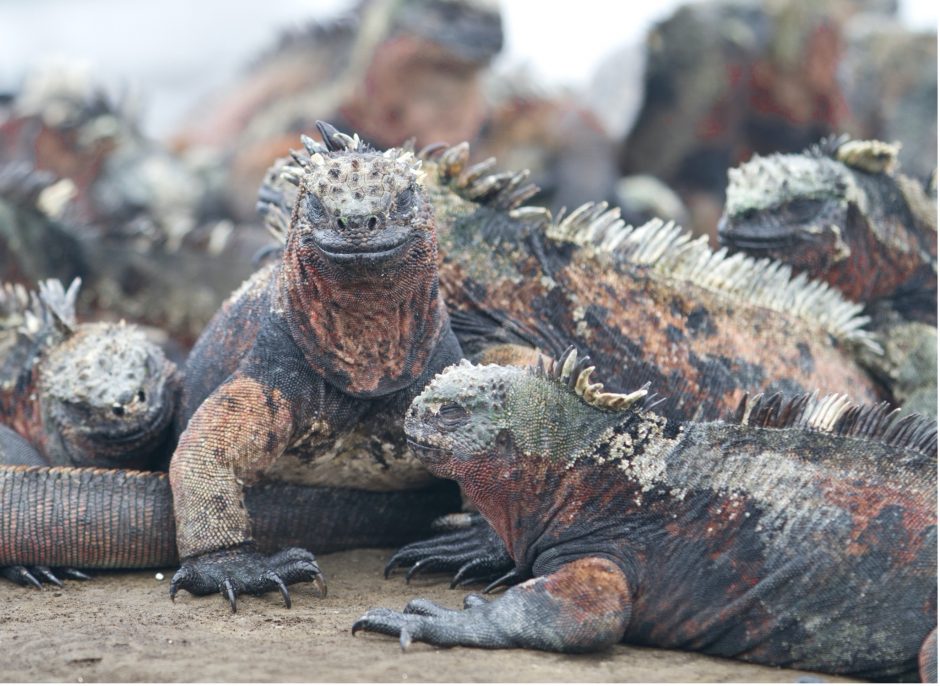
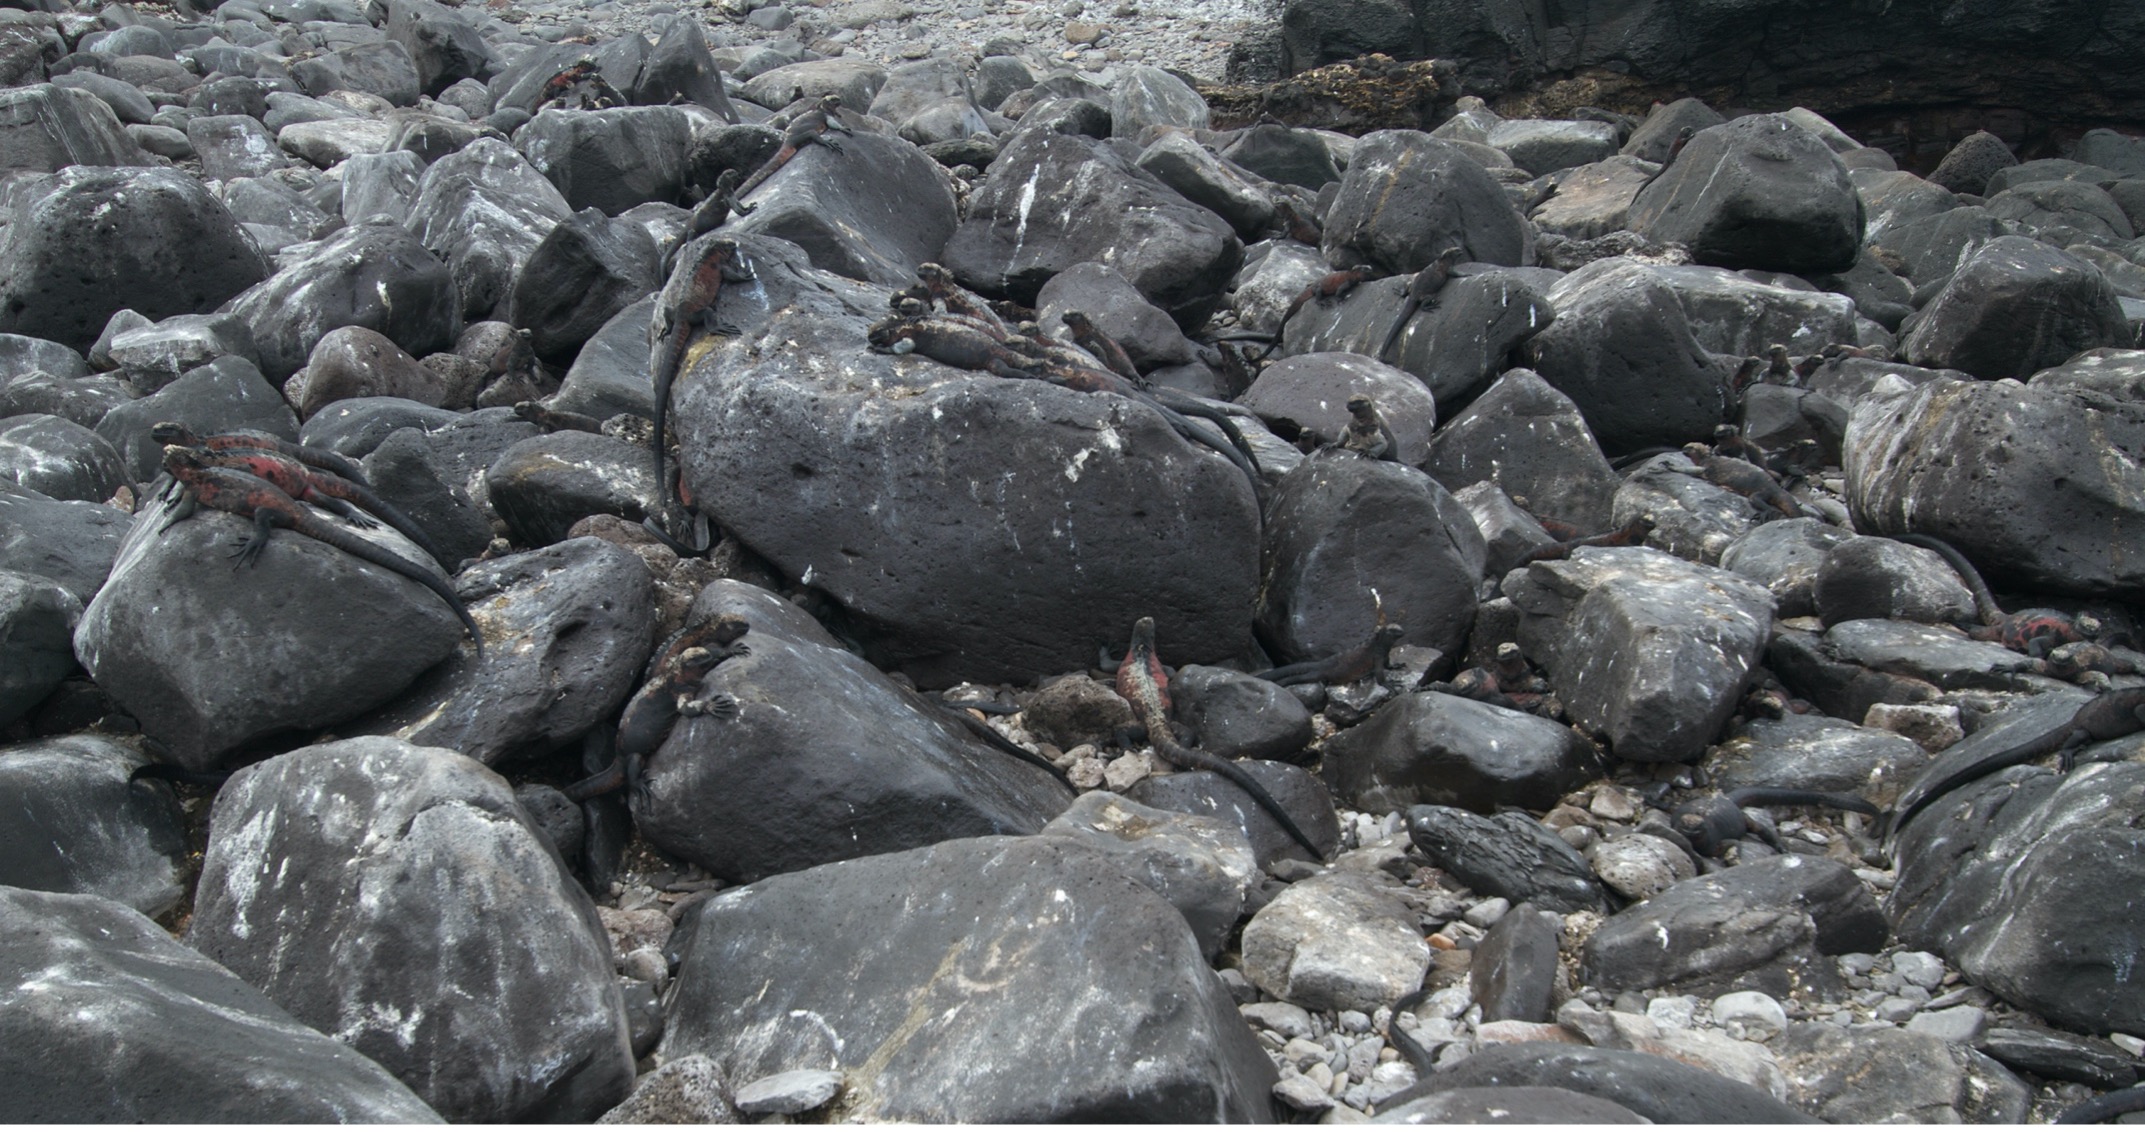
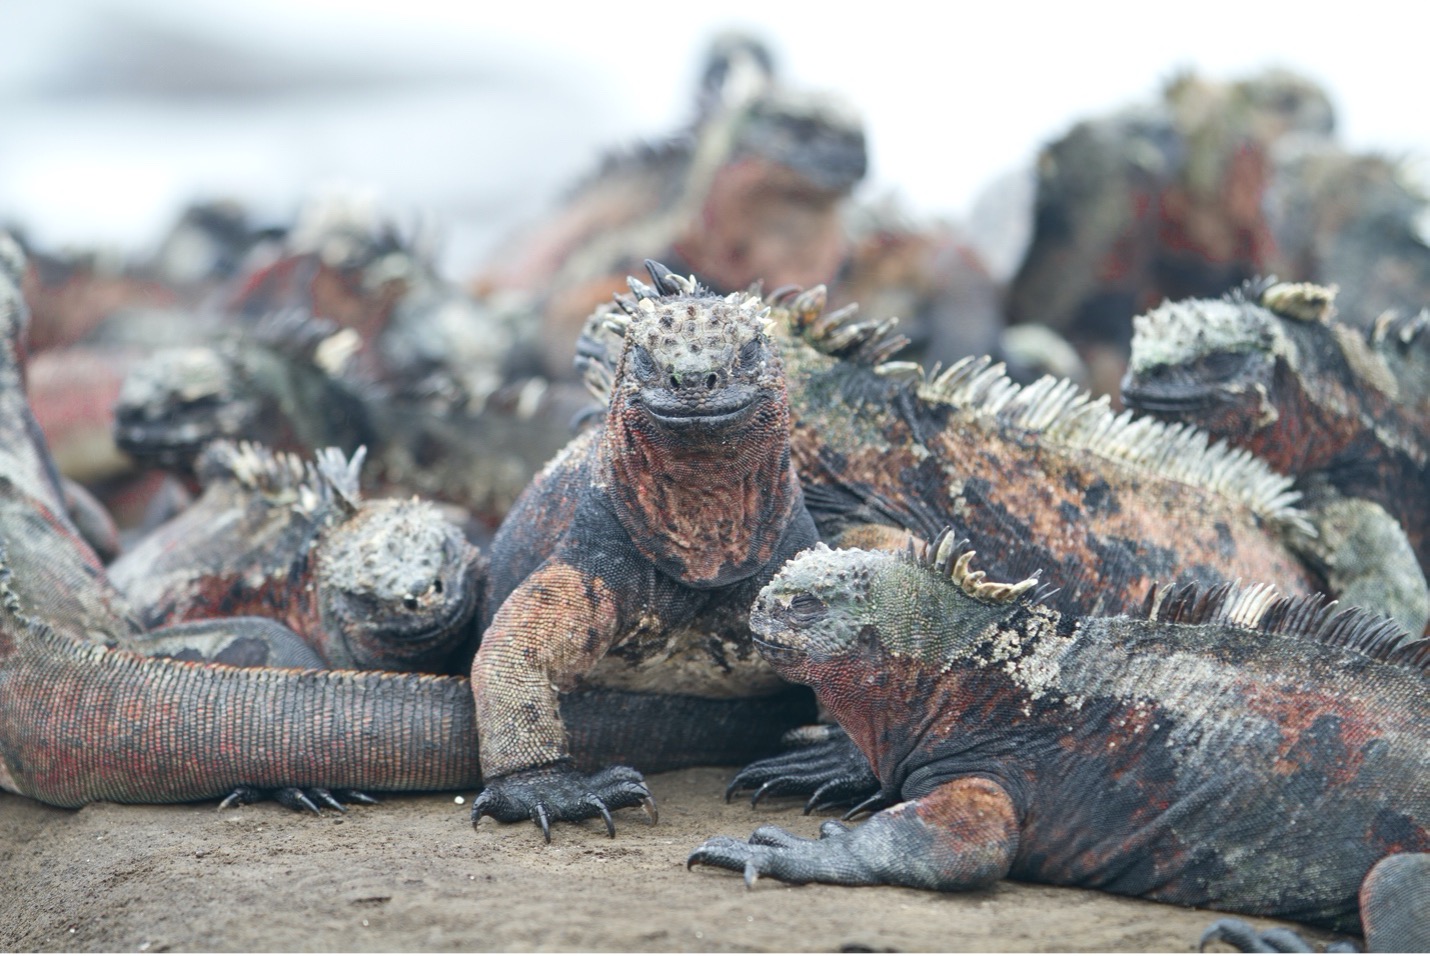
There are so, so many potential marine iguana photos you’ll encounter throughout the trip, at some point you’ll want to begin getting picky. That is, rather than just spotting a good-looking iguana, bringing your camera to your eye, and snapping, you’ll want to scope out and concentrate on the best marine iguana scenes. Otherwise, you’ll end up with loads of photos like this one, which just isn’t all that spectacular.
To me, the best shots are those where you can either get close or zoom in such that you are taking the photo at eye level. That is, your lens is parallel to the ground, vs. you angling the lens down from above.
Being on “eye level” with these creatures gives you a bigger impression and injects more intrigue into the shot.
See how in the below photo you feel like you’re really amongst them?

Dial in the Right Settings
There are of course many ways to interpret and photograph a scene like this one, but I feel that a shallow depth of field is the key ingredient.
This is one of the reasons I feel a classic 70-200mm f/2.8 lens may be the best lens for the Galapagos Islands.
Photographing a scene like this at 100mm or 200mm at f/2.8 or f/3.5 gives you that amazing shallow depth of field and blur.
This is vital for a few reasons.
First, it helps minimize the distractions of the background, and let’s face it, layers of marine iguanas all well-defined and in focus can distract you from the focal point of your scene.
Even though we’re showcasing the volume of marine iguanas, we really ought to highlight one or just a few to have maximum impact—otherwise, it’s confusing and distracting to the viewer.
Second, the blur of the background helps make that which is in perfect focus seem even sharper.
And finally, that blur is exclusive only to the best lenses out there and for so long we’ve associated it with professionalism. Thus, a photo that has such a blurred background just “looks better” to most people because of the association with professional equipment.
Thus, I recommend an aperture of f/2.8 or f/3.5 and then whatever shutter speed you need to freeze motion (e.g., 1/320th of a second for a 200mm image stabilized shot) and then the lowest ISO you can get.
Be Precise in your Composition (or not)
The trick to a great “layering” photo, where you have a main subject but then layers of similar-looking colors, patterns, or textures in the background, is you should use the individual elements of your photo to nail the composition just as you would if you were photographing a complex landscape scene with mountains, rivers, wildflowers, etc.
That is, you should still think about exactly what is placed where in your scene. If you step left just a couple feet can you get a better background? Can you feature more iguanas or line up their faces in the open space behind the “front row” of iguanas to create more interesting layering?
A super easy trick to nail composition in scenes like this is to actually shoot a decent bit wider than you want your “final” photo to look like. Thus, when you are editing your photos you can spend more time (while the animals are not moving) on the photo, digging down to the very subtle, small nuances of the scene.
Take a look at the original photo here, and notice how I chose to crop in a bit to help bring more attention to the front row of iguanas and the main subject iguana.
Shooting wider also helps if you ever need to use the original photo with space for thngs like presentation titles, or even when submitting to magazines or stock photo companies.
You can always crop in, but you can’t crop out…
Finally, experiment around a bit!
You’ll be surprised how much the scene can change just by altering the aperture a little (e.g., f/5.6 vs. f/2.8) or by stepping to your left or right and rendering a different background.
Also, be patient and wait for some sort of interesting wildlife behavior. Marine iguanas aren’t known to be wildly active, but they do often dart around in short spurts and can yield a unique photo in the moment!
And there you have it—all the tips and tricks for this photo, but also some (hopefully) helpful tips for all “layering” style photography. For those who wish to fine-tune your camera settings, I take an in-depth approach in the following Webinar:
I hope you are indeed headed to the Galapagos Islands and I hope you have a spectacular time photographing ALL of the wonders that await you!
Cheers,

Court
Leave a reply