How To Get This Shot: Alaska Bear Camp Shoreline
Anyone who says they have “enough” bear photos just haven’t been around the right bears—or in the right place for extraordinary bear photography.
Fortunately, there are outfitters that safely and sustainably get photographers out into the wilds of Alaska in ways not previously imagined for some of the best wildlife photography on planet Earth.
Follow along for details on how to get this brown bear shot and use these lessons for other close-up wildlife photography of charismatic megafauna.
How to get close to large brown bears
Brown bears, aka grizzly bears, get a bad reputation. While of formidable size and a bit intimidating, getting close to them (safely) is very doable in Alaska. At places like Nat Hab’s Alaska Bear Camp, situated on a private inholding in Lake Clark National Park, you can get safely and sustainably close to bears as they forage for clams and mussels, graze on grasses, and fish for salmon in the surrounding streams.
Fortunately, because of the relative abundance of food, we aren’t on the food chain for these bears. Combine that with expert guidance from local guides and naturalists and you’ll feel right at home even with these colossal bears all around you!
Your shot settings
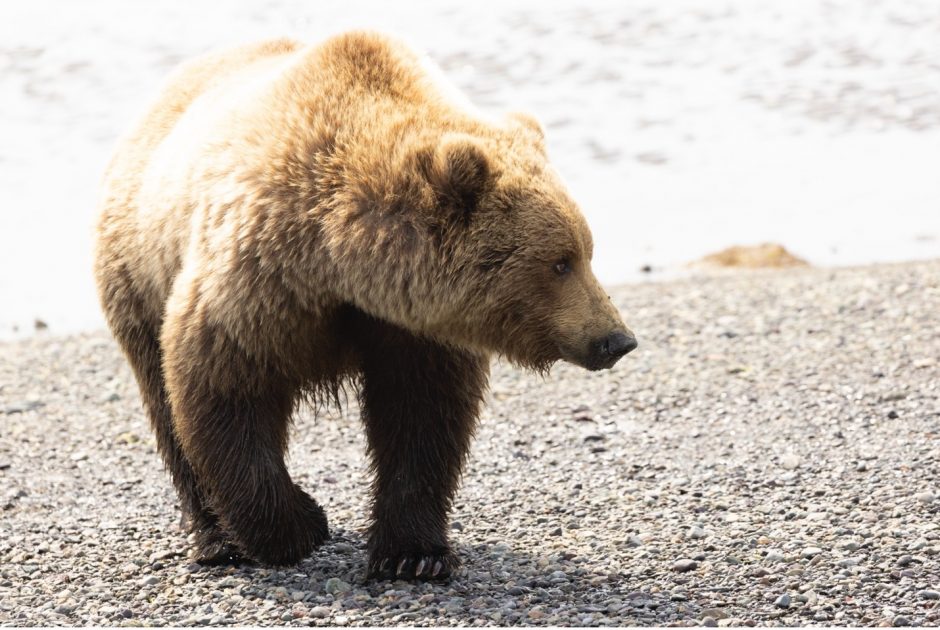
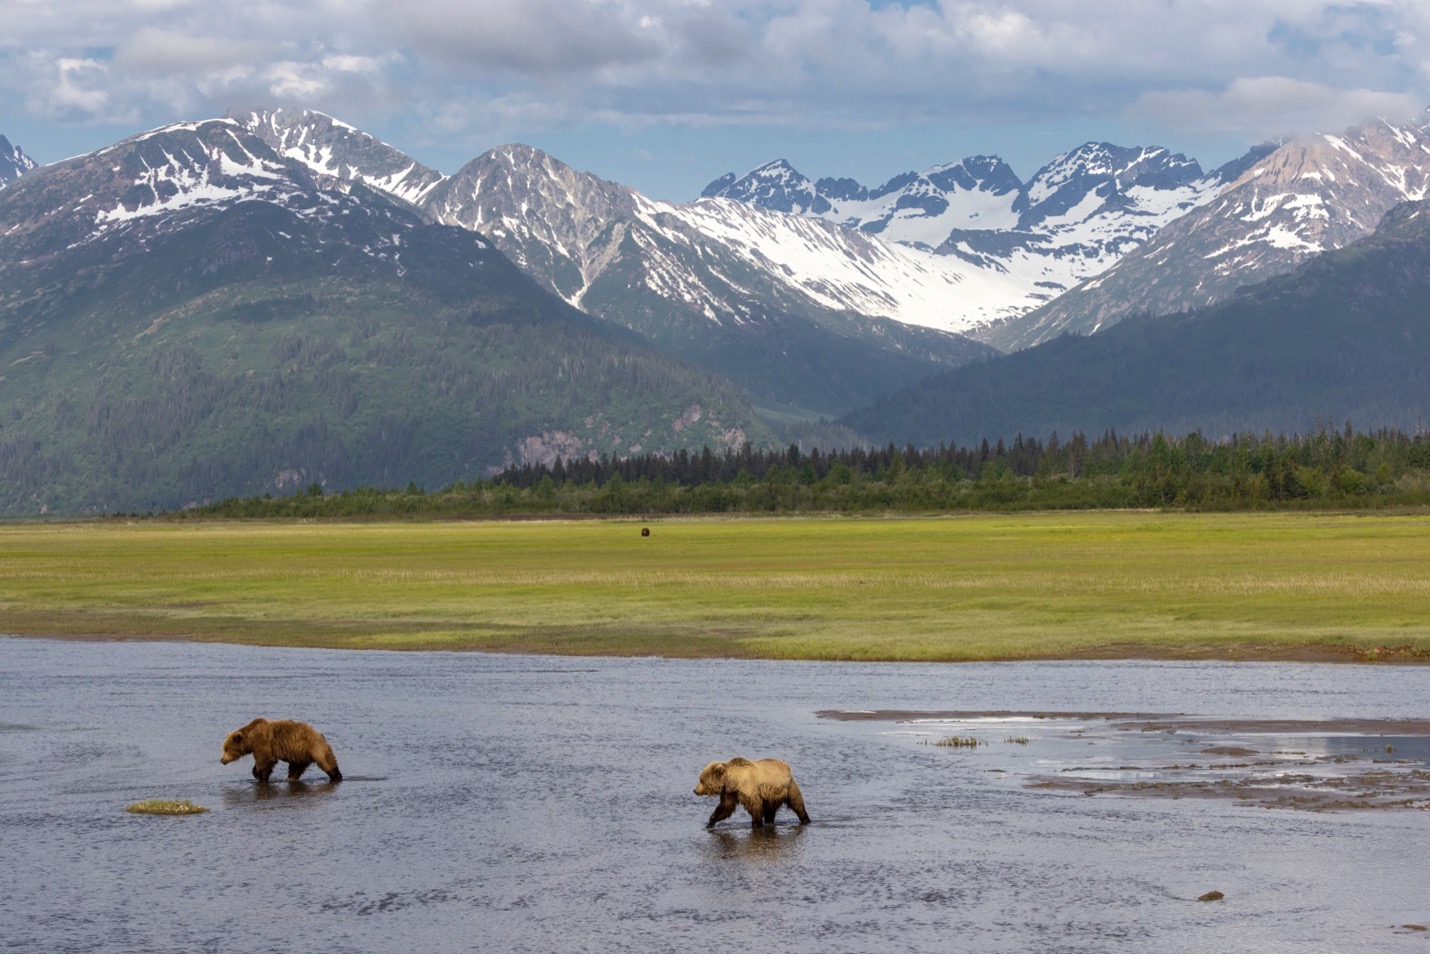
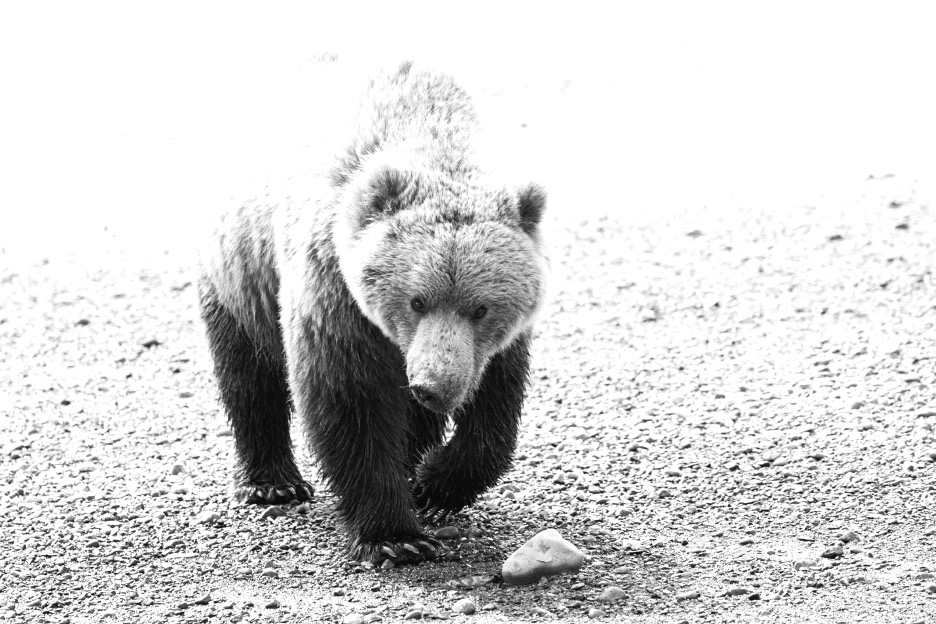
Once you have the opportunity in front of you, you are faced with a zillion options of how to photograph these wild brown bears. Although I do love wildlife-in-landscape photos of these bears, like in the above photo, the proximity you will have to these bears also makes it extremely rewarding to take “big” photos that fill the frame while still giving some context and wildness to the photo (like the gravel beach and bright Alaskan daylight in mid-summer in the photo below).
When preparing for such a photo, your camera settings are some of the most important aspects of the shot. That is, what you do with your aperture, shutter speed and ISO will be the key ingredients to getting a great photo.
Start with shutter speed.
Most of the time, these bears are active. That means you are automatically thinking about how to freeze motion for each and every shot you take. Fortunately, as you can see, there is great daylight, so a fast shutter speed isn’t prohibitive. But how fast, exactly?
As a general rule of thumb, I start my quest for perfection around 1/500th of a second. Even with a slowly moving bear, anything slower than 1/500 will have trouble freezing motion. If I’m photographing the bear as it rests, moves very slowly, or otherwise pauses its movement, 1/500 is probably fast enough. However, if the bear is walking vigorously or exhibiting any sort of erratic movement, I’m immediately considering moving up to 1/1000th of a second. If the bear is running or actively fishing for salmon, I might go up another notch to 1/1250, 1/1500 or higher.
Next up: aperture.
When filling the frame with an animal, I tend to have a bigger depth of field than you might imagine. For instance, with most wildlife portraiture, I usually try to emphasize the blur in the fore- and background via a small f/number, like f/4 or f/5.6 (or f/2.8 if you have such a lens). However, when there is very little background (or foreground) in the photo but LOTS of subject, I immediately consider f/8, f/11 and beyond.
In this bear photo, I want as much of the bear in sharp focus as possible.
Finally, for ISO…
Basically, you want to dial your ISO to whatever the photo “needs” for it to happen. That is, if you need to be at 1/1000 shutter speed to freeze the motion of this walking bear safely, and you need to be at f/11 to get a very wide depth of field, you may need to be at ISO 800 given the lighting conditions.
As you may know, the lower the ISO, the better quality the photo, so don’t automatically go super high on the ISO. This may require some experimentation and several adjustments.
Getting the composition right
One of the greatest luxuries of close-up bear photography is that you don’t need to nail perfect composition in the camera. Instead, you can do some adjustment on the computer afterward via cropping.
The reason for this is you can shoot slightly wider to allow for a bit of space on all sides, such that you can either straighten your photo or realign your subject in line with a composition rule like the rule of thirds during the editing process.
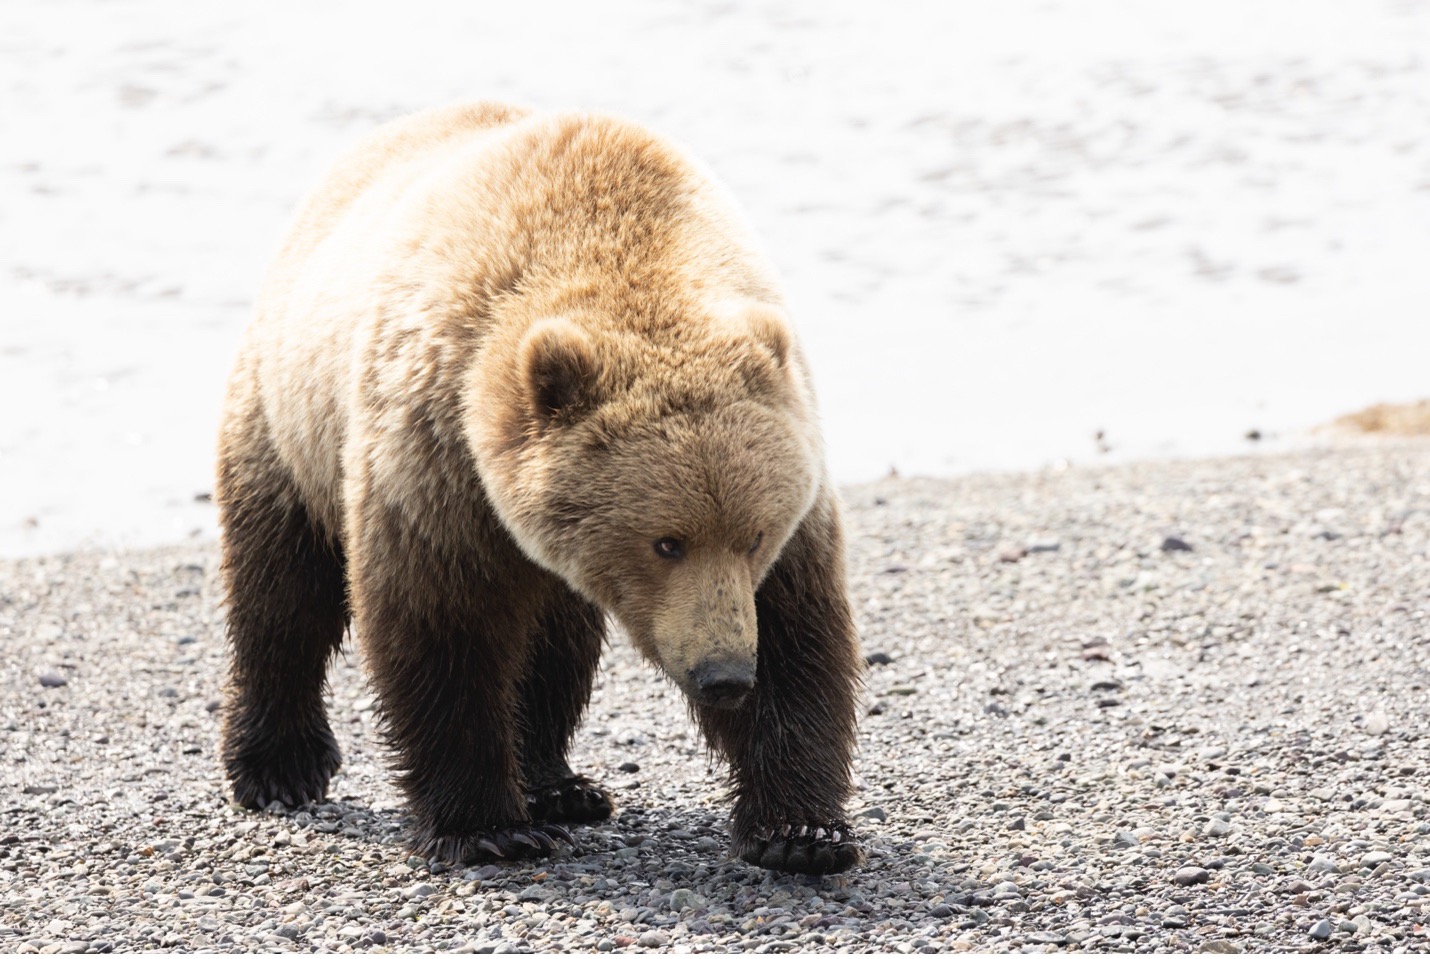
However, the general rule for the composition of photos like this one is to a) offset the subject based on the rule of thirds, such that the subject is aligned with the vertical axes, and b) if the animal is looking in a specific direction, have it looking into the open space of the scene.
If you can nail all this in the camera, that’s great, as you will be able to get the subject larger in the frame by not having to crop. But again, you can give yourself some flexibility by shooting a bit wider and planning to crop.
Creating captivating light
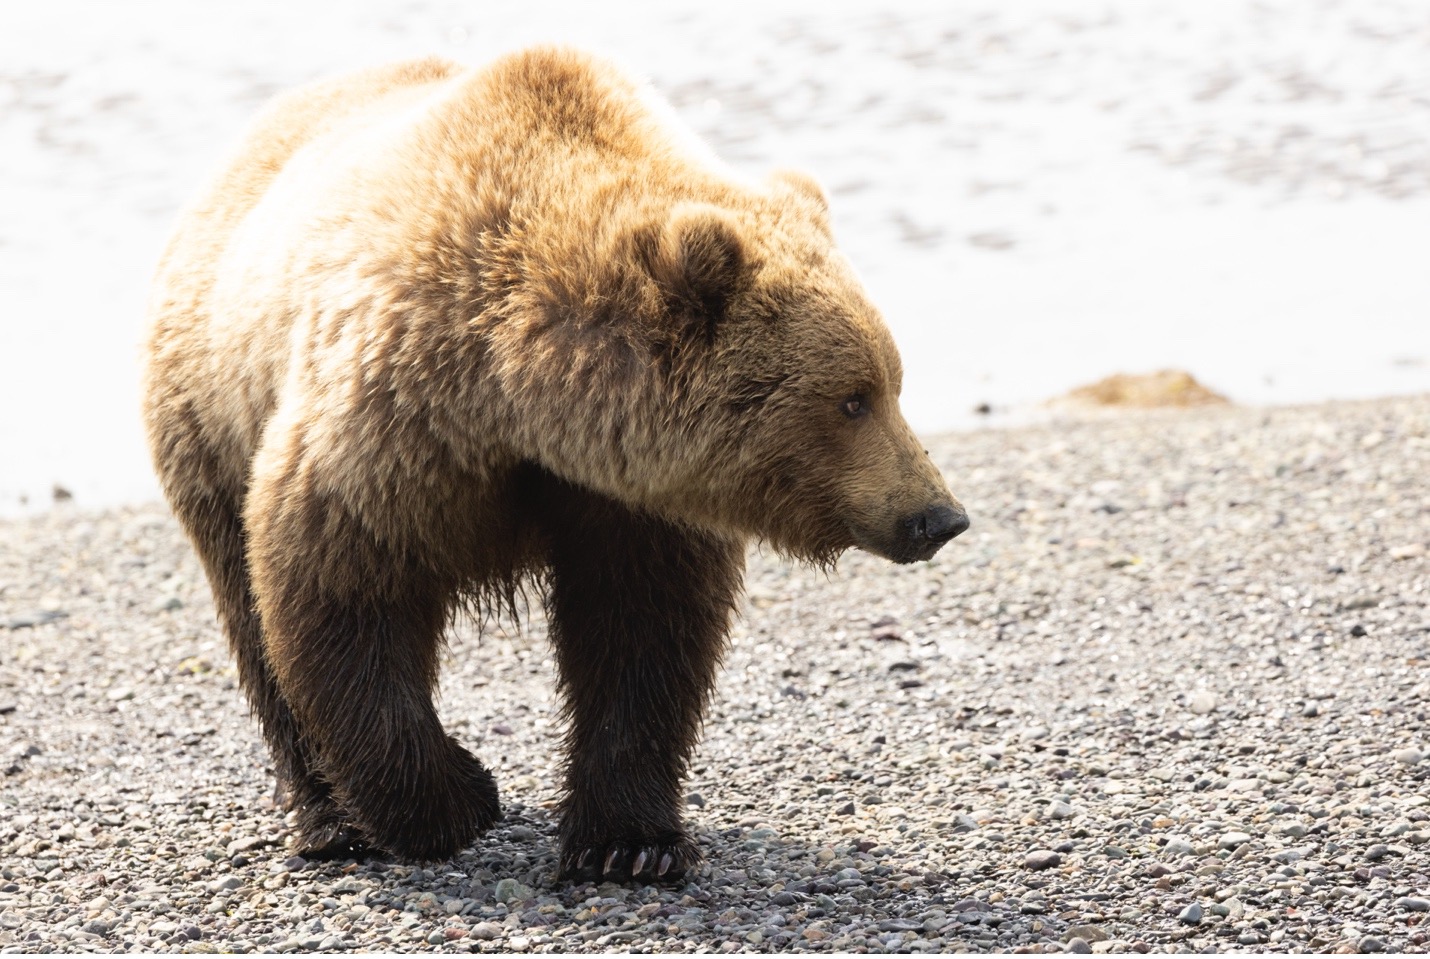
Here’s where the photo gets interesting. Notice how this photo is rather bright?
We term this high key, and it is a lovely technique for showcasing wildlife in a unique way. It works well in nearly any daylight situation, but particularly well when you have a nice gradient of light across the animal and some soft shadows. This works well for angled backlight shots, where the lighting is coming from behind the animal but not directly behind. Angled is ideal!
Then, by using your exposure compensation dial, increase your exposure incrementally. In special wildlife sightings like this one, you won’t have too much time to play around and experiment, so I usually go for a bold overexposure right off the bat—overexposing by 1 or 2 full stops. The risk is that it will “blow out” the highlights, but the reward is that you get a series of photos with that unique high-key vibe.
I’ve personally found that high-key photography also lends itself well to a warm white balance. Or if you want an entirely novel direction, you can convert it to black and white for an alluring high-contrast effect.
As you can see, there are some key considerations for what may appear to be a straightforward close-up photo. However, with the great opportunity of being so close to such magnificent creatures, you have a chance to take some wonderfully powerful and unique photos.
Want to photograph brown bears in Alaska this summer? Learn more about Nat Hab’s Alaska Bear Camp in Lake Clark National Park. I hope to see you up there!
Best,

Court
2 Comments

Gay Barton
November 7, 2023 at 10:54 am

Court Whelan, Ph.D.
November 21, 2023 at 12:44 pm
Court,
I have found your step by step photo guides to help me prepare ahead of time very valuable.
Whether shooting in my backyard or on location, it gives this amateur an advantage in creating a great shot!
so great to hear, Gay, I appreciate the feedback. So happy to help in your pursuits!!