How to Get Perfect Wildlife Portraits in the Galapagos Islands
When we describe a place as other worldly it can sound a bit cliché. However, when it comes to the Galapagos Islands, that’s just about the only way to describe it. The landscape is wild, the animals are spectacular, and the overall feeling is one of true exploration.
If you are headed to, or considering an adventure to the Galapagos Islands, read on to get my top tips on getting the perfect wildlife photos in the Galapagos.
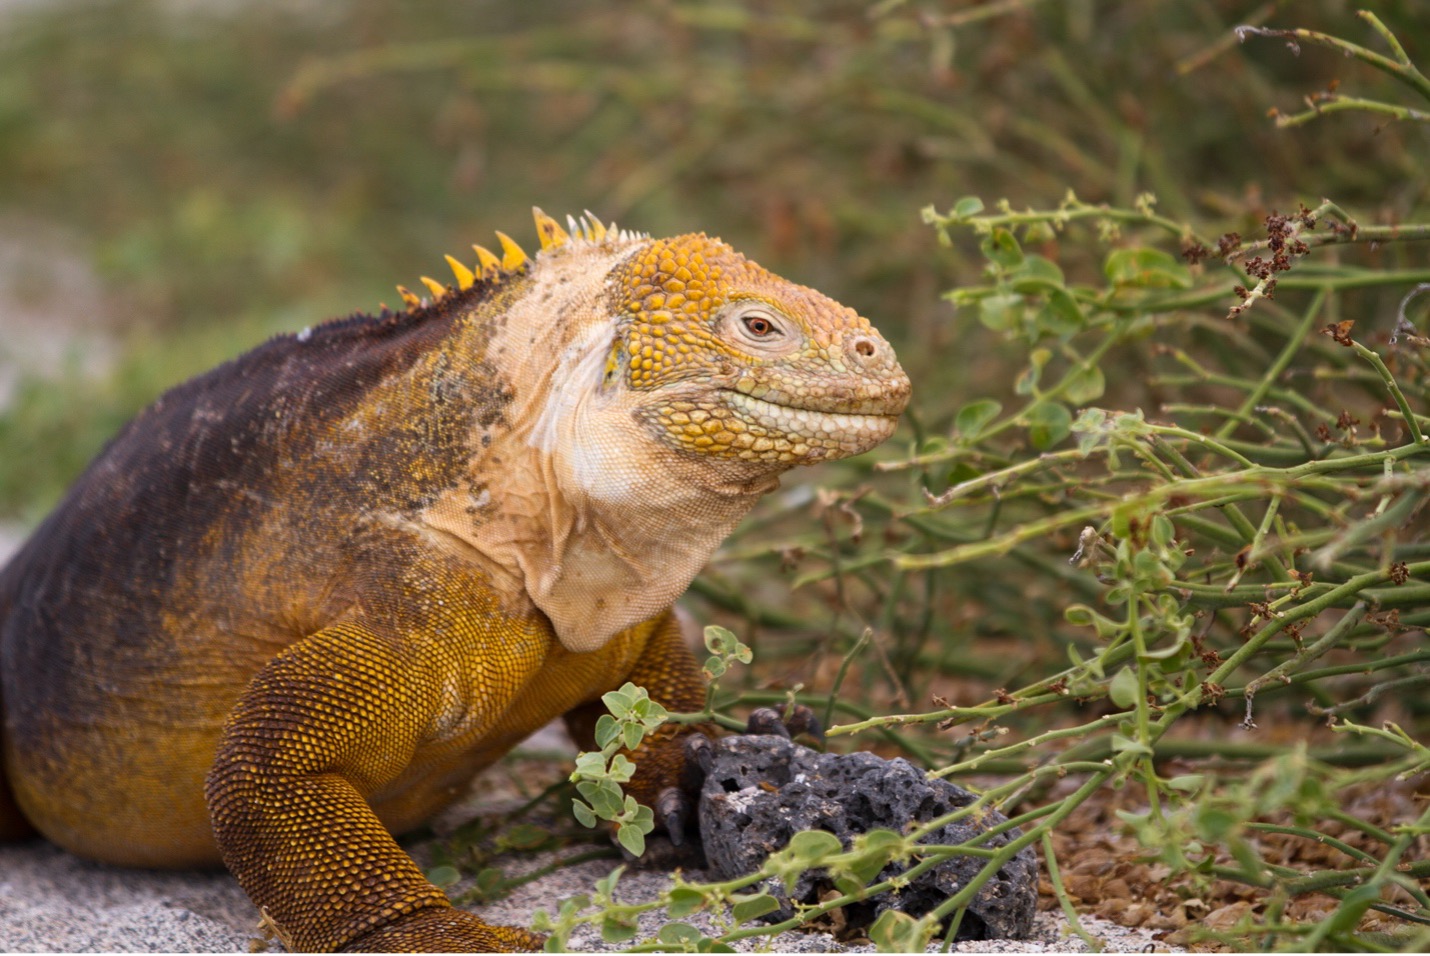
Isolating your Subject
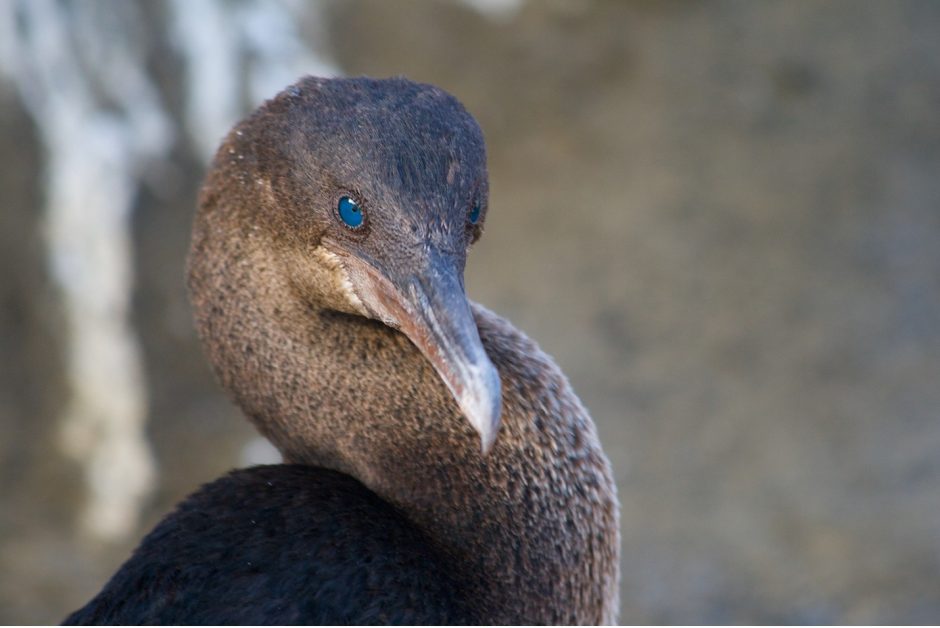
Having a well-defined subject is the cornerstone of portrait photography. And great portrait photography of wildlife is something you absolutely want in not only your repertoire, but also in your trip photo album or portfolio.

The reason is simple—you want your subject to stand out amongst the “noise” of the background. Noise here is just referring to the various distractions that are ever-present in natural settings. This isolation makes the subject look sharper and provides the most emphasis possible on the animal itself.
There are various ways to isolate your subject, ranging from choosing your background (a physical decision) to using the right kind of camera settings (a technological decision). The best are those that include both efforts. And the top reason is that you want to separate, visually, the subject from the background.
Finding the right wildlife is a good first step, but in a place like Galapagos Islands that’s pretty easy to do.
But once you have the right subject, the way to isolate your subject and make it pop out of the photo best is to use some telephoto, have a shallow depth of field, and find an angle on the subject to maximize distance between the subject and the background.
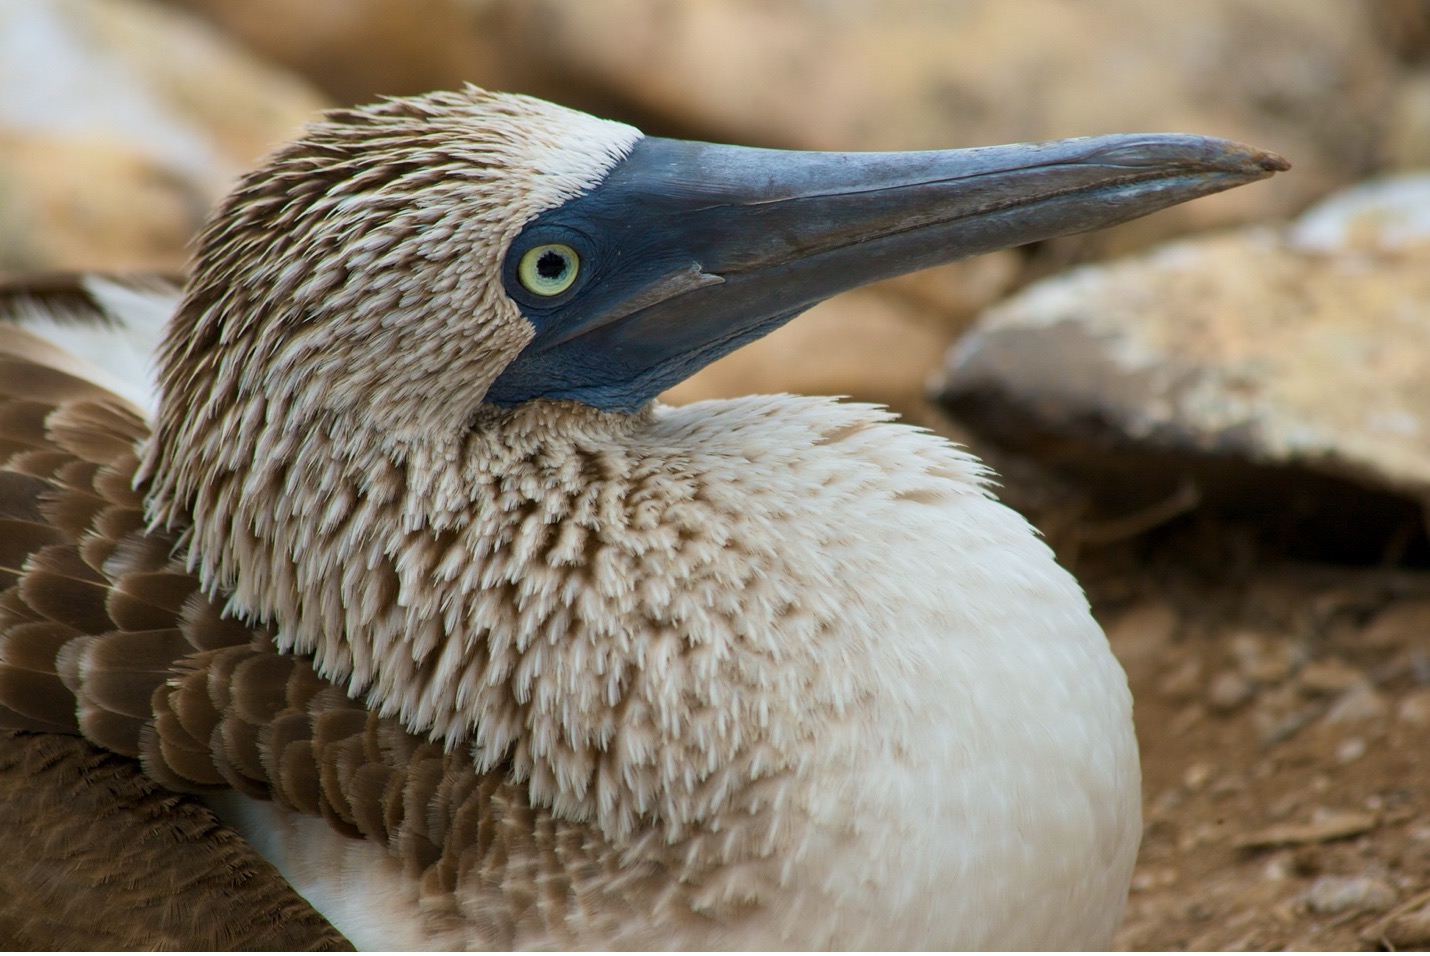
The smaller the f/number the better—something like f/4 is great, f/2.8 is best, and f/5.6 will do. If you can only get f/5.6 you will be able to add more blur to the background by using more telephoto zoom. Increasing “zoom” increases the effects of a particular depth of field. In addition, increasing the distance between the subject and its background helps tremendously for increasing that blur (aka, bokeh).
So, as you can see, the aperture setting is a key part of this, but you can compensate for the lack of shallow depth of field (usually because your lens doesn’t allow for it) by being very conscientious about your background.
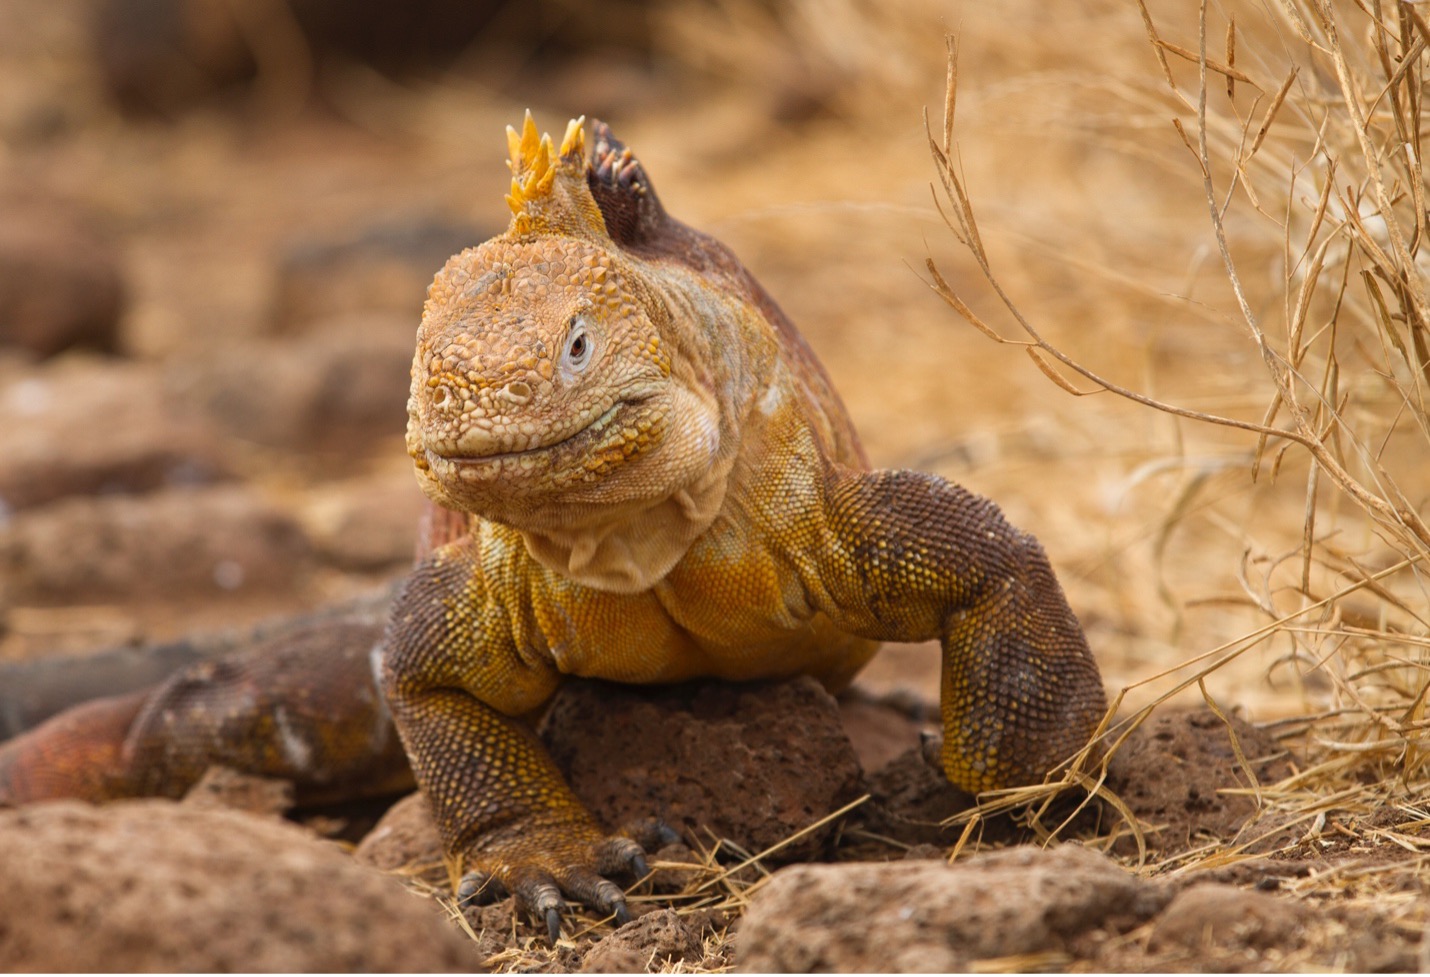
Incorporating the Environment
Wildlife portraiture that fills the frame with an animal is great, but there is another side to amazing wildlife portraiture. An equally exciting photo opportunity to look for is one where you feature the animal as part of its environment.
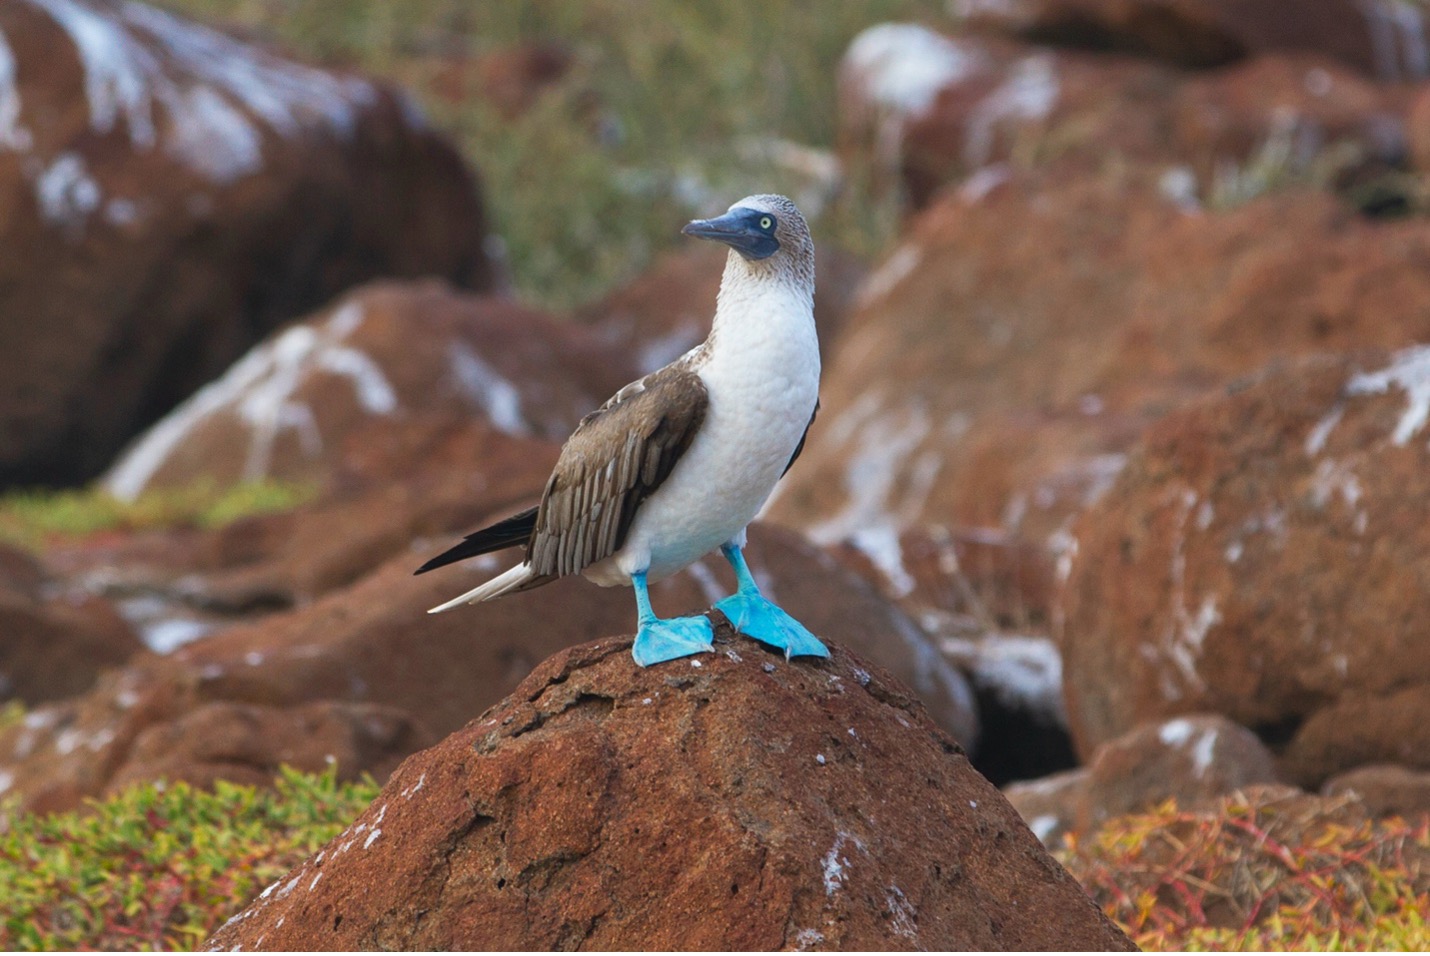
The Galapagos Islands lends itself very well to this style of photo, as there are both amazing landscapes and captivating wildlife. As you can see in the above photo, I purposefully “break” the rule of thirds by placing the animal in the dead middle of the frame. This helps to draw overt attention to the subject and emphasize the wildlife portraiture aspect of this photo. (it helps to have a somewhat symmetrical background when centering the subject)
To get these types of photos, you’ll want to take quite a different approach with camera settings.
In those cases where you want to feature both the natural landscape and wildlife, you want both a deep depth of field, like f/8 and perhaps even f/11 and greater. And where possible you may wish to have the background and animal subject relatively close to one another.
The reason for all this is that you want both the animal and the background in focus. The way to do this is to basically reverse everything we were talking about in the portraiture section. You want both the subject and the background to be well-defined and discernible, but to feature the background as prominently as possible. Otherwise, if it’s overly blurred, it can feel as if it’s wasted space as part of the scene. But by providing decent texture and definition of the background through these techniques, the “extra space” the background takes up in the scene becomes justified.
You usually won’t have the problem of the subject melting into the background, making the subject indistinguishable from the environment as even f/8 or f/11 will result in some background blur. And this becomes even more pronounced with the distance from you to the subject is less than the distance from the subject to the background.
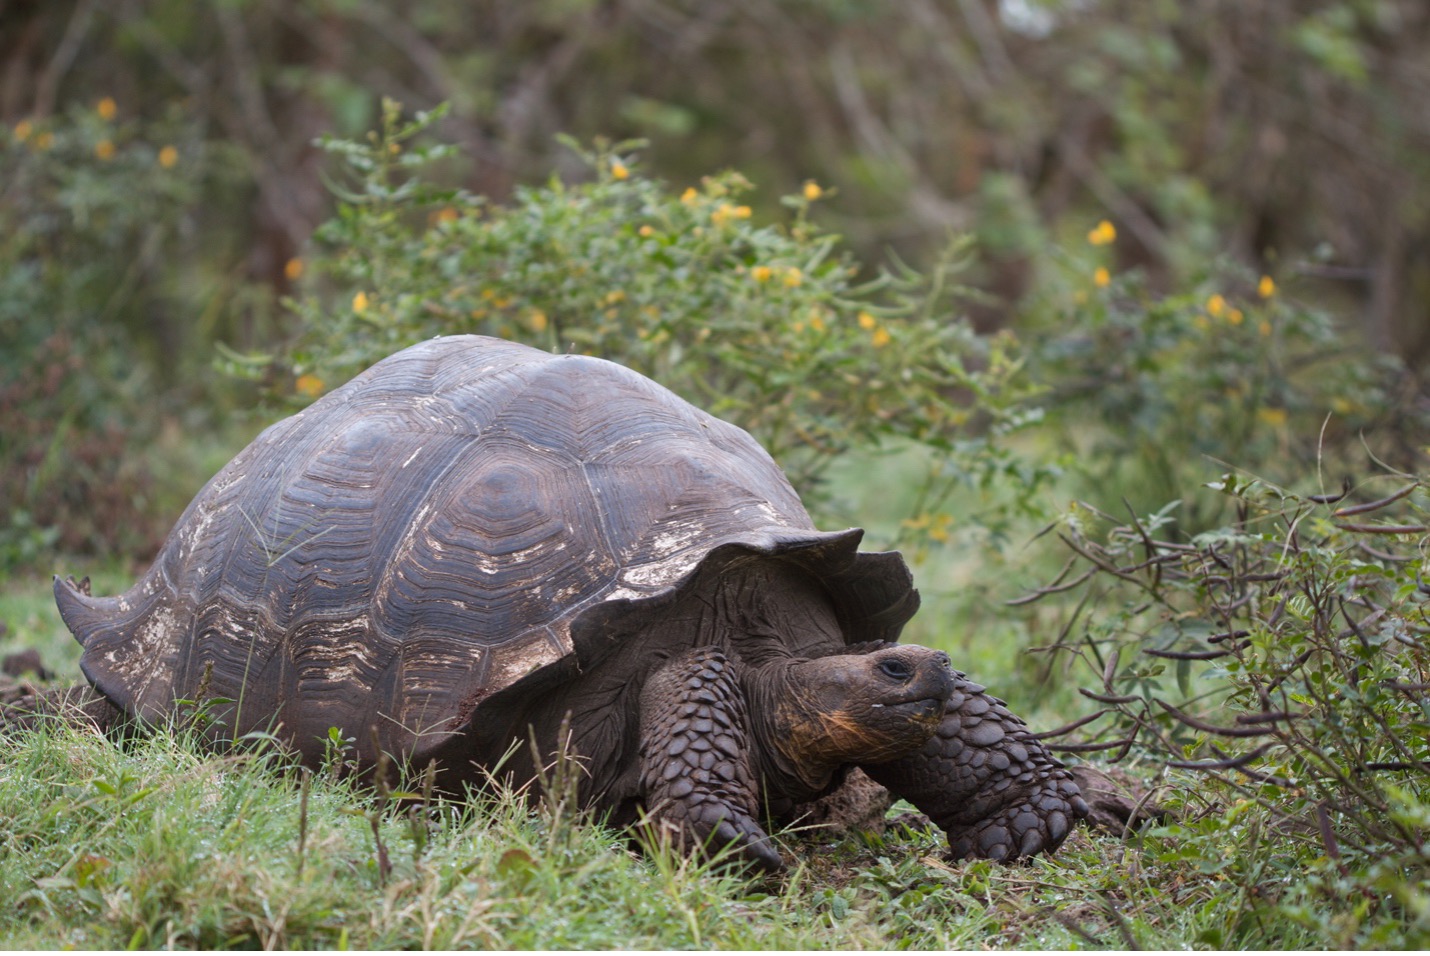
The Galapagos Islands is a perfect place to experiment with how distance affects depth of field, as you will have a litany of opportunities to choose from. There will be many, many cases with close-up wildlife, and of course as you keep your eyes out there are ample opportunities for great portraits at a distance.
Choosing your background
No matter which of the above styles you go for, being deliberate about the colors and textures behind your subject is one of the most important and next-level techniques for great portraiture. Subtle differences that result from small steps or pivots left or right can mean that the iguana has a very different background.
Neither of the above is “the right” background…that’s very subjective and contextual. But it’s important to know that you have this ability and with each photo opportunity you should stop and think for a moment about what your current background looks like, and how it might change and improve if you rotate slightly around your subject.
When you are exploring and photographing the Galapagos Islands you will have some of the best opportunities for wildlife portraiture on planet earth. I hope these tips help you on your photographic quest and you come home with even better photos than you imagined!
Go forward and give it a shot,

Court
Leave a reply