How to Get This Shot – Aurora over the Boreal Forest
If I’ve said it once, I’ll say it again—photographing the northern lights is one of the most thrilling things any photographer can experience. It’s a combination of intense beauty, and a mixture of artistic vision and rapid execution, putting your long exposure prowess to the greatest of tests.
While we have many resources on this site that will help you with the many facets of aurora photography, this article will be a deep dive into the components that make this photo so special.
Here we go!
Get yourself into the Boreal Forest
As you’ve heard me say over and over again, your foreground is really the x-factor when it comes to northern lights photography. You of coruse want to put yourself in a great global location for the lights, like Churchill, Manitoba, or elsewhere along the “aurora oval,” but physically you’ll want to find some intriguing foreground to really make your photo shine.
Over the course of our Natural Habitat Adventures Northern Lights Photo trips, we’ll be in boreal forest locations for at least two of our four nights photographing the aurora. There are many other places and foreground elements in the tiny town of Churchill, but the boreal forest can be one of the most special.
When you find yourself here setting up for the night, spend a little time scouting your locations. You never really know where the aurora will appear, but it does tend to start towards the north, making its way down south. Thus, pay particular attention to areas where a northern band of lights (stretching across the sky, from west to east) will appear best.
But frankly, they can pop up anywhere in the sky, so finding three or four closely locations to setup your tripod is ideal.
Find your Composition
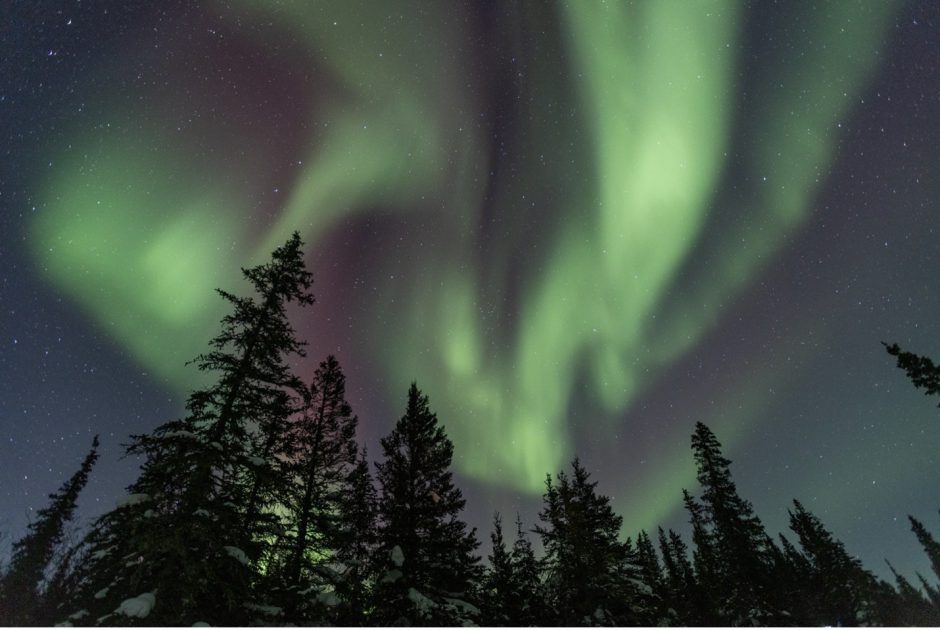
When the lights begin, you will be glad you did the scouting I recommended, but you’ll absolutely have to tweak your exact location and setup. Ideally you want to have the boreal forest trees reaching toward the sky, with the aurora swirling and dancing overhead. Position yourself, and your tripod, in a way that fills the frame with intrigue.
In the above photo, I chose to cut the entire ground out of the shot, only getting the trees starting from their lowest branches. This way, I could maximize the amount of sky in the frame.
With northern lights photography, the more sky you can get, the more aurora you can get!
In order to get a decent amount of trees and sky in your photo, you’ll be best served if you have an ultra-wide angle lens on your camera, like a 10-22mm (crop frame) or 16-35mm (full frame). Fish-eye lenses also work well, but I prefer these “rectilinear” lenses to minimize corner distortion.
As with all photos, you’ll want to try and abide by traditional rules of composition like the rule of thirds, leading lines, or framing. However, it can help to shoot wider than you actually need, to then allow you to crop your photo afterwards to really nail the composition. This also helps with any sort of straightening you may need to do.
It can be surprisingly difficult to nail composition, and leveling, in-camera when shooting the lights.
Dial in “The Right” Settings
Your settings may change throughout the night, especially as the aurora brightens and dims and brightens and dims. However, as a general rule of thumb, I’m always starting at these settings, and then either lower my ISO or shorten my shutter speed as the aurora gets brighter.
I begin with f/2.8, 20sec, ISO 3200
If the aurora is getting perpetually brighter, but not yet much movement, I start by dropping my ISO down to 1600 or even 800.
If the aurora begins to move, such that I want to freeze the ribbons and curtains of the aurora, I will drop my shutter speed down lower. You can never really “freeze” any motion when taking long exposures, but you’ll be surprised in the difference between 10 seconds and 20 seconds if the aurora is really kicking.
Figure Out your Focus
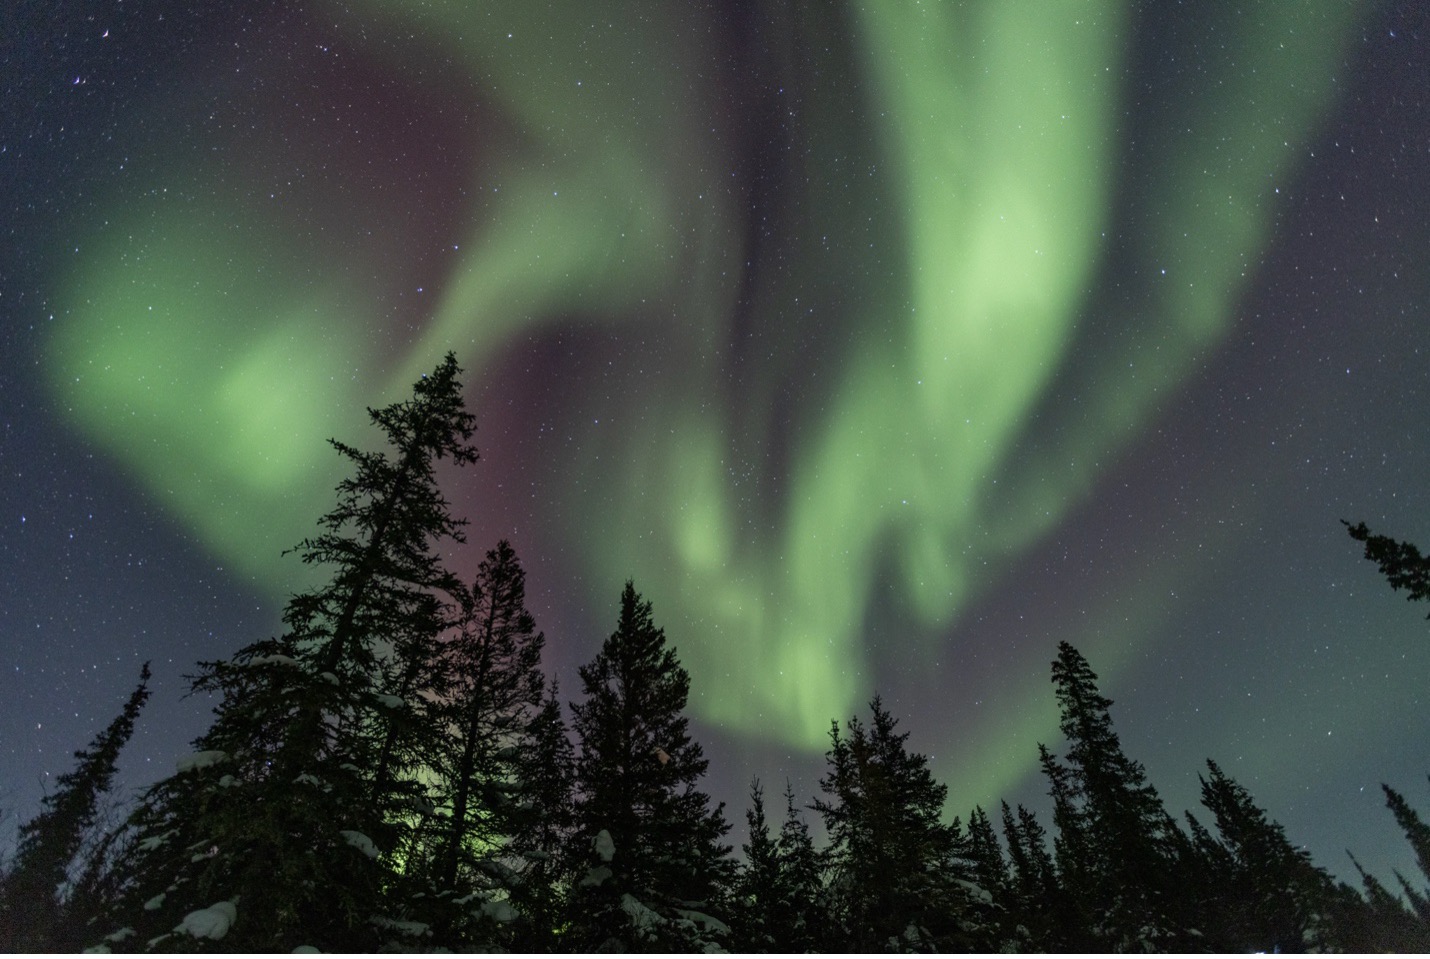
Focusing during aurora photography is another reason to choose a strong foreground element. In this photo, the spruce trees are close enough that I can actually auto-focus on them. To do so, I try and focus at the edge of the branches, where there is the most contrast between the dark branches and somewhat lighter sky.
Once I’ve auto-focused, I’ll “lock” focus by switching to manual focus. As long as I don’t move my tripod by much, and ensure that I don’t touch the focusing ring on my lens, every shot hereon out will be focused in this location.
Sometimes you may need to shine a flashlight on your foreground subject for a brief moment in order to lock focus. But be careful not to do so while others are actively photographing, as that could ruin their long exposure. I often will “synchronize” my entire group to focus simultaneously, as I shine a headlamp onto the trees, such that my entire group will achieve focus via the above technique simultaneously.
Take Photos and Experiment!
To avoid any sort of motion blur, I set my camera on a two-second timer. Thus, each time I press the shutter button, it takes two seconds before the camera takes the shot, which is long enough for any movement from my hand to dissipate before the shutter goes open.
The main ways to experiment are to a) change composition, b) change ISO, c) change shutter speed, and d) change location. Because focusing is a rather tedious task, I won’t readily change location entirely, as that will require me to completely redo the focusing technique. I make sure to do all my other experimenting first.
The primary thing I do is change composition. The great thing here is that as long as you don’t touch the focusing ring, nor move your tripod, you can take photo after photo simply by pushing the shutter button–no need to refocus and jump through those hoops.
Thus, you’ll want to try LOTS of different compositions. Try finding different trees nearby (that are at the same or very similar distance) or try taking the same shot but in portrait orientation vs. landscape. And as I said above, if you can drop your ISO down, do so when possible so that you get some shots with lower noise in them. Experiment with faster shutter speeds to have more distinguishable “bands” of aurora.
And there you go! All the steps you need to get an amazing aurora borealis photo within the majestic boreal forest. The great thing is that these steps and tips apply to nearly any other aurora photography over the course of your aurora photo adventure.
If you’re headed up to photograph the exquisite lady aurora I hope you have an amazing time and I might even see you up there!
All the best,

Court
Leave a reply