How to Get this Shot – Aurora above Trees
The northern lights is one of the most enchanting things to capture for any photographer. And the great thing is that you don’t need to be an expert or even have the latest and greatest photo gear to get awesome results. In fact, smartphone cameras are getting better and better with each new model—it’s astounding! But let’s be honest, to get great photos, you’ll need some good advice.
If you are headed to photograph the northern lights, whether you’re on a special photo adventure, or simply one to take in the sights, here is a quick guide for how to get this shot.
Pre-Trip
The first thing you want to do is determine if your camera can get the shot and then do a little soul searching for what sort of quality you’re aiming for. While many cameras can capture the lights, if you want a format for a wall-worthy photo, a proper DSLR or mirrorless with interchangeable lenses will be a must.
The quickest way to figure out if your camera can capture the shot in the first place is to set it on manual mode, then three custom settings—a shutter speed of 20 seconds, an aperture of f/4 or f/2.8 (the smaller the number the better), and an ISO of 1600. If your camera can do all three at the same time, you’re in business.
Where To Go
There is a specific magnetic band, which circles the geomagnetic north pole, that sees the most and best aurora activity. However, once you identify this band (aka the aurora oval), you still have choices of where to go. I for one love going to the Canadian Arctic to a small town called Churchill, as it encapsulates the most iconic scenery for the north. And when on a proper aurora photo adventure, it’s possible to get new, spectacular foreground elements each and every night.
Another great thing about Churchill is that it sits at the confluence of the boreal forest and tundra, so you get both biomes for photo opportunities.
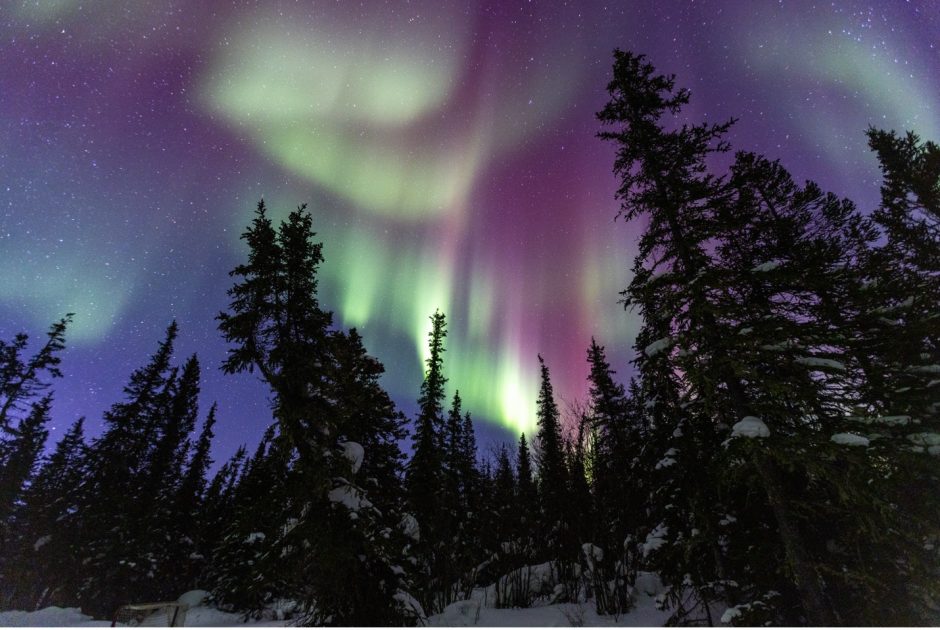
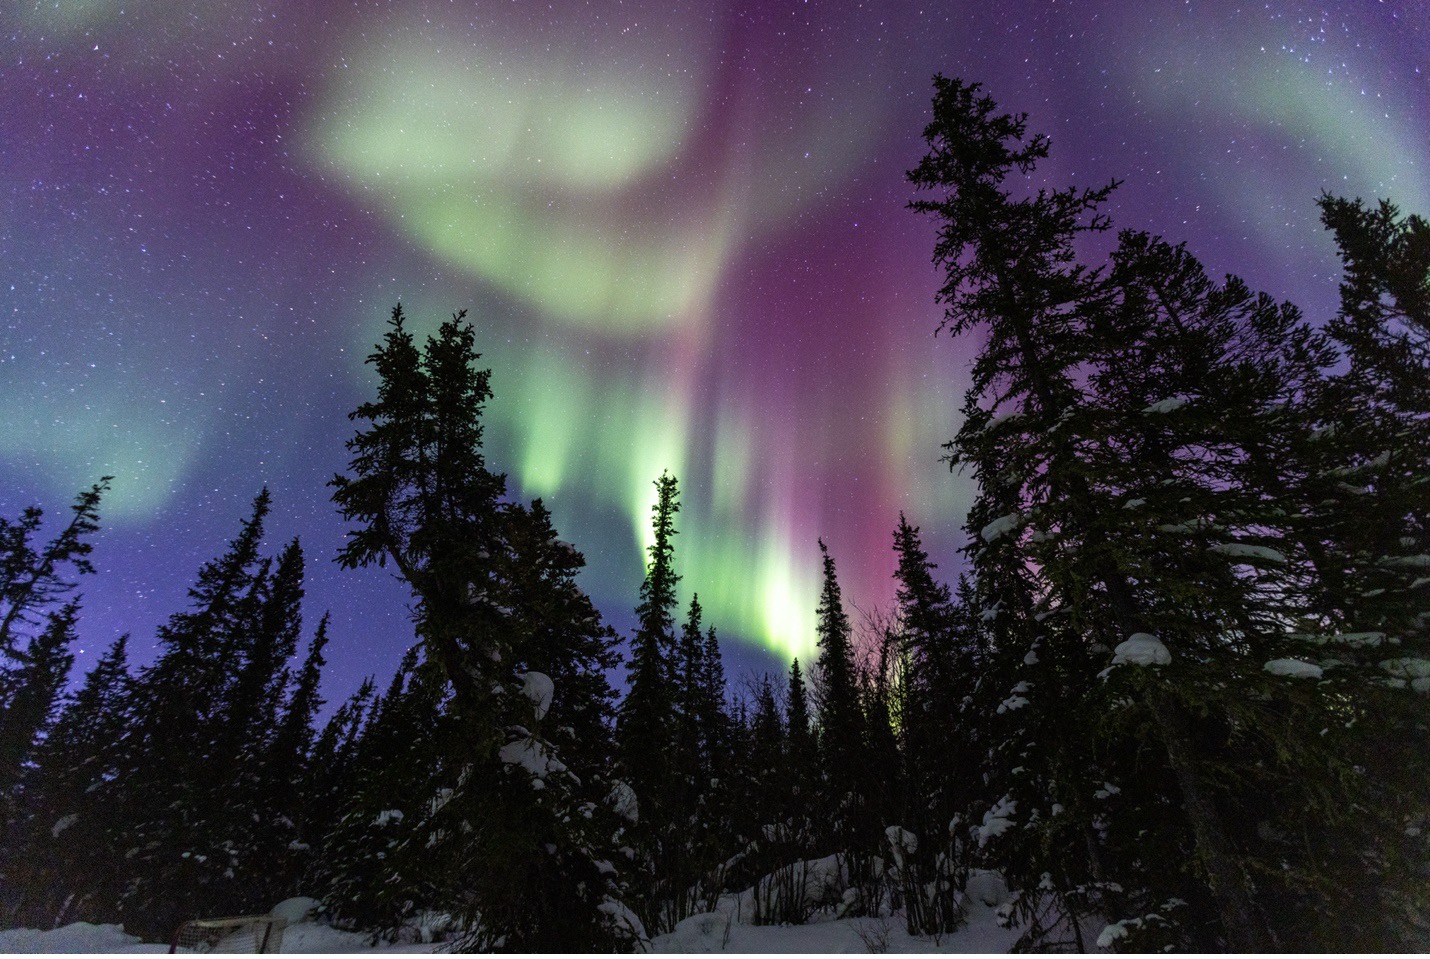
This photo we’re talking about here is in the boreal forest, surrounded by spruce trees—one of my favorite settings.
So, if you want this shot, you’ll need to get yourself up to Churchill and into the boreal forest.
Setting up the Shot
There is no perfect science to finding the ideal spruce trees for a photo like this. In fact, you probably ought to wait until the aurora starts to know which direction to face and which trees will become your foreground subjects. In other words, being reactionary is a key skill here.
However, you can prep a little by finding some trees that allow you, the photographer, to be south of the trees, such that you are facing north—the aurora generally starts in the north of the sky (although this isn’t the case 100% of the time).
As an added bonus, if you can be positioned about 30 or so yards from the trees, this will allow you to have them in your frame, but not dominate the frame. You want them prominent, but also yielding to the night sky, which will of course feature the aurora when the time is right.
In addition, by being a bit further away from your foreground, you are able to get more in focus at the shallow apertures needed in low light conditions. In converse, if you were to be right up against the trees, you may notice a more pronounced shallow depth of field, such that the foreground will be in focus, but the background (stars, etc.) may be noticeably blurry.
Giving that distance between you and the foreground subject is the key.
Your Camera Settings
This part is remarkably simple, especially if you’ve ever shot on manual mode before.
First, get your camera on manual mode, and dial in a 20 second exposure (usually denoted as 20”), an aperture of f/4 or bigger (i.e., f/4 or a smaller f number like f/3.5 or f/2.8) and ISO 1600.
If the aurora is bright, you may wish to dial your shutter speed down to 10 or 15 seconds. If the aurora is dim, keep it at 20 seconds, but perhaps go up to ISO 3200.
That’s about all the tinkering you’ll want to do with your camera settings if you are a beginner with long exposure photography.
For advanced night photographers, you may wish to tinker more, and of course getting your ISO down below 1600 is advisable if the lights become really active.
Your Focus
Here is where the biggest challenge usually occurs. But let me make it simple for you…you are going to focus on the foreground element at all costs.
Yes, you could make the argument that the aurora may be blurry, but it’s a cosmic blur anyways. Yes, you could say that the stars may be out of focus, but this is why I advise stepping back 30 or so yards from your foreground. Plus, you will likely want the stars “out of focus” because it’s far worse if your foreground is blurred vs. the small blur that could come from stars.
Next, you will want to stay on autofocus, find the top edge of the trees such that your focus box straddles the tree outline and sky. See the little yellow autofocus box in the photo above? This is what I’m talking about.
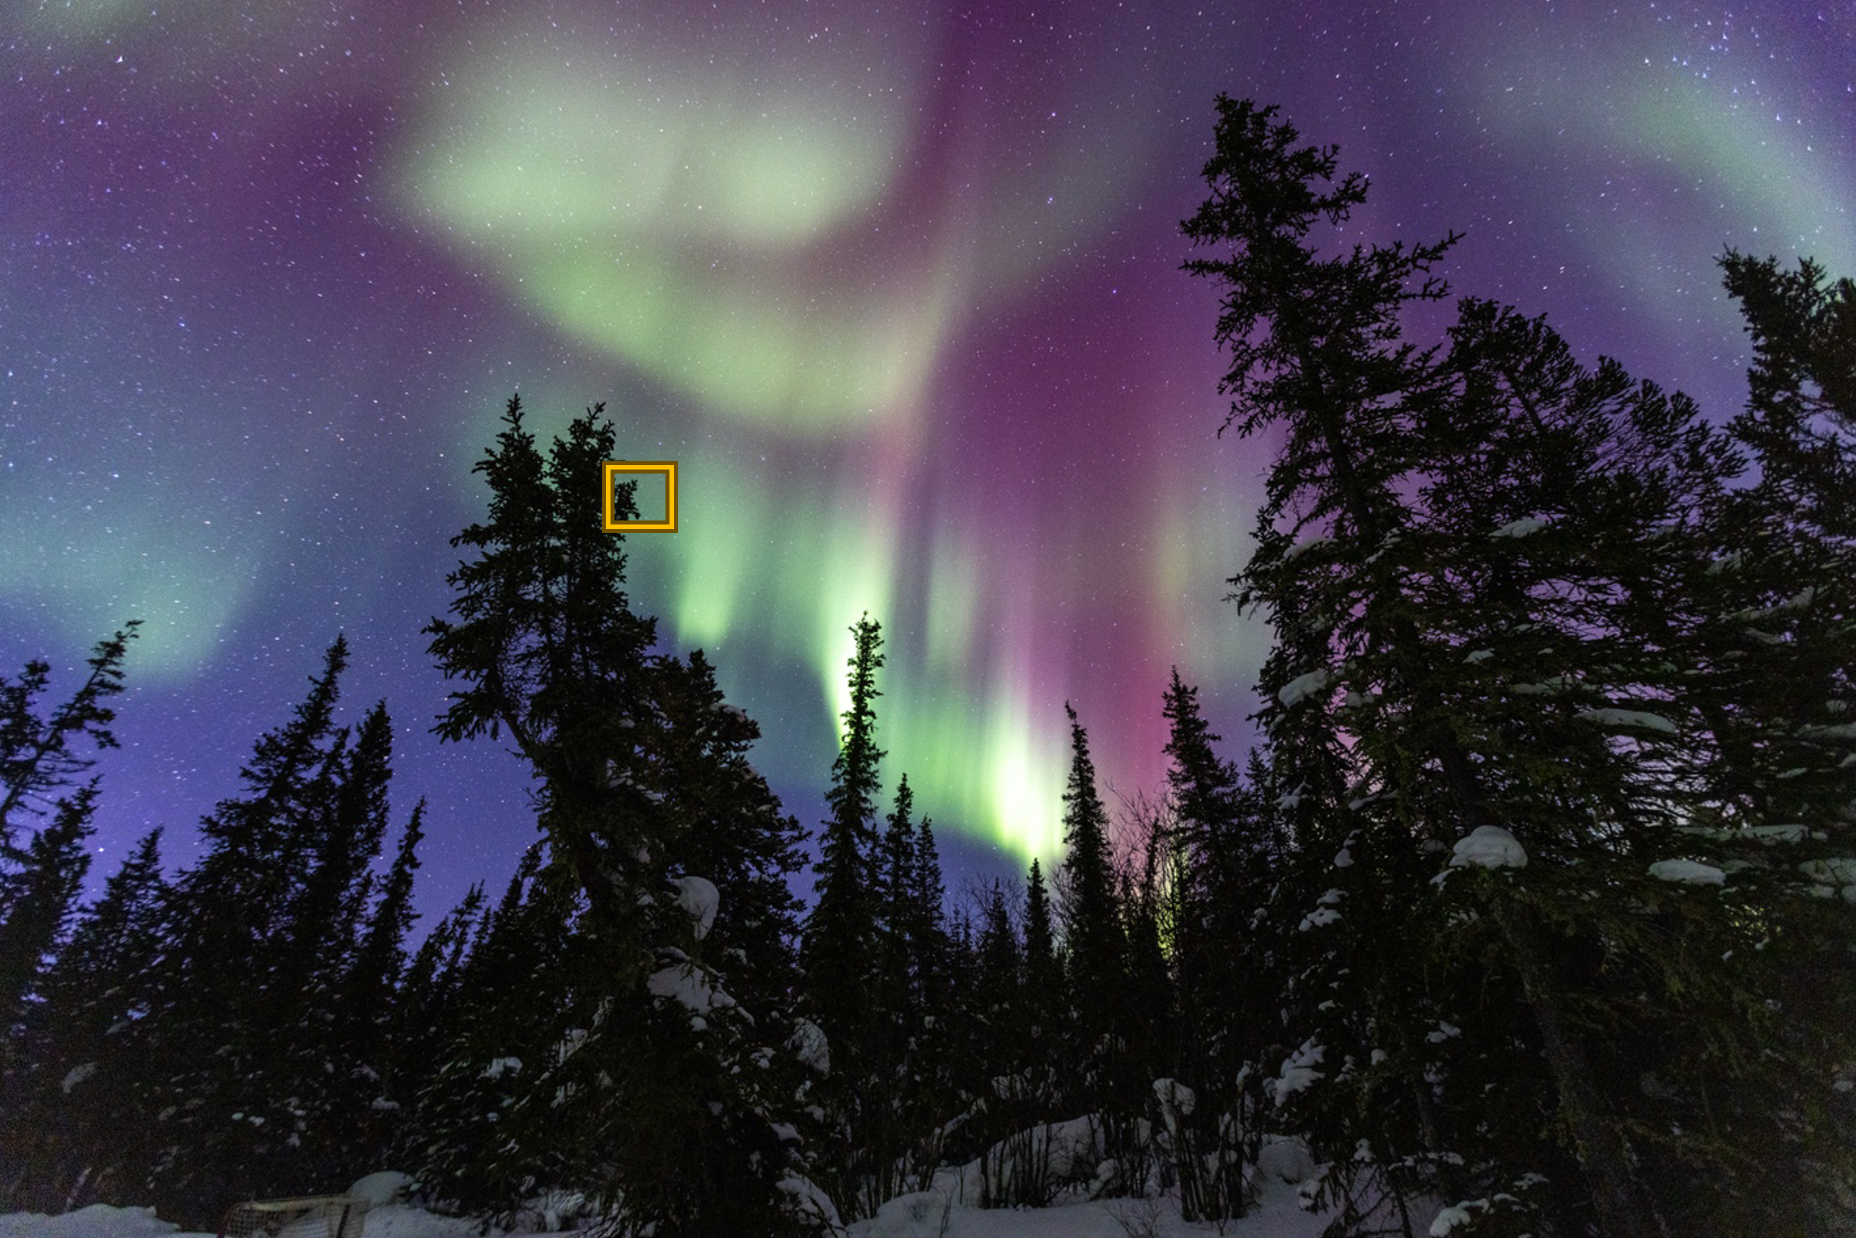
This contrast will give your autofocus the best chance at focusing in the dark. If this doesn’t work, you could briefly shine a light on the trees and focus there. However, this could ruin photographs that are in-progress, so be mindful of fellow photographers before turning a light on.
Once you achieve autofocus on your foreground, set your camera from auto to manual focus and be sure not to touch the focus ring on your lens for the ensuing photos. This locks in your focus to the exact depth of the trees, giving you the leeway to repeat shots with different orientations (portrait vs. landscape) and even different compositions without having to repeat the focusing steps (which are indeed a pain).
Rinse and Repeat
Ok, there will be no rinsing here, but you should definitely repeat as much as possible. At 20 second exposures, you will really only get 2 to 3 shots per minute, so if an aurora show lasts 30 minutes or an hour, you’re really only taking about 100-150 photos total. Thus, you’ll want to continue taking photos.
When it comes to this photo, you may wish to move around once the aurora gets kicking so that you can position the aurora neatly above the trees. But this isn’t necessary, nor possible in all scenarios. It’s just food for creative thought.
If you’re headed “up north” to see and photograph the aurora borealis, I wish you the best of luck in seeing lady aurora and hope this article helps you capture her in all her beauty!!
Cheers,

Court
Leave a reply