
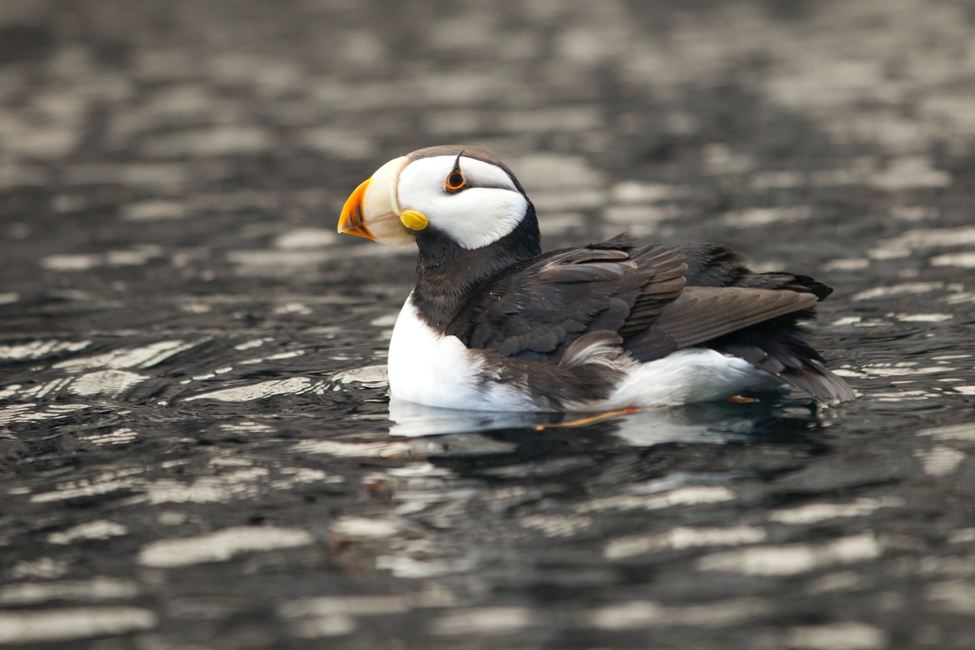
3 Tips to Instantly Elevate your Wildlife Photography
Wildlife photography is quickly becoming one of the most sought after forms of photography. This is in part because of new camera technology allowing for better, bigger, more extraordinary photos (think telephotos, better resolution, smarter sensors, etc.). But it’s also in part due to the ever-increasing wildlife conservation issues in our world today. Fortunately, we photographers are at a rare crossroads where our passion is actually able to help conservation by showcasing and garnering support for the splendor and fragility of our wild world…especially with those who may not be able to see it on their own.
Thus, if you’re headed on your next big wildlife photo safari, whether in Alaska, Africa, Antarctica, or anywhere in between, these tips are designed to get you better photos, which you can then use to help actually save the species and places you are most passionate about.
Think about size, scale, and a BIG photo
Big animals need to look big and small animals are small, right? Not so fast—you’re limiting yourself! Instead, think about how the animal fits into the frame or its environment to really harness the big or small look.
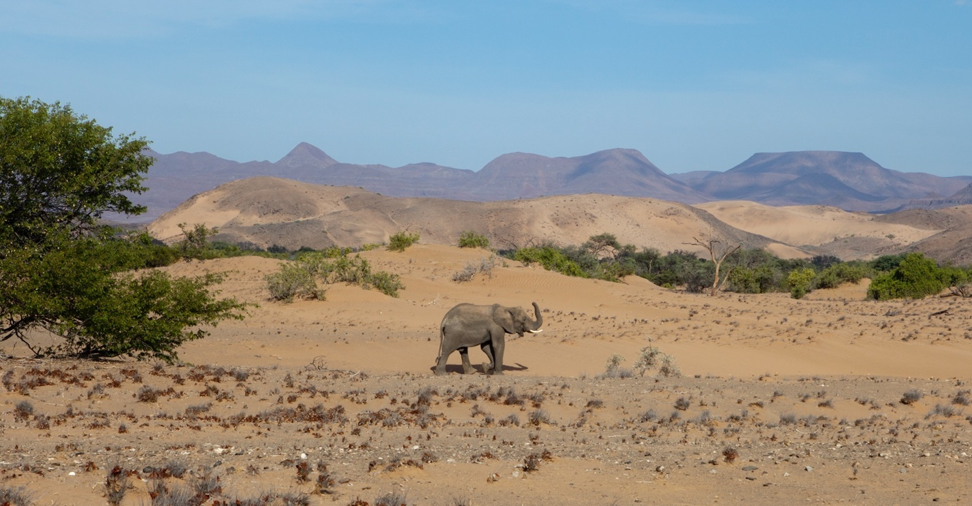
As you can see from above, elephants aren’t only to be photographed as “big photos.” In this case, the humbling, grand Namib desert provides a stunning context and scale to what could have been just another elephant photo.
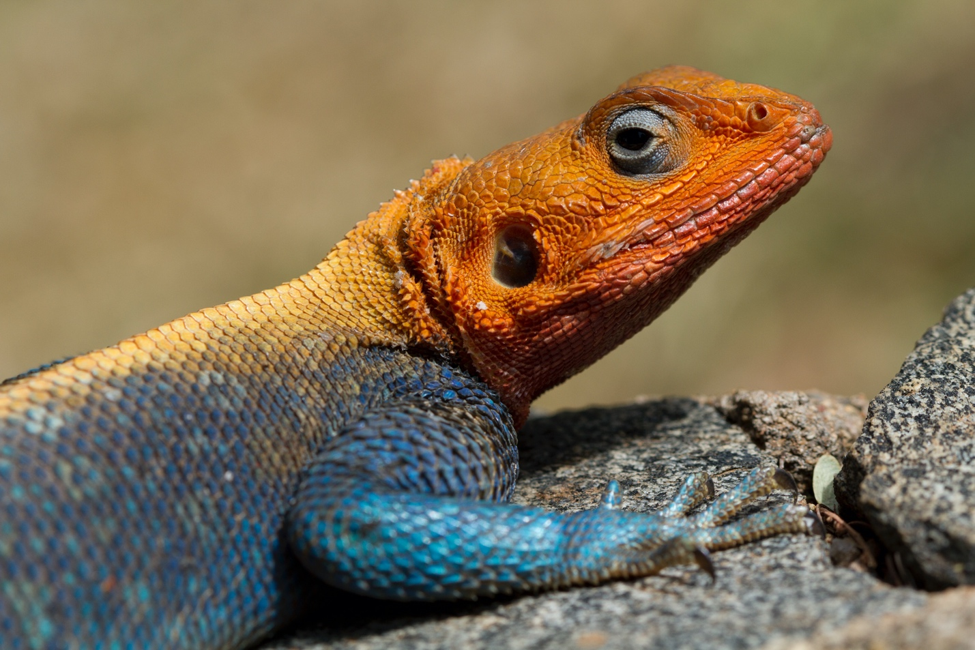
Conversely, you can take a BIG photo with a SMALL animal. With this small Agama lizard in Kenya, a telephoto lens at minimum focusing distance gives it a macro look, and turns this small reptile into a very impressionable animal.
The lessons here? Don’t always go into every shot with a traditional mindset of size. Instead, stop for a moment and look around. What tools do you have at your disposal (in the case of this telephoto shot of a lizard) or what is the landscape like around your wild animal (in the case of the large elephant in the even larger Namib desert).
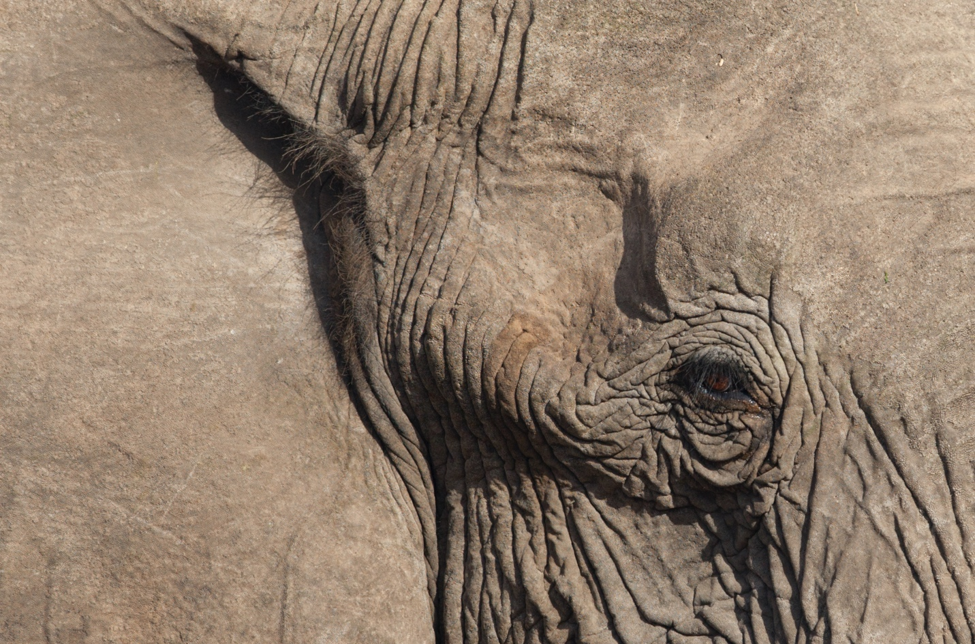
Finally, per the below photo, you don’t always have to photograph the entire animal to provide that alluring context or photographic elements. Here, we have a large African elephant, of course, but the photo is more about the features of the elephant…the wrinkles, the color, the texture, the eyelashes, and the harsh contrasts and shadows from what must be a mid-day, high-noon photo.
Just like we search for components of a landscape, you should do so with your wildlife subject and feature them in prominent ways.
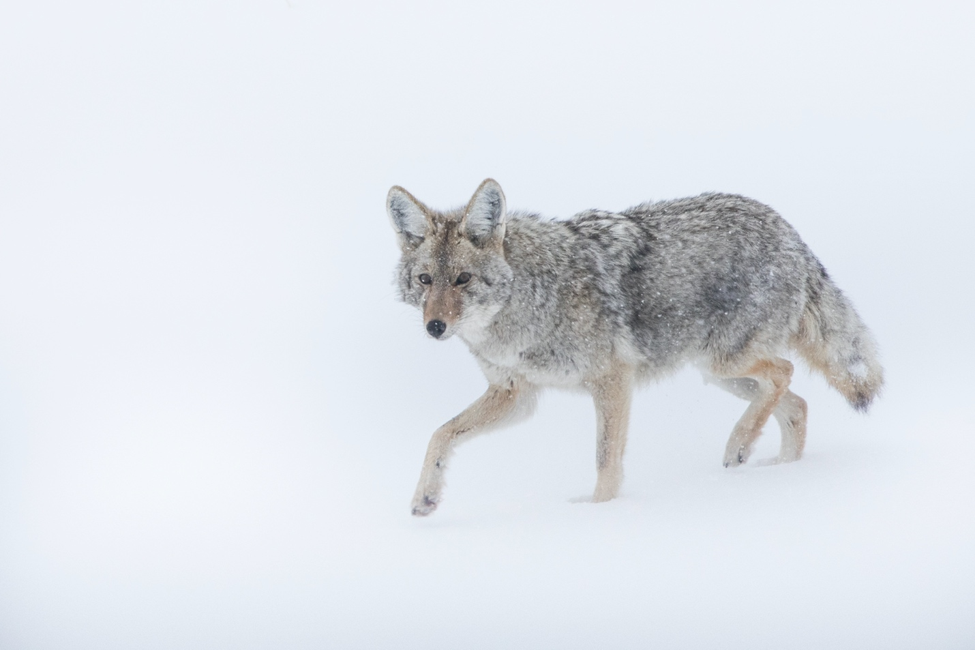
Have the animal stand out with proper depth of field
Harnessing the power of Depth of Field (aka DoF) is game-changing for wildlife photography. And it works both ways…narrowing your DoF for selective focus, or widening your DoF for intricate details in your focus area.
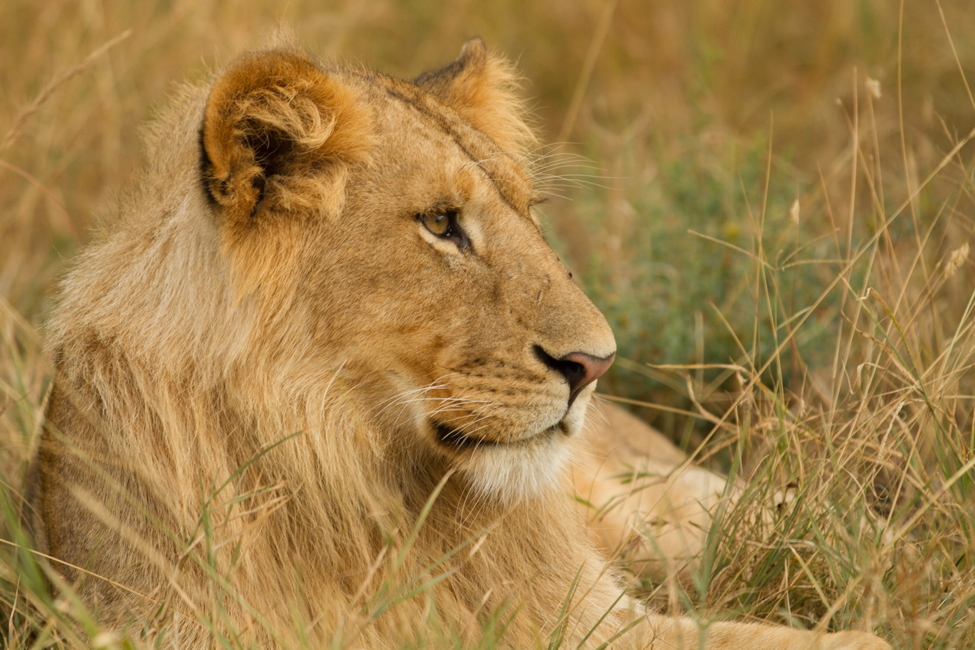
Animals, especially the big, charismatic ones, are often found in brushy areas. The animal likes this, as it generally helps conceal them, but we photographers are challenged with the added textures, and general competition in the shot. That is, we’d rather not have lots of lines, shadows, and whatever else arises from the brush being in the shot.
The best way to get around this is to use a very shallow DoF. This isolates the subject and helps blur out the “unwanted” aspects of the shot. If you’d like to read more on how to photograph wildlife in brushy conditions, I have an entire article dedicated to this topic here: How to Photograph Wildlife in through Brush and Vegetation.
Even in cases where you’re not intentionally avoiding brush in your photo, a shallow depth of field can do wonders to your photo—isolating your subject to draw attention to it in a strong, powerful way.
There are other times, however, when it’s critical to maximize your DoF to ensure sharpness from corner to corner. This plays into the first topic of this article, particularly with the close up of the elephant. In order to get every wrinkle in focus, you must have a wide DoF, like f/8 and beyond, to nail the shot.
Another classic time to maximize DoF is when you have either multiple subjects, or an intense background that you’d like to prominently feature as part of the shot. The below photo has both.

Here, I wanted to of course feature the whale tale, but I also wanted to feature the boat, which was a decent distance behind it. And with that mountain range of the Kenai Fjords National Park, I just wanted it all! Thus, big DoF (f/11 in this case).
Use shutter speed to your advantage
When taking photos of wildlife, the first thing that comes to mind regarding shutter speed is that you must have a fast enough shutter speed to freeze motion. This is extremely true, but as you’ll see, it’s only half of the potential with shutter speed. Nevertheless, let’s start with this—think fast.
Birds are a classic example of this, but the need for speed (shutter speed, that is) is a universal with wildlife photography. Generally speaking, the faster your shutter speed, the better. Animals move, and if you want them to appear tack sharp in your frame, you better have a fast enough shutter speed to prevent motion blur.
But what is fast enough?
This is VERY subjective to the scene before you. But as a general rule of thumb, if the animal is moving, you better be ready to shoot at least 1/500th of a second. And that’s just if it’s moving slightly. If you’re photographing a walking animal, or perpetual movement, I recommend getting up to 1/800th of a second, or 1/1000 if you’re able to. If the animal is really booking it…a run, or a trot, best to double that again and be looking at anywhere from 1/1250th to 1/2000th of a second.
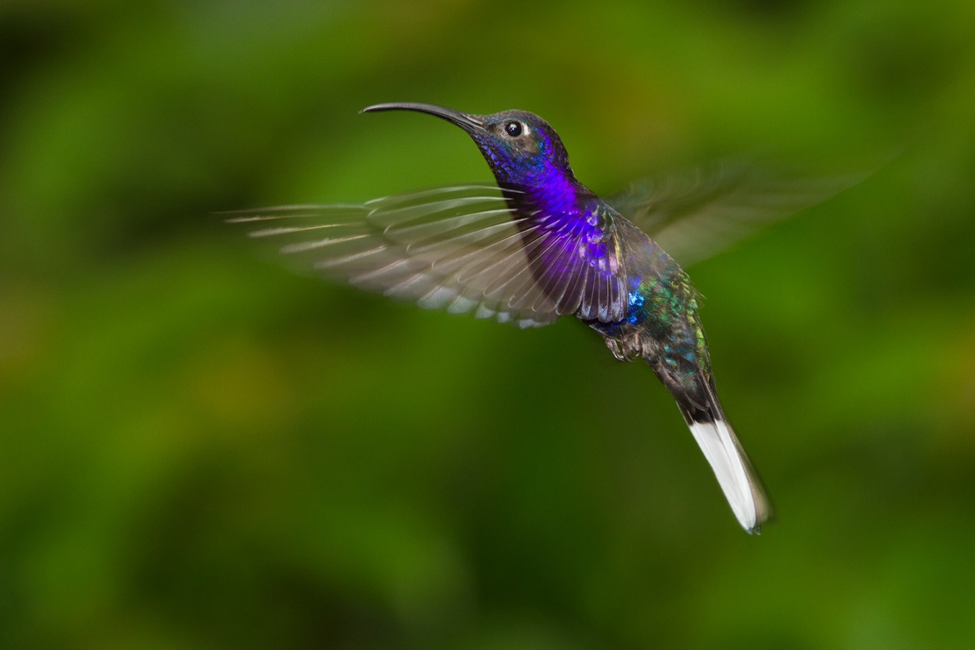
Finally, while it’s generally best to use a fast shutter speed for the photo you want, I HIGHLY recommend experimenting with slower-than-normal shutter speeds, too. Not something in between, however, like 1/250th of a second, I mean really slowing it down. I’m talking about 1/10th of a second and the ballpark.
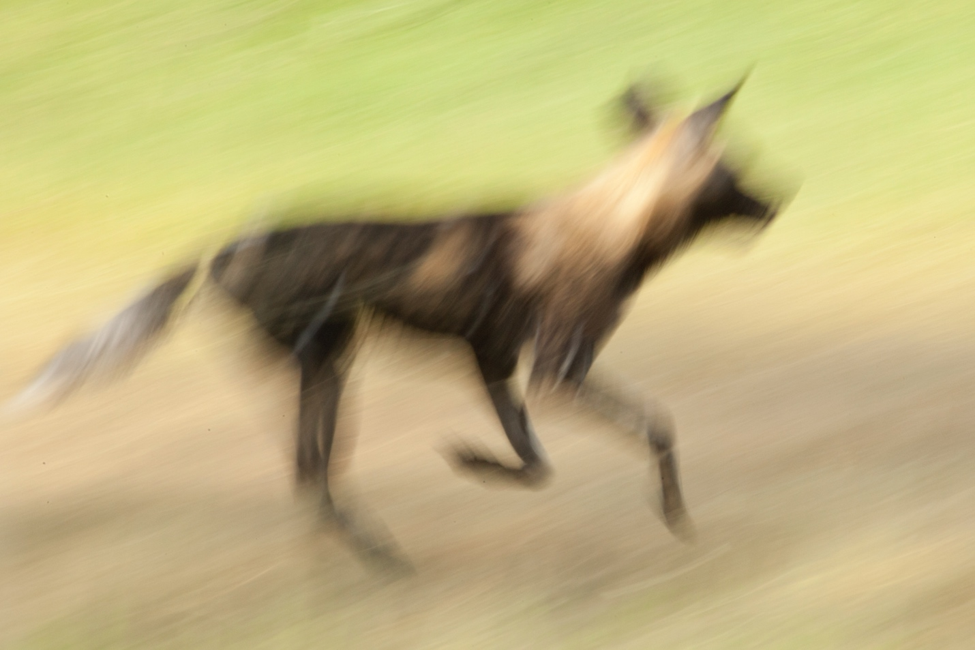
This is certainly not going to make the cover of a guidebook for Botswana anytime soon. Nevertheless, it’s one of my fondest photos of a wild dog…ever.
Let’s remember that we’re not always trying to document what we saw, and we’re not trying to compete with a field guide for “most accurate depiction of an animal.” Photography is an art form, and it’s a storytelling tool. Sometimes slow shutter speeds are just the right creative outlet you need to see and photograph wildlife differently.
What makes the critter you’re photographing so special? Wild dogs run and hummingbirds beat their little wings at an alarming rate…showcase this motion with your slow shutter photography.
I hope this helps give you some new inspiration, new views, and new interest in getting out there and showcasing our spectacular, wild world.
Go forward and give it a shot!

Court
2 Comments

Don Campbell
March 27, 2023 at 3:39 pm

Court Whelan, Ph.D.
April 21, 2023 at 9:11 am
Thanks for the tips. I shpt a lot of wildlife, and it’s good to have a few things in mind when setting up the camera for conditions, and framing the subject. Some things come automatically, but an error can make a great shot only interesting.
Keep the great ideas coming!
thanks for the great feedback, Don! I appreciate this and glad you’re enjoying!