What is Zoom Compression in Photography?
One of the most powerful tools in landscape photography is being able to “compress” your field of view. With it, you can create stunning images that will truly make you look like a pro.
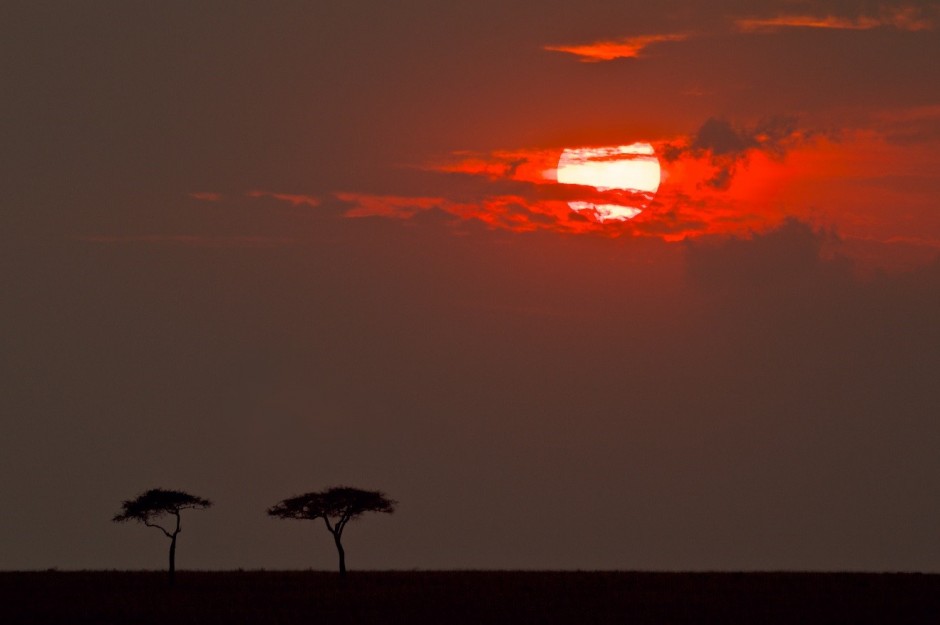
The basic gist is that you are photographing a scene that is quite far away (ALL elements of the scene) and using a telephoto lens. In regards to the photo above, normally, two acacia trees photographed with a telephoto lens would fill the frame with the trees. That is, they would appear rather large in the resulting photo. However, these were on the very distant horizon of Kenya’s Maasai Mara – potentially a mile or two away. The compression happens when you compare the trees with their surroundings. Technically speaking, the trees are the foreground and the sunset is the background. When taking the photograph, however, this isn’t that intuitive, as they both seem like distant specs on the horizon – both the trees and sun. But, because these comparatively are both quite distant from you, the photographer, a sense of “compression” happens, making the background (sun) appear more prominent than it actually is to the naked eye. That’s when the magic happens.
Ever see those photos of massive moons over a landscape of a city or mountain? No, the moon wasn’t necessarily 100 times its normal size that night. It’s just what happens when you zoom in on a very distant landscape. In fact, when doing so, you’re likely to not even be able to see the trees or equivalent “foreground” with your naked eye. However, by using your zoom like a telescope, you are magnifying everything. You magnify the microscopic trees just as you magnify the normal sized sun or moon. Same thing goes with colorful sunrises and sunsets. The actual colors you see may only be a fraction of the sky, but by zooming in, your photo will look as though the entire horizon is on fire.
We won’t go into the physics of why this happens, as it’s irrelevant to mastering the technique for a good compression photo. The key thing to note is that this compression is actually a type of distortion, making background images larger than they appear in real life.
The other key thing is to know when and how to take advantage of it! Things to look out for are:
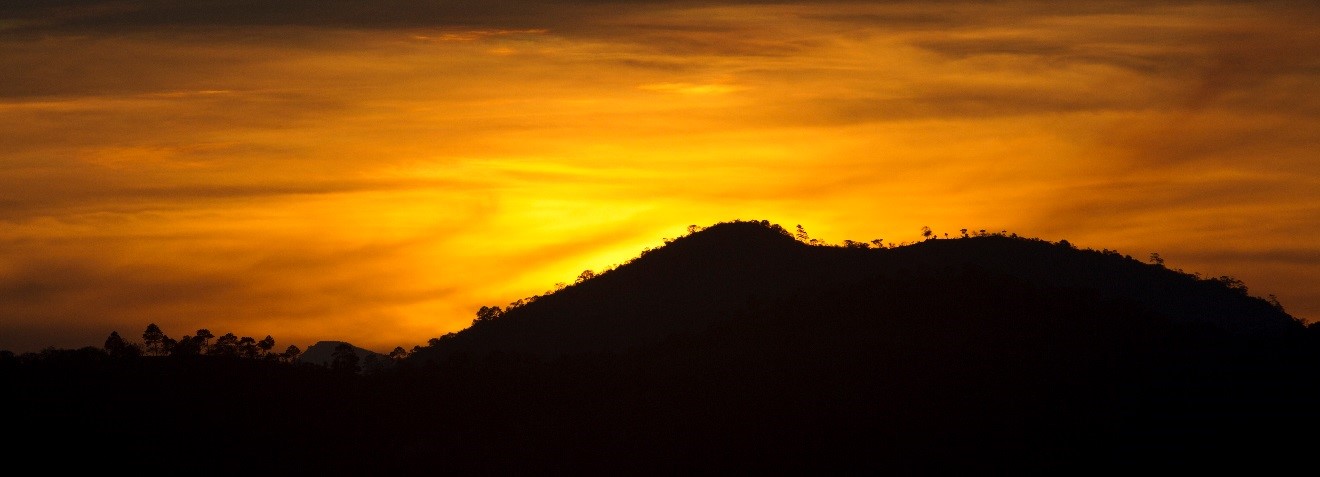
- Distant horizons with “foreground” texture. Texture really just means “stuff” – something to photograph. Maybe it’s a stand of trees, or an entire forest. Or, in the case of the orange sunset photo example above, just some trees on top of a hill. Basically, you’re looking for something to be your subject.
- Something notable in the “background”. Notable is again just an ambiguous word. The most common background subjects would be the sun and moon, but city buildings, lights in a distant harbor, and even mountain ranges are all other examples.
- PLENTY of space between you and the entire scene. When practicing, it may be hard to find examples of this, and rightfully so. Scenes that allow you to photograph clearly in one direction for something miles away aren’t necessarily around every corner. However, the best way to recognize opportunities like this is to get out there and practice. In no time you’ll be able to recognize these opportunities when they do present themselves.
Hope this helps, and if you have any questions as you go along, leave a comment below and I’ll be happy to help.
Go forth and give it a shot,
4 Comments

Kevin O'Kane
May 8, 2016 at 6:59 pm

Court Whelan, Ph.D.
May 11, 2016 at 4:11 pm

Jennifer Probert
January 17, 2023 at 1:26 pm

Court Whelan, Ph.D.
January 22, 2023 at 2:06 pm
This effect can used when photographing runners or bikers spread out in a race. The more distant runners appear to be much closer to the closer racers than they really are.
Excellent point and a great example. Sporting events in general are a great time to practice this technique. Thanks for the comment!
Hi there. Great article but I’m fairly new to photography and confused about something. If there’s a mountain about a mile away can zoom compression make it appear close enough to touch? Like it’s right on the other side of the road?
Hi Jennifer, great question! The answer is, sorta–yes :). The gist here is that a telephoto lens magnifies what you’re looking at. It’s like if you have a magnifying glass that is 3 times power or 6 times power. Different telephoto lenses (e.g., 300mm or 600mm) magnify at different strengths. The bigger the focal length, the more magnification. So, yes, if you use maximum telephoto power you can zoom into the side of a mountain to make it very large. However, as you use more and more telephoto you’ll eventually get to the point where the mountain fills the entire frame–edge to edge. If you zoom more (i.e., use more telephoto) you will start only getting a part of the mountain, but nevertheless it is still magnifying. Thus, I don’t know if you’d get the desired effect of “making it look like it’s on the other side of the road” but in a way, yes, you could orient yourself so that a road is in the foreground and a mountain is in the background, and through the use of telephoto power, you could make it look like the mountain is much closer :). I hope this helps!