Under vs. Over-Exposure, which is better?
Exposure is really just a semi-fancy way of saying the amount of light that is in your photo. When shooting on most camera modes, the camera decides on what is “proper” exposure, and it gets it right most of the time. This goes for settings like aperture priority, shutter priority, program, and auto modes. In fact, the only time the camera doesn’t have some decision-making ability is when you shoot on FULL manual mode. Thus, chances are you are allowing the camera to decide on the right light for some if not all the time.
As I mentioned, cameras (especially newer, smarter ones) get the exposure right most of the time. And when I say most of the time, I mean greater than 50%, but certainly not 100% of the time. The reason for this only partial accuracy comes down to how your camera meters, or chooses appropriate lighting. Let’s go over this now.
Your Metering Mode
When cameras choose the right exposure, i.e., the right amount of light, they do so by adjusting aperture, shutter speed, and ISO to give you exactly 18% pure gray in your scene. This very digital way of thinking sounds a little unromantic and un-artistic, but keep in mind that aesthetics and art all have foundations in mathematics, so this precise calculation is actually a pretty good way to go. But keep in mind, you don’t have to think about this–the camera does this automatically for you on all modes except full manual.
The part you DO have to think about is what it means to have 18% gray “in your scene.” What is your scene, exactly?
Most cameras allow you to choose the area your camera considers in three ways. For simplicity’s sake, I’ll define them below:
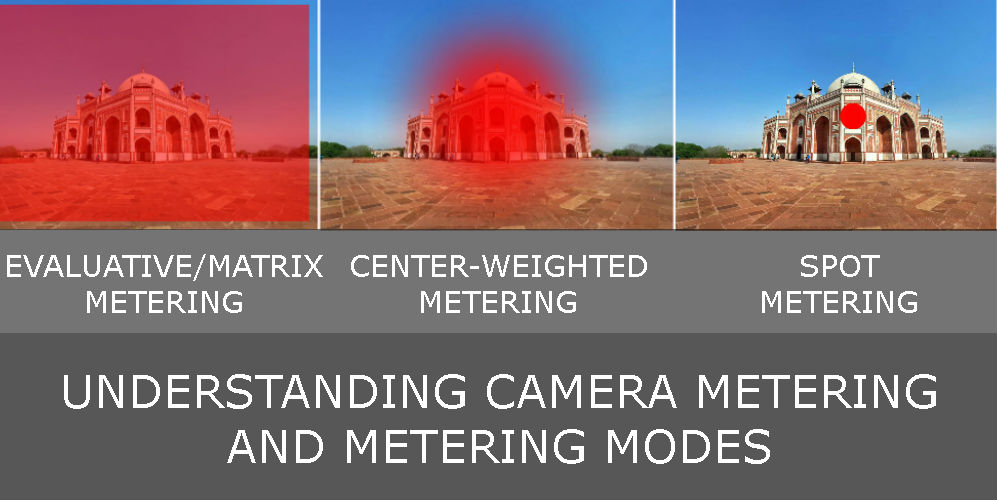
Evaluative: This enables your camera to intelligently use the entire frame of your camera to average out 18% gray. I use this 98% of the time.
Center-weighted: This tells your camera you only want it to think about the center of your photo. Good for fashion or model photography where your subject fills the middle of your frame, and you don’t really care as much about the background and outer details of the shot. I personally never use this.
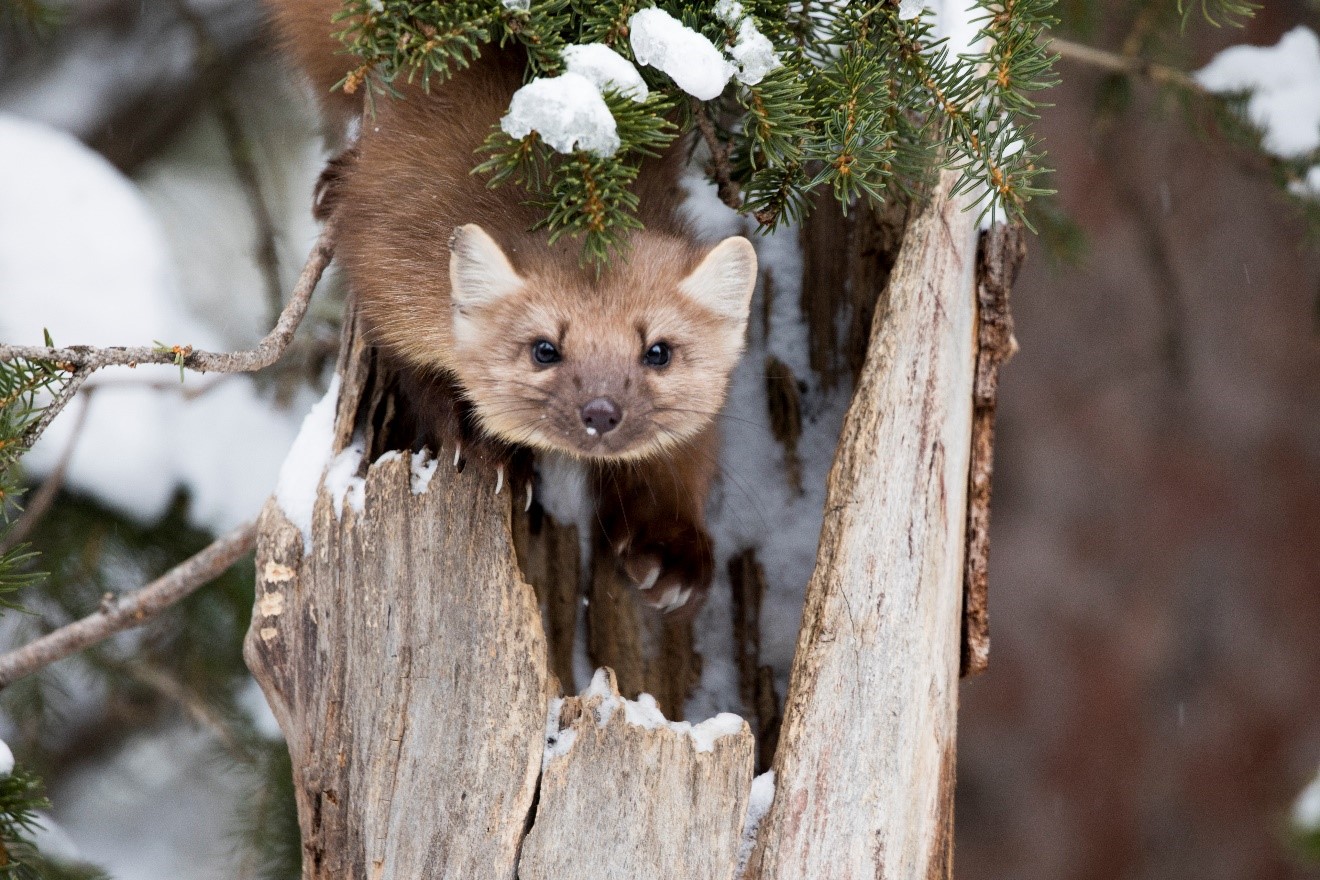
Spot-metering: This tells your camera you only want the PRECISE middle of the frame to be considered for your proper 18% gray exposure. It’s like center-weighted, but way smaller and more precise. This is great for small wildlife tucked inside trees or bushes, where the rest of the frame may be too dark or too light, and you really just want to focus on the animal. I use this for bird photography, as well as night photography. But, this still only represents only about 2% of my shots.
Here is an excellent example of what I’m talking about from the website “The Photography Blogger.” The red represents what part of the frame is considered by the camera on each mode. Remember, the camera is STILL choosing to exposure for 18% gray, but only for a certain portion of the scene.
So, keeping in mind that the camera is a digital instrument, you can see how the above may affect your shot. For instance, if there is a preponderance of bright spots or shadows in your frame, the type of metering mode you choose can change the exposure.
Exposure Compensation
These are the two most important words in photography when it comes to nailing the proper light in your photography. Exposure Compensation. Like I said, your camera gets this right more than 50% of the time…heck, maybe even 75% of the time, but not ALL the time. So, what can you do? Exposure compensation!
If you aren’t familiar with how to adjust your camera’s exposure compensation, I implore you to check your camera’s manual and memorize this before your next photo adventure. Live it, breathe it, and become a better photographer overnight.
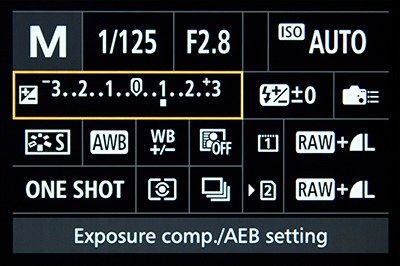
In essence, by changing the exposure compensation on your camera, you’re telling your camera that you want either more or less light in the shot. It’s really that simple. Dialing your exposure to the positive (+) side makes your next photos brighter, and dialing to the negative (-) makes your next photos darker. Note, that it’s not just your 1 next photo, it’s all–you must change back to zero to get an “even” exposure…back to trusty 18% gray.
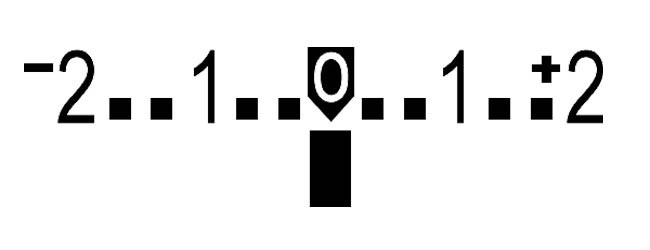
Below is what a traditional Canon exposure compensation meter looks like. This is what you want to get REALLY comfy changing on the fly.
How to Best Use Exposure Compensation
How to best use this tool is of course rather subjective, but my general workflow is to always start on even, which is 0….right in the middle of that meter. Then, I’m very diligent to continually look at my photos as I take them and adjust the exposure meter when needed.
It can be challenging and semi-inaccurate when photographing in bright sun, as it’s hard to tell just from the back of your camera whether it’s perfectly exposed. However, as you get more used to using this tool, you’ll get better and better at seeing when photos need to be “corrected” by adjusting exposure compensation.
Err on the Side of UNDER Exposure
It can be tricky to know if your photos are perfectly exposed. Nowadays with digital cameras, it’s wonderfully easy to review your photos and make small adjustments DURING your photo shoot. However, as I mention above, it can be sometimes misleading. Thus, what are you to do?
In general, I do keep my exposure at zero most of the time. And if the photo is only looking a little dark, I don’t worry about changing the exposure meter because it’s always better to lighten a dark photo than to darken a light photo in lightroom or photoshop. This is just a rule to live by.
So, when do I begin to tinker with the exposure compensation meter?
Generally I start thinking about under or over-exposure when I’m in harsh or difficult lighting conditions. Nice and cloudy days with even lighting is actually the easiest for photography and I rarely need to touch my exposure meter. But on bright, sunny days I’m constantly adjusting. Mainly this is to compensate for photographing wildlife in the sun or in the shadows. However, it’s not always straight forward to under or over-expose based on whether an animal is in the sun or shadows. Sometimes I actually UNDER exposure when an animal is in dense jungle, because I want the scene to look a bit darker. I don’t actually want the photo to be perfectly exposed because it’s supposed to look a little darker. A bit counter-intuitive, eh?
And when animals are in the sun, I’m very sensitive to whether they have any strong highlights on them, such that they look bright white on part of their body. Highlights like these are generally a bad thing, as you lose texture, color, and data in the scene. It’s very hard to correct this in photoshop.
Thus, there is no golden rule I can give you about when exactly to over or under exposure. But, again, I’ll tell you when in doubt, always leave your image a little darker than you think instead of a little too bright, because it’s always easier to lighten a dark photo than to darken a photo that’s too bright.
Summary
As you can see, this is a somewhat complicated topic. However, it’s one of the most important things to learn, as it can improve your photography near-instantly. If you spend any time with your camera’s manual, do so to learn how to quickly change your exposure compensation. And if there’s anything you begin practicing with in your photography, it’s this–take a photo on zero, then take the same photo over and under-exposed. Begin to see the difference and the power of each little adjustment you make.
Lastly, when not entirely sure of your decision, stick with a photo that’s a little too dark than a little too light.
Now go forward and give it a shot!
Cheers,

Court
1 Comment

Abhijit Choudhury
November 18, 2020 at 12:16 am
Very informative