
Tried and True Techniques for Wildlife Portrait Photos in Africa
There is a lot to love about Africa Photo Safaris and there’s virtually no wrong time to go to Africa to revel in the grandeur of some of the world’s largest land animals. Between elephants, giraffes, and more antelope species that you ever imagined, there is no shortage of captivating wildlife.
However, the predators often play a special role in any safari, often being the most charismatic, regal, and cherished photos. Follow these simple tips to maximize your potential when photographing Africa’s most coveted wildlife sightings.
Get in position
Fortunately there are many, many places to go in Africa to ensure top-notch chances of encountering (and photographing) lions, leopards, wild dogs, etc. However, the way you travel in Africa can be quite different between safari operators and photo tour companies. While the first step to getting the above photo is getting to Africa, your first step really is to ask the right questions about seasonality, safari parks, permits, off-road regulations, etc., as these do play a big role in the types of chances you’ll have. Going with a specialized photo tour is a great start, but you’ll still want to be sure you have expert leadership, plenty of room in the safari trucks, etc.
Lens selection
So, that’s obviously a big #1 step, but once you get yourself in position (which is ultimately up to your guides) you’ll want to have a few tools at the ready to ensure you’re getting a shot you’re thrilled with.
You’ll want to have the right lens with you and on your camera. I tend to prefer zoom telephotos vs. fixed lenses, as they’re usually smaller, lighter, and more versatile. And those that have come out in recent years are astonishingly sharp, which has been a long-time criticism vs. prime lenses.
Generally for African safaris, you’ll want to have at least a 400mm full-frame equivalent. That means if you have a full-frame camera (generally the higher-end DSLRs), you’ll need something 400mm. But the good news is that for those of you with mirrorless or crop-frame cameras, you can likely get a lens at a lower focal length because of the conversion factor built into the camera itself (most mirrorless cameras are a 2x conversion and most crop frame DSLRs are 1.5 or 1.6x conversions).
Thus, a 300mm lens on a mirrorless or crop frame could be quite alright. Of course the more zoom you have the more possibilities you’ll have for stellar shots, but there is a diminishing return on this, as you’ll also have more to lug and swing around from side to side when framing up a shot. Or, in cases when wildlife is closer than expected, you may wind up with a shot of the lion’s eyeball when you really wanted the entire face.
For those that have point and shoot cameras, we’re generally looking for a zoom range of 20x zoom at least. Many advanced point and shoots are now clocking in at 40x and 50x, which is more than ample.
Zoom telephotos vs. big prime lenses
While I do appreciate the flexibility and portability of a smaller zoom telephoto, like a 100-400mm, 80-400mm, or 200-500mm, don’t underestimate the brilliance of a spectacular prime lens like a 300mm, 400mm, or 500mm at f/2.8 or f/4. While you don’t often need big apertures like f/2.8 for light, it does greatly help greatly with blurring the background of shots. However, these lenses can be quite pricey, so if you’re not familiar with them you might be better off sticking with something like a 100-400mm zoom telephoto.
Camera settings
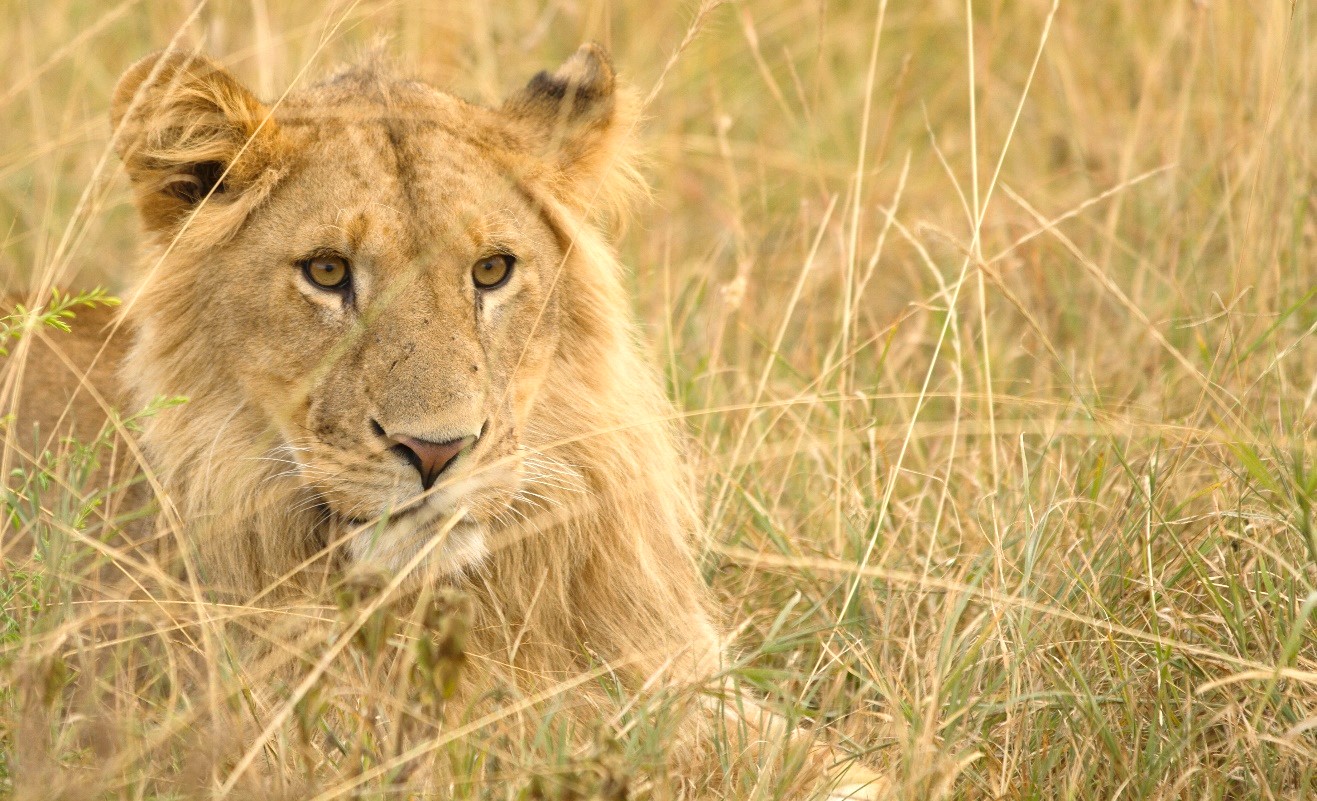
As you can see from the above photo, there is often a lot of brush and grass that can be distracting. And the truth is, lots of shots aren’t going to be perfect simply because animals rest where they want to rest, and it’s up to you the photographer to make lemonade out of what the environment gives you.
This is where camera settings can help. Regardless of the lens you have, I recommend shooting nearly “wide open,” which means dialing your aperture to the smallest number possible. This functions to draw focus to what IS in focus, which in this case is the portraiture of the animal.
Getting back to those big prime lenses I talk about in the previous section, this is where they have a clear advantage. Because they have fewer working parts (gross oversimplification), they’re able to have significantly larger apertures (capable of smaller f/stop numbers) so you can get a lot more intentional blur. Next time you’re reading a National Geographic or seeing some truly stellar wildlife photography, take notice of how beautiful the blur is either in front of or behind the animal—this is what a big, fancy prime lens will get you. It’s actually quite remarkable.
Taking the shots
So you’ve got yourself in front of an awesome African animal and you have the right lens. You have your aperture at the smallest number, and you’re lining up your photo. Do you just fire away and take a million photos? Well, not really, but kinda.
On one hand, you definitely want to take lots of shots, and preferably in burst mode, which on fancier cameras will take 4-10 frames per second. This is good!
But on the other hand, if you’re sitting at a majestic lion for an hour, you’ll want to be deliberate about what and when you take those bursts of photos. Photographing the whole time will just be too much of the same thing.
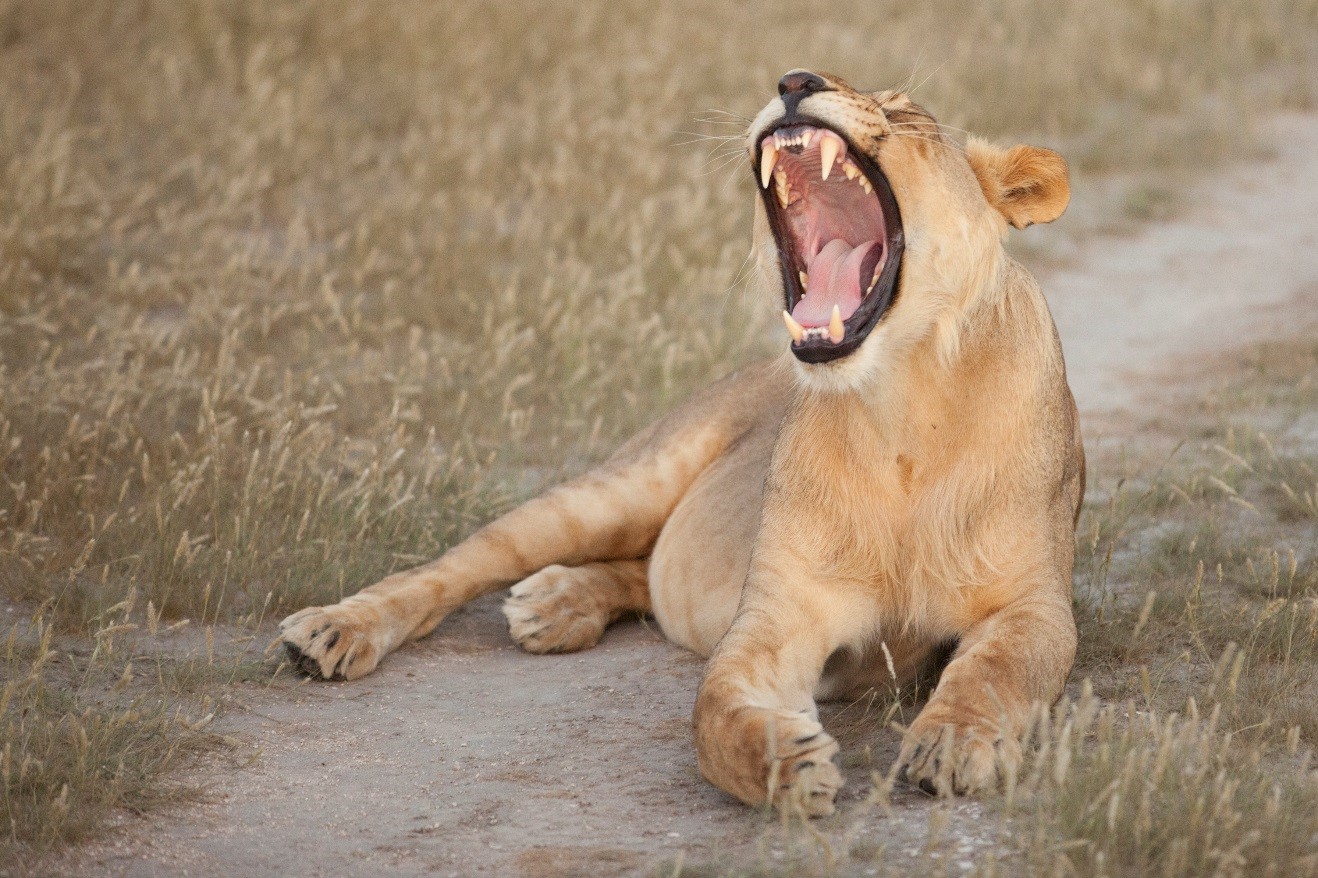
Oftentimes when you get a cooperative lion or leopard (or fill in the blank for what extraordinary wildlife you may encounter in Africa), you’ll have time to photograph it as it stands, sits, rests, or whatever it’s doing to give you this close-up portrait-style photo. However, what I’ll personally recommend is that you pay particular attention to when (and if) it does something else. Often the moments right as it begins to stand, or roll over, or begin to groom itself (or better yet, one of its cubs!) are the most photogenic.
Thus, you really can’t ever let your guard down. Be ready, because those moments happen, and that’s how folks get on the cover of National Geographic—patience and opportunity.
Processing and editing for the finished product
This is definitely not the time nor the place to go into pages of detail on the many techniques and beliefs on how much or how little you should edit your photos. But what I will tell you is that you really ought to spend a little time on every photo, even if it’s just to crop a little, bring the attention more on your subject in line with composition rules, or to lighten a little, darken slightly, etc. Remember, darkroom techniques in film days used to be a huge part of the art behind photography, and it’s still a key part of the process.
Personally, with every photo I ultimately deem a “keeper, I look at 1) the composition and crop if needed, 2) the white balance, 3) color saturation, 4) exposure, and in some cases the shadows and highlights. I may tweak each of these slightly to ultimately get the photo to look more like what I remember it to appear the day I snapped it.
And because we’re talking primarily about wildlife portraits here, I think we can indeed get a little artsy—think about the qualities you like about human portraits…mysterious, charismatic, vibrant, austere?
When it comes to those close-up fill-the-frame shots of big animals in Africa, I feel like this is where the eye behind the camera really has a chance to shine. Be deliberate, be creative, and you’ll be even more thrilled with your photos and memories of an extraordinary expedition.
Cheers,

Court
Leave a reply