Tips and Tricks for Photographing Mountain Gorillas in East Africa
An opportunity to photograph mountain gorillas in either Uganda or Rwanda is a life-long dream for most wildlife and nature photographers. Between the raw beauty, charisma, and proximity with which you can photograph these amazing primates, it’s sure to be one of the most spectacular and dramatic photographic moments of your life.
If you’re headed on a primate safari to either Uganda and/or Rwanda, be sure to consider these tips and tricks, as they are quite critical to capturing the best photos in this most unique of encounters.
Focus out the brush
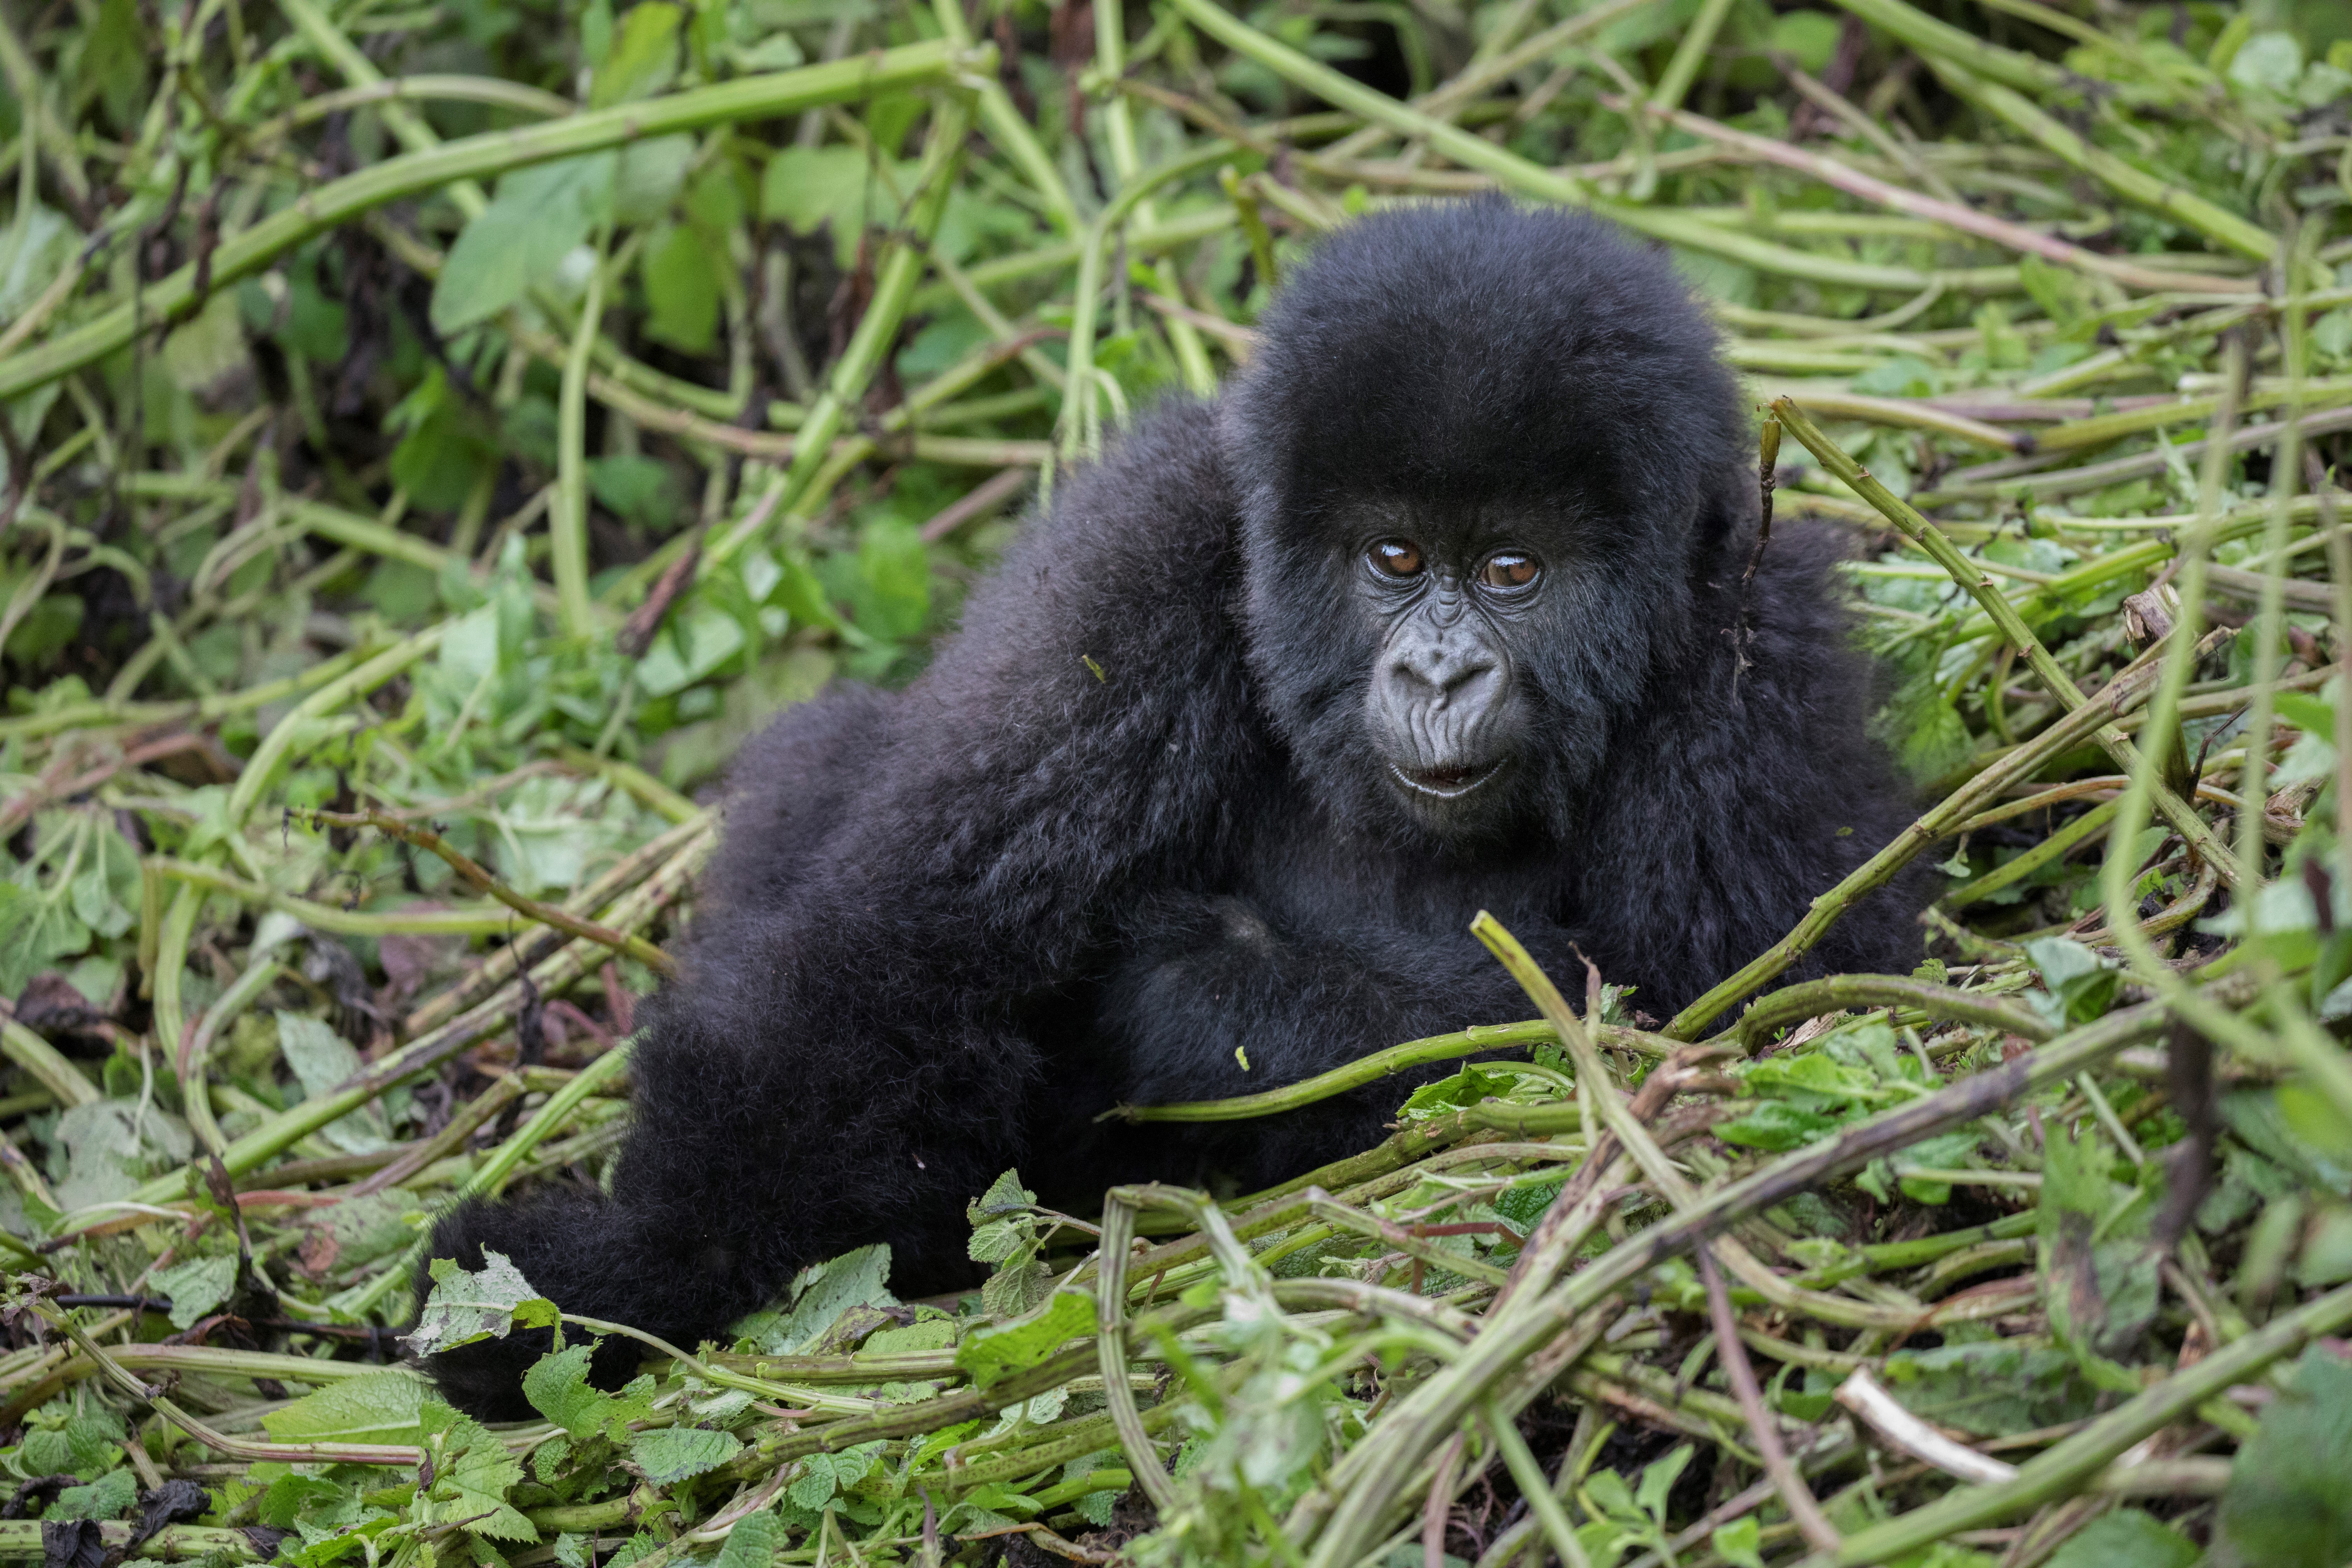
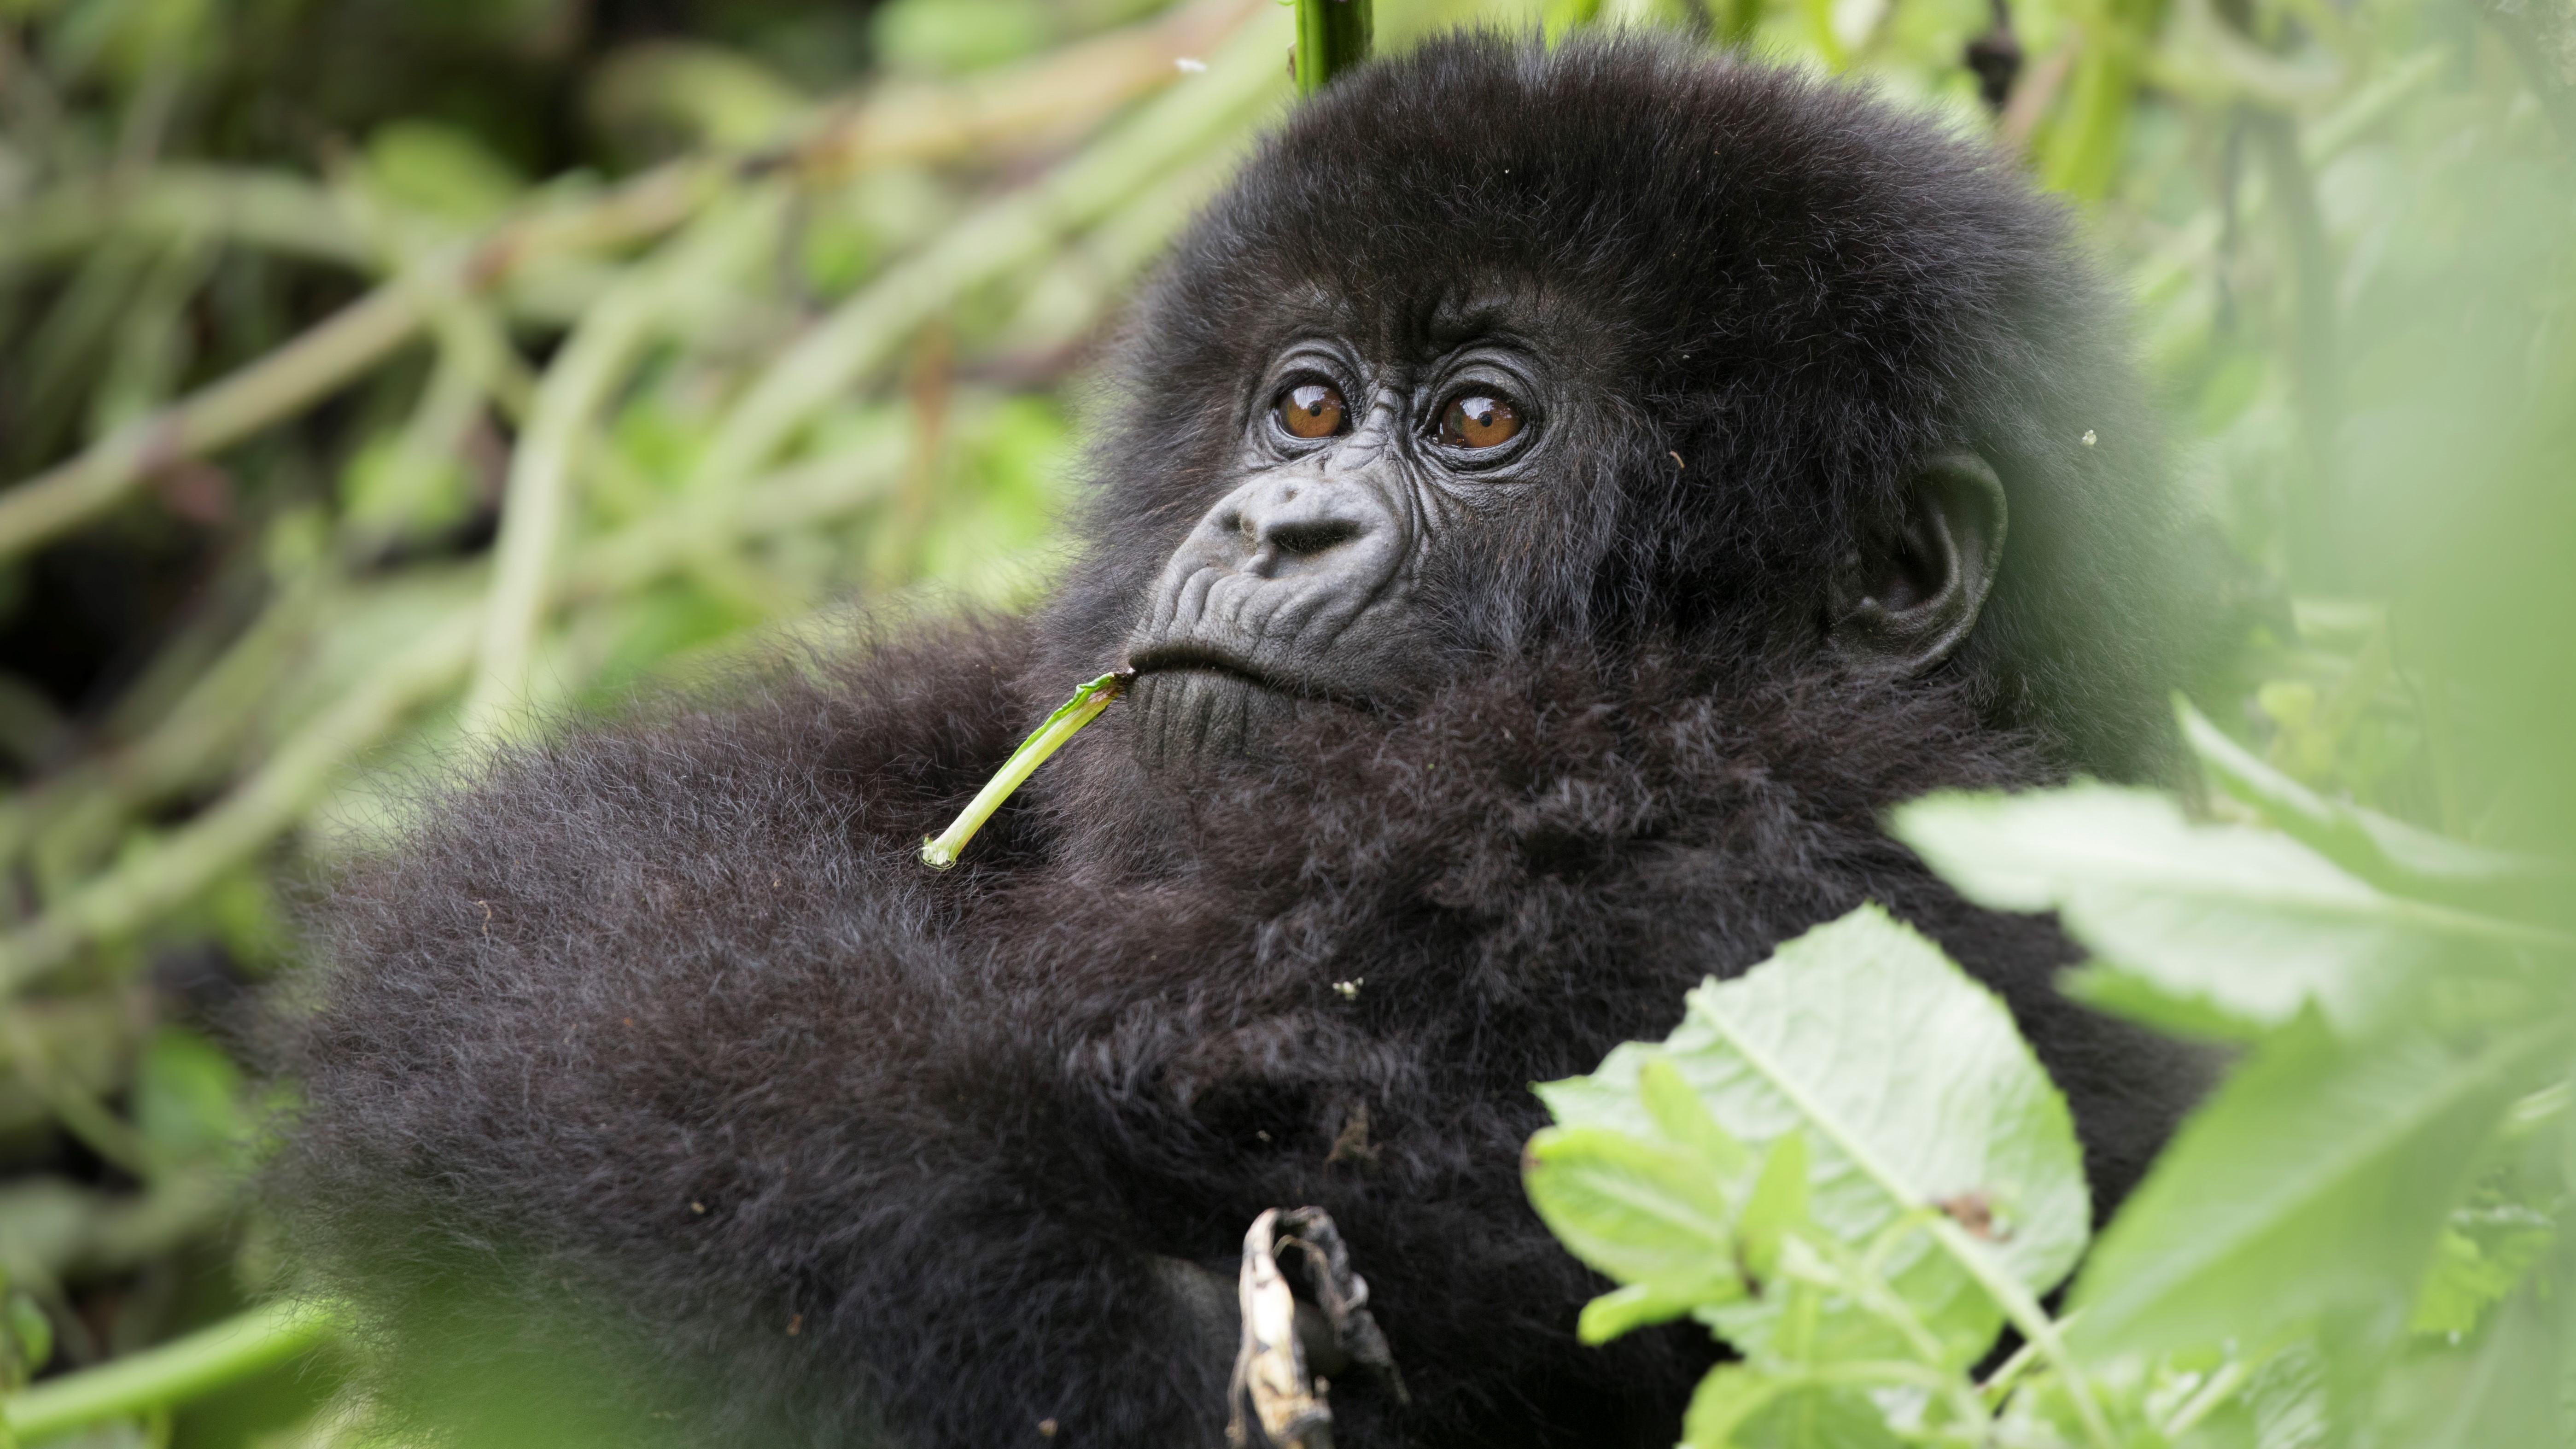
I love the above photo, of the baby gorillas posing in the brush. However, it does serve to illustrate a certain point. The brush and foliage is wildly dense and is often highly textured and prominent in the scene. While it’s unique and beautiful in its own way, it can be quite distracting.
Focusing out the brush and foliage can be quite a challenge when photographing mountain gorillas.
However, there are tricks and techniques to really highlight your subject and dumb down the background (or foreground).
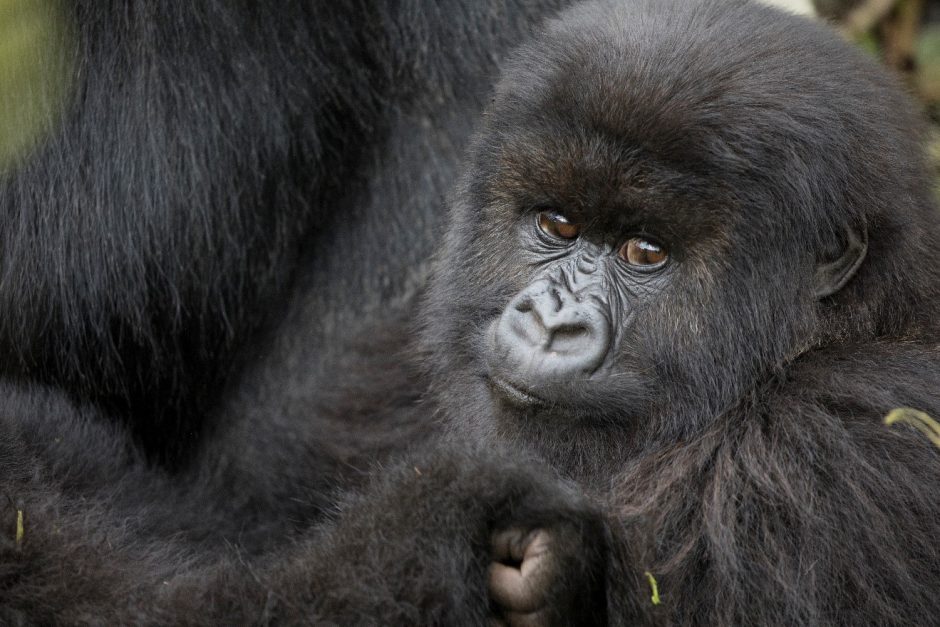
One way is to “fill the frame” with the animal itself. In the above photo, I used a telephoto 100-400mm lens on a full frame camera to minimize how much background is actually showing in the photo. This can REALLY help minimize the distraction, by reducing such foliage and brush.
Another way is to use a shallow depth of field and/or telephoto lens. Lenses like the venerable 70-200mm f/2.8 are ideal for photographing mountain gorillas in their natural habitat. For one, they allow you to fill the frame, like the above. But perhaps more importantly, they allow for that shallow depth of field to blur out the background. Between the 200mm focal length and shallow f/2.8, the background just melts away.
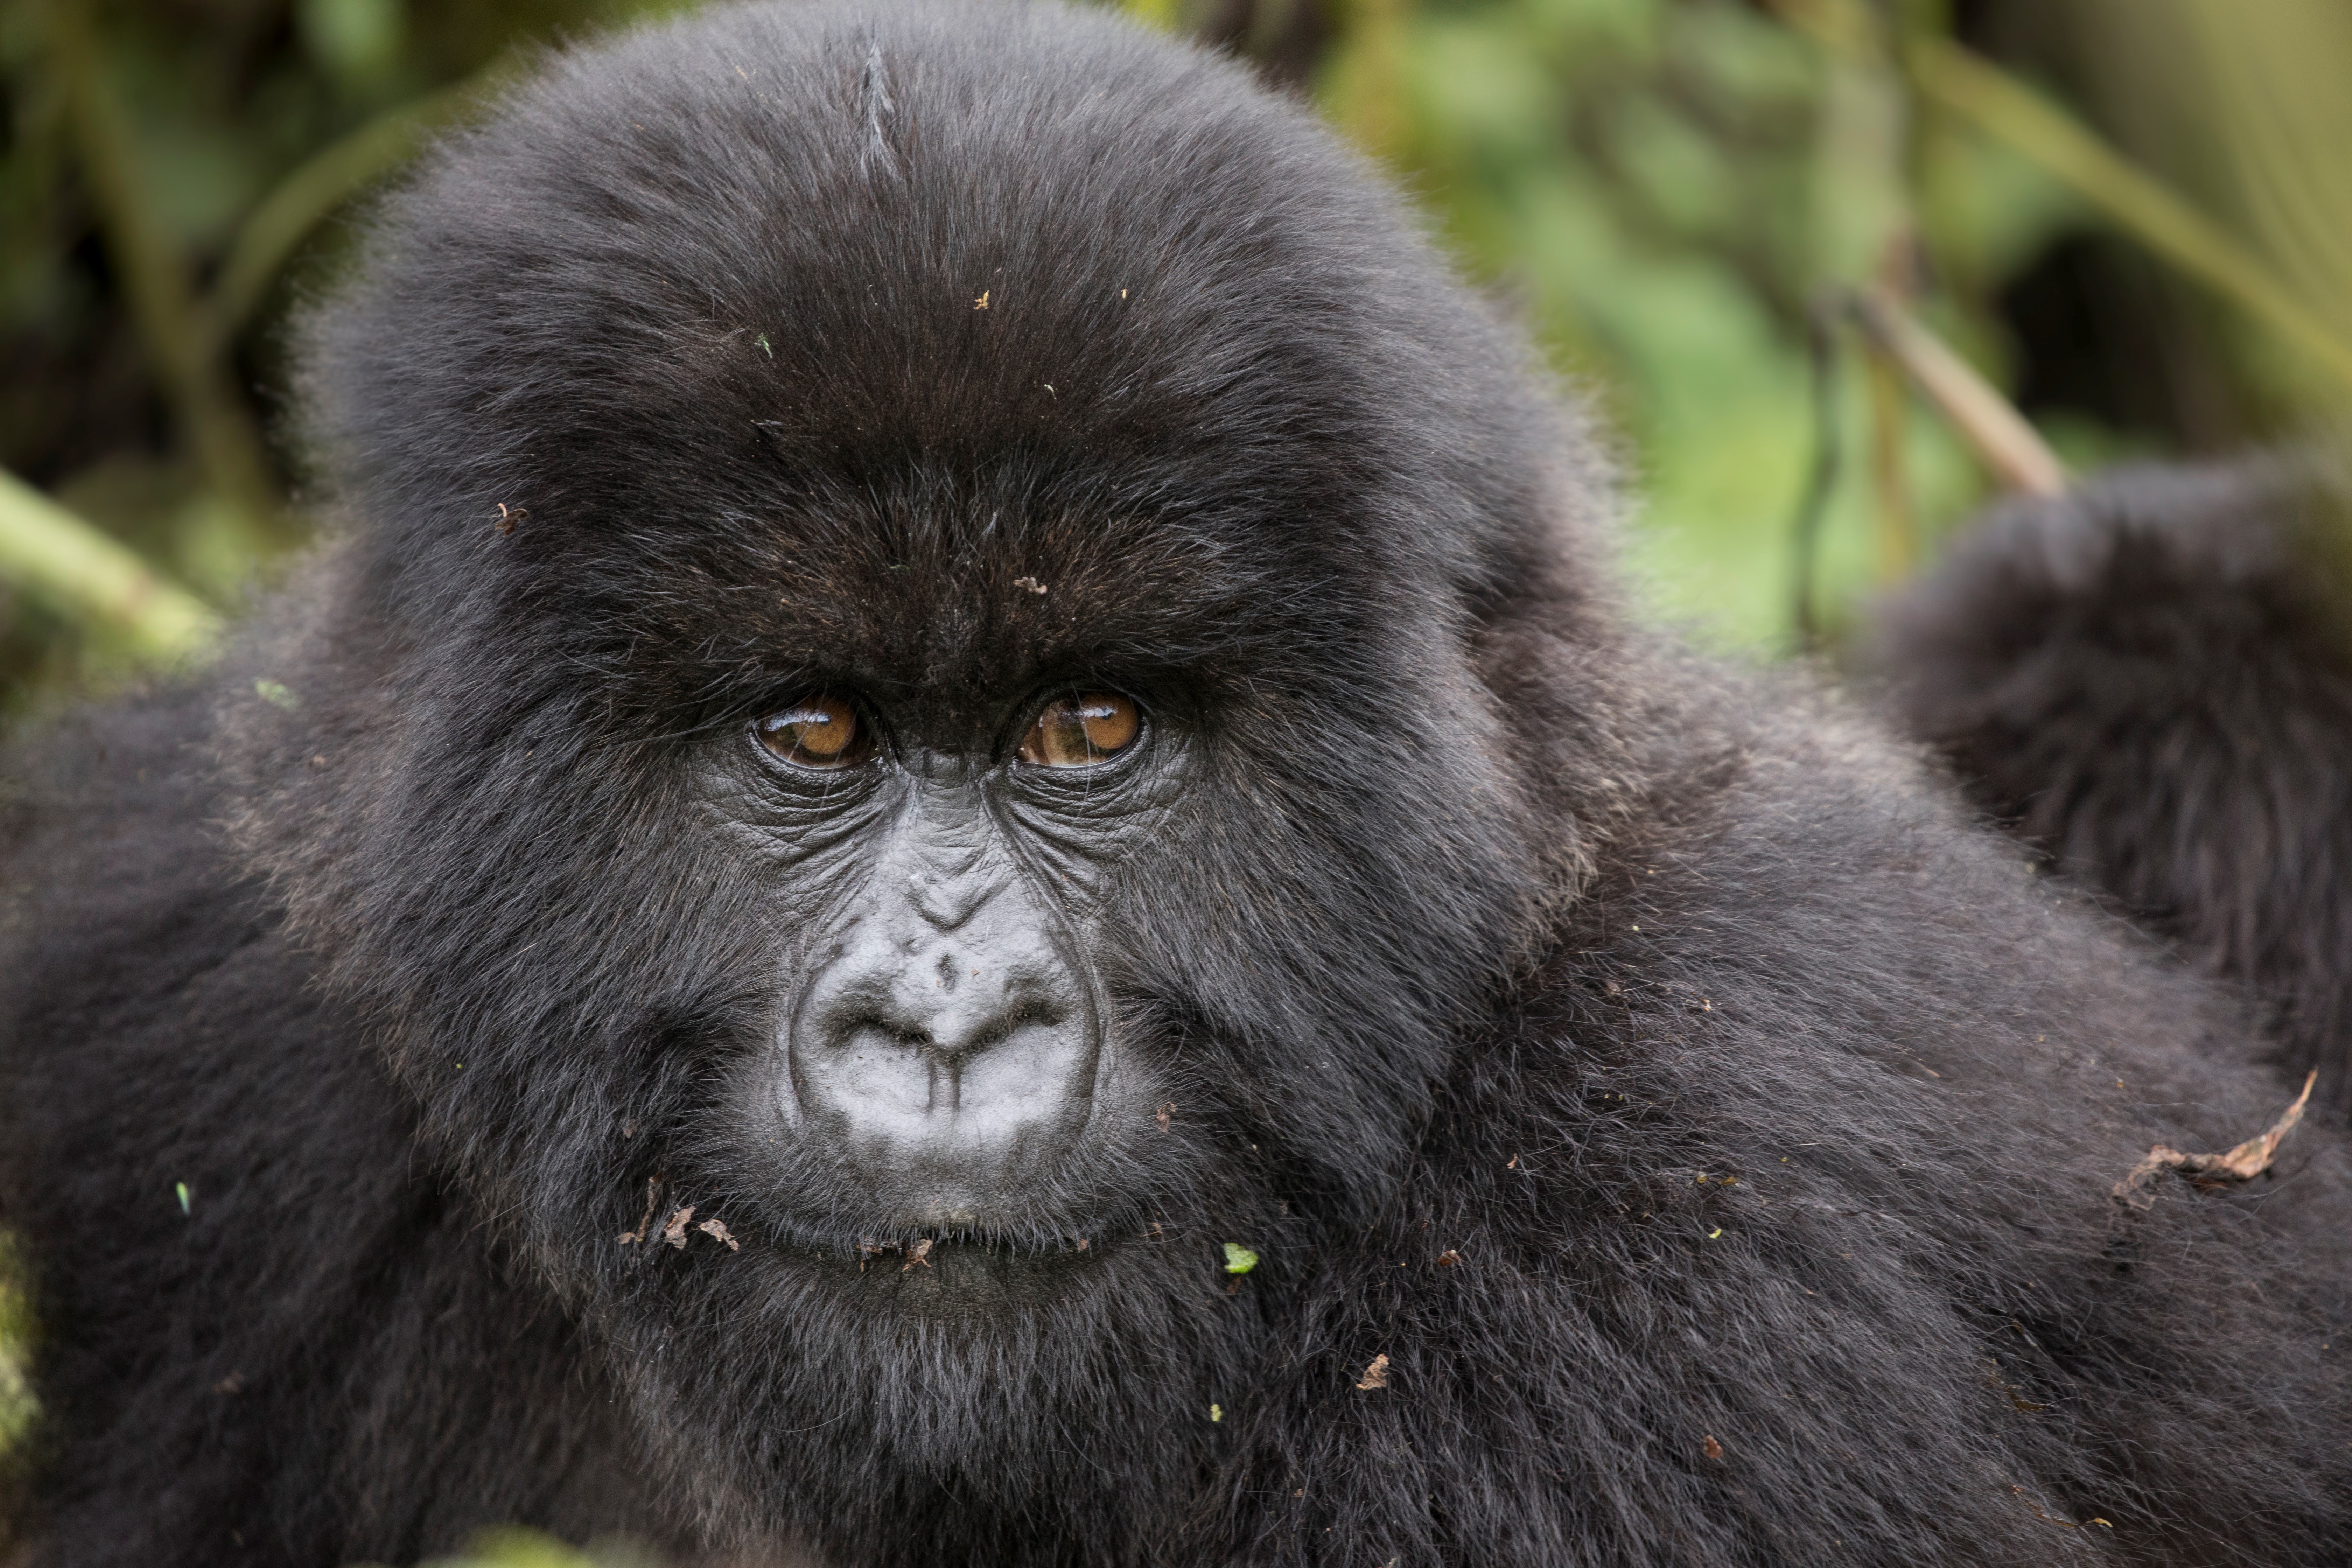
As a last resort, I’ll use photoshop to manually blur out part of the photo. This helps direct the viewer’s eyes to the key part of the scene, which is usually the face and eyes of the gorilla. You can tell pretty easily that the above is photoshopped to add blur, and it’s not ideal in all situations. But I do generally prefer a nice bokeh in the background, even if a little suspect, vs. lots of distraction.
Pay attention to exposure compensation
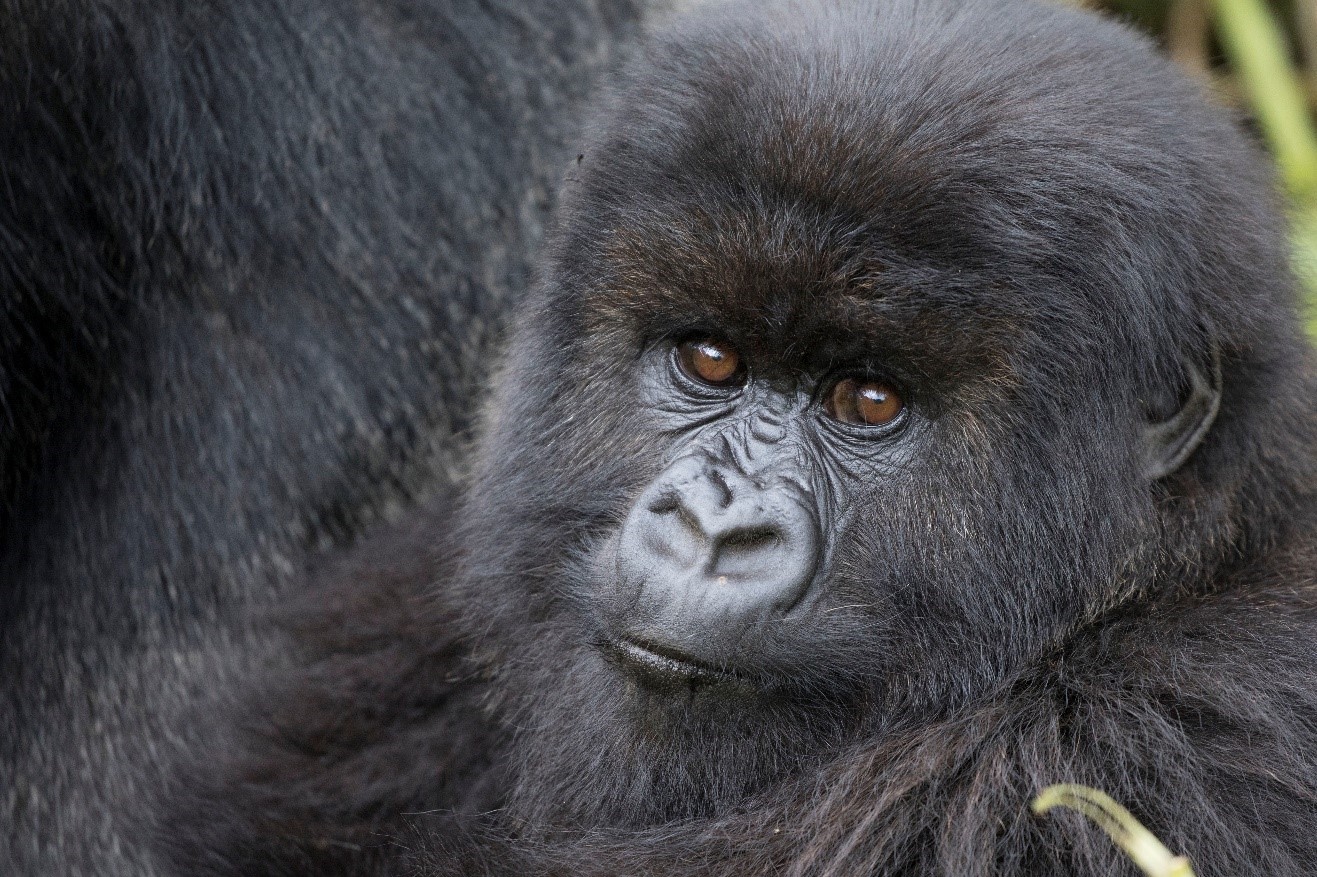
Anytime you are photographing wildlife that have dominant, uniform coloration, whether it be polar bears in the arctic, brown bears in Alaska, or gorillas in Africa, you must think about adjusting your exposure compensation.

Unless you’re shooting on full manual, your camera will “evaluate” the scene for you and choose what it thinks is an appropriate exposure. That is, the camera chooses how light or dark the overall scene is. Because the camera is a digital instrument, it doesn’t take into account whether or not you actually want the animal to look overly bright, like a polar bear, or overly dark, like a gorilla. It just sees all the black and tries to lighten it.
Generally speaking, for gorillas, the amount of black in the scene will cause your camera to artificially lighten the photo beyond where you might want it to be. That is, you WANT the gorilla to look dark, because it IS dark. Thus, be default, you may want to dial your exposure compensation to the negatives, to tell your camera that you’re OK with the photo being a little darker than normal.
Keep in mind, this really only applies to gorilla photos that fill the frame with the dark fur. If you’re photographing a family of gorillas, be ready to dial your exposure compensation back to zero.
And frankly, this isn’t a 100% set-in-stone rule, just something to be aware of and be ready to adjust if things aren’t looking quite right.
Set your white balance accordingly
Although white balance is something you can generally “fix” in photoshop or lightroom, I find it best to get it accurate in-camera. And again, just like the above section, when you have dominant colors in your scene, your camera might not do great choosing settings on its own.
While Auto White Balance (AWB) might be OK, you may want to change your white balance settings to match the environment. For instance, if the gorillas are in a shady habitat, you may want to set it on shady. If it’s a cloudy day, consider setting your white balance on cloudy. Or, if the troop is in full sun, you may want to set your white balance on sunny.
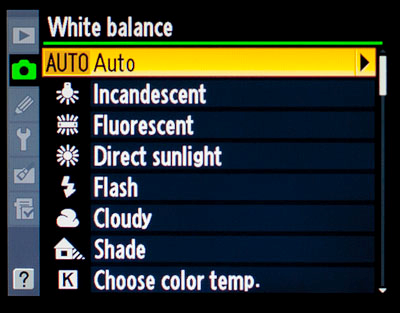
By changing each of these settings, you’re affecting the color temperature and injecting either more blue or more yellow into your scene. So, while it’s a good starting point to match your white balance to the actual environmental conditions, you may prefer to add more yellow into your scene regardless of the environment. This would be called a “warming effect” and is akin to putting a warming filter on your lens back in the day. The other end is a “cooling effect” to add more a blue tone to the photo.

So, now you’re ready to get out there and photograph some exquisite mountain gorillas! Also, take a look at my article on the best camera gear to bring with you on a gorilla safari to fill in the rest of the picture!
Cheers,

Court
15 Comments

Annette
September 18, 2022 at 4:54 am

Court Whelan, Ph.D.
September 20, 2022 at 11:09 am

Destination Uganda
October 18, 2022 at 4:36 am

Gorilla Tour
November 2, 2022 at 7:01 am

Sarah
March 20, 2023 at 2:19 am

Gerald Eseru
March 25, 2023 at 2:37 am

True Uganda safaris
August 14, 2023 at 8:50 am

True Uganda safaris
August 16, 2023 at 1:48 am

Lynda Avards
March 6, 2024 at 10:01 am

Court Whelan, Ph.D.
March 13, 2024 at 6:27 am

Parker Tom
April 8, 2024 at 3:13 am

Moses Cole
May 6, 2024 at 1:55 am

Court Whelan, Ph.D.
May 7, 2024 at 2:08 pm

Lynette Answorth
June 5, 2024 at 3:20 am

Court Whelan, Ph.D.
June 21, 2024 at 7:50 am
Just learnt many tips, i was only aware of “don’t use flash lights” when photographing mountain gorillas. I guess there tips were meant for professionals but, i will also utilize them on my next encounter with mountain gorillas!!
Good job Mr. Whelan.
thanks, Annette!!
Mountain gorillas are exceptional and incredible. Thank you for this detailed species and its helpful.
There’s much needed information you just shared about such incredible species and man’s closest relative. These are amazing images too.
Mountain gorillas are by-far the best primates to see on a Safari to Africa. Thank you for sharing this with the world
thanks for the article i really love mount gorillas
very perfect article thanks for sharing it with us.
very perfect article thanks for sharing it with us.
This is greatly informative. There’s much information you shared aboutthis unique and awesomely incredible species that happens to be man’s closest relative. These Mountain gorillas are by-far the best primates to see on a Safari to Africa. Thank you for sharing!
thanks, Lynda!
This post deserves the praise above. Thank you for sharing this and I will share it with my friend on my platforms.
A well written and researched piece. Thank you for the information. Without a doubt I will make Gorilla tracking a must do on my next visit to Rwanda. Thank you
thanks, Moses!
You have inspired me to take a vacation when I get some time off. I would love to see the Gorillas and chimpanzees. Thank you for this.
thanks, Lynette!!