How to take Stunning Star Photos
Sometimes called Astrophotography, taking night photos of stars can produce stunning results. However, it’s not without its challenges. Follow these tips to go straight to the front of the line and capture photos you’re happy with and proud of.
The lens
Perhaps the most critical part of the equation is the lens you use. No matter how dark the sky or bright the stars, night photos are very challenging because of the extreme lack of light. You can no doubt get a star shot with a basic kit lens like an 18-55mm f/3.5-5.6, but it’s not going to have any of the same brilliance as if you can get your hands on something like a 24mm f/1.4, 35mm f/1.8, or 50mm f/1.8. The extra amount of light that such lenses let in is truly the difference between an okay shot and a stunning one.
The location
Once you get your hands on a very “fast” lens (a lens f/2.8 or lower), you’ll need to get to a dark location with almost no light pollution. Not only will light pollution shroud the stars and make them less visible, light from nearby cities will also fill the atmosphere with a colored haze, which you don’t want. In some cases, the glow of city lights on the distant horizon can be quite a neat effect, but it really needs to be just a flicker on the horizon, nothing prominent at all.
If you’re planning a trip to the deserts of the SW, it’s a no brainer to try this technique as you will have very limited light pollution. But, there are many other places on our planet equally dark. You can check the dark sky probability HERE before your next adventure, wherever it may be.
The technique
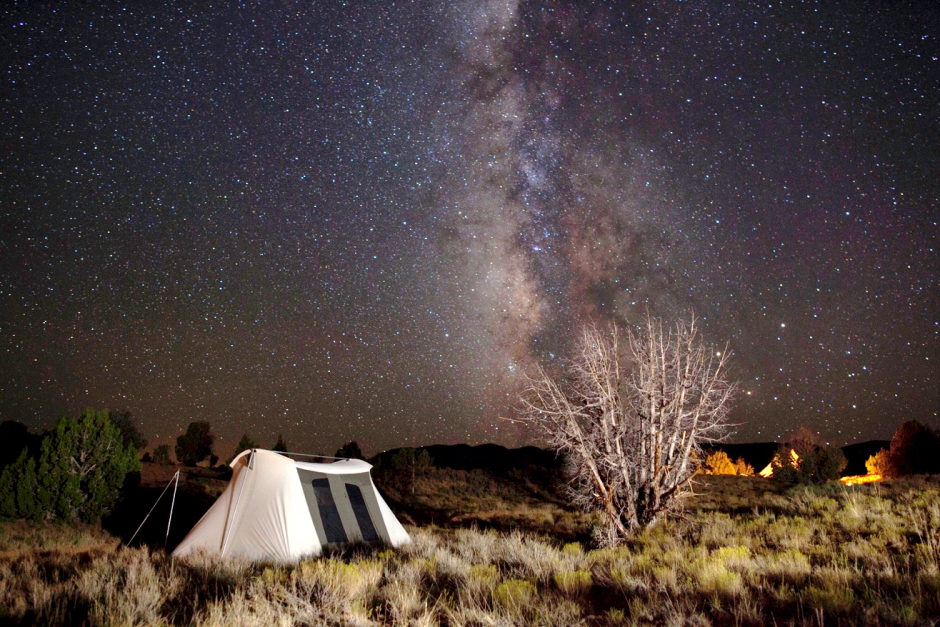
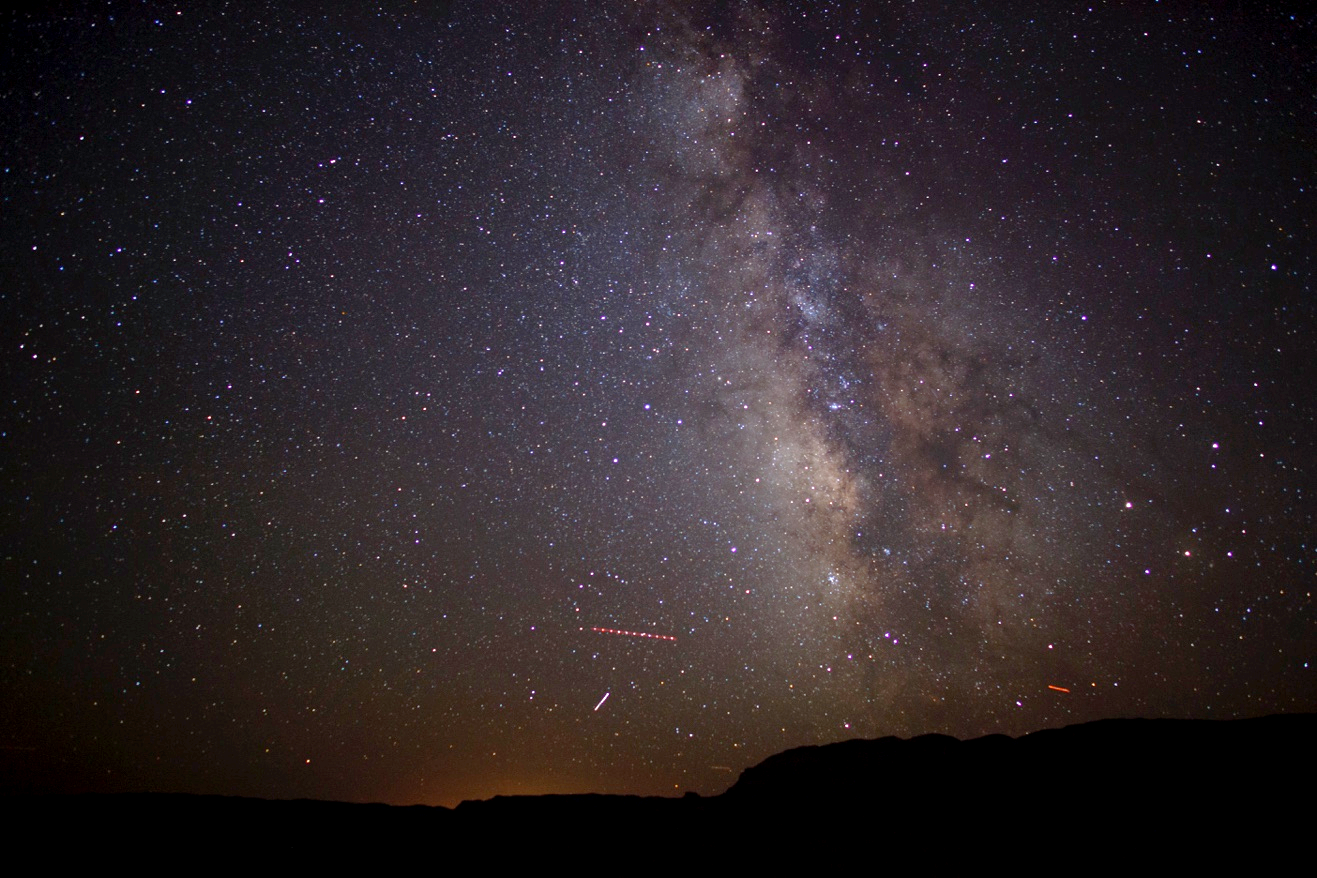
If you’re new to the process, don’t worry about finding the perfect foreground. Just getting the horizon and stars above it is fine as you practice and get better at the technique.
Your camera settings are actually quite simple, and there is very little room for variation. You must be at the widest aperture possible (something around f/1.4 or f/2.8…nothing higher will work) and you cannot shoot slower than about 25 seconds. Because of this combination, using the manual mode on your camera (M) is best. The only thing you really can play with is your ISO. However, I’ll caution you as it’s easy to take the photo and review it in the camera, only to find out when you put it on the computer that you used too high of an ISO and the photo is really grainy. Newer cameras can go up to ISO 6400 or even higher, but do your best to stick to around ISO 800 to 2500.
One issue with shutter speed is that if you let your camera go too long, the actual rotation of the earth will blur the stars. This usually starts to happen at around 30 seconds, but if you want to get sciency about it, it occurs at around 500/the focal length of your lens. E.g., 500/24mm ~ 20 seconds. For longer lenses you begin to notice it even sooner.
I start with my camera settings at 24mm, f/1.4, 20 seconds, ISO 2000, and then experiment to fine tune the photo.
Where to focus?
Focusing is perhaps the most difficult and frustrating part of night/star photography. You’re already working in the dark, fumbling around with camera settings, and now you have to find something in the pitch black to focus on. Not easy! And plus, since you’re shooting on a low aperture number, you don’t have much margin for error if you focus on the wrong thing.
Generally what I’ve found to work best is to indeed find a foreground element to involve in the shot. Not only does it produce a better photo with more context and more visual appeal, but it also gives me something to focus on. Typically I try to find something roughly 30 to 40 feet away so that it’s not right in front of my camera. This is to minimize depth of field issues at such low apertures (don’t want the stars to be overly blurry).
One trick is to carry a large flashlight with you, shine it on that object you pick out, and then use “live view” mode on your camera. Then, use manual focus and zoom in on your screen (usually a + or – button somewhere on the back of the camera) to 10x zoom so that you can get tack sharp focus. Then, don’t touch the focus for the rest of your shooting. Keep it on manual and just fire away.
The takeaways
There are no two ways about it, star photography is tough. However, it’s extremely rewarding when you get a beautiful shot and instantly all the trouble is worth the effort. Take a few minutes to find something neat in the foreground, dial your settings in, and pay particular attention to your focus (and review photos as needed to ensure sharpness). Then, as you take your shots, experiment with different ISOs, slightly longer or shorter shutter speeds, or different focus points. With practice and time, you’ll gain confidence and skill to give you perhaps the shot of a lifetime.
Go forward and give it a shot,
Leave a reply