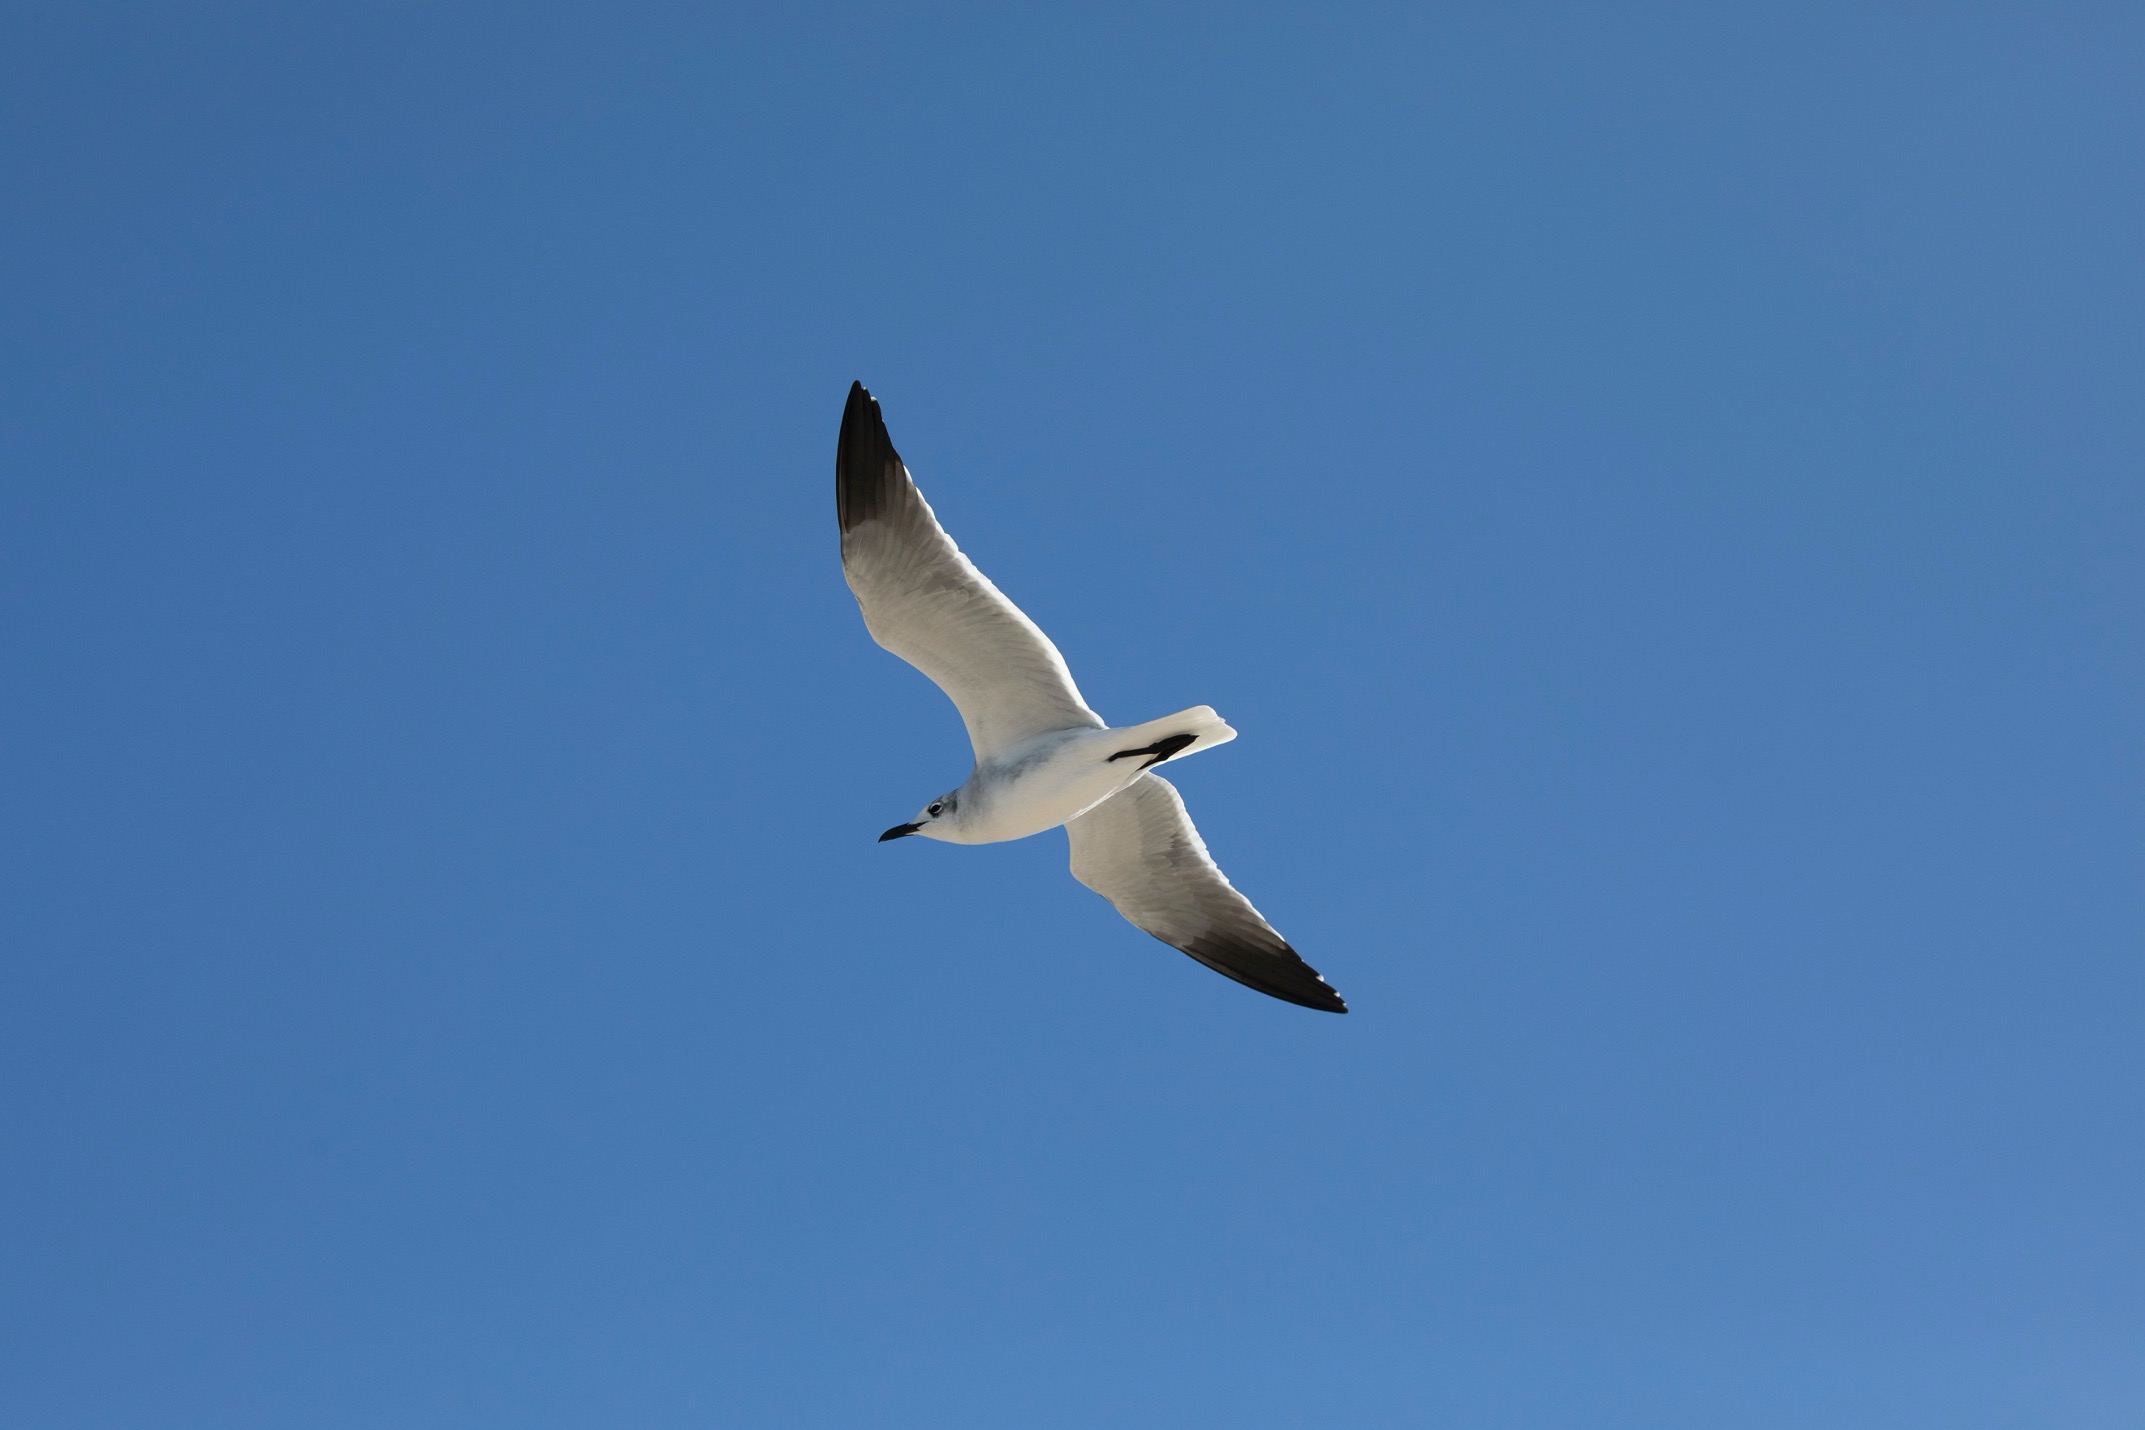
How to Photograph Flying Birds in Florida and Beyond
Photos of soaring birds are generally viewed as the hallmark of a great wildlife photographer. If only people knew how easy it was to master! This tutorial is designed to get you photographing birds-in-flight in no time.
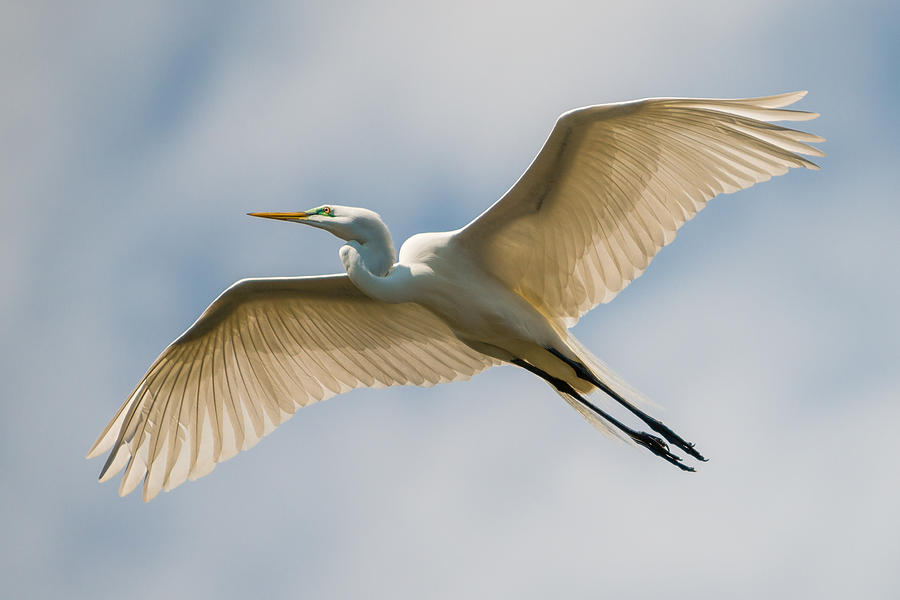
Florida happens to be a particularly great place to photograph flying birds, as the sunshine state boasts some extremely impressive, large birds that look absolutely stunning in flight. In addition, with the sprawling coastlines, big blue skies, estuaries, and grass flats, you get really great lighting and background to your photos.
However, you’ll quickly notice that you can use these techniques anywhere, so whether you’re headed on a Florida Nature Safari or not, these are sure to get you fantastic photos that will have a permanent place in your portfolio.
Step 1 – Find some great subjects
The first thing you’ll need to do is of course get to a place that routinely has birds in flight. While your backyard or local nature park may be a great place, those that are truly wonderful usually allow for big open skies and lots of diverse flight activity.
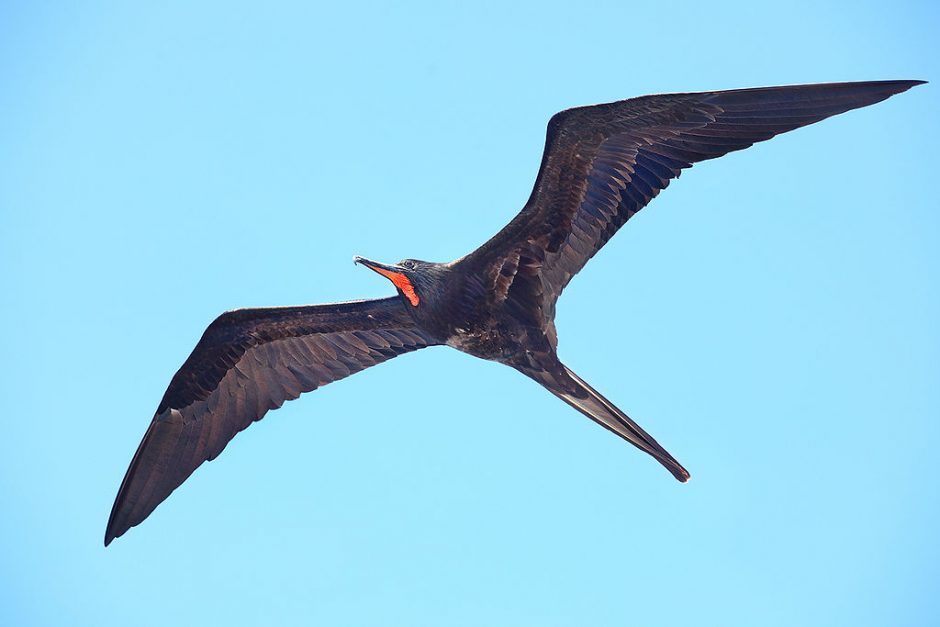
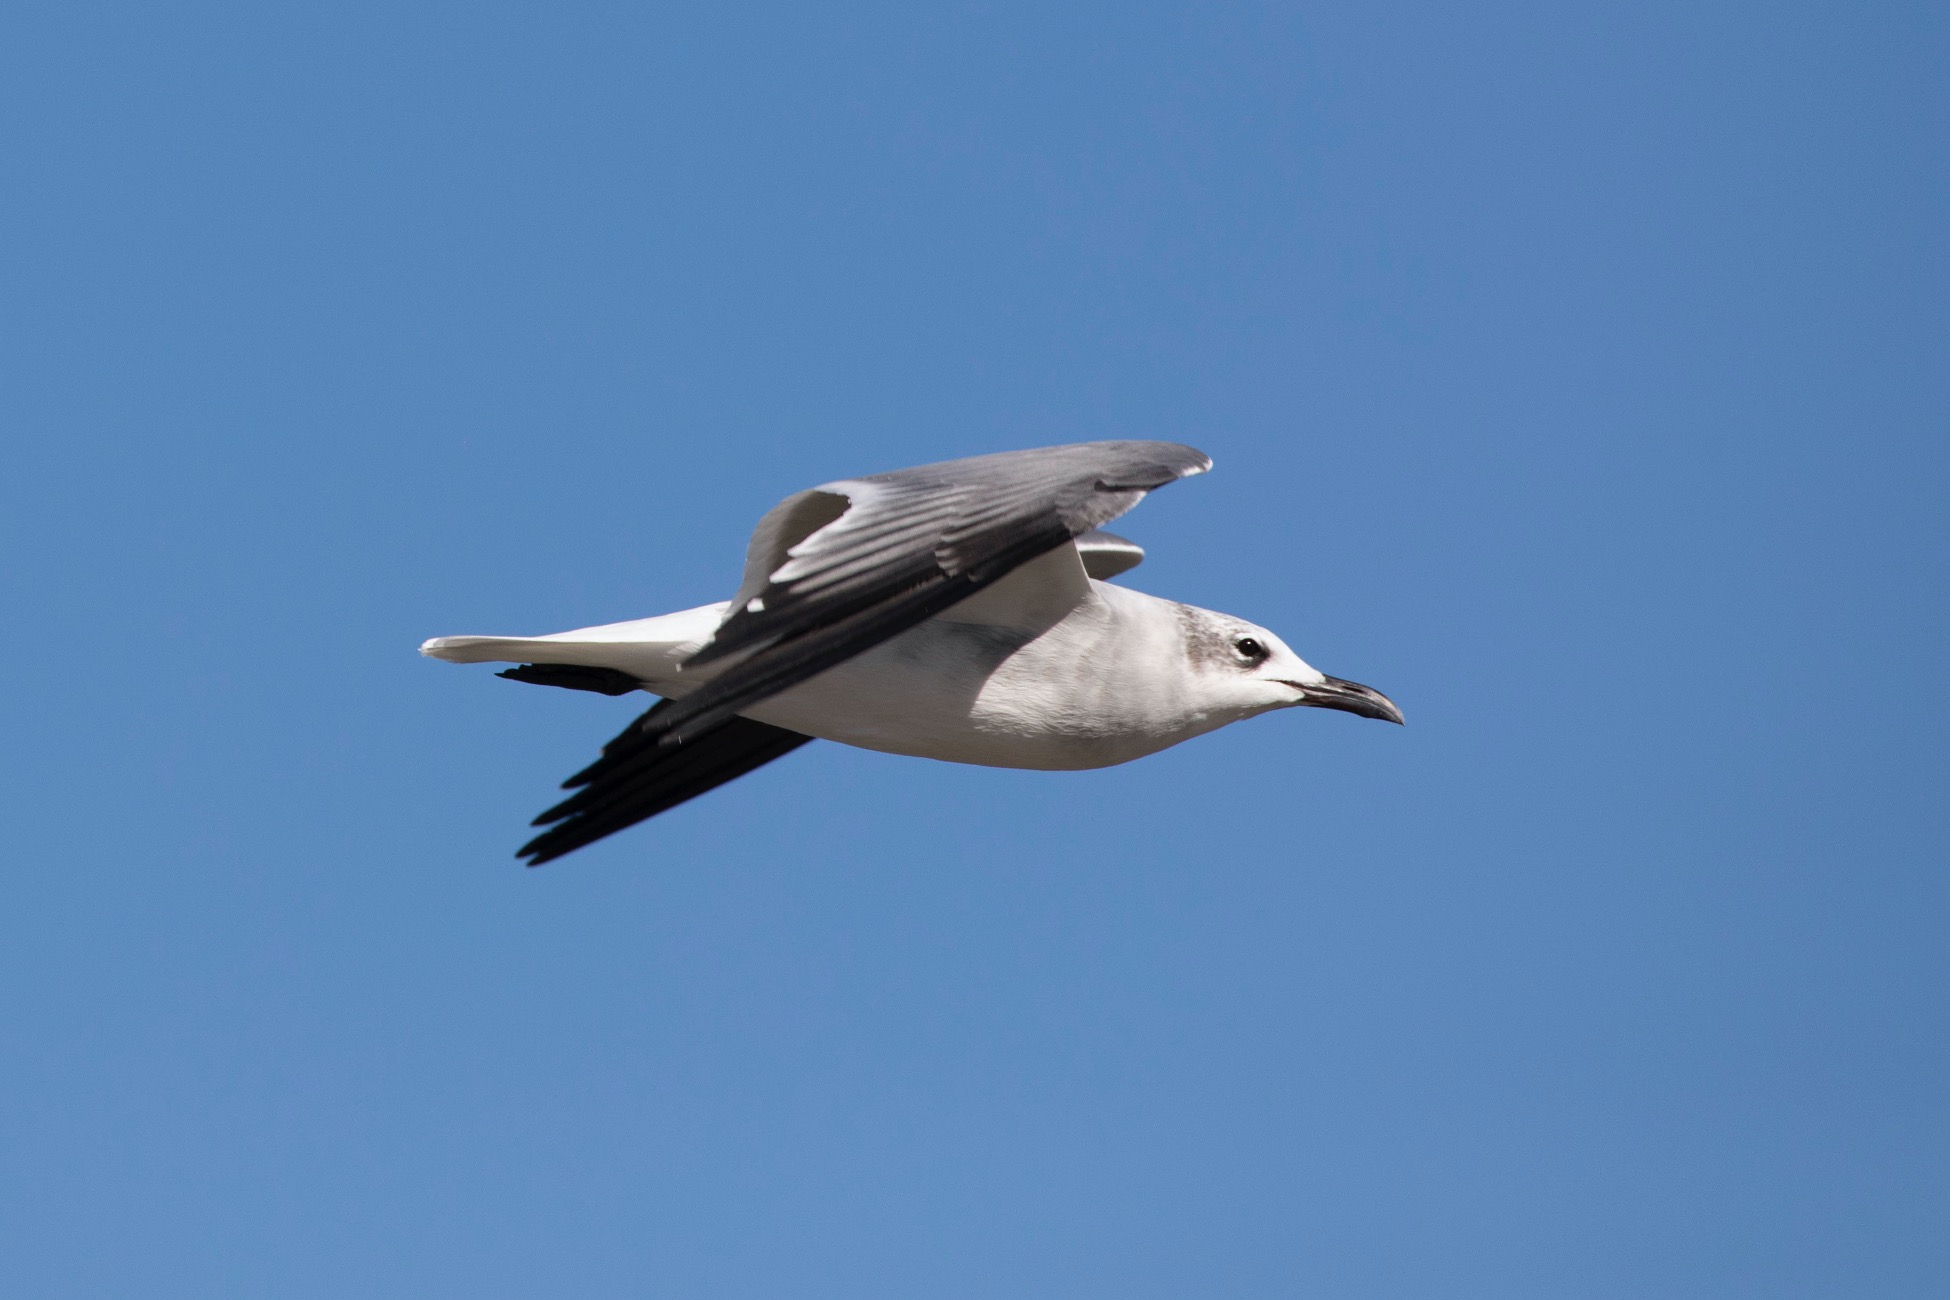
As I mention above, Florida is great for this as you can see and photograph classic flight and soaring, as well as diving behaviors and various bird interactions, too (some birds are kleptoparasitic, meaning that they actively steal fish from other birds, resulting in some interesting bird-photography drama!).
Other good areas are transitional zones from forests to fields. You usually will find smaller birds in these areas, which are a bit more difficult to photograph, but the sheer abundance of bird subjects helps a lot.

Step 2 – Set your focus mode
Different manufacturers call this different things, but basically you want to set your autofocus mode to one that continually focuses and re-focuses as long as you have the shutter held half way. Canon likes to call this “servo” mode and Nikon and Sony call this “continuous.”
Either way, the effect is the same…your camera will continually re-focus on whatever is in your focus zone.
Normally I’m not a fan of this continuous focus mode, as it’s too haywire to predictably focus on my subject. Since I normally have my focus zone permanently set at the dead center of my frame, continuous focus disallows me from locking in focus and then recomposing my photo—a tactic I use all the time to get the composition I want.
However, as you’ll see from the next step, pivoting away from center point autofocus is key to the success of this method.
Step 3 – Set your focus zone
As I said above, normally I’m on center-point autofocus…I don’t want the camera to choose where it focuses…I like to tell it exactly where I want to focus each and every time.
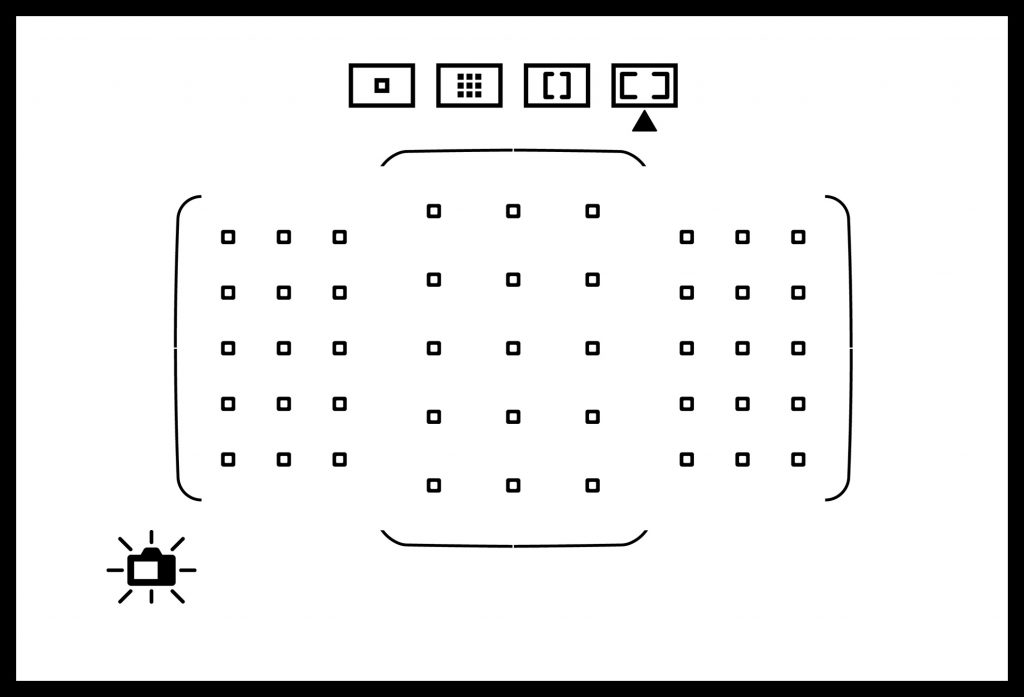
However, with flying birds, you can stack the deck in your favor if you do indeed let the camera do some deciding for you. When paired with a continuous auto-focus, allowing your camera the full frame of focusing options, the camera is remarkably adept at picking out motion and foreground elements like birds.
Note: there are more and more mirrorless cameras today that have “bird photography” settings, which is basically a shortcut to the steps I’m telling you here. If you have one of these newer cameras, definitely use this feature, as it’s a remarkable advantage and will yield some sensational photos.
To repeat, set your auto-focus zone to the entire frame…usually at the exact opposite end of the menu as the single, center-point auto-focus.
Step 4 – Set your drive mode
Your drive mode dictates how many shots your camera can take per second, usually denoted as FPS, or frames per second. By default, your camera is on a moderately fast frame rate, but usually it is not set on the fastest, as it can result in too many photos if you have a heavy shutter finger.
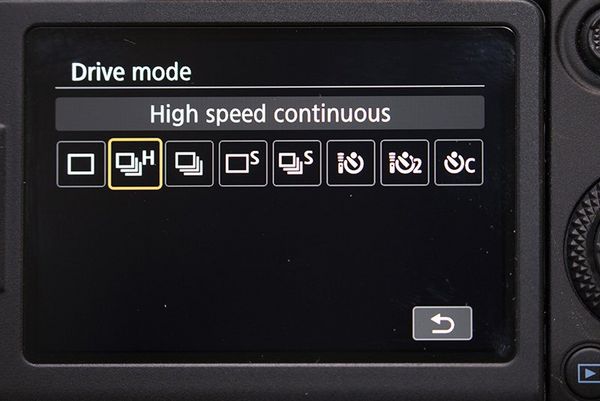
But for these purposes, you indeed want to be able to take many, many photos per second…essentially, as many as you can—hopefully your camera can take 7+ per second.
If you have a camera that can take 30 per second, which is becoming more and more common these days, aim for a FPS of around 10-20, depending on how much time you want to spend sorting through and editing photos.
Step 5 – Set your aperture and shutter speed, and ISO to auto
Not all cameras have equal capabilities at this moment in time to be able to set your ISO to auto, while custom setting your aperture and shutter speed. However, the majority do, and I do advise going this route for photographing birds-in-flight.
To cut to the chase, you want to set your aperture to a reasonably big f/number, so that the entire bird is in focus. I usually go with f/8, which gives me a wide depth of field, but also allows me to still shoot at a very fast shutter speed without requiring a very high ISO.
For shutter speed, I usually aim for 1/1500th of a second. However, I am very mindful of what ISO my camera will give me at this speed and at f/8, so if I find that it’s requiring ISO 1600 or higher, I may dial my shutter speed back slightly. This usually happens if I am shooting in low light, like early mornings or late evenings. Fortunately, for anything during daylight hours, you usually have plenty of light. And again, another reason why Florida is a great place for this…longer days in the migratory season, and big, open skies that let in lots of light.
Step 6 – Track the bird and adjust settings as needed
So now that your camera is on Court’s patented “flying bird mode” you can concentrate on the important stuff…finding and photographing some amazing birds!
There are many ways to capture birds in flight. I find for starters, it’s great to locate some birds that are already flying/soaring to practice with.
However, as you begin to master the technique you can begin to time your photos with birds just as they begin to take flight, from the water or otherwise.
You can also be patient and observant, waiting for interactions among various species of birds (remember the kleptoparasitic thing I was talking about…), and using that fast drive motor to document a set of photos from one particular behavior or interaction.
I hope this has been helpful, and I hope you are headed somewhere (or live somewhere) where you can use these tips and master this technique. Once you have it dialed in, the possibilities are endless and the scope of your photography will continue to grow in splendor!
Cheers, and be well,

Court
Leave a reply