How to Photograph a “Sun Dog”
It’s winter, which means that if you haven’t seen already, you may soon witness this odd white, cold, powder floating down from the sky, blanketing the ground in a pillowy spectacle. When the temperatures start to drop and the snow begins to fall, there is another thing that may be looming after the storm. On clear sky days in cold environments, keep your eyes on the sky as a sun dog could appear!
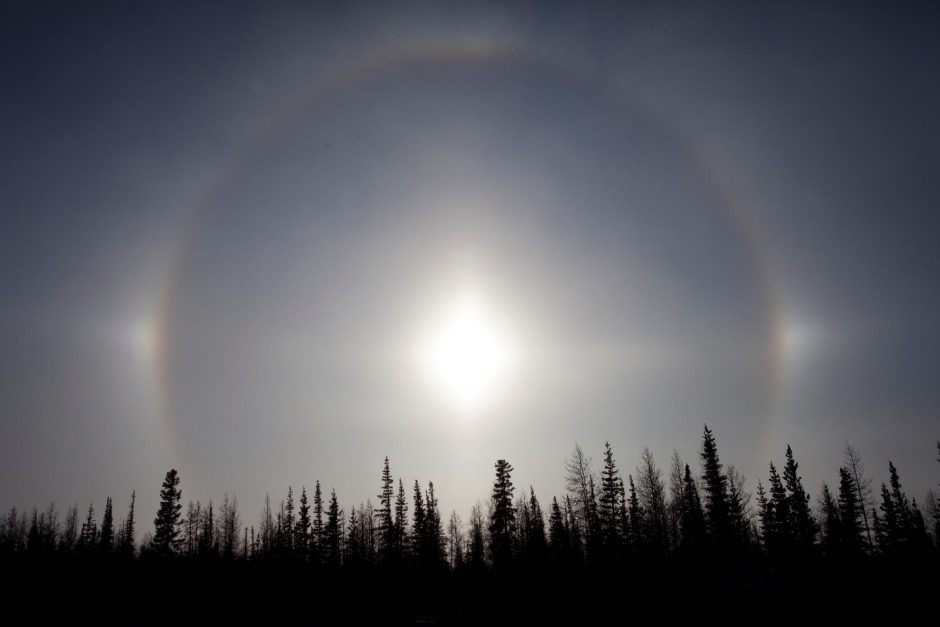
Typically formed as a result of high altitude ice crystals, a geometric prism begins to encircle the sun. It’s truly a sight to behold, and often a routine sighting in the far north on northern photographic expeditions.
What we’d like to discuss here is how to properly capture this in your camera, as anytime you’re photographing directly at the sun, challenges arise. Rather than review all the potential challenges, I aim to give you two quick solutions and methods for photographing this beautiful atmospheric phenomenon.
The trick is to make sure that you have proper exposure. That is, the right balance of light and dark. If you over expose, that means you’ll get the photo way too bright, and you won’t be able to discern the subtleties of those beautiful encircling prisms. If you under expose, you may not capture enough light to even see the sun dog at all.
Here are two techniques that you can use individually, or even in tandem, to get the shot.
Technique #1: Properly expose by picking the right focus point
When you focus your camera is also where your camera will look to for calculating the right exposure point. Cameras will always try to aim for an average of 18% pure gray in the photo. Thus, if you focus on something pitch black, the camera is going to try to automate settings to brighten the scene. Conversely, if you focus one something very bright, your camera will automatically try and darken the scene because again, it’s trying to average for a set amount of “brightness” – 18% gray.
Your task when photographing sun dogs? Try to find something in the scene to focus on that will tell your camera to darken the shot. Hint: what about the sun? It’s pretty bright! Try it out…focus on the sun and then take the photo. For sun dogs, this is always where I start. Whether I’m on aperture priority mode (my personal go to, FYI), “P” or program mode, or fully automatic, this is a great place to start. The beauty of digital cameras is that you can review it and see if you think it’s the right balance of light and dark.
If you think the photo is too dark, try and find something to focus on not quite as bright. Maybe focus on a patch of snow, or a building, or a sunlit tree.
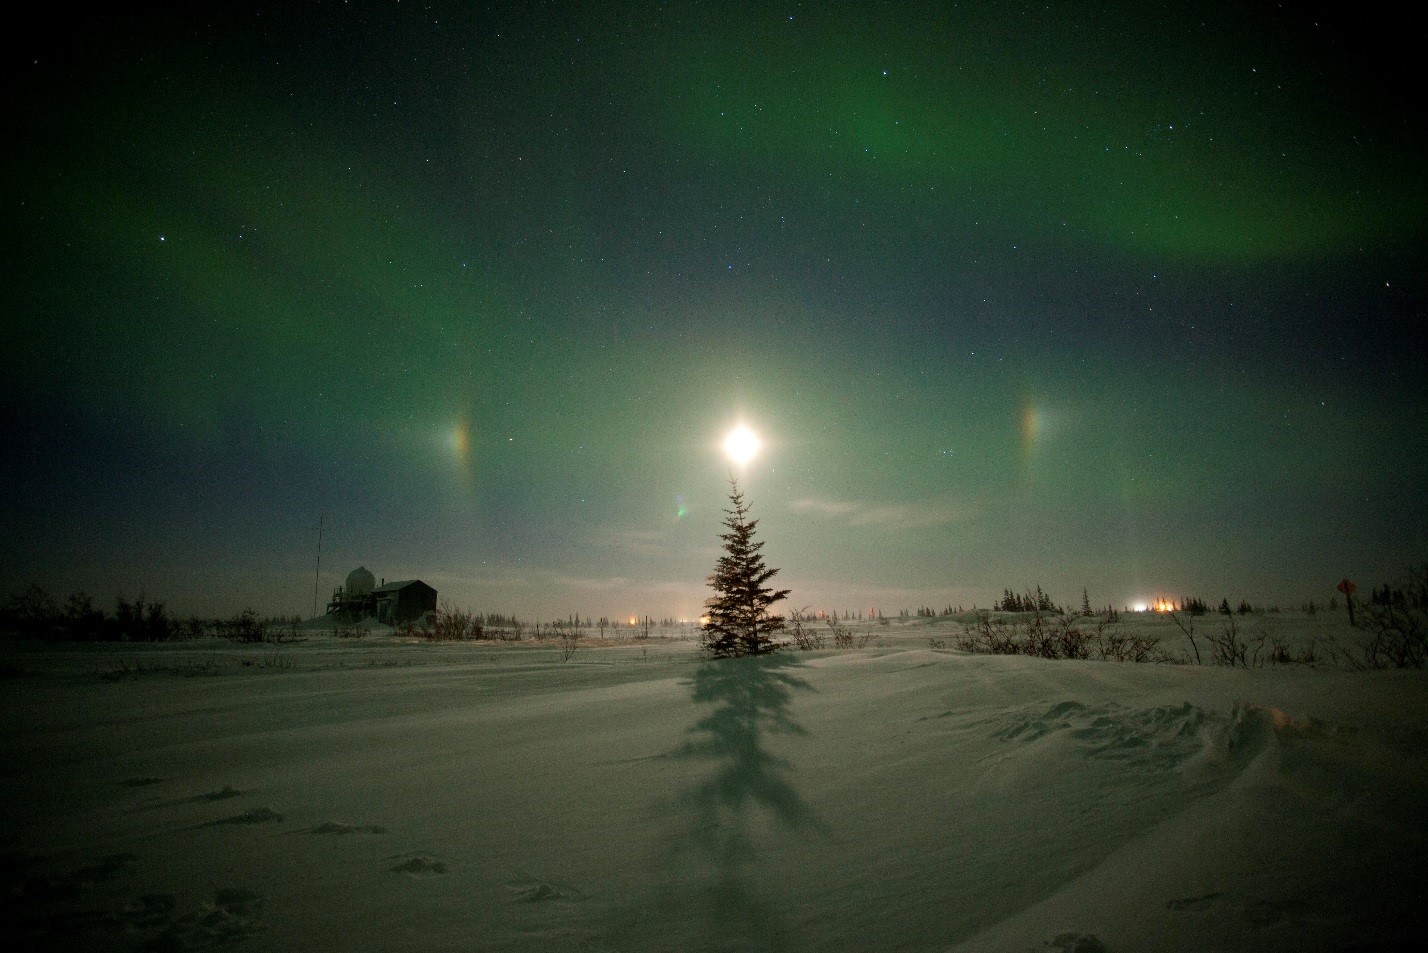
On some occasions, you can even get a sun dog with northern lights! Or what I call a “moon cat”…
Technique #2: manually adjust your camera’s exposure
This technique involves first taking a test photo. For the above photo, I took a test photo by focusing on that line of spruce trees, then recomposing the shot to get a nice composition, thus framing the sun dog. Then, just as before, I review the photo and see if it’s too light or too dark.
Now, since I took a photo of something relatively dark (the dark and shadowy trees), the camera is going to automatically try and lighten the photo with the shot settings it chooses. So, what I’m going to do is to adjust my exposure manually.
What you’re looking for is something like the below:
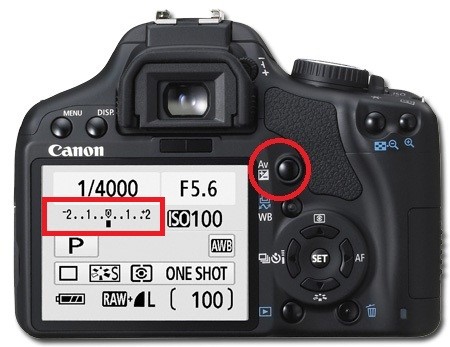
If you do not have a DSLR or a mirrorless, but more of a point and shoot, look for an icon like this:

By pressing this, or finding it in your camera’s menu, you’ll be able to adjust the exposure so that your camera chooses shot settings accordingly. If you go to the plus end, that’s manually telling your camera to make the next photo brighter. Going negative makes the next photo darker.
So, for my next shot, after my initial sun dog test shot, I will decrease the exposure to manually tell my camera to make the next shot darker. Finding the sweet spot of darkness will take practice, but fortunately you can shoot and review and shoot and review as many times as you like. Try it out!
If you get a chance to witness this stunning phenomenon, I hope these tricks and tips will come in handy! And as a quick heads up, I will oftentimes employ BOTH technique #1 and #2 together to quickly get the right exposure.
Go forward and give it a shot,
Court
Leave a reply