How to get this Shot: Holding a Hoodoo
It’s fun, it’s whimsical, it’s travel photography. Sometimes the mood strikes you to be a little goofy and creative while out on the trail. There are lots of examples out there of folks using this perspective trick, and while they may differ slightly, some of the principles are universal.
Follow along to capture a memorable photo like this next time you’re on an adventure to Bryce Canyon National Park. And if you’ve seen one of the recent Natural Habitat U.S. National Park Catalogs, it features this shot right on the cover!
- Well first, you’ve got to be in the right place and at the right time. Joining a special photo adventure certainly helps, as not only will your Expedition Leader be willing to help, but you’ll have eager fellow “models” that are always up for some fun.
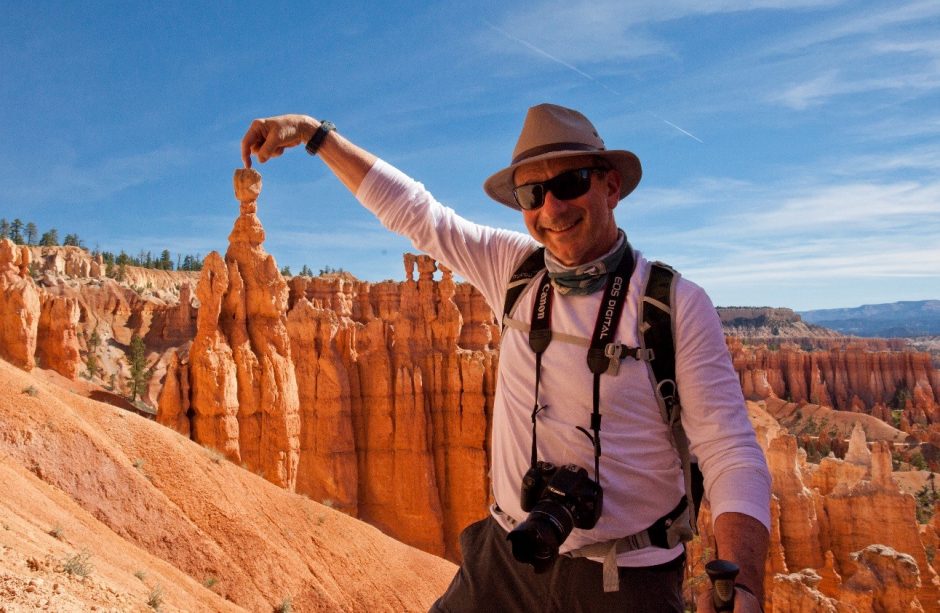
- Next, you have to find a hoodoo, or other prominent landscape feature like the one above. This one happens to be “the most famous hoodoo of all”, known as Thor’s Hammer. It’s not difficult to find, as it’s on one of the main trails known as “Navajo Loop.” Again, you’re putting yourself in a better position if you join a photo trip, but you can also check on the park map and do some exploration on your own.
- Once you’ve found your hoodoo, and you have a friend willing to be patient for a few minutes, you are ready to position the two of you.
- The real trick is finding the right distance from you, your friend, and the landscape feature. If the landscape feature is too big or too small, it’s just not going to look right. So in the above photo, we stopped on the trail right around where the hoodoos appeared to be just right…where the hoodoos are indeed actually “arm-sized.”
- The other critical step is to make sure that the lighting is somewhat equal between your model and the landscape. If one is much brighter, it won’t give it that fun look, as if the person is actually right next to the feature–touching it. In the above case, everything has a bit of soft light, some shadow, but in general they’re evenly lit in both cases.
- Next, you will indeed need to have your friend make the pointing movement, and you’ll have to direct him or her a little. However, the real work comes from you and your positioning. The micro adjustments necessary to get it to line up perfectly come from the photographer. You will have to move slightly left, right, up or down in order to get things lined up perfect. There is no way photoshop can help this, so you must take it in-camera to be best.
- Then lastly, take LOTS of shots, like a couple dozen, to make sure you’ve got one that works best.
When it comes to travel photography, so much is about storytelling. Part of this story was how much fun we were having this day. The weather was great, we just were finishing up a sensational hike, and having lots of laughs along the way. Why not experiment a little bit and showcase the good nature we all have while doing what we love.
Now go forward and give it a shot,

Court
Leave a reply