How to Create Your Own Time-Lapse Nature Video
Forty-year-old Phoenix father Mike Olbinski spends much of his free time chasing thunderstorms, tornadoes and other extreme weather. His mission? To capture breathtaking images of these weather phenomena. According to the Daily Mail, he spent 14 days earlier this year on the Great Plains filming a time-lapse video called “The Chase.” His work displays a stunning range of nature’s moods, from dark angry skies to rainbows peeking out from behind clouds to lightning casting a black city nightscape into sudden brilliance. Some of Olbinksi’s work can get dangerous, as he films from the fringes of 50-mph winds, tornadoes and hailstorms to capture such rare footage. The results are amazing, however.
Fortunately, you can don’t have to brave such extreme conditions to take great time-lapse photos of Mother Nature. All you need is the right equipment and a little know-how.
Choosing a Subject
Choosing your subject is the first step to creating a time-lapse film. What kind of natural subjects can you film? Fundamentally, time-lapse photography is taking many photos of the same thing over a period of time, so natural subjects that change their appearance over time make for interesting photos. For example, natural changes in lighting over the course of a day or a season can create fascinating effects on skies, horizons, mountains, lakes and forests.
Natural phenomena that develop in sequences also make good time-lapse photography subjects. The growth of plants and animals can be captured over time to create amazing footage.
Time-lapse photography can also capture activity that occurs too slowly or subtly for the human eye to notice at normal speed. For instance, filming the area around an anthill over the course of a few hours can reveal a flurry of activity you would normally overlook.
Another application of time-lapse photography is using lighting changes to bring out fine details such as color that might be less noticeable in photos taken at normal speed. The color patterns on a flower or an insect can undergo subtle variations of appearance over time that are easier to appreciate with time-lapse pictures taken under a range of lighting conditions.
The amount of time you have available to devote to shooting will affect the subject you select. Filming a frog sitting in a garden for a few hours is a shorter project than filming the hatching of a chicken egg over three weeks.
Planning Your Shoot
After you pick your subject, you need to plan your shoot. This is a several-step process. Let’s take a look:
First, plan your composition. How close will you be to your subject? Where will it appear in the frame? What angle will you use? What else will be in the shot?
Next, estimate how long you should wait between shots. To do this, start by figuring out how long the event you’re filming will take to complete. For instance, are you trying to capture 15 minutes of sunset or an entire evening of the moon? To do this, divide the time of your event, converted into seconds, by the number of frames you plan to shoot. The number of frames can be determined by multiplying the number of seconds you want your edited film to run times the number of frames per second. For instance:
- Let’s say you want to produce a 3-minute film of the sun setting; your run time would then be 3 times 60 seconds, or 180 seconds.
- You then multiply this by your desired number of frames per second. Your fps selection depends on how you want your final film to look. Movies generally show between 20 to 30 frames per second. The more fps, the smoother the transition between frames, while fewer fps means choppier, more abrupt transitions.
- Dividing the time of your event by the number of frames will tell you how long you should space out the interval between your shots.
To apply this formula, filming a sunset over two and one half hours (150 minutes) would be 9,000 seconds. If you want to produce a 3-minute (180-second) film at 25 fps, you would need 180 times 25 or 4,500 frames. 9,000 seconds divided by 4,500 frames equals 2 seconds per frame, so you would want to shoot 1 frame every 2 seconds.
Next, set your exposure. Your exposure is determined by the balance between the sensitivity of your image sensor (ISO), how wide your lens is open (aperture), and your exposure time (shutter speed). Adjusting these numbers produces different results. As a general rule, keep your shutter speed under 1/100 of a second. In daylight conditions, this will often mean you need to use an ND filter to reduce the intensity of the light your camera registers without altering its color.
Finally, take some test shots. You should do this over a mini-time-lapse sequence to make everything is set up correctly. Mark any adjustments, and check your tripod and camera for stability.
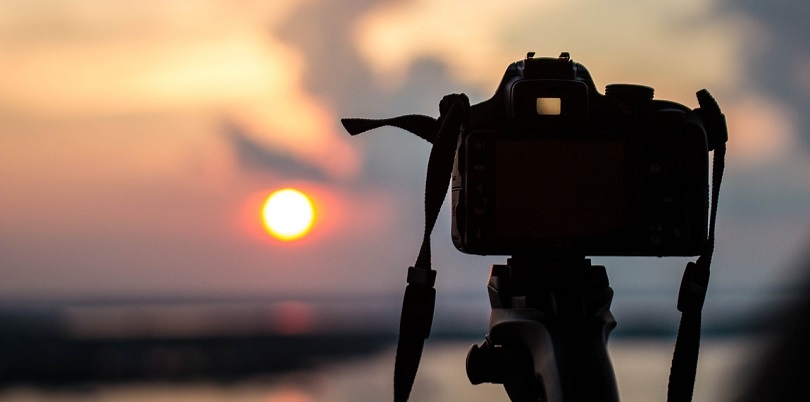
Photography Equipment
Speaking of cameras, tripods and ND filters, these are a few of the essential pieces of equipment you’ll need to do time-lapse photography. A DSLR camera lends itself well to taking time-lapse shots. For tripods, stability is key. You can easily find a heavy, used tripod without spending much money. However, if you’re going to be shooting in a remote location where you don’t want to carry a heavy tripod, consider a portable model.
Another invaluable piece of equipment you’ll need is an intervalometer. This is an automatic trigger that lets you set precisely the intervals between your photos. Some cameras have intervalometers built into their firmware. You can also buy an external invervalometer for a reasonable price, with some models running less than $30.
Editing Software
Editing is the final phase in the process of creating a time-lapse photography film. First, import your pictures into a photo editing program. There you can touch up your photos. If you use batch photo editing, you can make changes to one photo and apply them to a series of photos instead of making the same change multiple times. You can also use transitional editing with key frames and raw meta data to apply exposure changes throughout a series of photos. Deflickering can help you smooth out distracting light flickers from your original footage.
To create your final film, you can then import your pictures into a video editing program for final polishing. Here you can adjust sequences, add sound and music tracks, and insert frame transitions and other special effects. Add a title to your film and upload it to your favorite video sharing site to show your friends and followers.
This is a guest post by Roy Rasmussen, is a freelance copywriter and marketing consultant.
1 Comment

Kathrine
October 8, 2019 at 7:20 pm
Thank you!