Conquering Canyons Photography: HDR & Bracketing
The Desert Southwest of the United States is full of geologic wonders and can be a veritable playground for landscape photographers. However, in places like Bryce Canyon National Park, with its dramatic spires, ridges and hoodoos, it can be challenging to capture the full range of light and shadow.
This is where Bracketing and High Dynamic Range (HDR) photography can transform your images from good to spectacular. The intense contrast between the glowing sunrise or sunset and the deep shadows in the canyon means that single exposures can struggle to capture the full tonal range of the scene. By bracketing and utilizing HDR techniques, you can achieve detailed, balanced, and vibrant images that truly showcase the beauty of Bryce Canyon.
This guide will explore the essentials of bracketing and HDR photography, including how to apply them for stunning shots next time you find yourself in the Desert Southwest.
What Is Bracketing?
Bracketing is the process of taking multiple photos of the same scene at different exposure levels. Typically, you’ll shoot:
- One photo at the camera’s recommended exposure (normal exposure).
- One or more photos underexposed to capture highlight details.
- One or more photos overexposed to capture shadow details.
These exposures are later blended together, either manually or automatically in post-processing, to create a final High-Dynamic Range image that captures the full range of light in a scene—without losing detail in the shadows or highlights.
Why Use Bracketing for Photographing Canyons?
The lighting conditions in a place like Bryce Canyon NP, especially during sunrise and sunset, often feature extreme contrasts between the bright sky and darker canyon areas. The natural amphitheaters and hoodoo formations are bathed in golden light, while shadows lurk in the recesses of the formations. Bracketing ensures that you capture all the intricate details in both the bright and dark areas.
Some key reasons to use bracketing in Bryce Canyon include:
- Dynamic Lighting: The harsh contrast between bright skies and shadowed hoodoos requires multiple exposures to capture the full tonal range.
- Vivid Sunrises and Sunsets: Bracketing is ideal for capturing the subtle colors of a vibrant sunrise or sunset, especially where the sky might be much brighter than the foreground.
- Textures and Details: The rugged textures of the hoodoos and canyon formations can get lost in harsh lighting, but bracketing allows you to preserve those details.
How to Set Up Bracketing
Most modern DSLR and mirrorless cameras come with an auto-bracketing function, making it easy to capture multiple exposures with a single press of the shutter button. (Be sure to review your camera’s manual for detailed instructions) Here’s how I set it up:
- Switch to Aperture Priority Mode: Since you want a consistent depth of field, set your camera to aperture priority mode. This allows the camera to adjust the shutter speed for each bracketed shot while keeping the aperture constant.
- Set the Number of Shots: Typically, bracketing sequences involve three to five shots. For HDR, three exposures (one underexposed, one properly exposed, and one overexposed) are often enough. However, in extreme lighting conditions like sunrise or sunset, you may want to bracket five or more exposures.
- Set the Exposure Interval: The exposure interval determines how much you underexpose and overexpose each shot. A common setting is ±2 EV (exposure value), though ±1 or ±3 EV can be used depending on how contrasting the scene is.
- Use a Tripod: Bracketing requires that all your shots align perfectly to avoid ghosting or blurring when the exposures are blended. A tripod ensures stability and consistency between shots. Further reduce your camera’s movement by using a remote trigger or your camera’s timer.
- Shoot in RAW: Always shoot in RAW when bracketing. RAW files retain more data, making it easier to recover details in both shadows and highlights during post-processing.
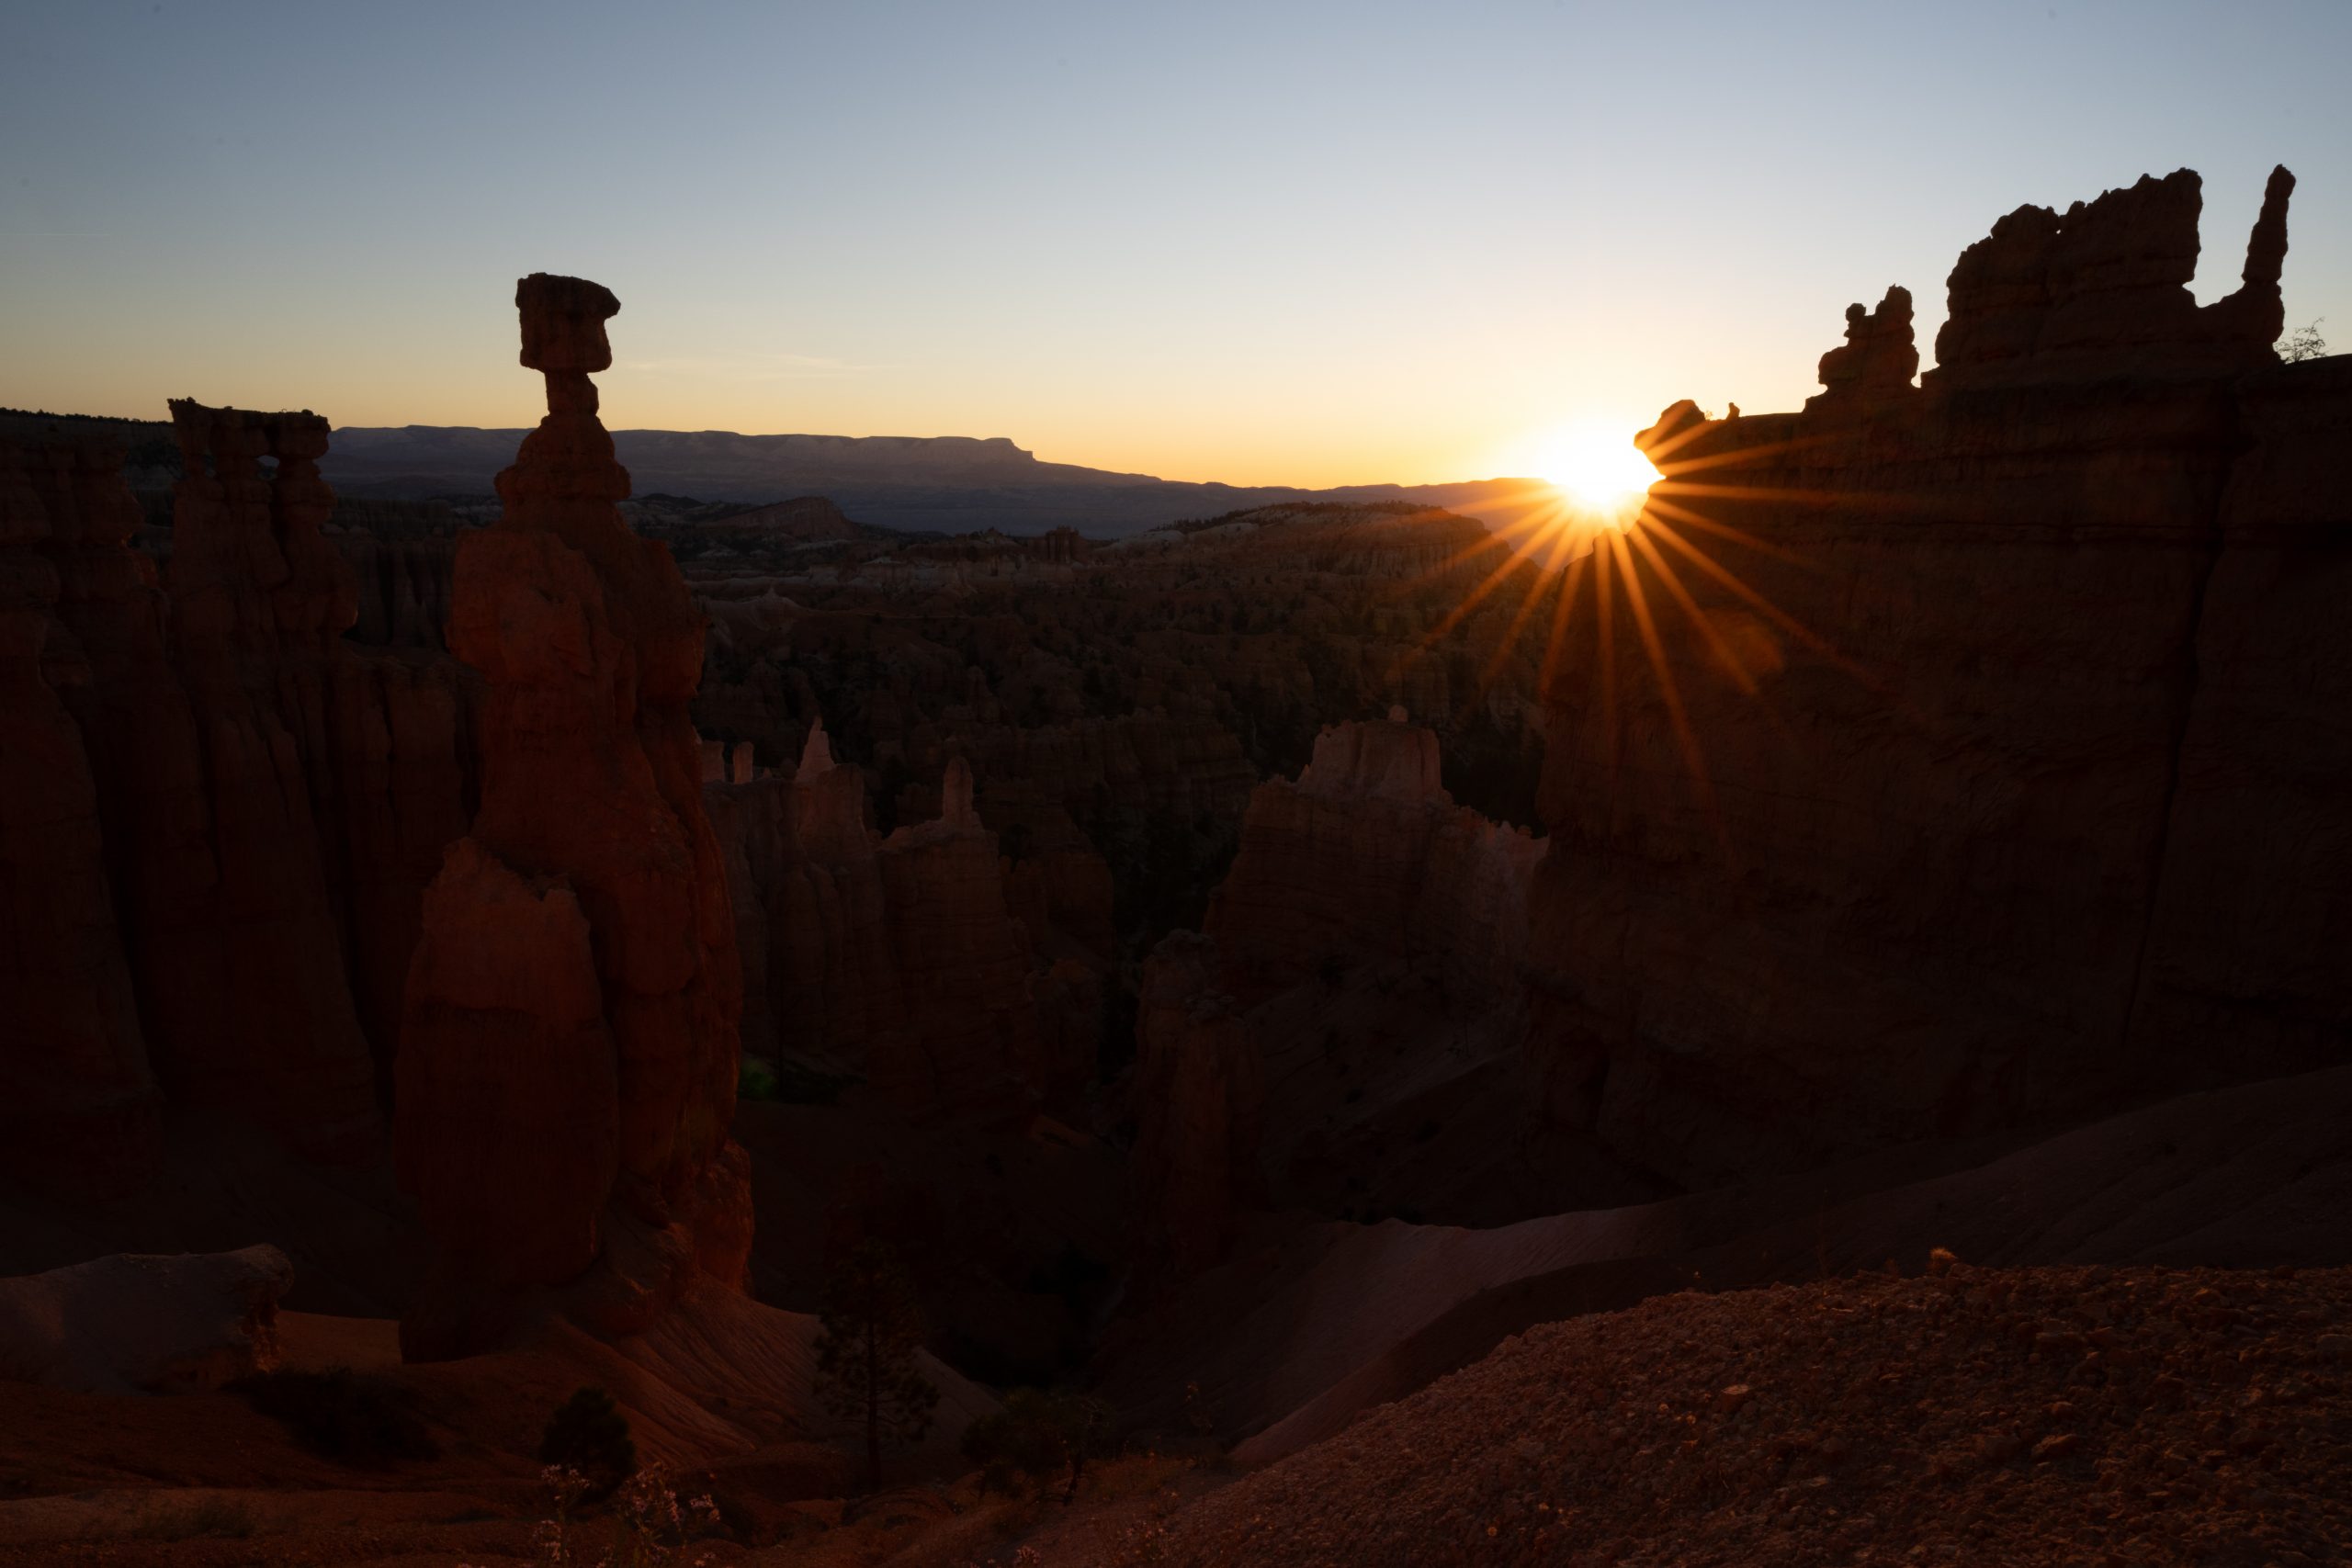
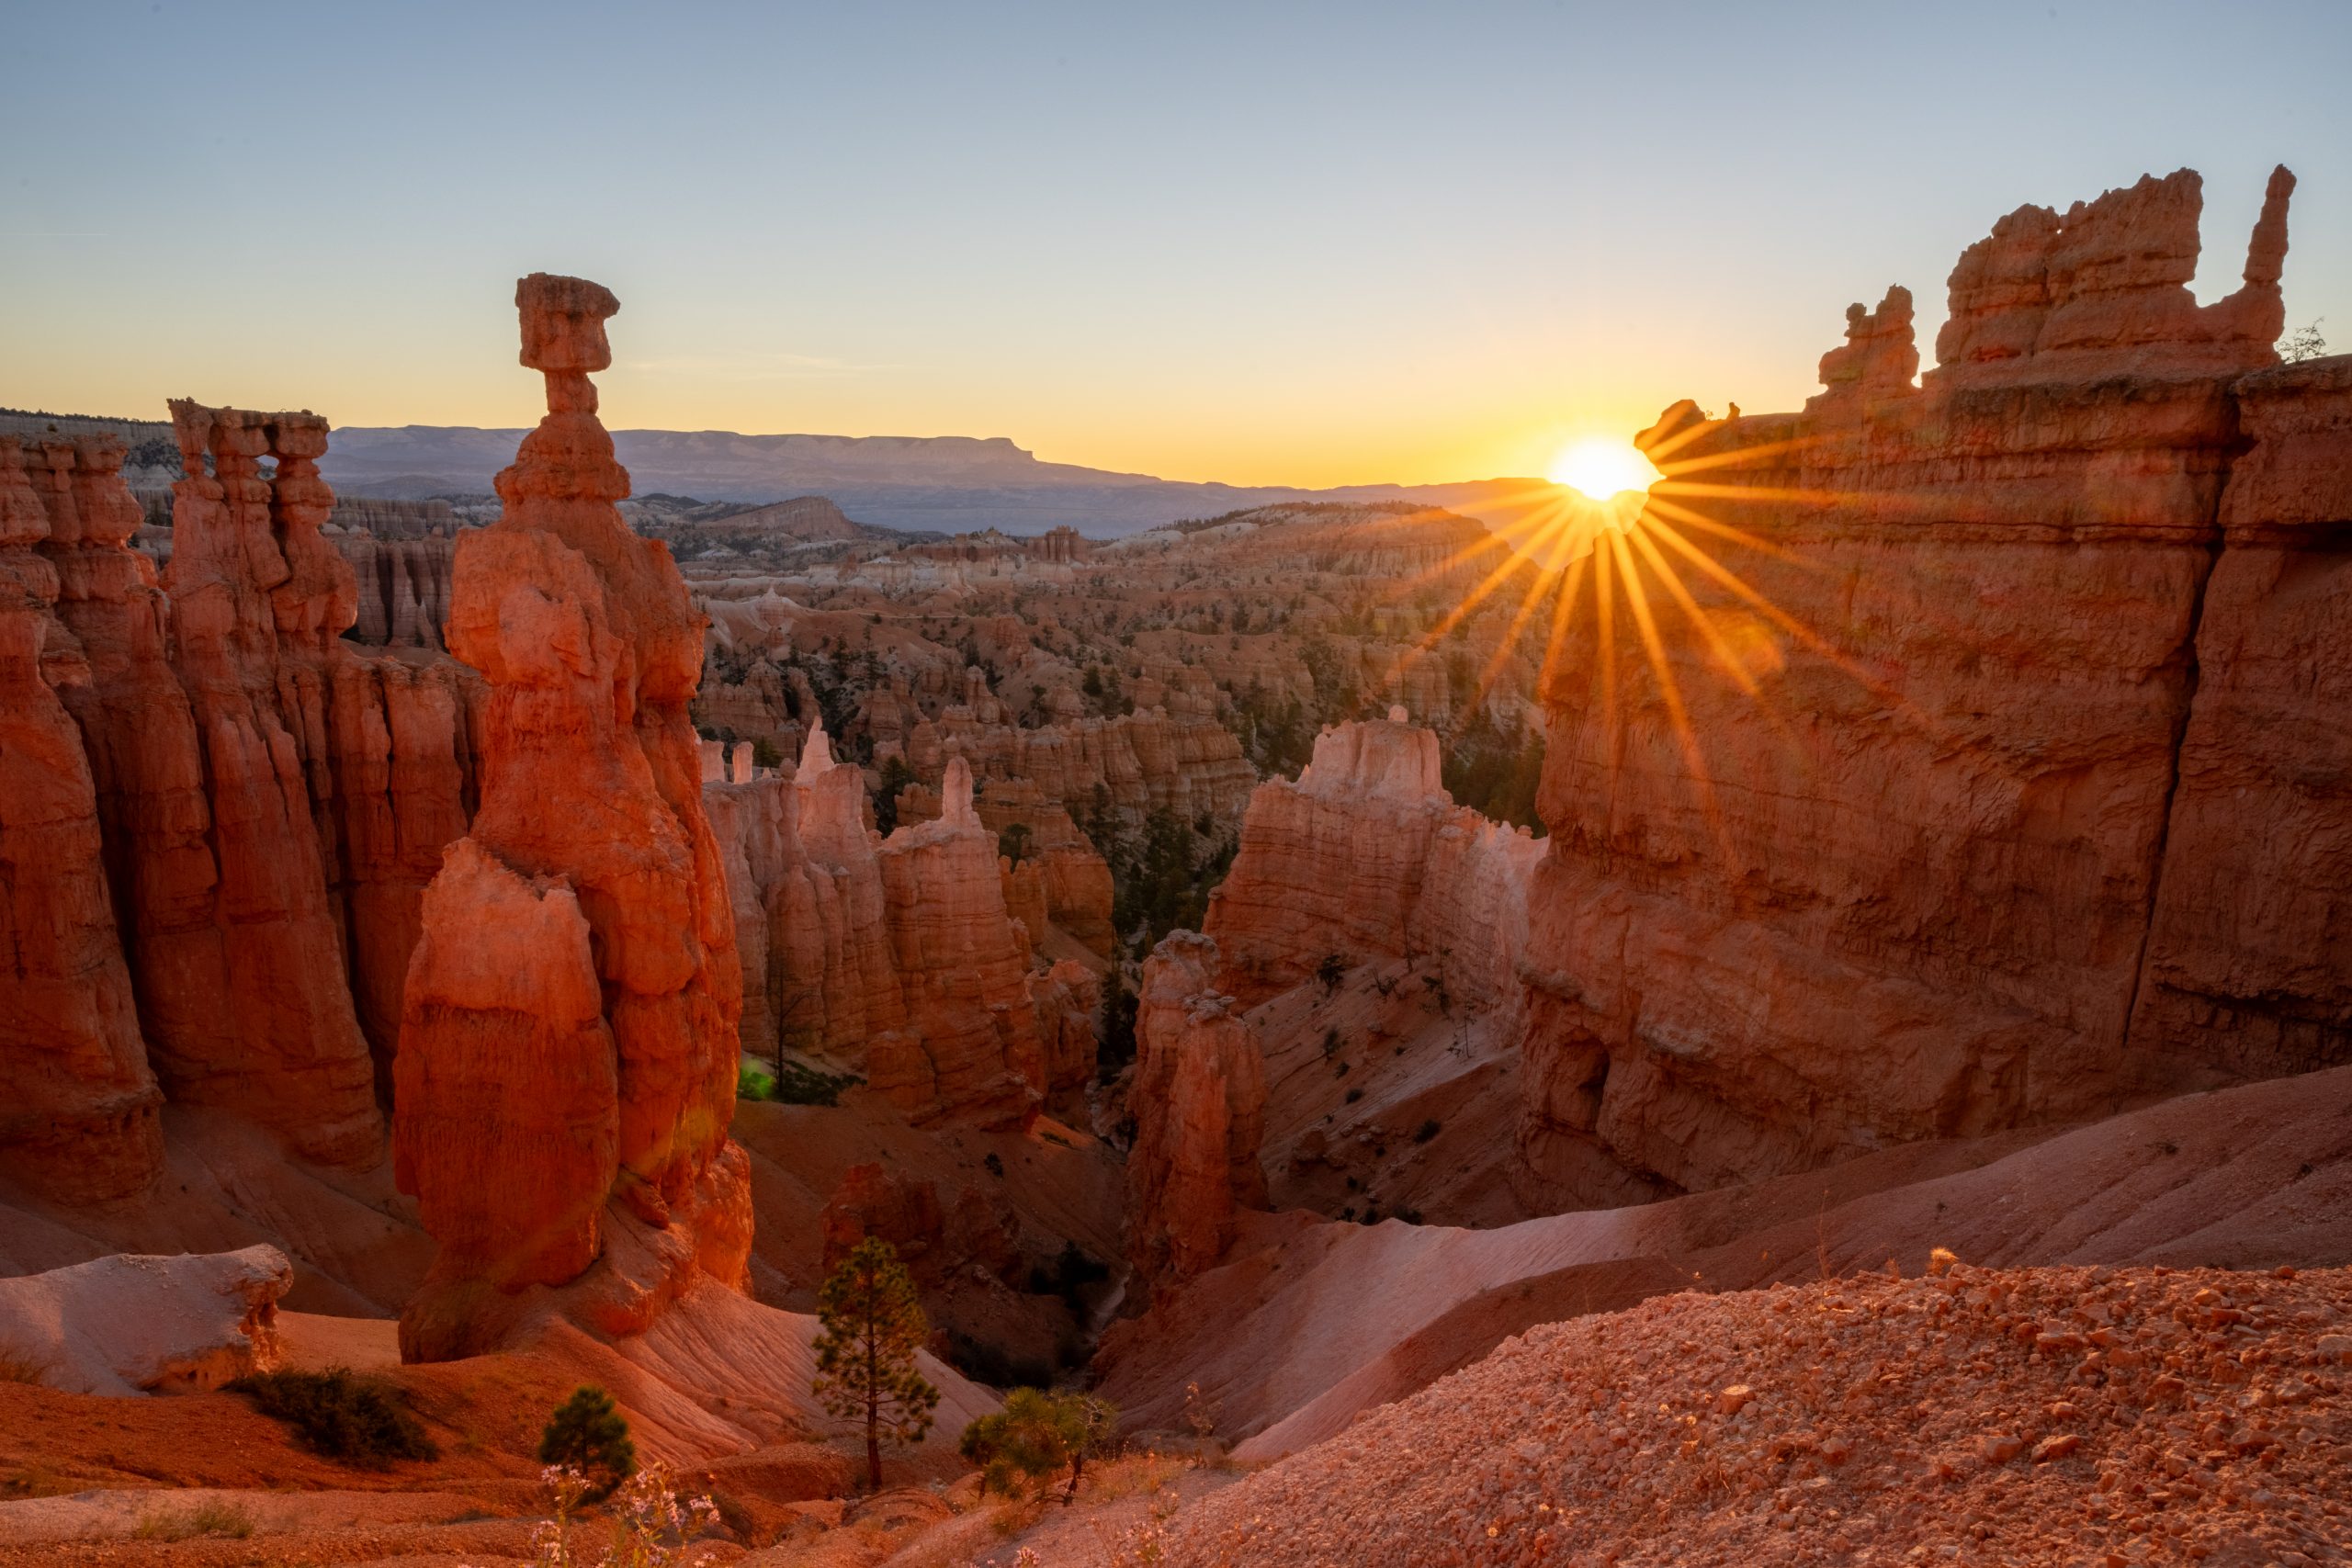
Here are the three bracketing exposures I took of Thor’s Hammer Hoodoo in Bryce Canyon National Park. First, the underexposed image that captures the most detail and color in the bright sunrise sky:
Next, the medium or even exposure that collects details in the mid-tones: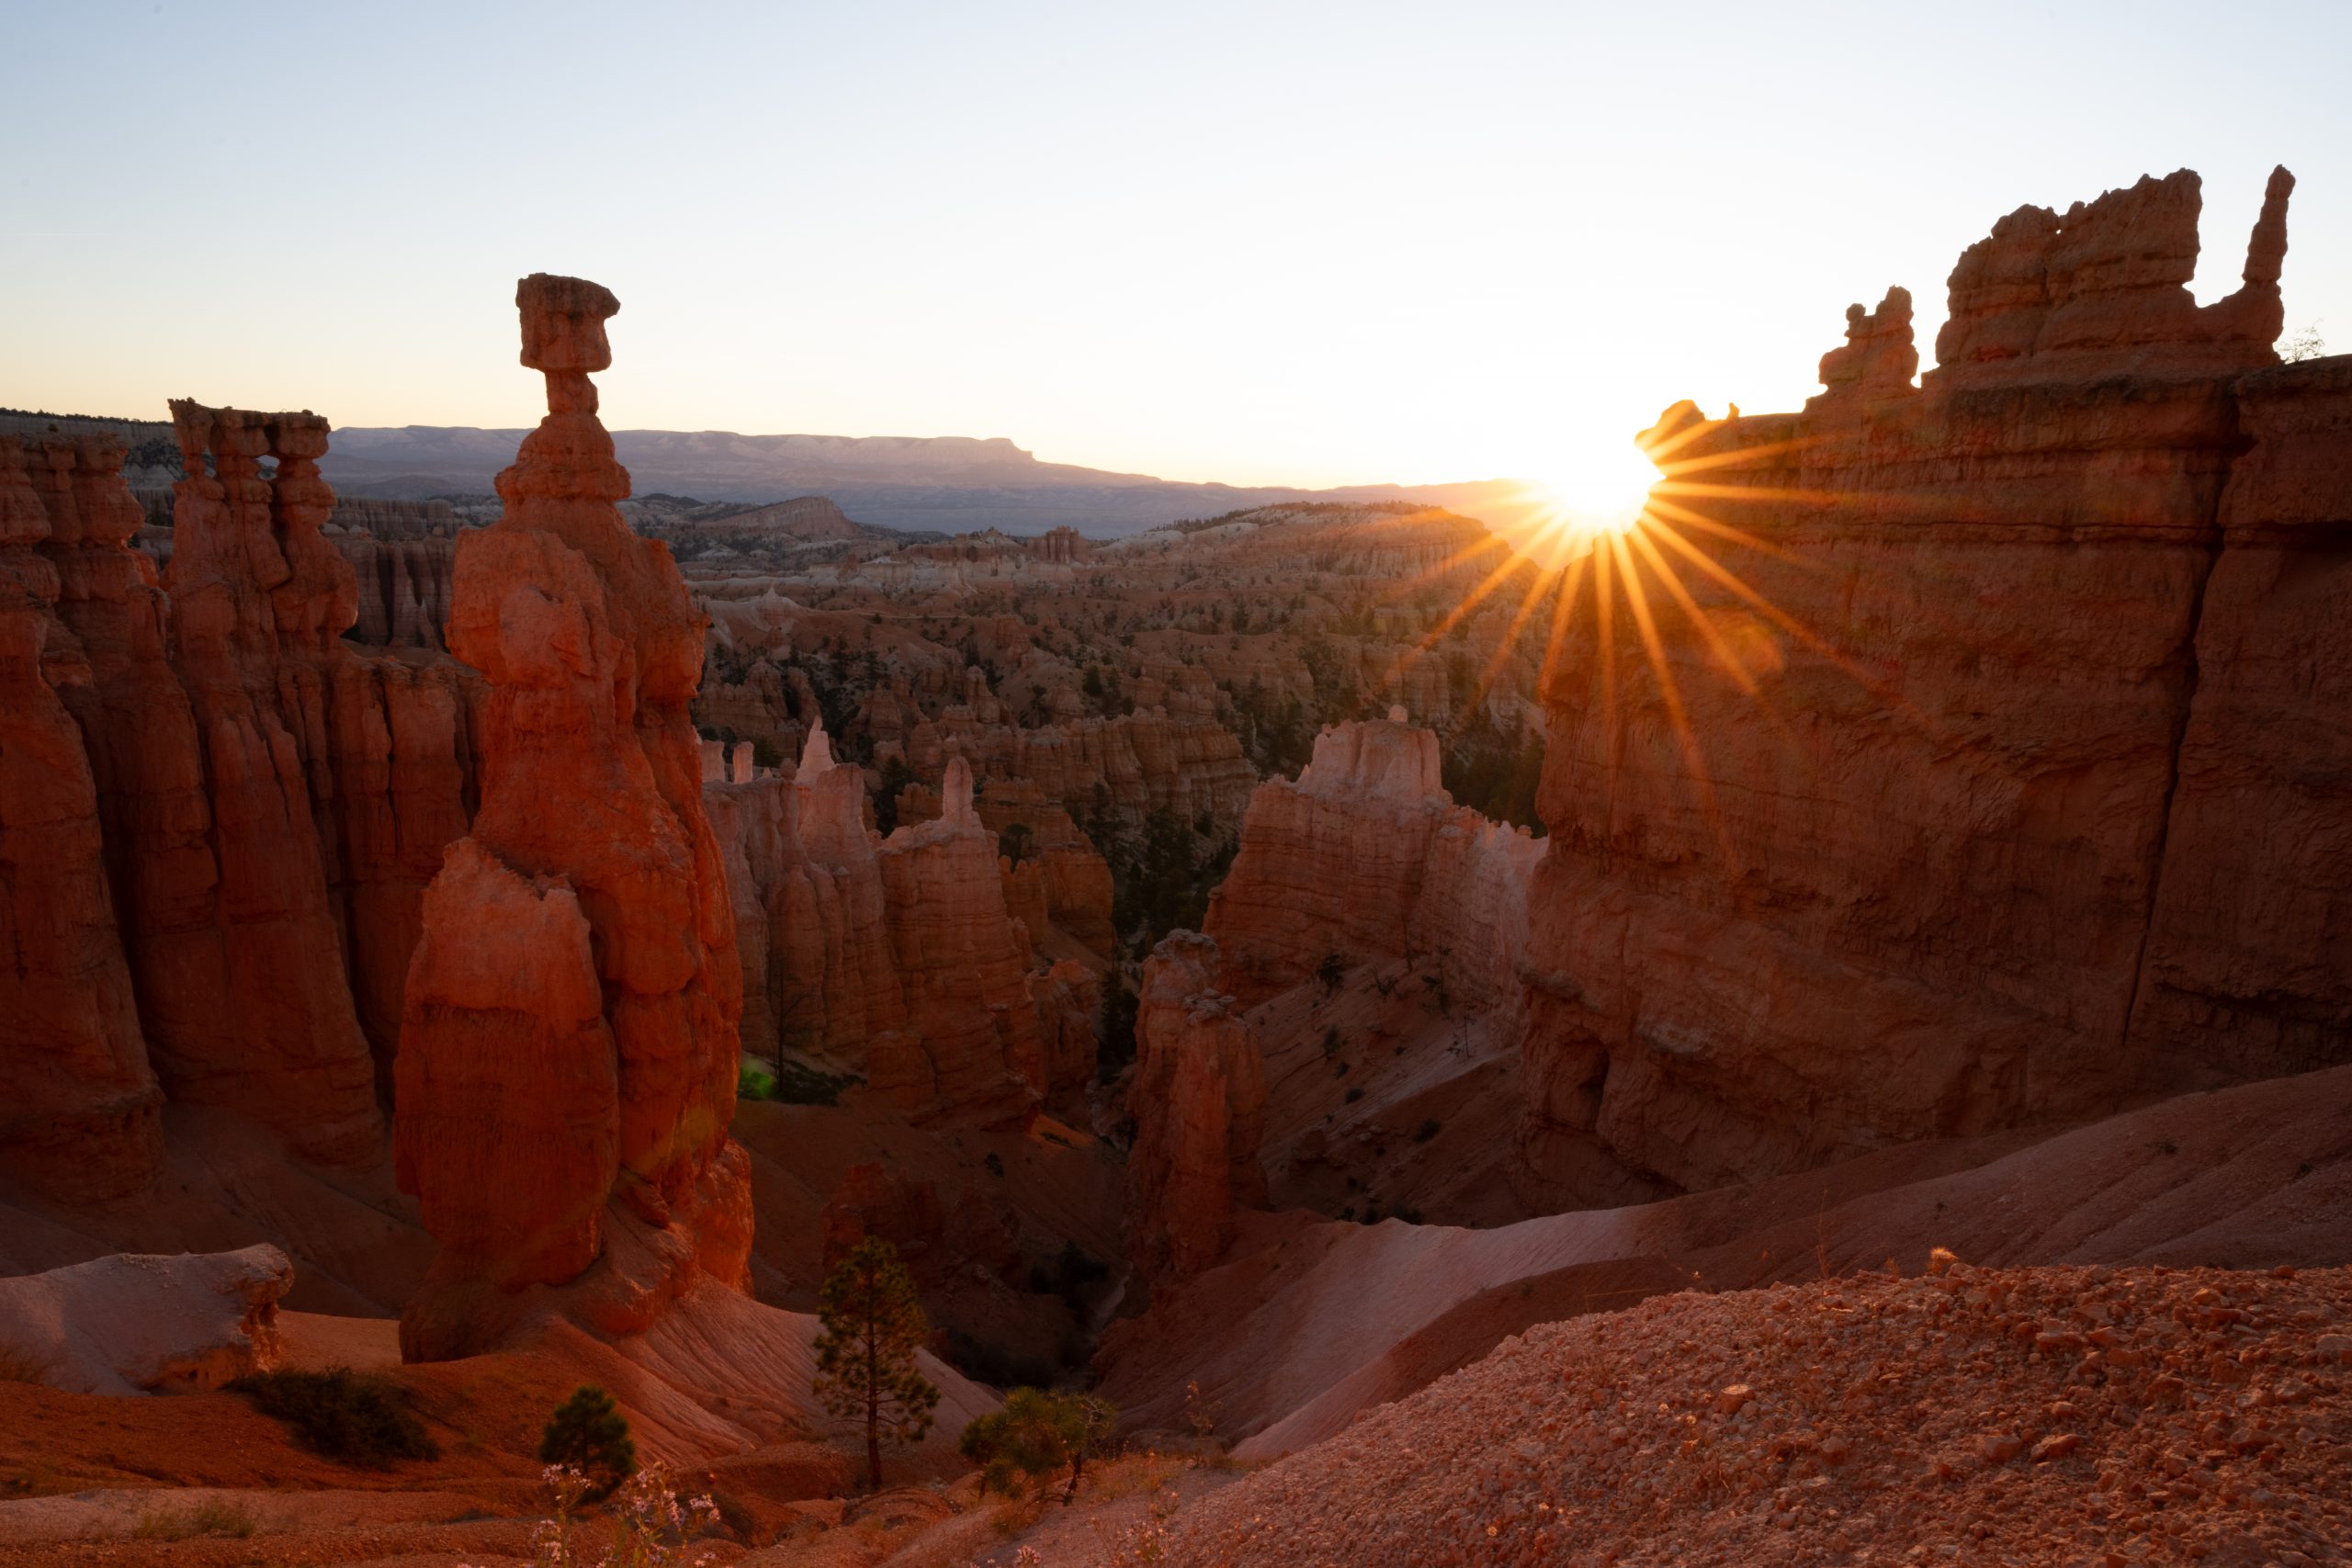
Finally, here is the overexposed image that captures the details in the dark areas such as the shadows in and around the hoodoo formations: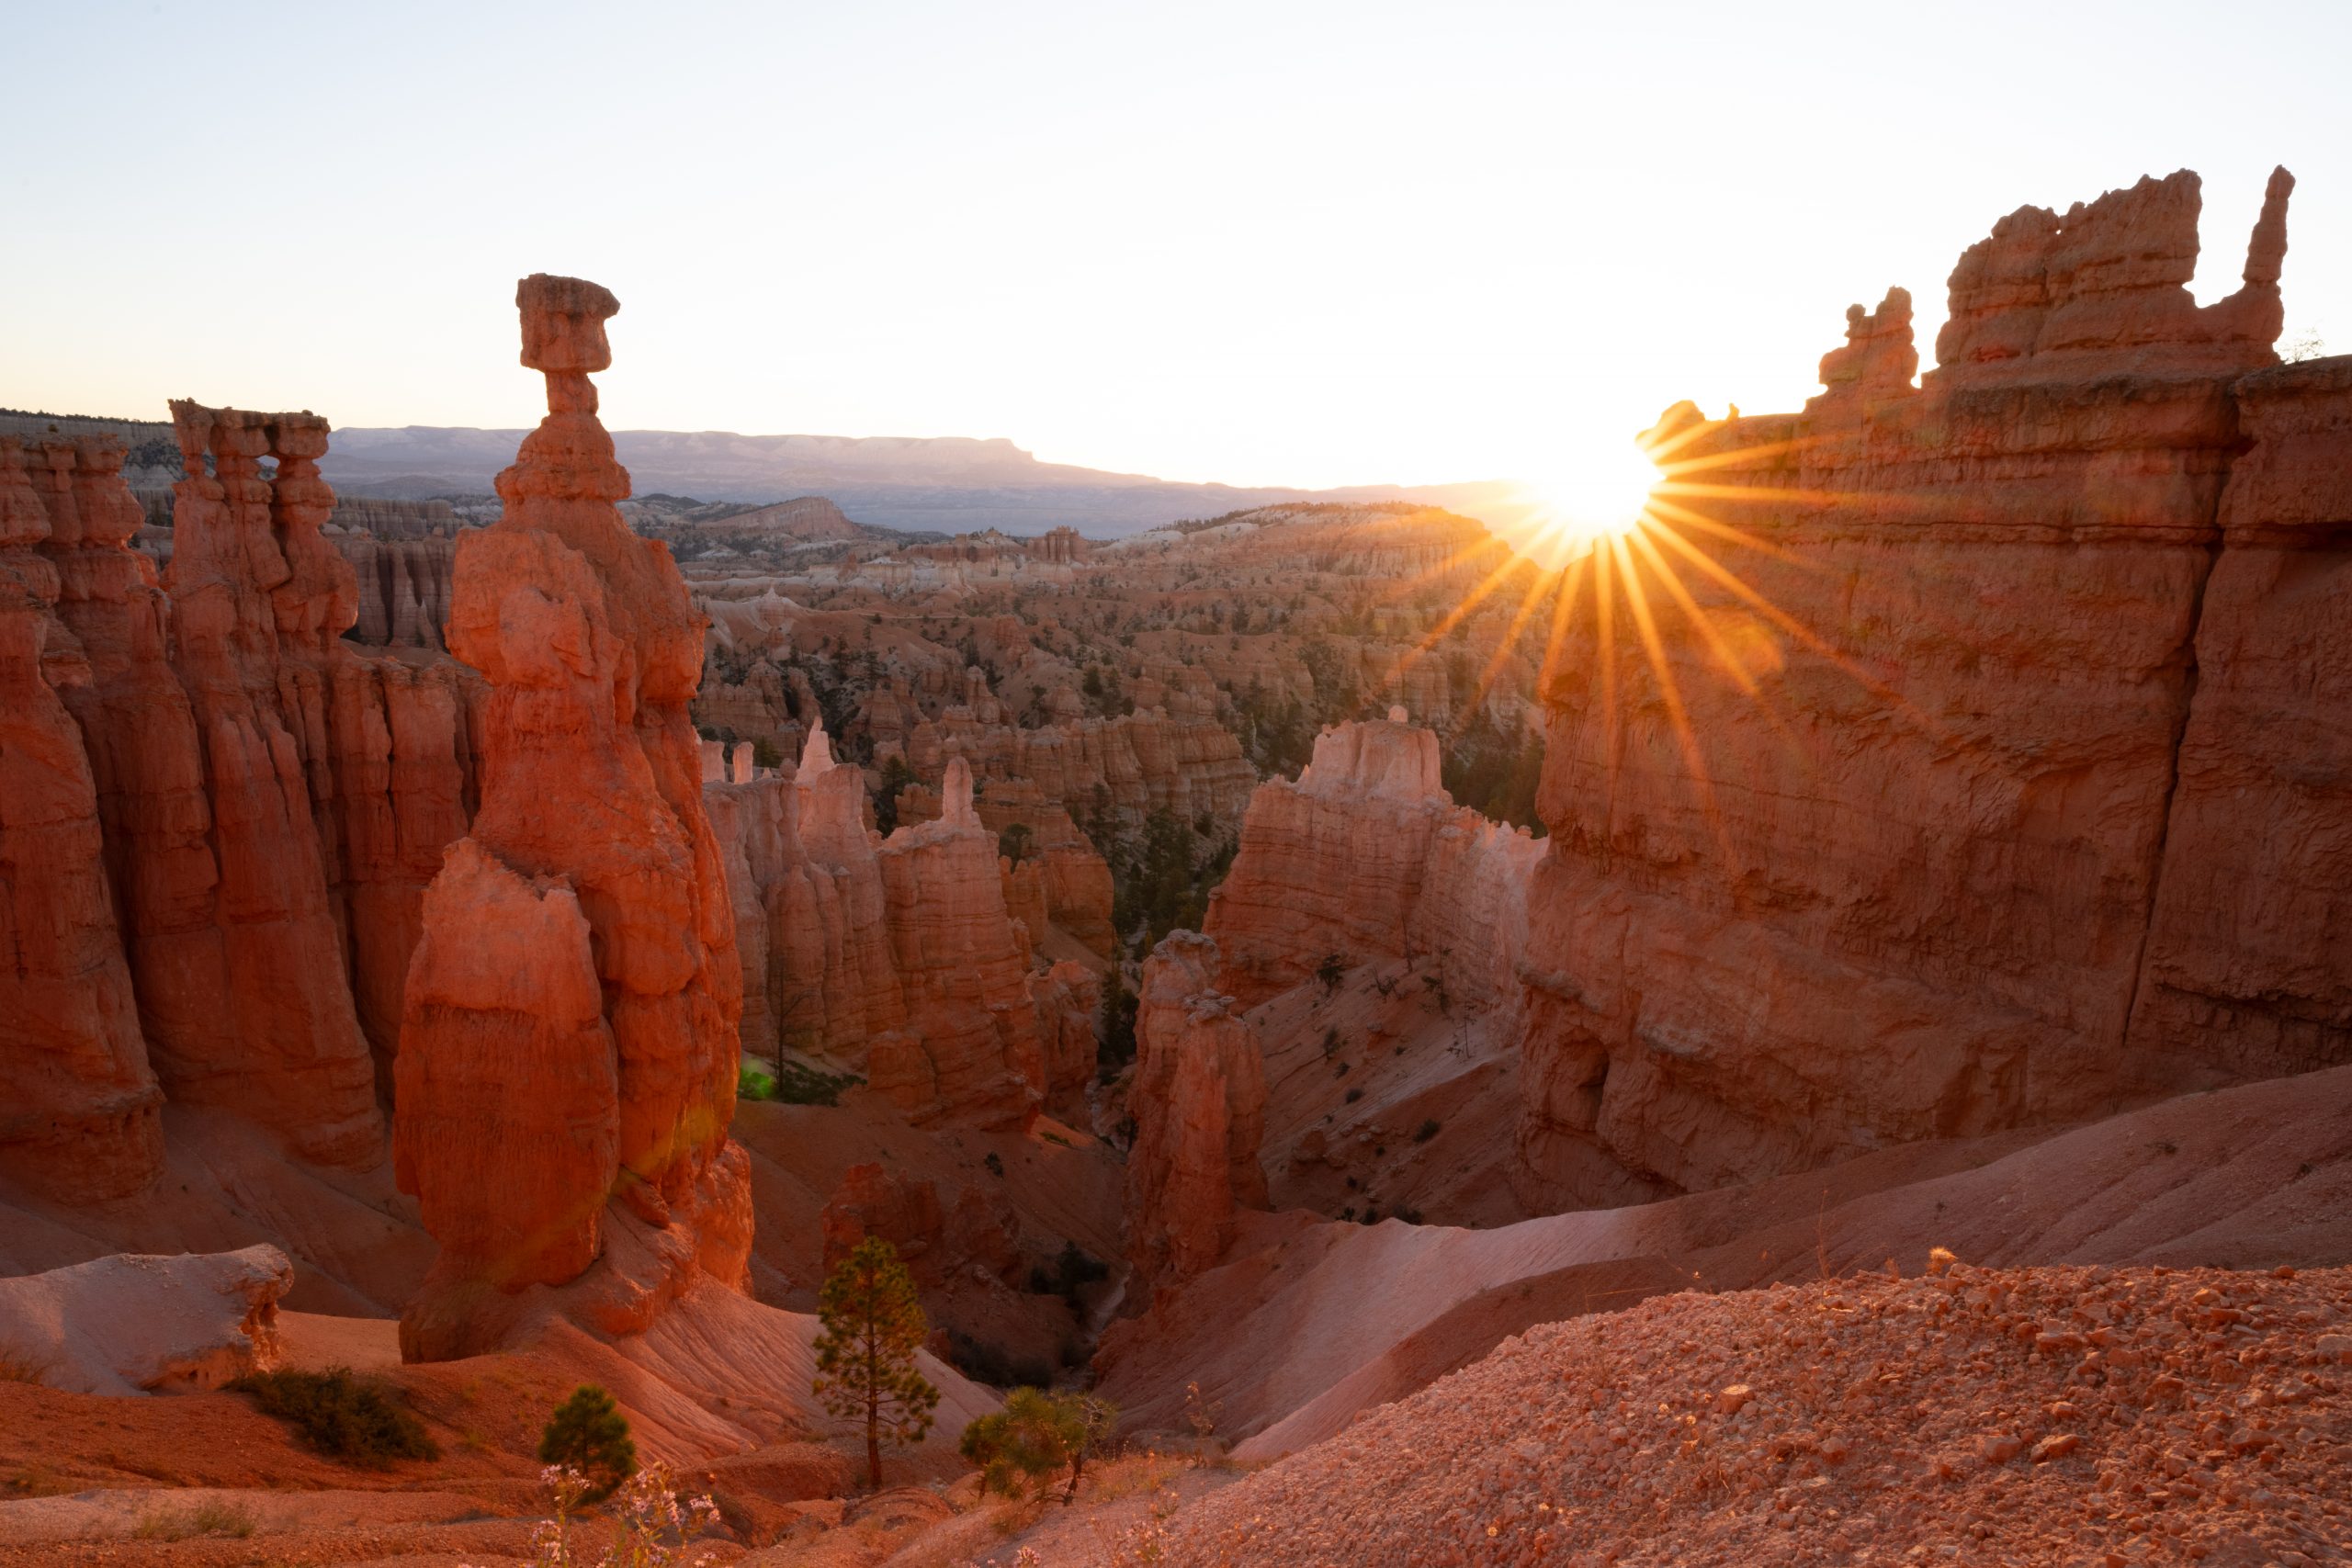
Post-Processing HDR Images
Once you’ve captured your bracketed shots, it’s time to blend them into a single HDR image. Popular software options for HDR processing include Adobe Lightroom, Photomatix, and Aurora HDR. Of course, the exact procedure will depend on the software you choose.
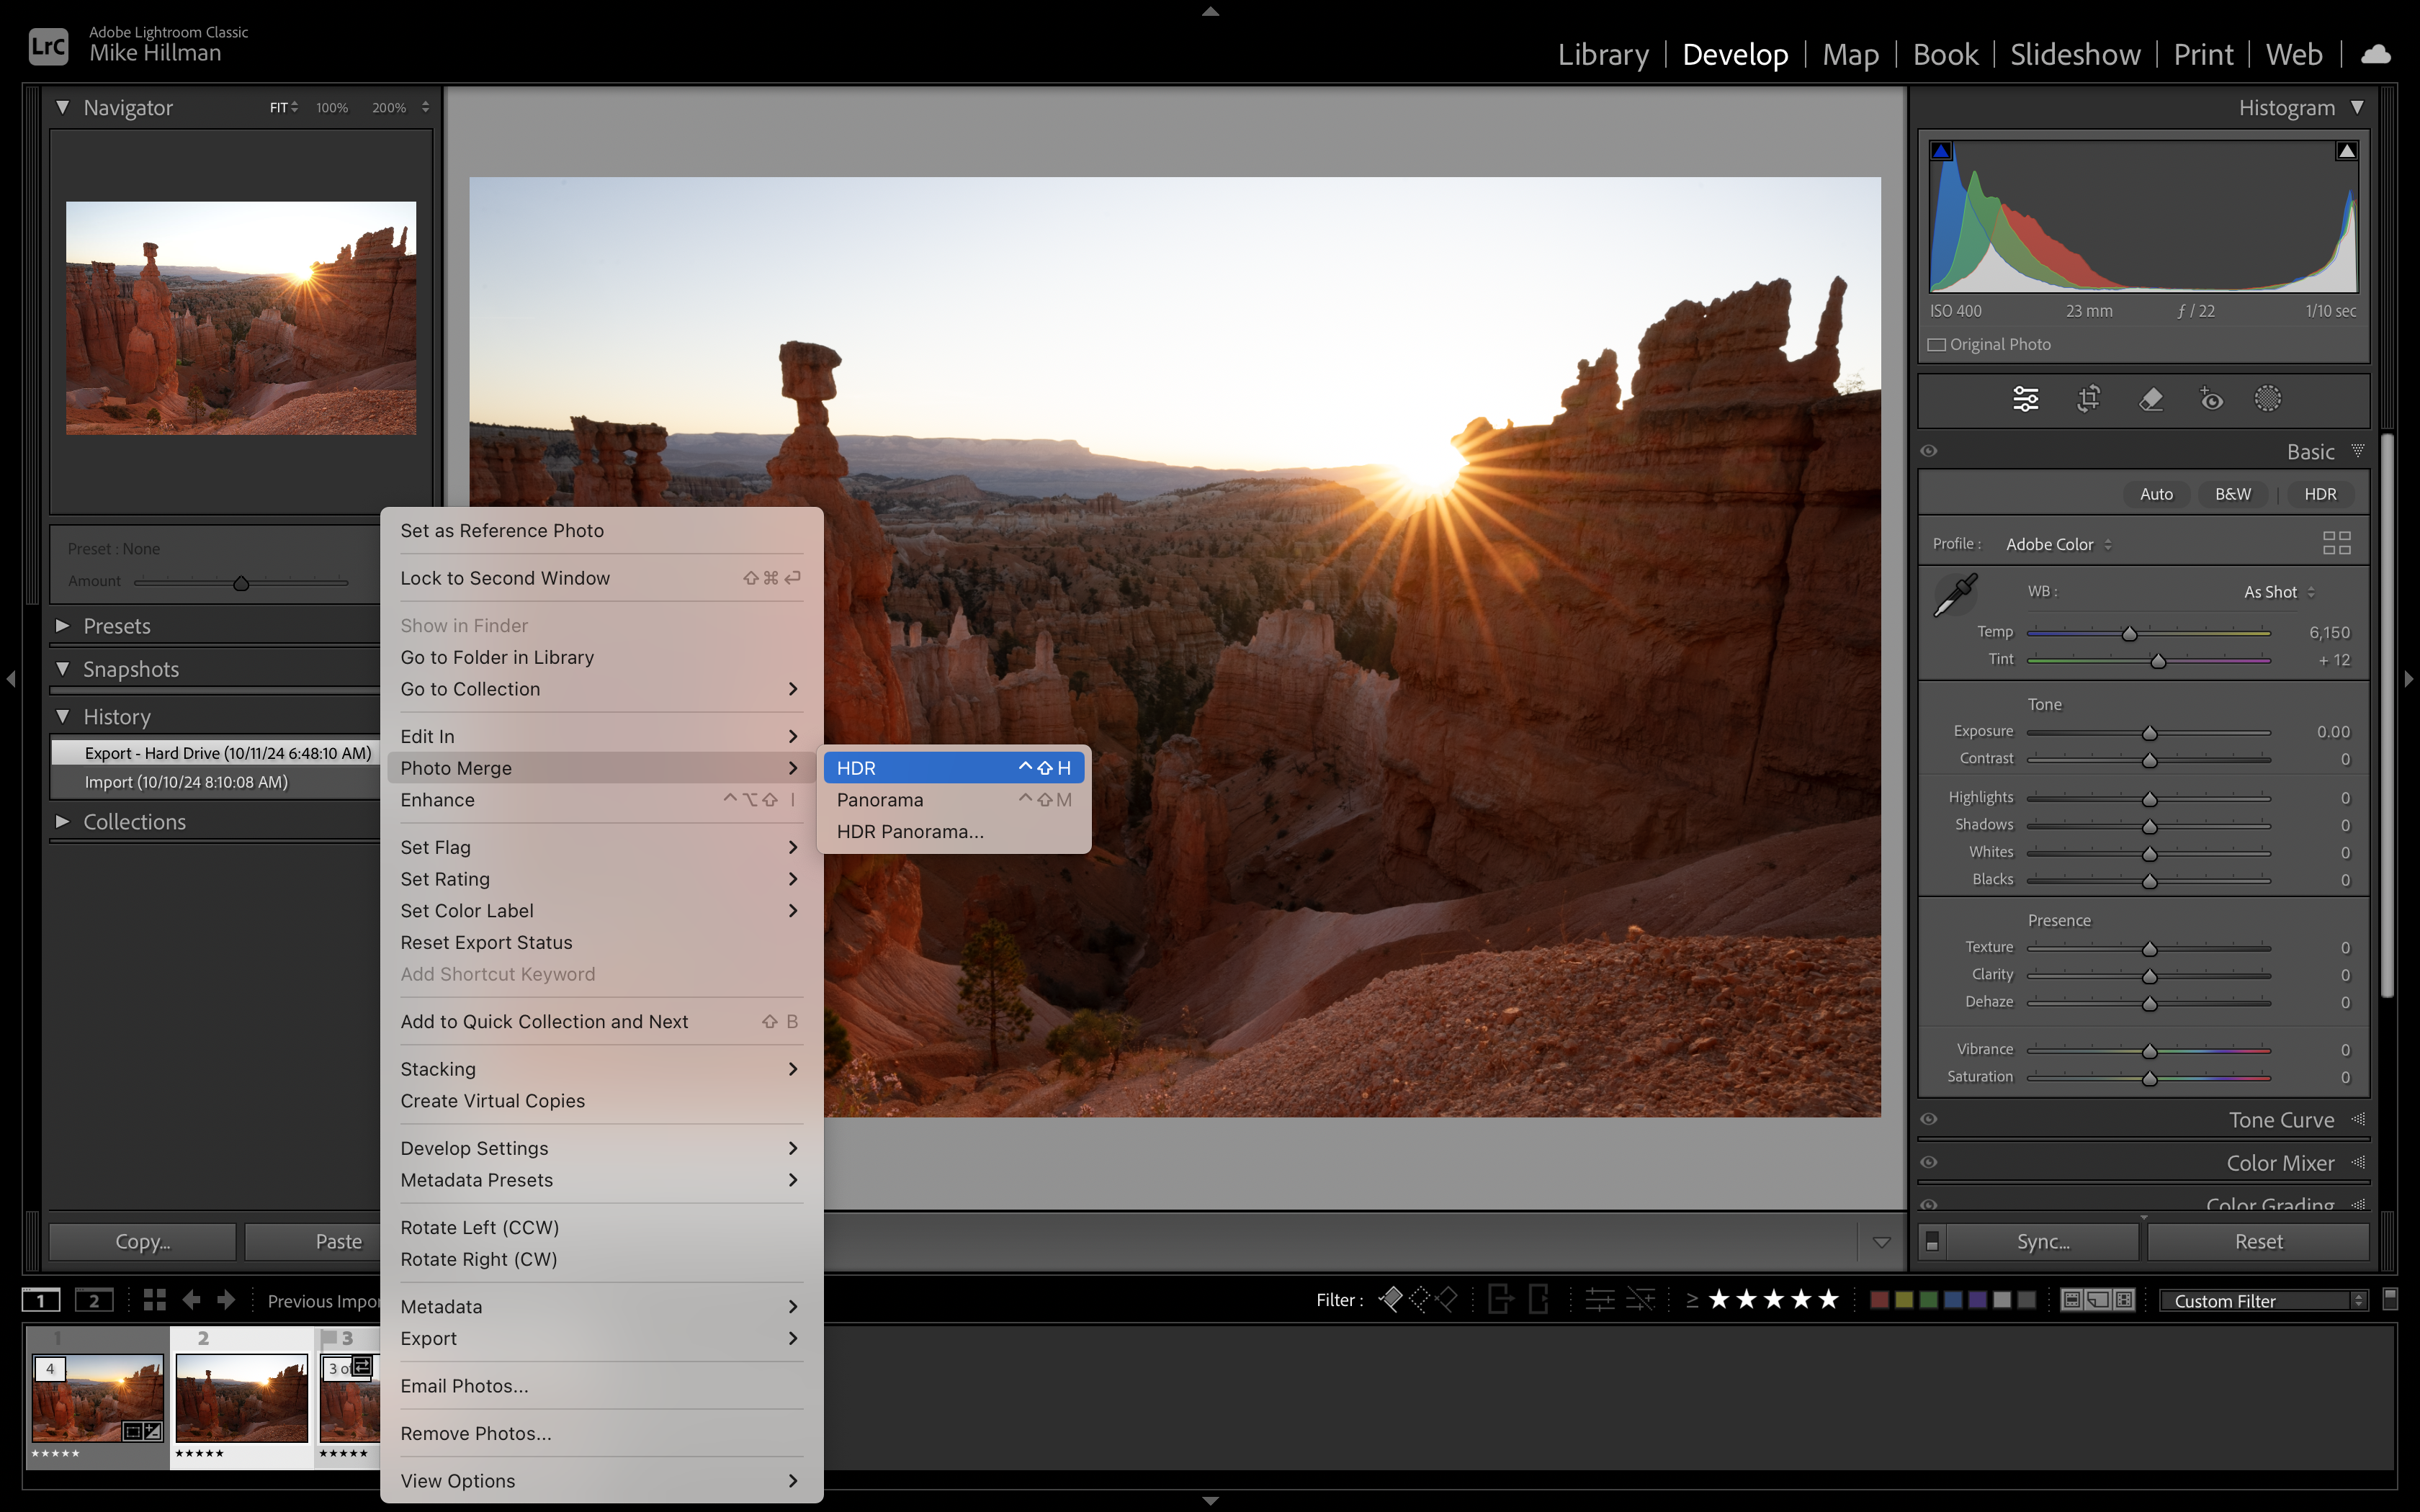
I use Adobe Lightroom for a majority of my editing, so here is how I merge photos using this software. Once you’ve imported your bracketed images, select all of them at once, right click to open the pop-up menu you see below. You’ll see ‘Photo Merge’ toward the top of the menu, then select ‘HDR’.
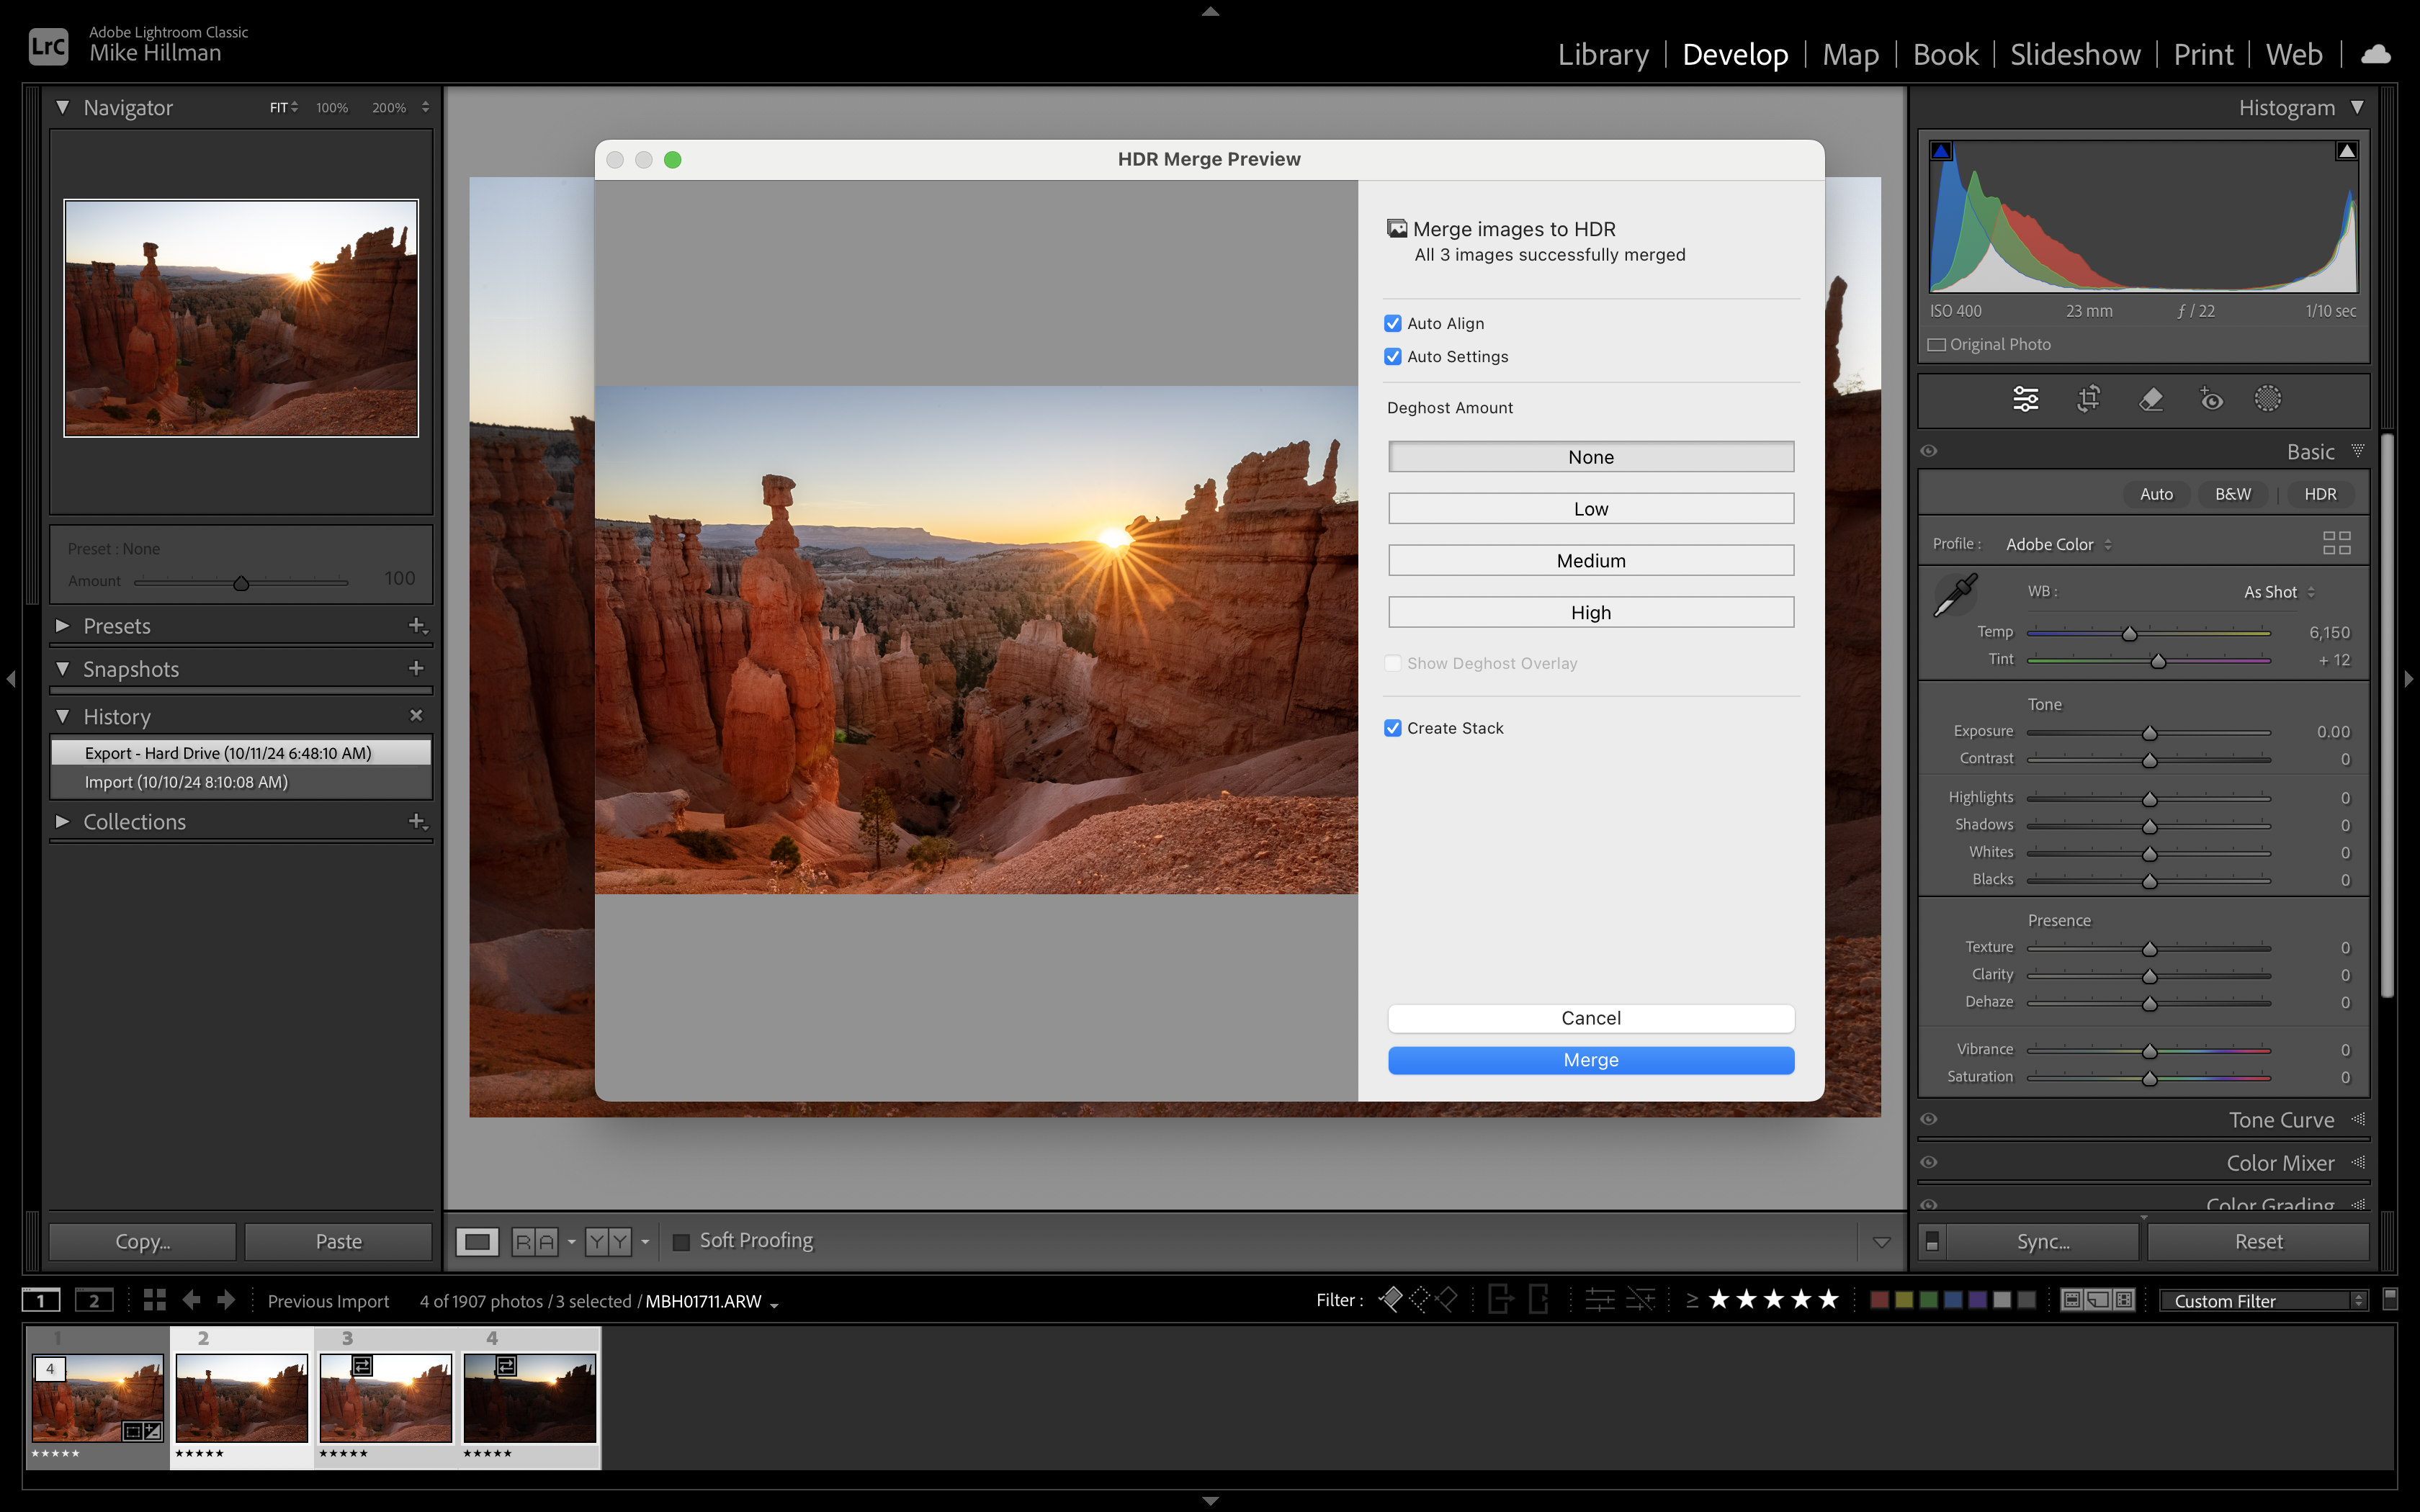
The program will take some time to load your HDR preview depending on your computer speed and the number of images you are merging. In the HDR Merge Preview screen, you’ll want to click ‘Auto Align’ so that Lightroom ensures your images align together perfectly before merging.
Depending on your editing style, you can click ‘Auto Settings’ to basically skip a step in the editing to see how Lightroom would edit the photo. As these edits (like all in Lightroom) are non-destructive, you can change any of the automatic edits once the image is merged.
‘Deghost Amount’ will remove anything moving between each exposure taken (think a bird flying through your sky). These will appear as transparent ghosts if not edited out. If you know animals or leaves were moving significantly between exposures, you can experiment with the ‘Deghost Amount’ to make your merged image look more cohesive.
Finally, to group your bracketed images together for a more organized Lightroom collection, I also have ‘Create Stack’ clicked.
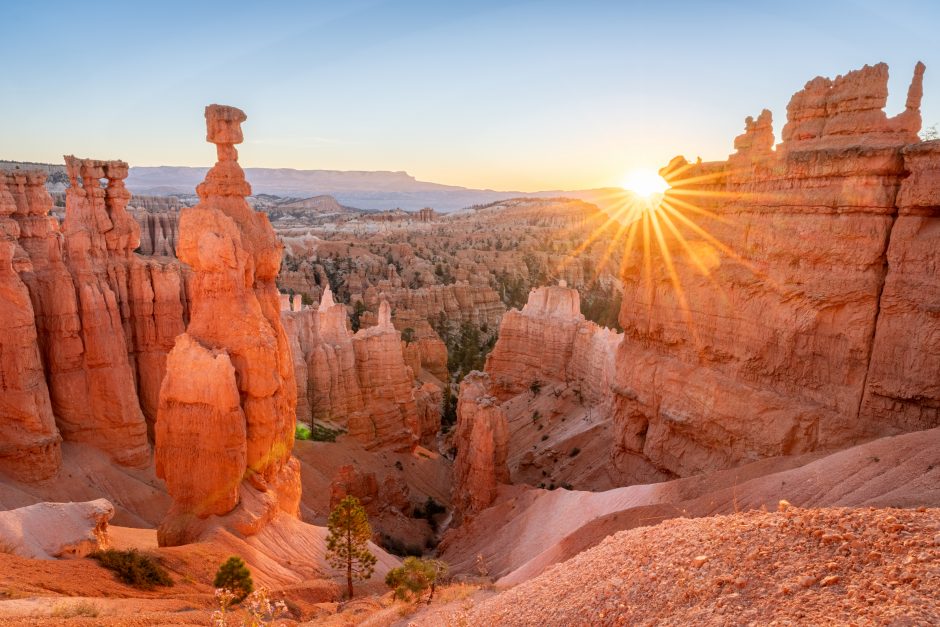
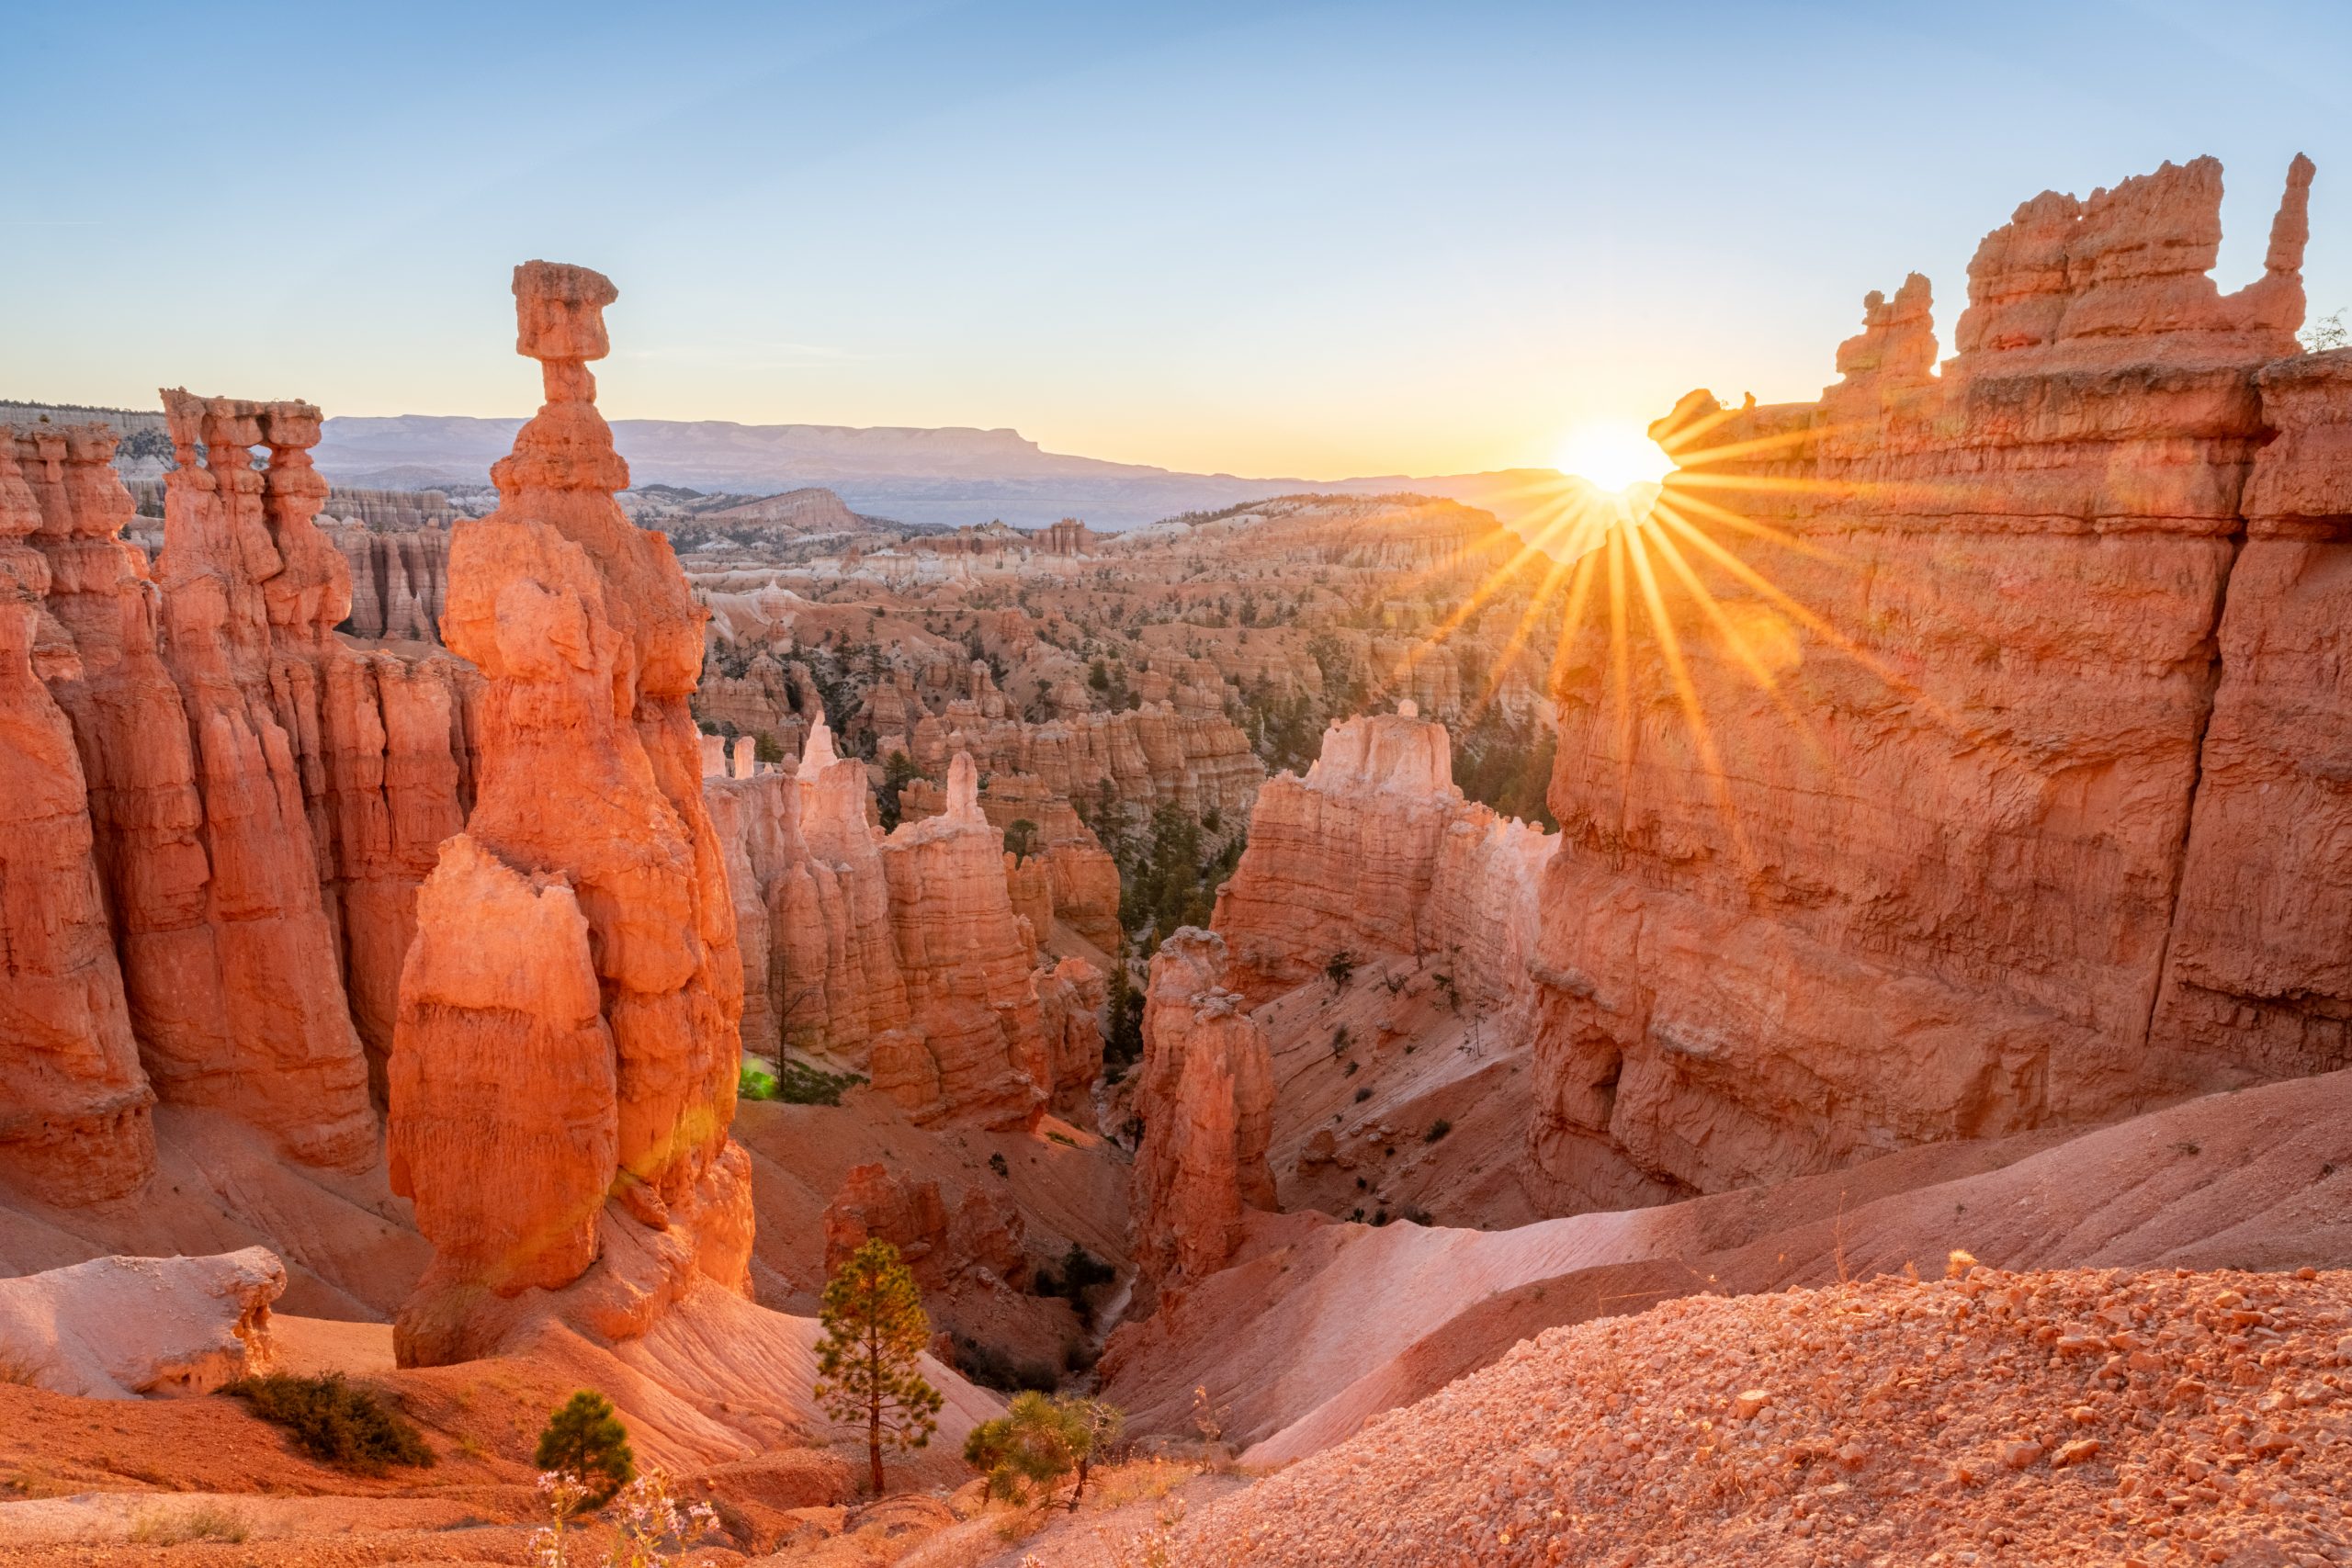
Upon merging, below is the image that was created. Notice how the shadows aren’t too dark and the sky isn’t so bright that you lose all the color in the sunrise. This is the magic of HDR and why it’s so useful in high-contrast areas like the canyons of the Desert Southwest.
Tips for Editing Natural-Looking HDR Photography
While HDR can create stunning results, it’s easy to overdo the effect, resulting in unrealistic or “overcooked” images.
- Fine-Tune Contrast and Exposure: Use the editing sliders to adjust contrast, exposure, and saturation. HDR images tend to have a lot of contrast by nature, so you may need to pull back on some areas to create a balanced final image.
- Avoid Over-Saturation: HDR can sometimes make colors too vibrant. Adjust saturation and vibrance carefully to maintain natural tones.
- Finalize Your Edits: Once the HDR image is processed, you can finalize your image with minor adjustments like sharpening, noise reduction, and clarity enhancements.
In Conclusion
Bracketing and HDR photography are powerful techniques that can help you capture the full beauty of the American Desert Southwest, especially in a place like Bryce Canyon National Park. By mastering these methods, you’ll be able to create images that showcase the region’s vivid colors, intricate textures, and dramatic lighting.
Whether you’re shooting the hoodoos at sunrise or capturing a sunset canyon vista, bracketing and HDR will ensure that every detail of this iconic landscape is preserved in stunning clarity.
Happy Photographing,

Leave a reply