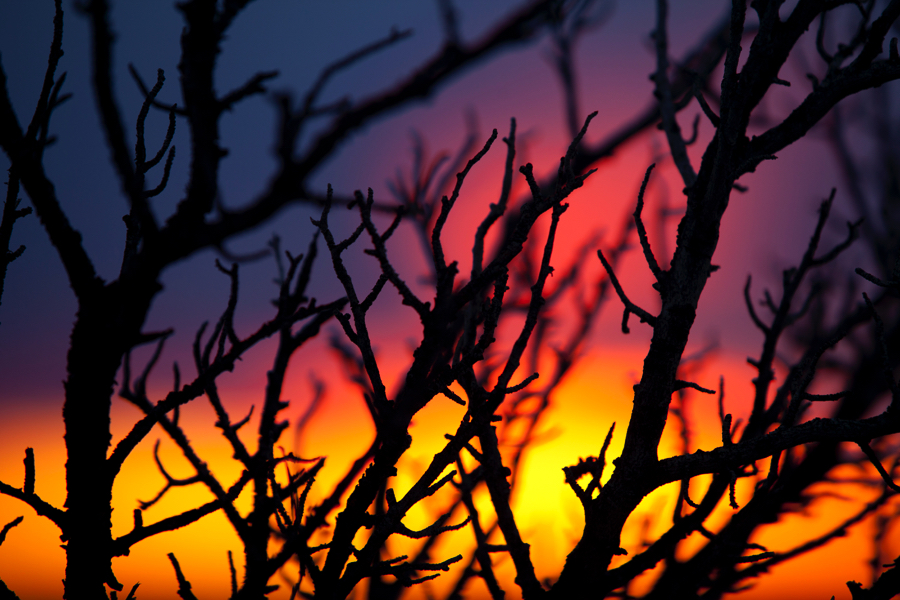
Exposure & Light
Along with composition, light is one of the most important considerations when taking photographs. After all, photography really is all about light. You could be witnessing the greatest view of the grand canyon, but if it’s in the middle of the night, you’re not seeing much – it’s all about light! With new techniques in post-processing programs like photoshop and lightroom, it is getting easier to change exposure and lighting after you take the photo, but the fact remains that you will always be happier with the photo if you take it best in the moment. Not just happy because you don’t have to spend lots of time editing a photo, but happy because the photo will indeed look better.
The first thing to consider when dealing with light and exposure in your photography is simple – getting the exposure right. Not too light and overexposed (or blown out in photography jargon), and not too dark either. But how, you ask, is it possible to determine this? Digital cameras now afford us the luxury of actually previewing the image just moments after taking it. This, of course, is a highly valuable tool and always the first way to evaluate the scene and determine the settings to shoot with. But, it can be misleading. Things can get in the way to fool you when doing this. The brightness level you have your LCD screen, for example, is one. Then there is the brightness of where you’re actually viewing the image (full sun vs. a dark hallway). Between these two things, it’s evident that simply viewing the photo is rather inexact. Fortunately, memory is cheap and you can get away with taking a few of the same photo at different exposure levels. However, if you want to get scientific and very precise, all digital cameras come with what’s known as a “histogram” function, where you can read the light levels of the photo in a very precise and scientific way.
Histograms, however, are not the be all end all of light measurement. You should use your eyes to evaluate, as the first and last line of defense. They are, though, a great way to see if there are any major problems going on with a shot.
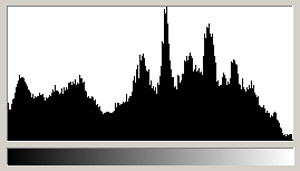
A typical histograms shows that light is generally in the middle range of darkness, ideal for a balanced shot
In looking at the above histogram, the spikes, although relevant in terms of which dark/light profiles are most commonly represented in the photo’s exposure, are irrelevant information for making any changes to the next photo’s exposure. For instance, one might be photographing fall aspen trees, with shades of light grey represented more frequently due to their light-colored bark.
What we’re really looking for in a histogram is any major swing to one end of the graph or the other. That is, a major curve at the extreme dark or light end, which would indicate that the photo is “scientifically” too dark or too light.
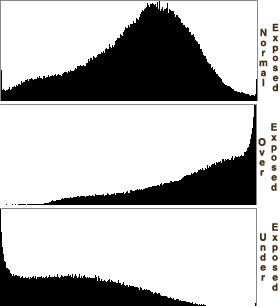
Three scenarios for exposure. The top is evenly exposed, whereas the middle is seriously overexposed, and the bottom is seriously underexposed.
The above three histograms illustrate what we’re looking for (the top graph), and two scenarios that would cause us to want to re-evaluate the photo and take another shot. When there is too much over or under exposed parts of the photo data is lost and not even the fanciest editing program can fix it.
Camera Metering
Unless you are photographing on full manual mode (usually designed with an “M”), your camera is choosing the appropriate exposure for you based on the scene. You can manually dial in an exposure compensation in order to correct what the camera “decides” for you. Each camera brand and model will look slightly different, but they in some way shape or form will look like the image below, ranging from -2 to +2. Because of the brilliance of digital cameras, most will now allow you to preview the image based on whether you overexpose the shot by +1, +2, or underexpose it by -1, or -2. If not, you can always take a trial shot to see the result.
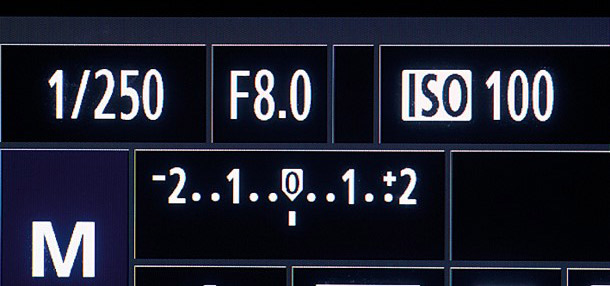
Most camera menus will have a sliding scale like the one above, ranging from -2 to +2.
How a camera chooses exposure
Cameras are smart and getting smarter with each year and new models that come out. From point and shoot to full-frame DSLR, they have a number of highly intelligent sensors and data points from which they decide on what an “evenly exposed” shot ought to be. In the camera world, this even exposure means that the camera perceives 18% gray across the image. This has been determined through years of experimentation from camera engineers to be similar to what the eye sees naturally.
The challenge for the photographer is telling the camera whether it should look at part of the image to meter, use only a small point, or use the whole frame. The reason for not just using the entire image has particular importance with wildlife photography where the subject is the focus and thus prioritized for even exposure, even if at the expense of the background.
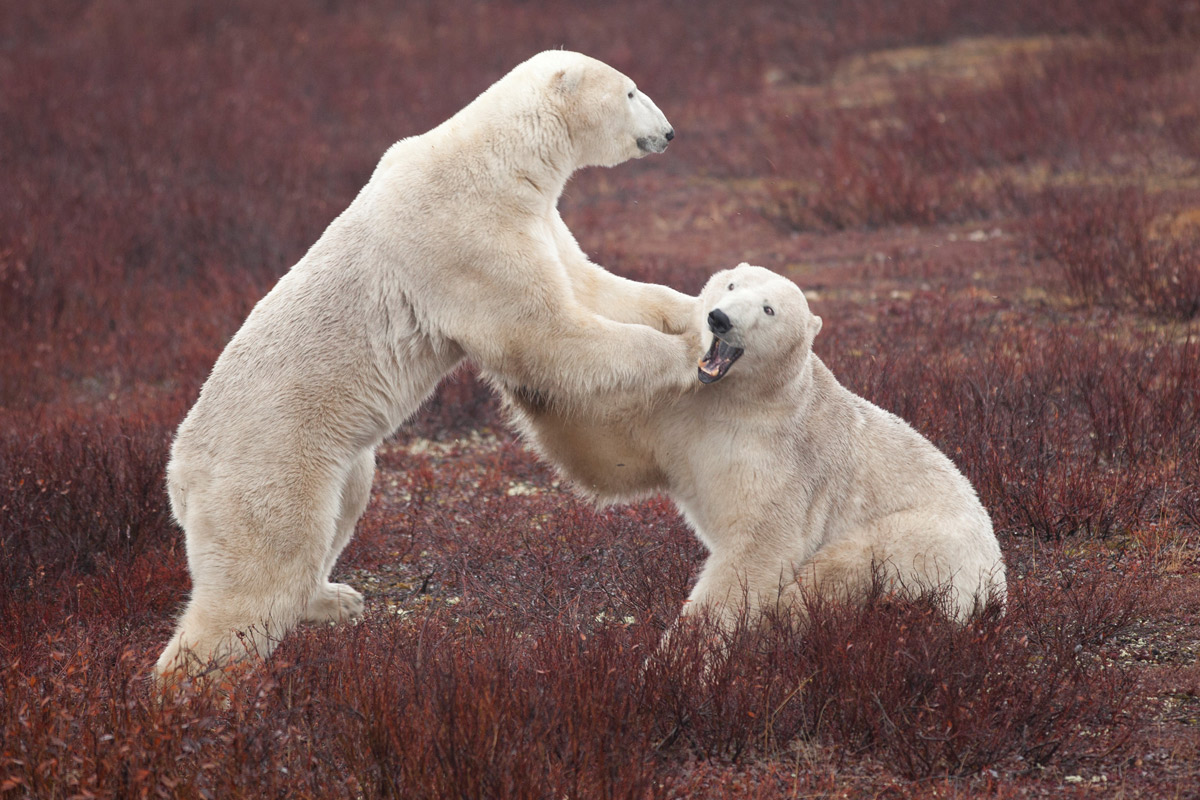
A prime example of this in the world of wildlife photography is when the animal stands out significantly from the background. In the case of photographing polar bears, it matters most how the bears are exposed, not so much the background. Although the red and brown willows are neat, they aren’t what you care about most – you want those bears as the centerpiece. In this case, one would want to manually use a metering setting that is in the center of the shot so that the camera doesn’t adjust to the darkness of the background, which would overexpose the white bears. If changing the metering mode is difficult to do (which it can be depending on your camera), the easiest way is to try and take a few different shots at varying exposure levels. Remember, it’s always best to get the shot right the first time, so if you have to delete photos after you return from the trip, it’s better to do this than to have to make a major correction in lightroom or another editing program.
For most cameras, there are four types of metering modes that your camera uses to decide on which part of the photo it evaluates for proper exposure. As you can see from the red areas, evaluative is the most comprehensive, looking at the entire frame for proper exposure. This is ideal for landscape, scenic, and general shots. Center-weighted gives more priority to the middle of the photo, and is still appropriate for landscape and general shots. Both partial and spot metering is best for wildlife shots, where the other elements of the landscape are secondary to a singular subject in the photograph. Needless to say, spot is the most pinpoint accurate of the two. But it’s important to remember when using partial or spot metering, where you auto-focus your camera also becomes the point at which your camera exposes for.
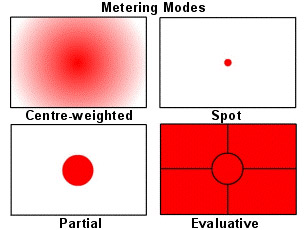
Setting exposure metering modes like those above will best be done by looking at your camera’s manual, but plan on something in your camera’s menu resembling the below.
Most cameras have four metering modes. From the left, these menu icons represent center-weighted, partial, spot, and evaluative.
Rules of Thumb
For a topic as important, and oftentimes confusing, as exposure and light in photography, it’s best to summarize things with some basic rules of thumb:
- Always consult your eyes first, and histogram second for shots that could be over or underexposed
- Don’t hesitate to take another shot, compensating for exposure in your camera’s menu with a +1 or -1 setting.
- Choose the best metering mode for the type of photography that you do, and it will save you time in the long run.
- Practice makes perfect. Getting comfortable changing your camera’s exposure settings (both modes and compensation) can be challenging. With practice, it will become second nature and you’ll get the shot each and every time – with very little editing to do afterwards!
