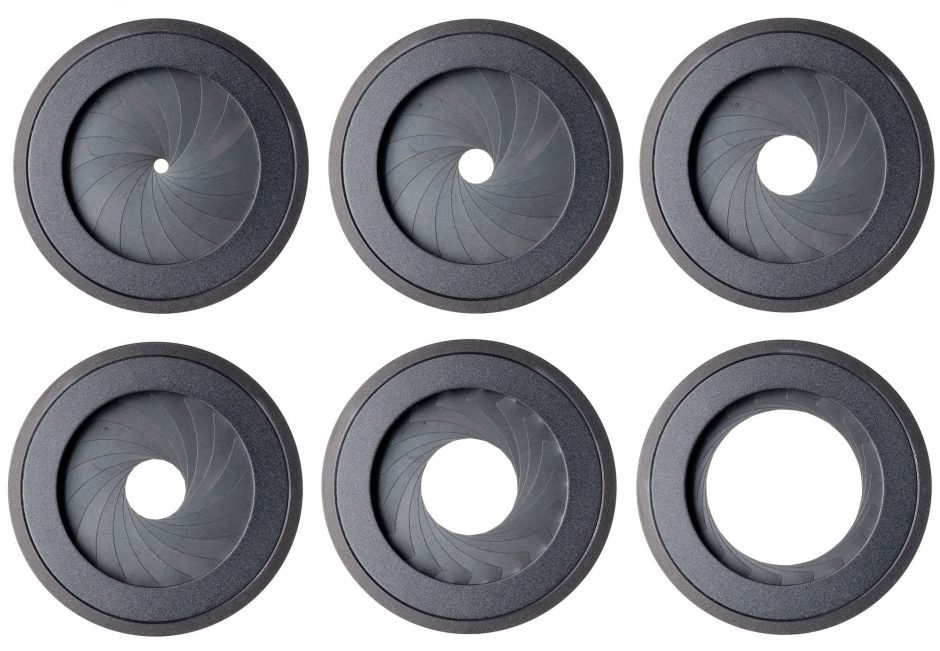
Aperture & F-stops
If you’re an enthusiastic amateur at photography and haven’t yet gotten past the “auto” mode on your camera, this is the best place to begin with in expanding your photographic prowess and understanding – by choosing your own aperture to shoot with.
To start with, let’s define what a camera aperture is, and what the f-stop designation actually means. A camera’s aperture is basically the diameter of the opening within the lens that allows light to pass through to then reach the sensor (or film, in the good ol’ days).
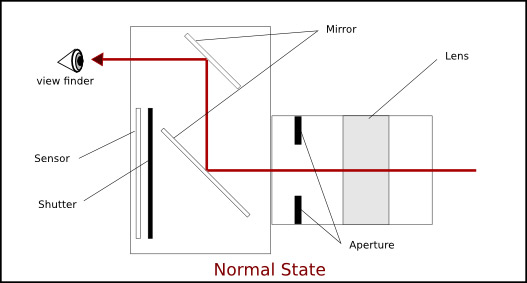
Above is a graphic of a side profile of a typical SLR camera, with lens pointing towards the right. The two small black lines represent the outer openings of the aperture. Since this is a profile graphic, it’s a little difficult to understand what the opening actually looks like, so the below graphic shows the head-on view of a lens aperture.
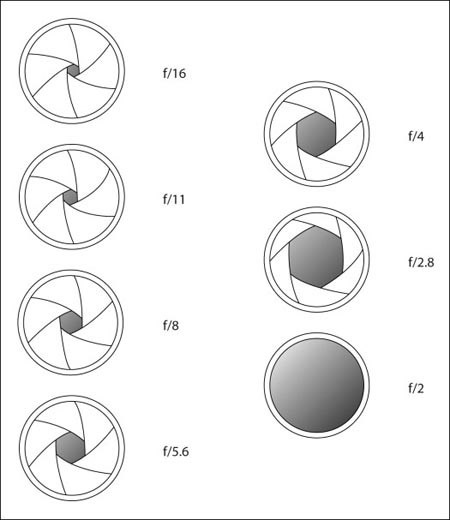
As you can see, for each diameter of aperture there is a corresponding “f” value. The above chart lists all “common” aperture values, as denoted by the corresponding f-values. Between each of these values, most modern cameras will allow you to set values 1/3 of the way between. For example, between 5.6 and 8 there is f/6.3 and f/7.1, too. The “whole” stops of f/5.6 and f/8 have two in between points that you can dial your camera for. The key to understanding this all right away is to immediately disregard these numbers as any sort of actual numerical value in relation to one another. In other words, do not start mentally comparing these whole numbers to decimals, or trying to make a relationship between these numbers using math. Rather, you’re going to need to memorize each of the above f-values (aka “f-stops”) as categories. Just like you would memorize your ABCs from A to G, so should you memorize these numbers above (f/2 to f/16).
So, you ask, if I’m to memorize these numbers what is the significance of all this? Glad you asked. As you can see, the lowest f-stop number, f/2, is the widest opening in the aperture. This means that you are letting more light reach your sensor than f/2.8. Just like a water pipe with a wider diameter allows more water to flow through per second, so does a wider aperture when it comes to letting more light “flow” into the camera’s sensor.
The numbers in the above chart are there for a reason. It certainly seems arbitrary to have these seemingly-obscure numbers, jumping from 2 to 2.8 to 4 to 5.6 to 8, then 11 and 16. How are these all related? Simple – each “stop” (just a basic term – memorize this jargon, too) going from 2 to 2.8 and then to 4 is allowing half the amount of light into the sensor. Higher numbers let in less light than the lower numbers. Thus, if you have your camera set at f/4, you are letting in twice the amount of light than if you set it at f/5.6 (ie, f/4 is one full stop wider aperture). Similarly, f/5.6 lets in twice the amount of light as f/8, and f/11 twice as much as f/16. Remember, don’t worry about these numbers in relation to one another – it’s best just to memorize them for now.
There are two primary ramifications for setting your camera at a particular “f-stop” or “aperture setting” (note: these terms mean the same thing). The first, which I’ve already identified, is how much light you’re letting through. This is especially important when making sure you are shooting with a fast enough shutter speed. Read the Exposure & Light section for more info on this.
The second ramification is your depth of field, and that will be the focus (pun intended) of the rest of this article.
So, what is depth of field? Basically it determines how much of your photo is in focus. For example, have you seen photos with a beautiful background blur, intentionally left out of focus?
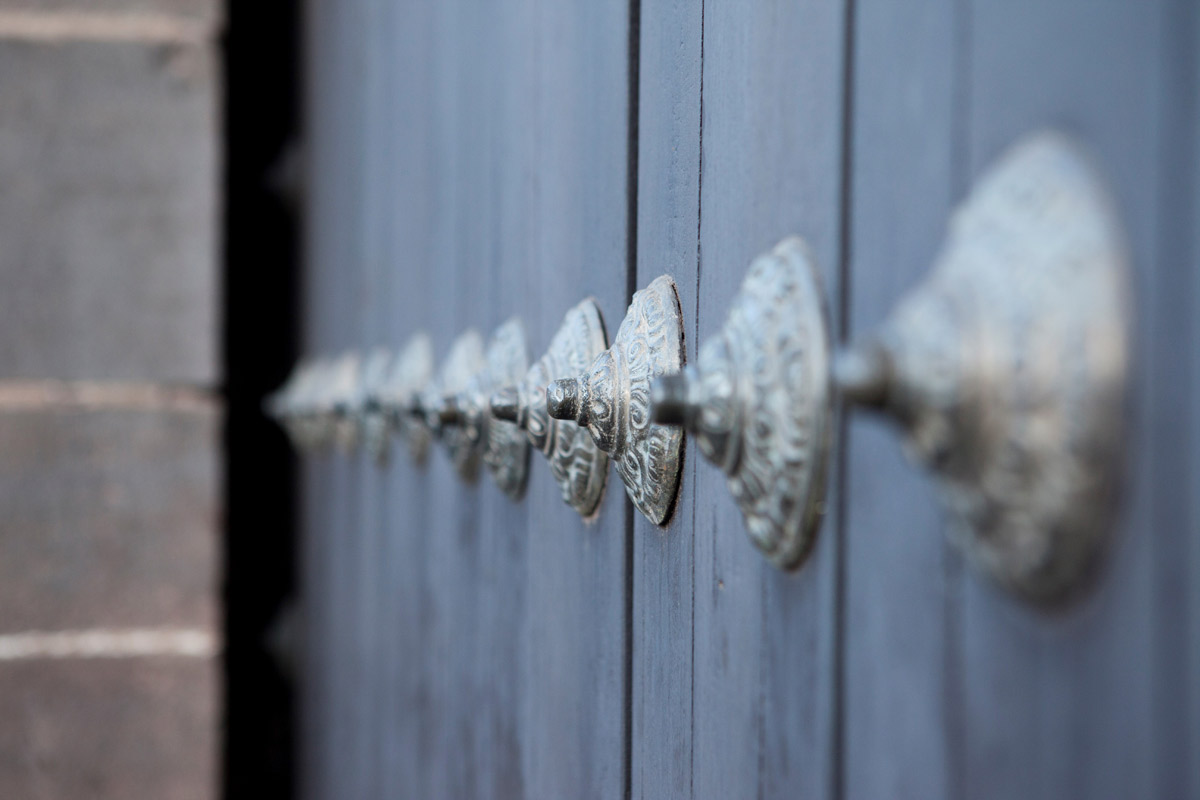
The above photo exemplifies the intentional use of blur. Even though these rivets on a door in Cusco, Peru, are rather close together, a very wide aperture (ie, small number, f/2.8) creates this very shallow depth of field.

Similarly, the above photo features a lemur in Madagascar with an artistic and pleasing blur surrounding the subject. Because the leaves and other branches are at a greater distance from the photographer than the lemur is, a wide aperture allows for a more narrow (aka shallow) depth of field, yielding a nice blur to the non-important parts of the photo. This allows the viewer’s eyes to be drawn to the main subject – the fascinating lemur (Coquerel’s Sifaka species).
The exact aperture setting or f-stop that will yield such blur is going to depend on many factors. How far away your camera is from the subject, and how far away the various parts of the scene are from one another are primary considerations. For instance, if you want blur branches around an animal (eg, the lemur photo) the branches need to be outside of the plane of focus by a reasonable amount. The word “reasonable” is ambiguous and so is the exact blur you’ll get from one scene to the next. Practice is truly the only way to get a decent handle on ratios from camera to subject to background, etc., etc.
Aperture settings go the other way, with bigger f-stop numbers allowing more of the scene to be in focus. Rather than go into a physics lesson here to explain exactly how optical physics will yield a greater plane of focus, just go ahead and blindly follow this tidbit of info. Just like a shallow depth of field, and the resulting blur, will vary based on things like the distance you are from the subject you’re photographing, and so on and so forth, the same is true of getting everything in focus.
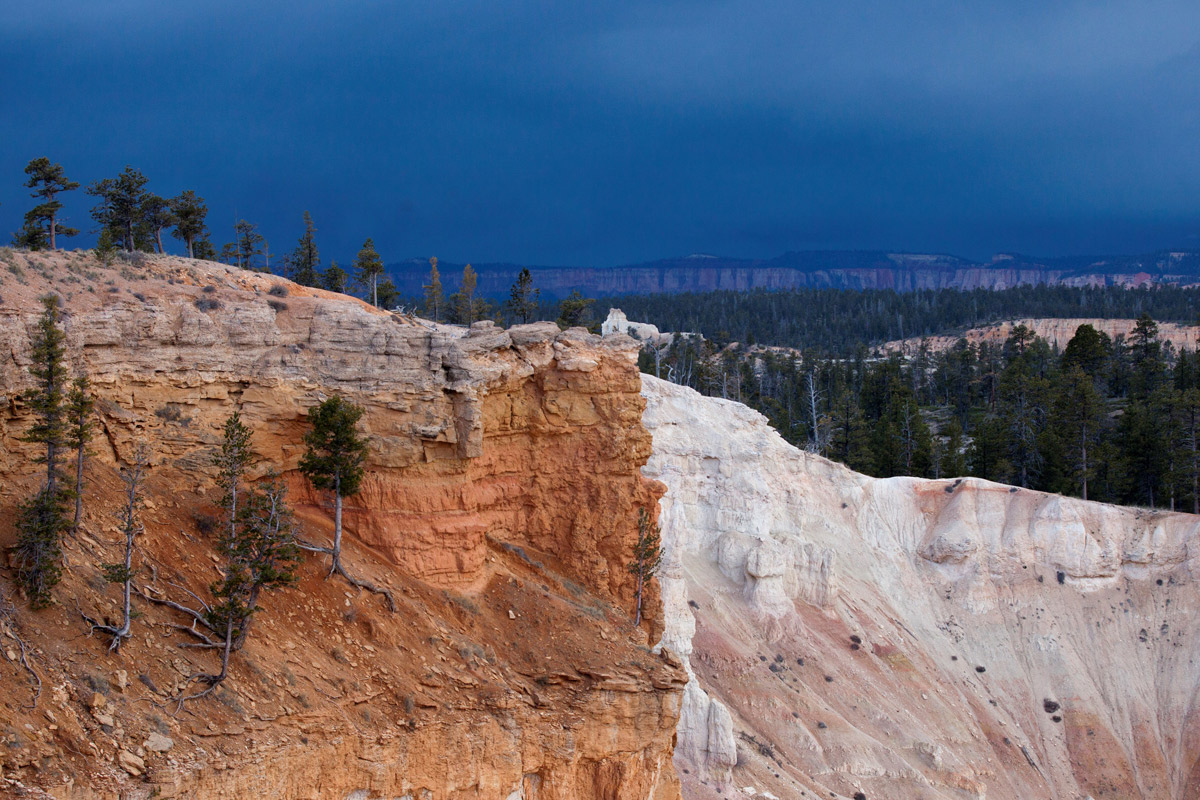
Landscape photography is the most common time to use a very wide depth of field, getting as much of the scene in focus as possible. Rules are always meant to be broken, so not every landscape shot needs to be at a big f-stop number (f/8 and above), but many indeed are.
The above shot of the rim on Bryce Canyon is a great example of needing to use a wide depth of field to make sure everything is in focus. The orange soil and the white soil are actually separated by a small gap of around 50 yards as the canyon rim winded around from left to right. As a result, a shallow depth of field would have caused part of the scene to be out of focus. The white cliff would be out of focus if I focused on the orange, and vice versa. However, with a high f-stop, both are in focus in the above photo as desired.
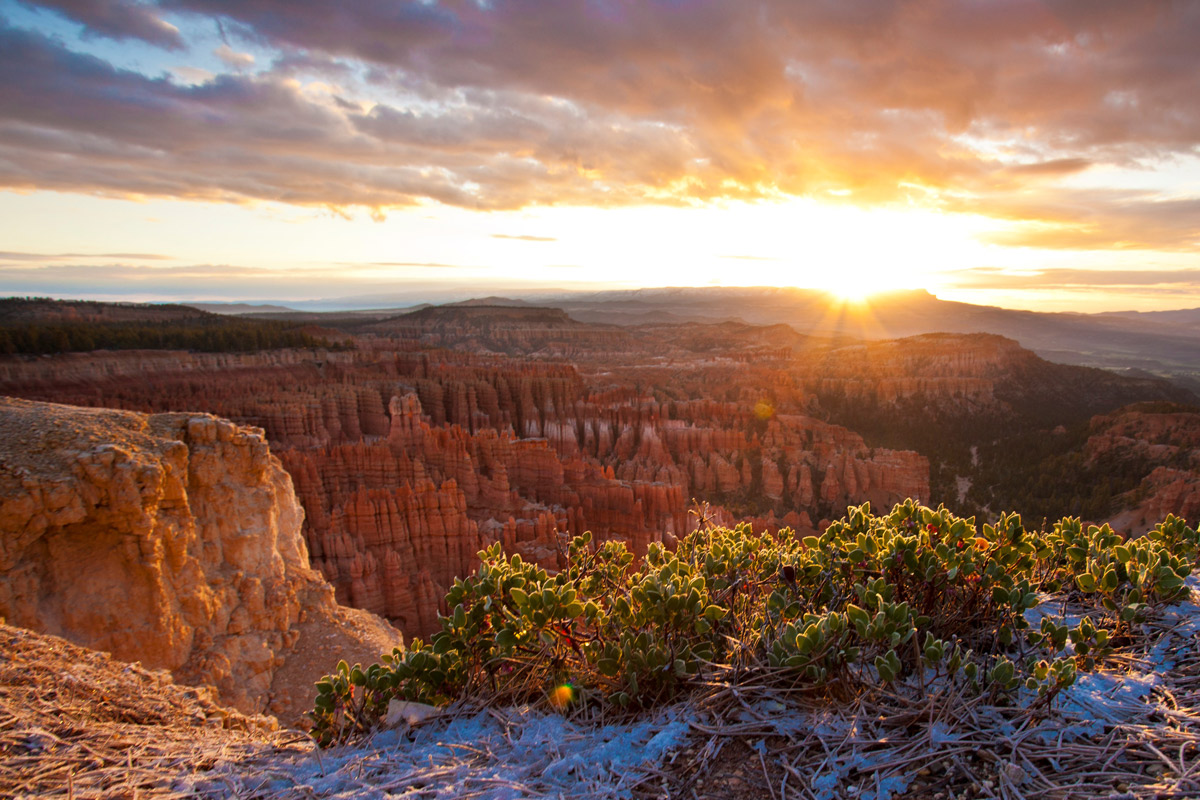
One rule of thumb for landscape photography is to try and find something in the foreground to focus on. Check out our composition and landscape photography pages for more info on this. But foreground focus can pose challenges when it comes to wide depth of field. Because of the ratio of your camera to the subject (eg, the foreground element) and from subject to the background, it’s imperative that you use a very very large f-stop number. F/11, f/16, and even greater are often needed. Even in the above photo you can see how the Manzanita bush is in sharp focus, with the clay hoodoos in the background a bit out of focus.
Aperture is truly at the heart of photography, so having an understanding of it is critical for advancing the way you shoot. Inherently it is a rather simple process. Changing the aperture is a sliding scale and affects two things – the depth of field and the amount of light let in. However, the ramifications for these two things have on your photo are paramount.
When it comes to understanding these ramifications, practice makes perfect. Get outside or on a nature trip and play around. The more shots you take, the better you’ll understand how to use apertures and f-stops to dramatically improve your technique and ultimately the quality of your photos.
Recap
- Changing the f-stop or aperture widens or narrows an opening inside your lens that lets light reach the sensor.
- A wide depth of field (more parts of the photo in focus) is achieved by having a narrow aperture (smaller opening), corresponding to a big f-stop (f/8 and above)
- A narrow depth of field will intentionally blur parts of the photo, and is achieved by having a wide aperture (larger opening), corresponding to a small f-stop number (f/4 and below)
- F-stop numbers are all relative depending on the distance you are to the things you’re photographing and the proportion of the subject to the overall frame of the shot.
- Practice is critical to properly understand the effects of changing your aperture/f-stop.
