Pro Tips for Capturing Wildlife Portraits on Safari
Wildlife portraits are usually the most sought-after form of nature photography, as they feature charismatic wildlife in big, bold glory.
And speaking of big, charismatic wildlife, what’s more extraordinary than the wildlife of Africa and joining a dedicated photo safari to capture their splendor in the best ways possible?
So today, we’re discussing how to combine the brilliance of African safari wildlife with the venerable approach of wildlife portrait photography to create true works of art. The best part is that that are as fun to create as they are to view (and show off) after the trip!
Choose the right lens
To get great portraits, you have to have a great quality lens. Because so much of strong portraiture is in the sharpness and inherent contrast in the scene, a good lens will go a long way. However, beyond just a top quality lens, you’ll want to use a lens that is capable of shallow depths of field.
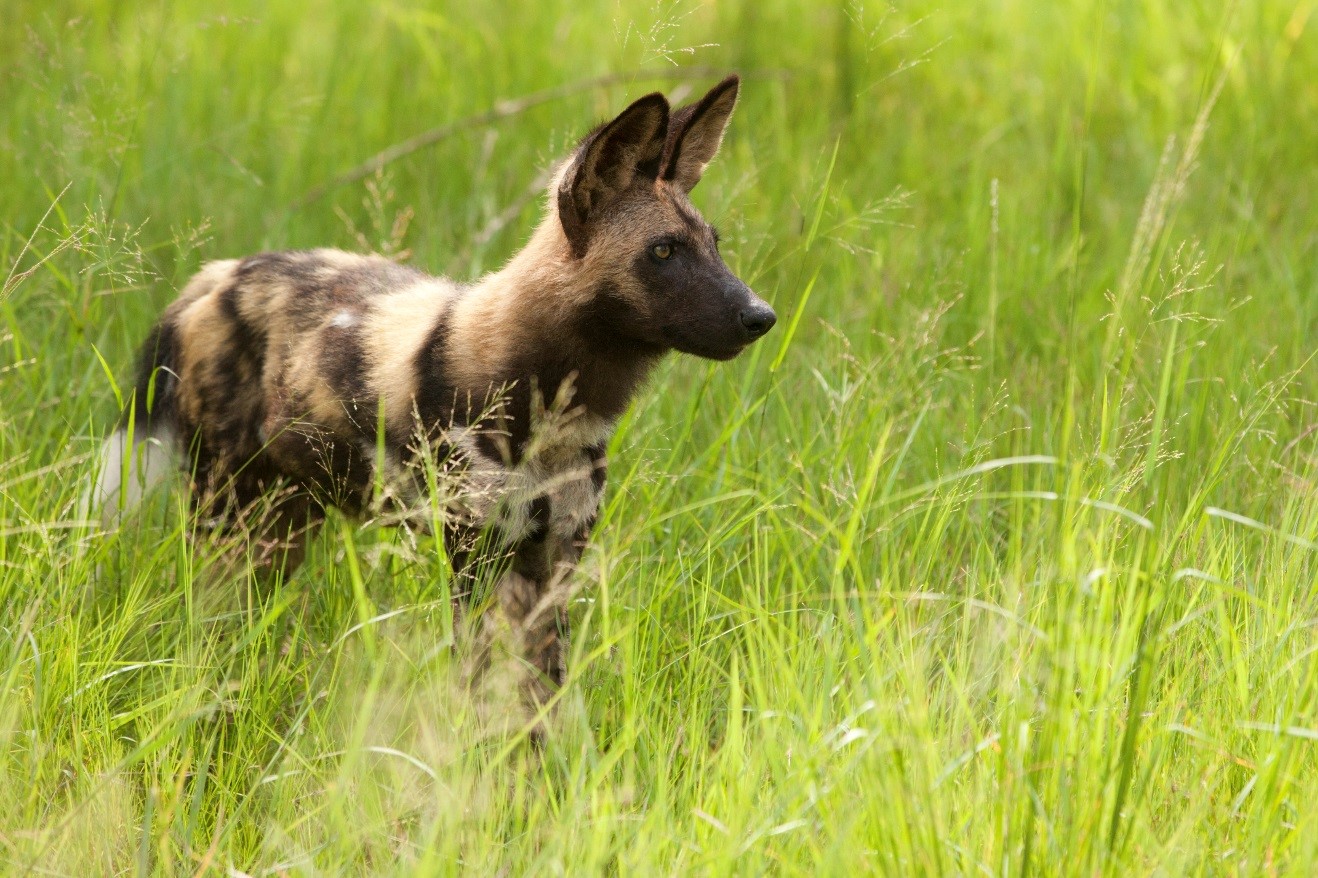
A shallow depth of field is key in portrait photography, as it helps isolate the subject from the background (or foreground) to minimize distractions. The blurred background also makes the subject pop and seem even sharper because of that juxtaposition of blur and sharpness.
There are so, so many lenses to choose out there, but the very best for portraiture will be in the f/4 or f/2.8 range. However, these are often cost prohibitive when you’re looking at focal lengths in the 300, 400, and 500mm range. Thus, most wildlife safari lenses will be closer to f/5.6 at their smallest f/number. While f/4 is better, f/5.6 when used correctly, can be excellent as well.
Dial in the right settings
It may seem obvious based on the previous section, but you’ll want to set your aperture on the smallest f/number (aka, biggest aperture) to maximize that shallow depth of field. Fortunately, this will also give you more light in your camera, so if you’re shooting at low-light times of day like dawn or dusk, you get a boost in shutter speed due to the big aperture. It’s a two-fold benefit!
Your other key settings, like ISO and shutter speed really just “need to work” in order to support the aperture. Thus, you don’t need to over think it. Per the norm, you’ll need to shoot fast enough to freeze motion and keep your ISOs as low as possible.
You’ll also want to have your camera on burst mode so that you take as many photos per second as possible. The slightest change in the animal’s expression can make or break your favorite photo.

Get the right composition
Just because you’re filling the frame with an amazing animal doesn’t mean you can ignore time-tested rules of composition.
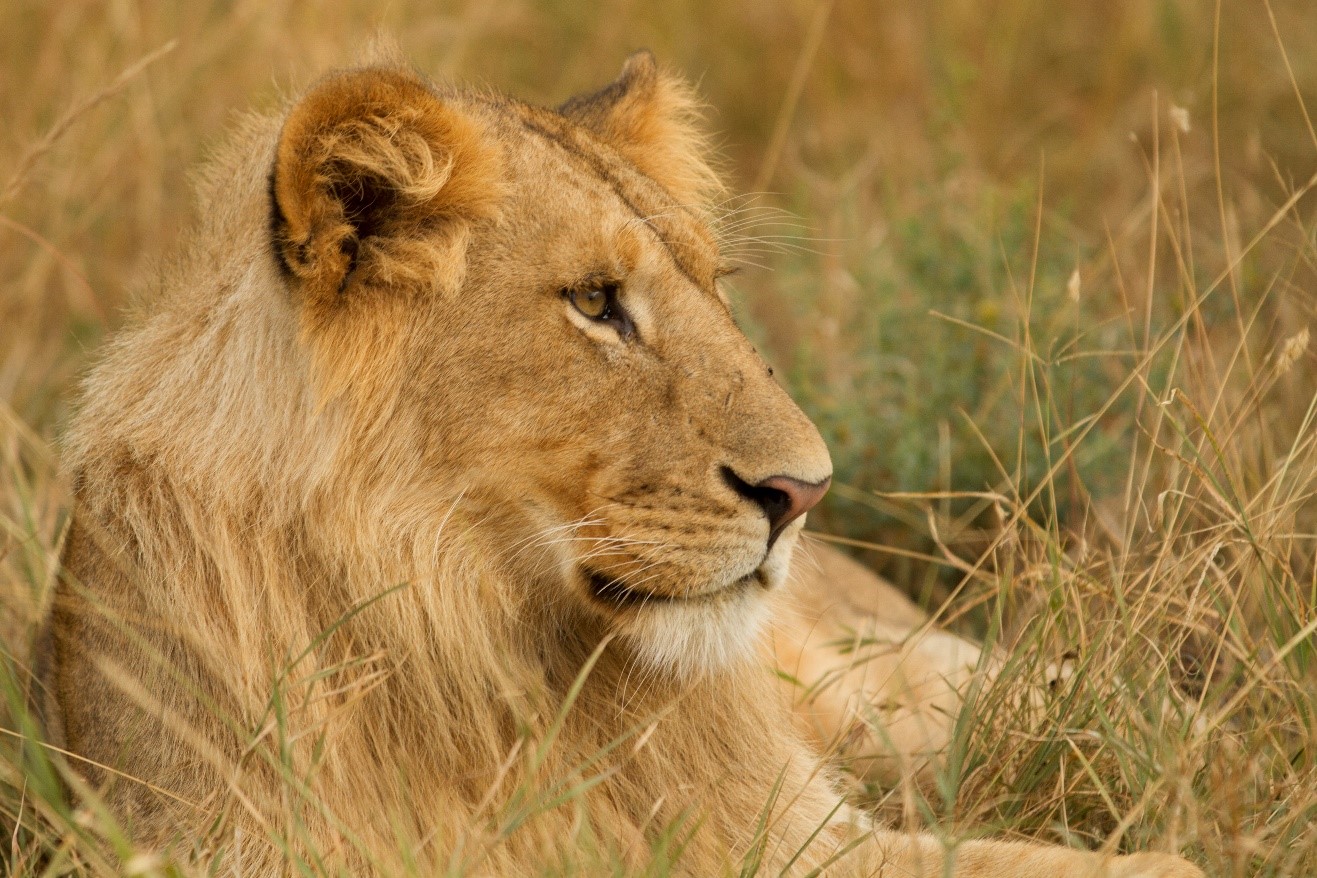
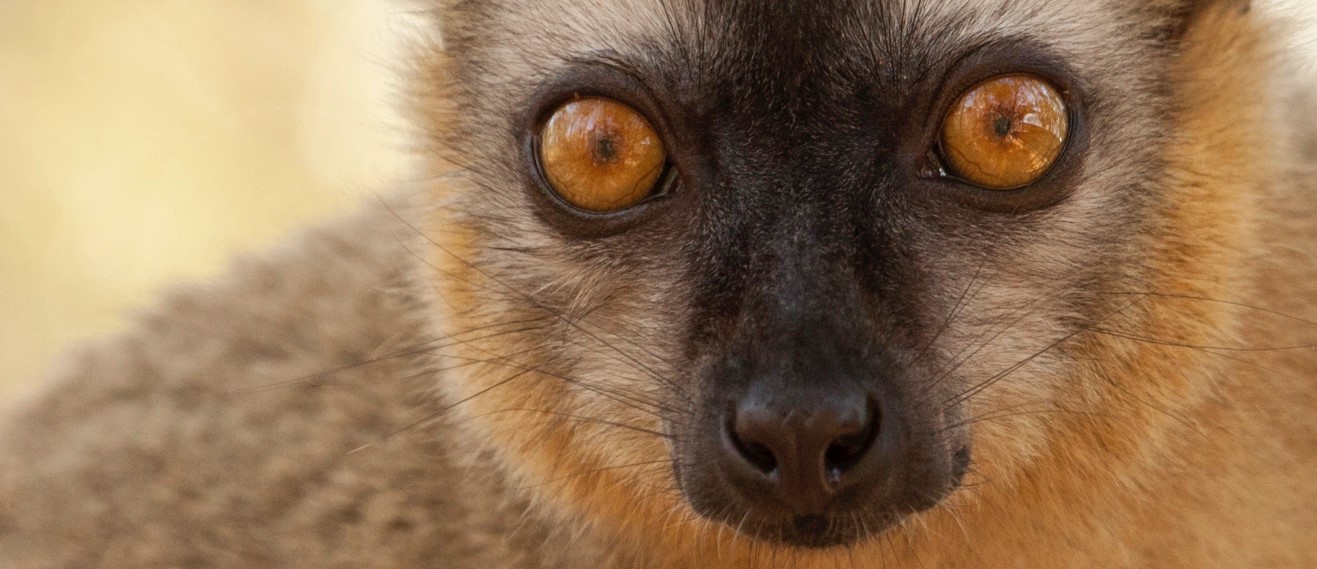
Be sure to frame your shot adhering to the rule of thirds (or close to it) for maximum impact. Rules are always meant to be broken, but in the case of wildlife portraiture, there isn’t as much flexibility because you are zeroing in so close to just part of the animal (usually its face). Doing things like exaggerating composition or other rule-breaking techniques doesn’t apply quite as much here.
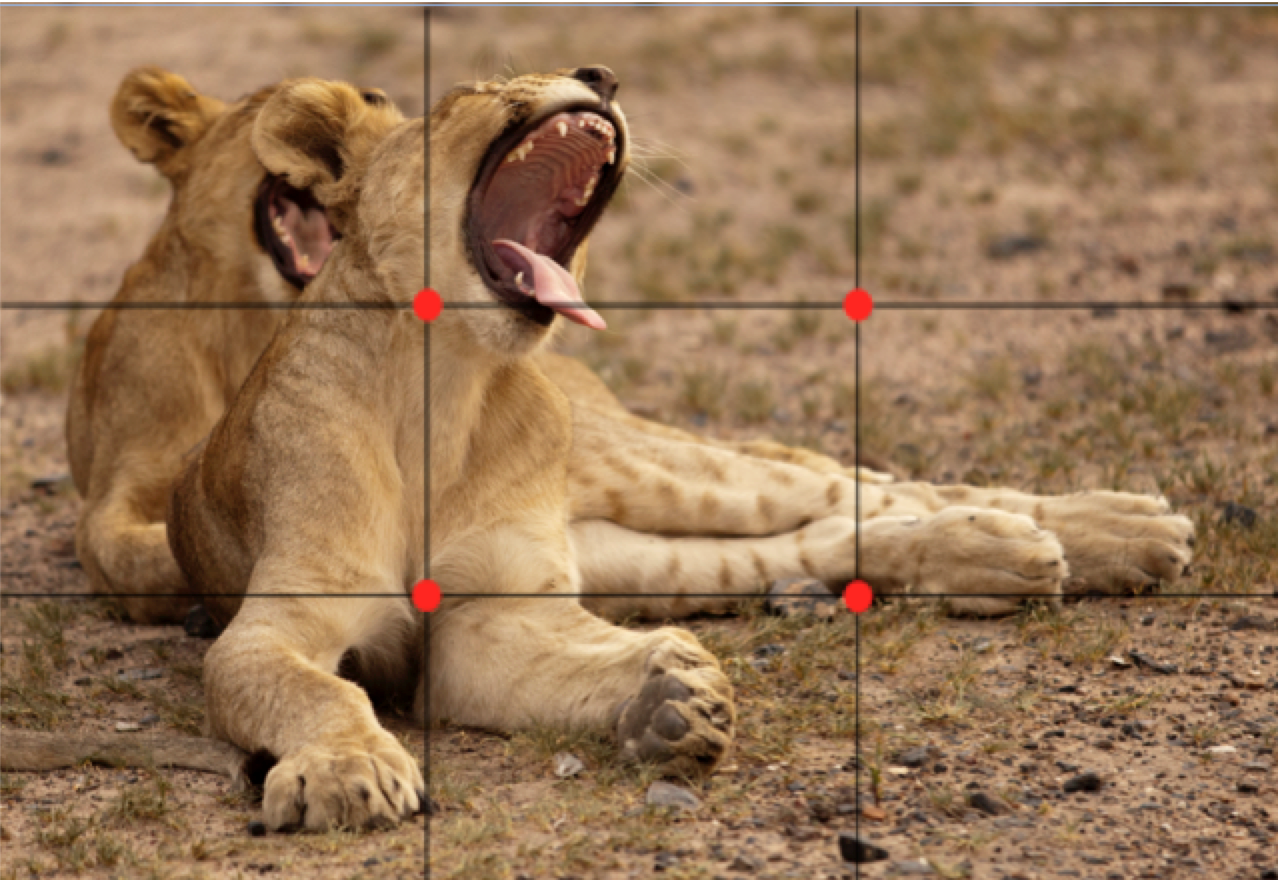
The key thing here is to try and position the eye (if visible) of the animal somewhere near the intersecting lines of the rule-of-thirds grid. Do this, and you’re golden 99% of the time.
Process in the right way
Photo editing and processing can be very subjective and up to the interpretation of the photographer. However, several processing elements typically do quite well for wildlife portraiture.
First, boosting the contrast slider usually makes for a bigger, bolder impression in the photo. Contrast results in brighter light areas and darker dark areas, making the photo a bit more dramatic. Usually when I’m featuring a single animal, I want to add drama into the scene because there isn’t necessarily too much behavior being featured.
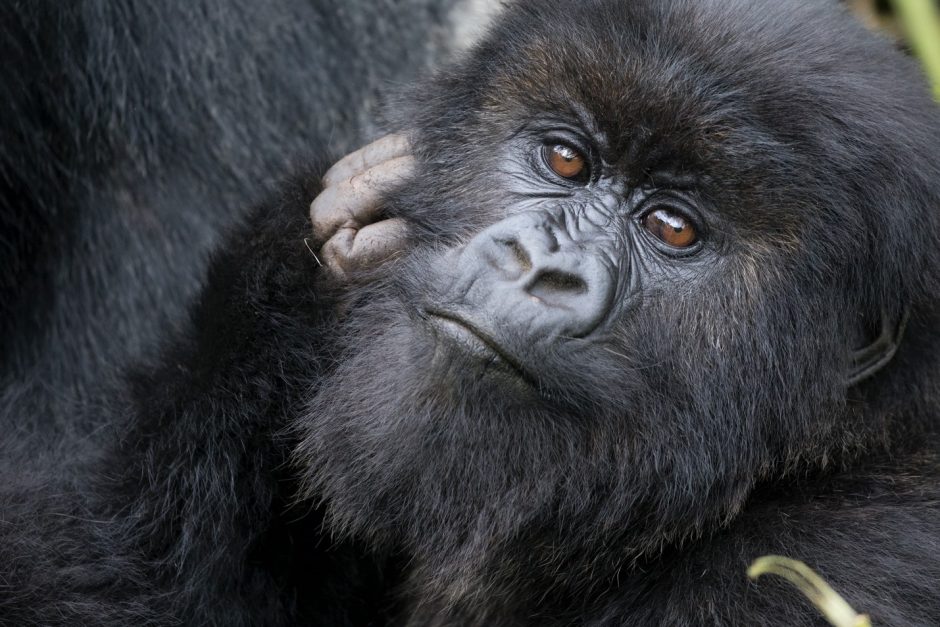
Next, I often will spot-sharpen the eyes of the animal. The eyes are indeed the windows into the soul of the animal and having spectacularly sharp, in-focus eyes is key. You of course will focus on the eyes when taking the shot, but to add even more umph, give those eyes a little extra sharpness in post processing.
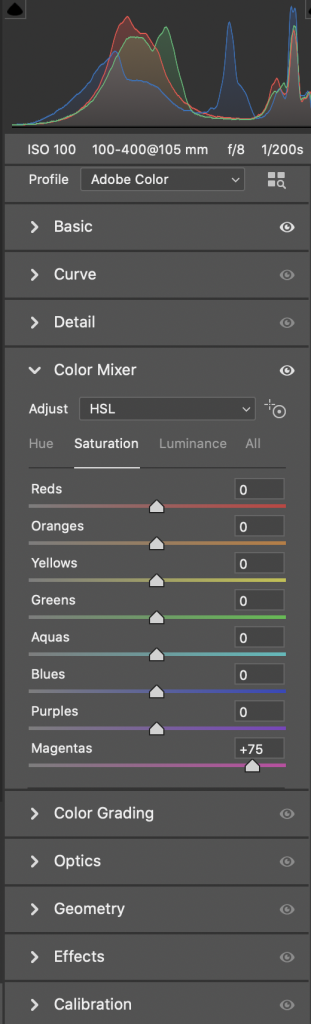
Finally, it’s hard not to consider a bit of saturation when featuring a bold animal portrait. However, just increasing the overall saturation slider could be a mistake. Much like sharpening, spot saturation could be your solution.
Spot saturating a certain color of fur, or the eyes, or even the surrounding environment may be better than a blanket saturation across the entire scene.
On a similar note, going into individual color saturation could be the answer if you quickly want to, say, saturate all the blues, oranges, or reds, while leaving the rest alone.
And finally, don’t hesitate to de-saturate your photo. Whether you go all the way to a black & white photo or select certain parts of the scene to de-saturate, you may find that this provides just the right vibe you’re going for in your wildlife portrait.
Wildlife portraiture is one of the best ways to really showcase the very essence of safari animals. When you are in a place as grand as Africa and come face to face with some of the biggest and most charismatic animals on our planet, featuring them succinctly but dramatically is a must.
Wildlife portraiture will always have a place in your trip portfolio/album and hopefully these tips will help you capture the animals on our planet even better—in all their glory!
Best,

Court
2 Comments

Agustín Orihuela
May 19, 2022 at 10:23 am

Court Whelan, Ph.D.
May 27, 2022 at 11:51 am
Just to thank you Curt for your selfless advice, which is always very useful. Thank you very much.
my pleasure! Happy to help you on your photographic journey!