Tips on Glacier Landscape Photography
There is perhaps no more brilliantly enigmatic landscapes to photograph than some of the great glaciated areas of our world. Whether you’re in the wilds of Patagonia or at the extreme other end of the world in the glacial bays of Alaska, you’ll no doubt want to return home with exquisite photos of these mighty walls of ice. Follow these tips to be sure you go into the photo expedition confident and prepared.
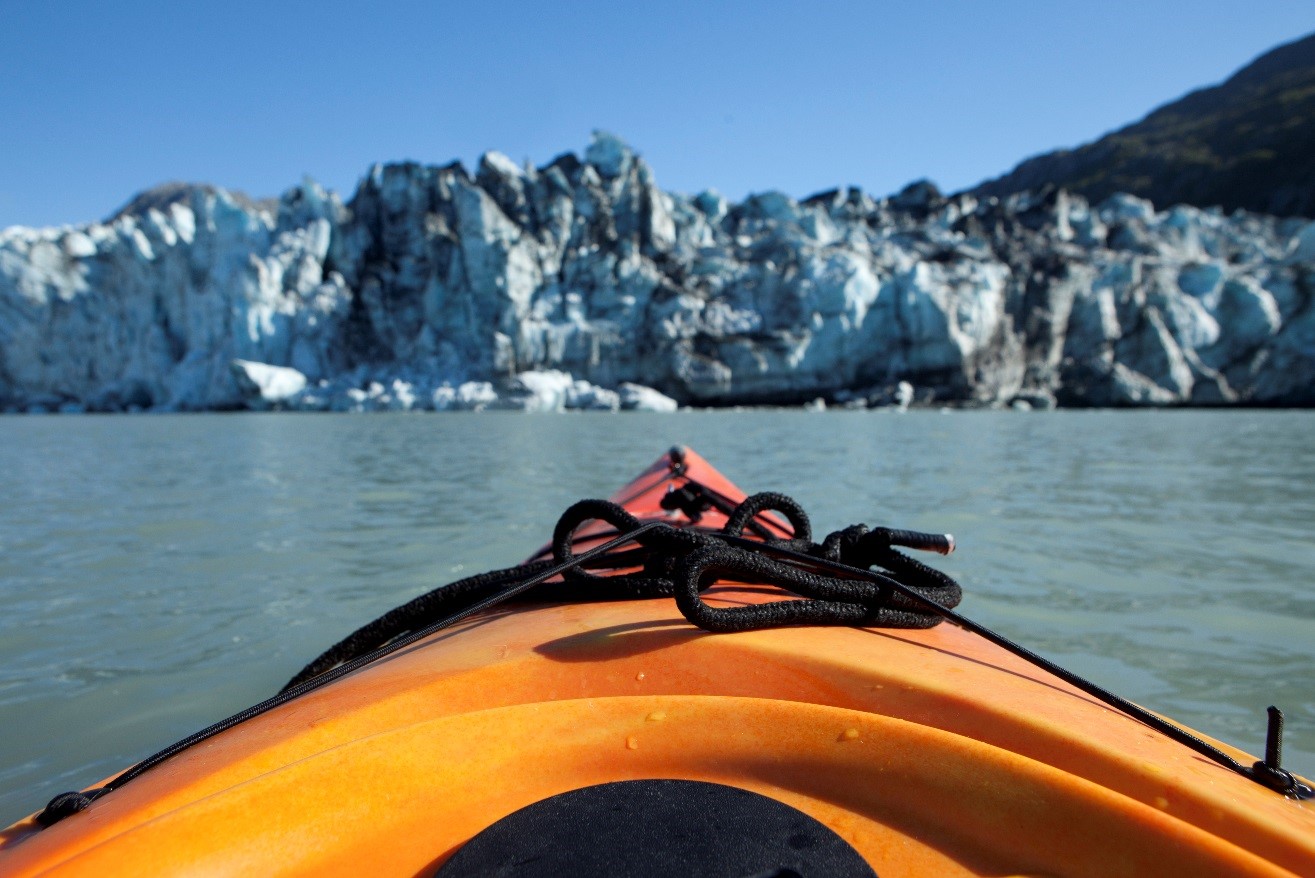
Get the iconic shot first, but get ready to zoom in
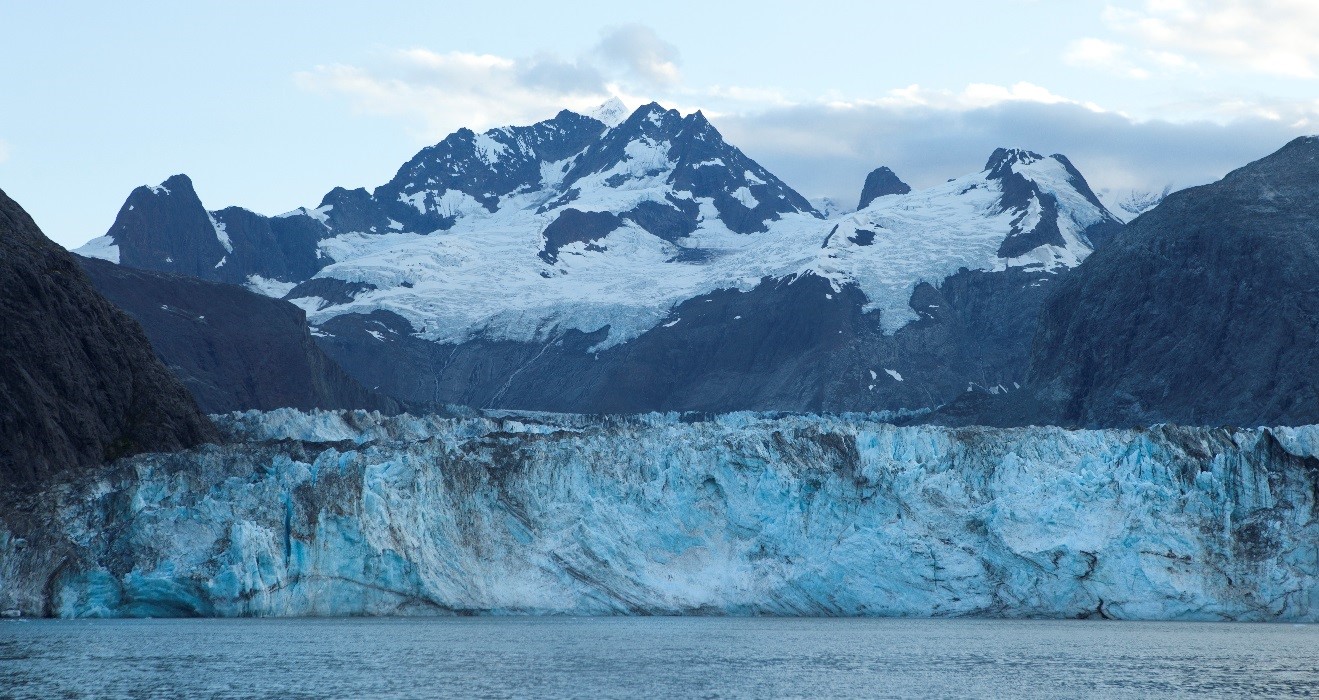
As you approach a glacier, whether by foot, boat, or kayak, you’ll obviously start further away and get closer over time. Kind of a no-brainer, but use this to your advantage to plan your shots. In a photo like the one above, I actually started with a reasonable telephoto lens (70-200mm), but given the size and distance, I was able to still get a great landscape shot from it.
Because glaciers often stretch for great distance across a landscape, you’ll often get a considerable amount of “non-glacier” elements in your photo (i.e., water and sky). Using a typical 2:3 or 4:5 aspect ratio, that’s going to make the glacier look somewhat small and only take up a small slice of the frame. The best way around this is to crop your photo (on a computer) into a bit more of a panoramic look, by cutting out some of the top and bottom. You can also plan on “stitching” your photos in photoshop to create more of a true panoramic, but this can be tricky and I often find that by taking a single wide angle photo and cropping out some of the top and bottom, it gives me the desired effect like the photo above.

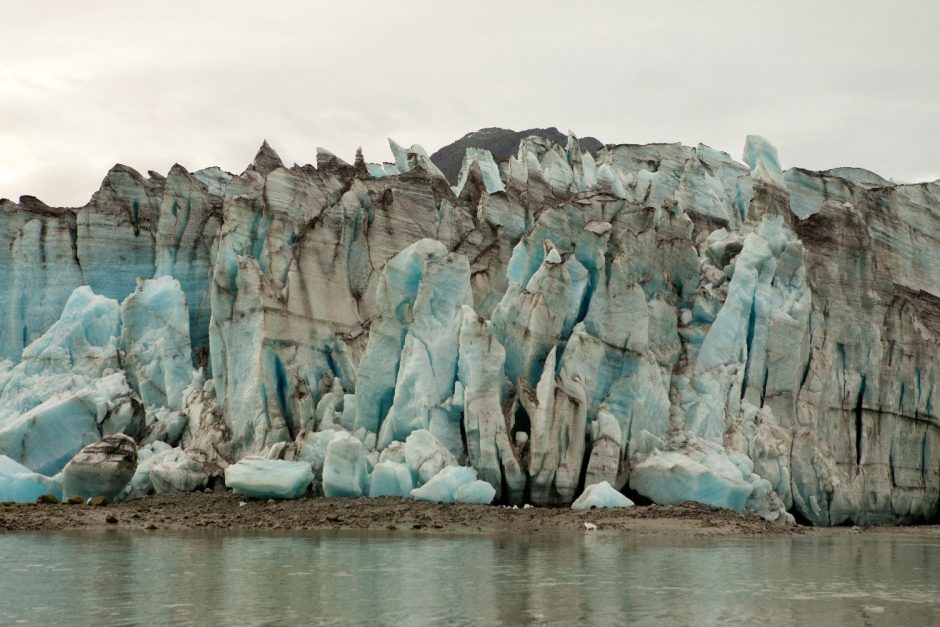
Whether you need to change lenses or use your camera’s optical zoom to zoom into the photo, know that you’ll want to fill the frame with the ice at some point. Glaciers exhibit incredible textures and colors, almost like abstract art. Thus, while you’ll no doubt want the iconic landscape photo, think about getting closer, not just physically (which is completely up to the day’s conditions), but photographically, too.
Pay particular attention to “leading lines” and use them to compose an interesting shot. Not just framing the vertical spires of ice, but also some of the horizontal, darker striations in the glacier itself.
Try and find a way to show scale in the photo
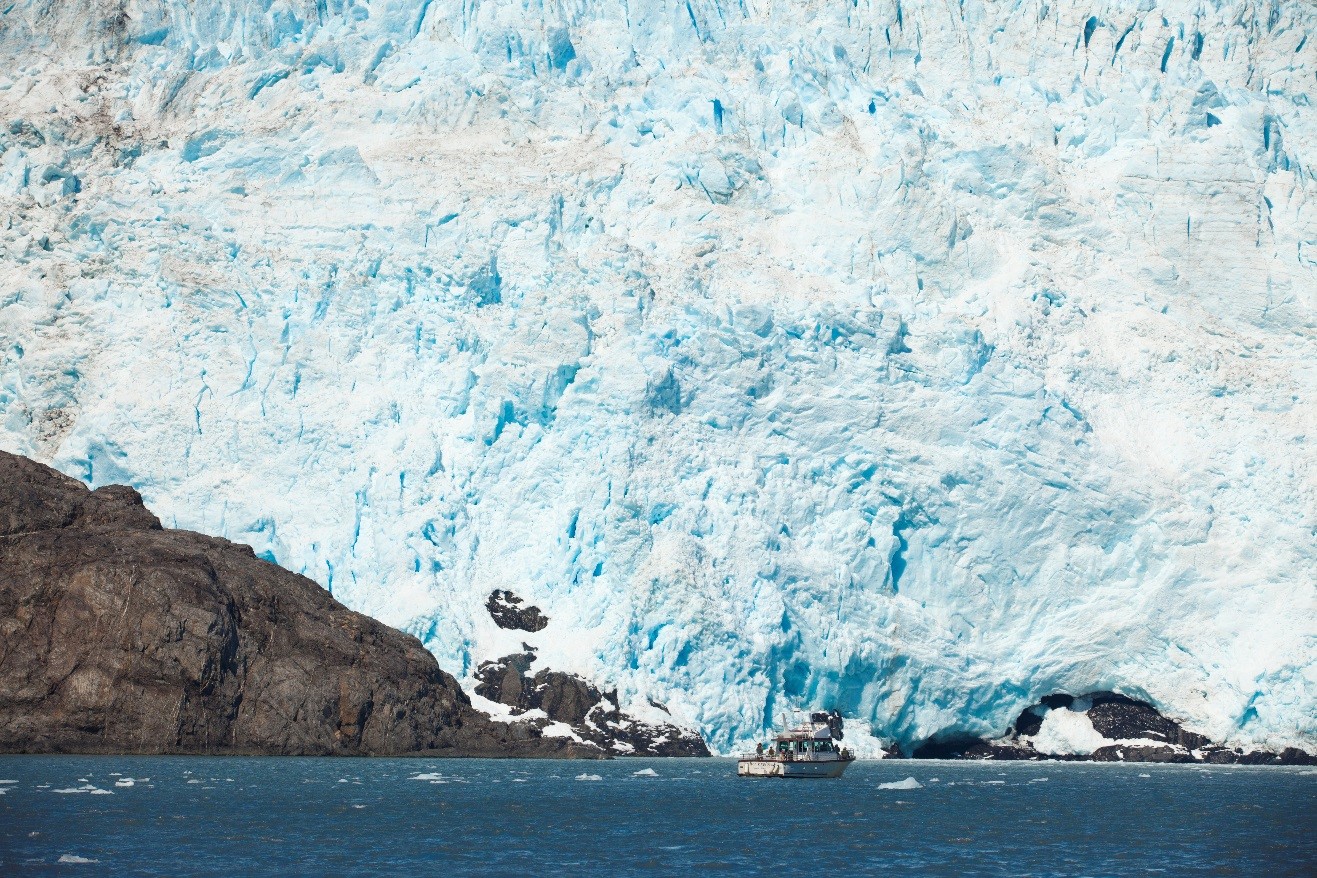
Not all glaciers are massive, but many of the ones you’re likely to see on photo expeditions to the grandest places, like Patagonia, Alaska, and Antarctica certainly are. Because glaciers are other-worldly to begin with, it’s difficult for the viewer to really understand how large the chunks and walls of ice really are. As a result, pay particular attention to other boats in the area, or hikers walking on or near the glaciers to help show the extraordinary size of the glacier. You won’t always have the luxury of lining up the glacier, horizon, and boat or person perfectly, but I still think it’s a key photo to take away from the experience.
Get an action shot if you can
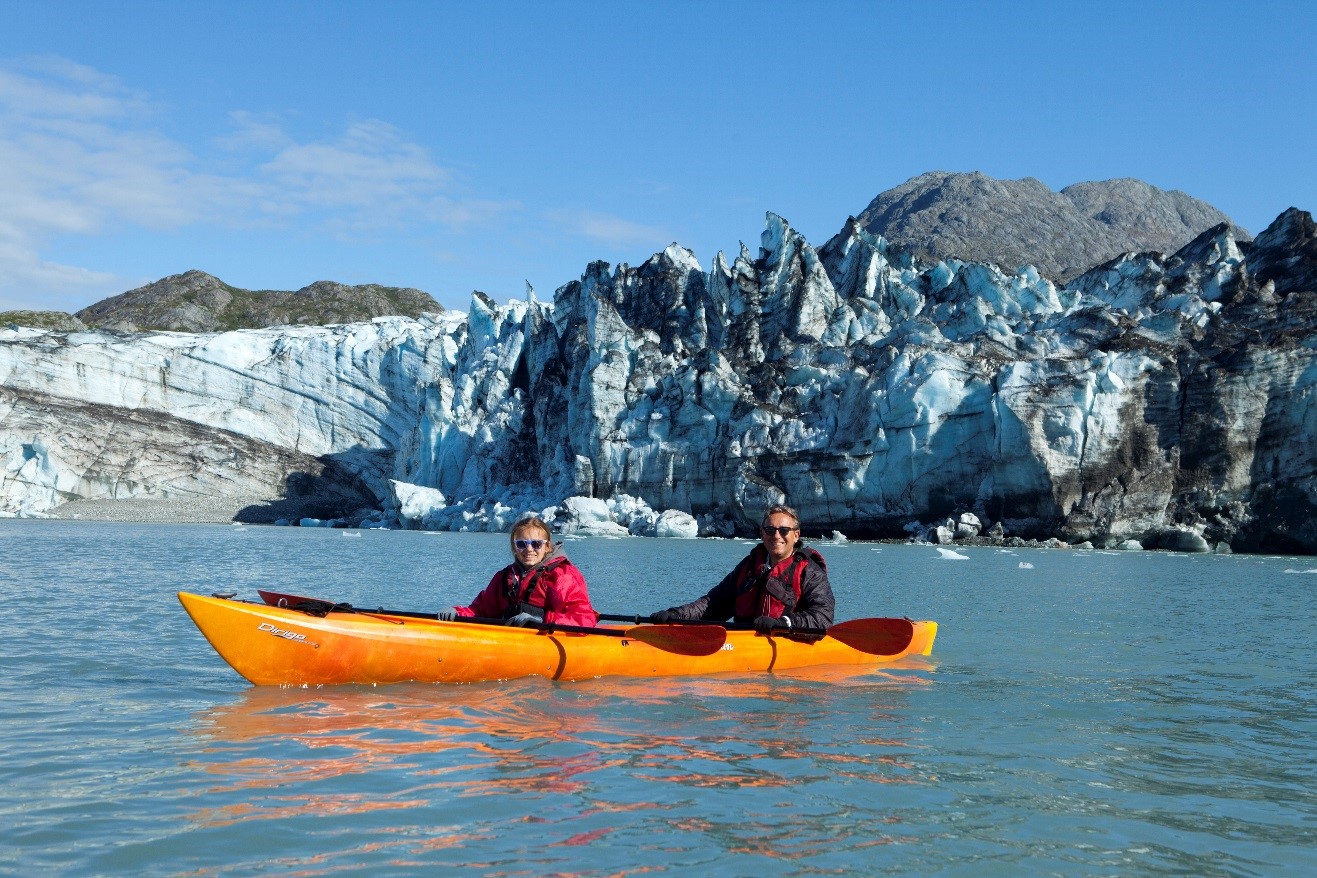
I often have guests on my expeditions that are quite worried about bringing their camera with them while kayaking around glaciers, specifically while in and around Alaska’s Inside Passage. While it is somewhat risky, with the water and all, it’s a photographic opportunity not to be missed! For one, you’re on the water, so you get a really ground-level perspective. But more importantly, you have the chance to get some really cool photos! Plan on bringing a small dry bag to store your camera in when paddling, and be extra careful, obviously, when photographing, but with the small risk comes huge reward and some really really fun shots.
Post-processing is extremely helpful
I always am an advocate for keeping post processing to a minimum, because the best shots are those that begin that way in the camera. However, there are a couple things that I do recommend toying with when it comes to photoshop, lightroom, and other post-processing programs. One, because glacier photos often need it and two, because they can handle it. In other words, you can get away with a bit more tinkering than usual in order to make the photos really pop.
The two primary steps I take are to increase the saturation, and then increase the contrast.
Very often, the blue that our eyes see in a glacier only comes through very mildly in the camera. Thus, increasing the saturation really helps get that blue to come out as our eyes see it. The other is contrast. By increasing the contrast of the photo, you’re simultaneously darkening the darks and lightening the lights in a very calculated way. Because one of the captivating aspects of glaciers are the extensive cracks, fissures, and crevasses, an increase in contrast really helps the shadows pop, in contrast to the much lighter ice surrounding.
Also, you may wish to adjust the exposure of your photo, either lightening or darkening the entire shot. Because of the preponderance of very light or very dark parts of a glacier photo, cameras often have difficulty in getting the lighting perfect. When photographing scenes that mostly are very very light or very very dark (i.e., one or the other), it’s easy to adjust this as you’re taking the photos. However, because glacier photographs are nearly always a combination of the light and dark patches, I find it best to try and make minor lighting adjustments in photoshop after the fact.
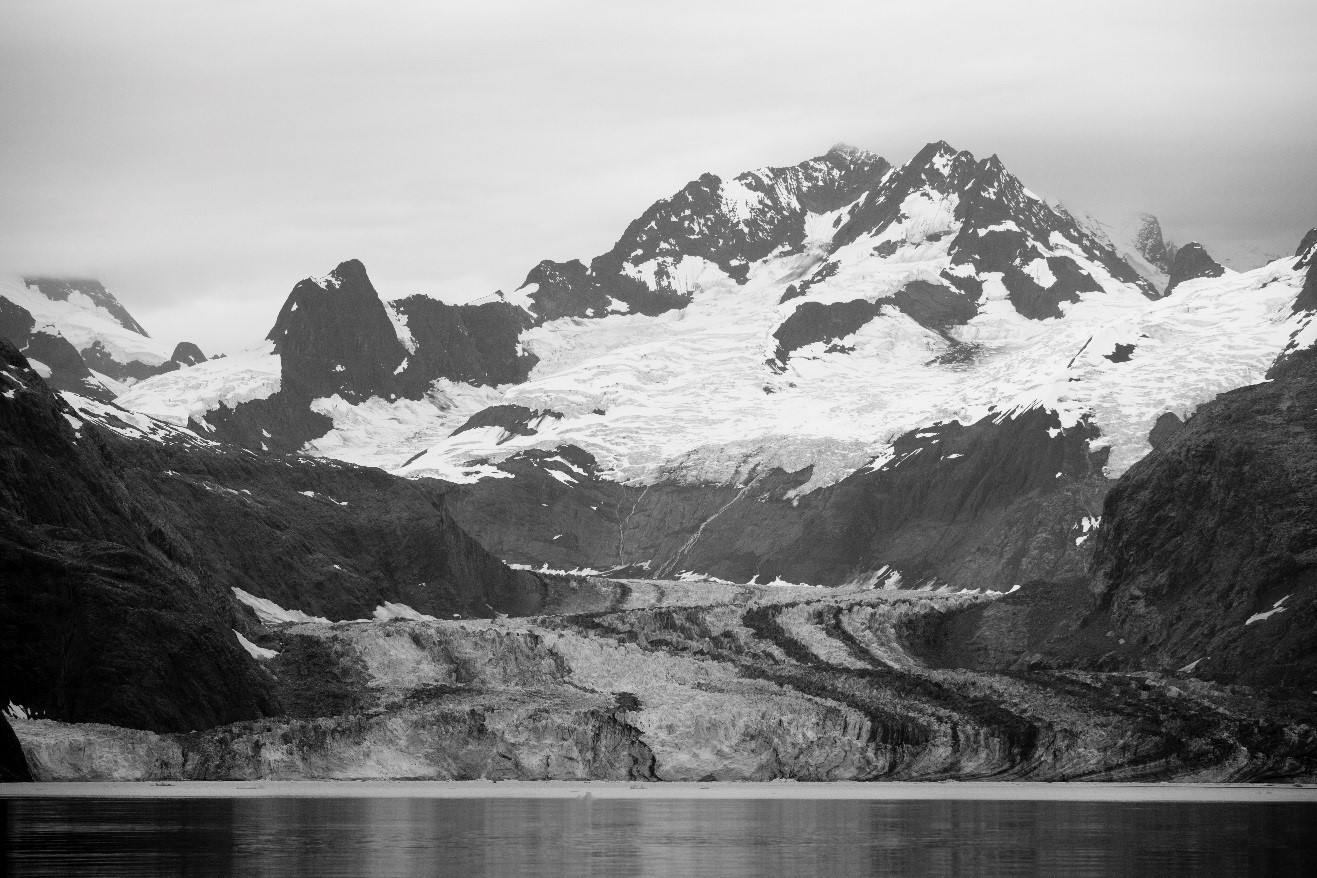
And the other thing you can experiment with is completely desaturating your photo, turning it into a black and white photo. Once again, glacier photos can handle this treatment and oftentimes turn out quite stunning.
Well, I truly hope this has been informative and helpful before, during, and after your next photo adventure. If you have any of your own advice on photographing glaciers, or questions I can help with, please do leave a comment below!
Go forward and give it a shot,
Court
2 Comments

DAVID GODFREY
August 7, 2019 at 7:57 am

Court Whelan, Ph.D.
August 21, 2019 at 10:13 am
Very helpful and interesting post but I wonder whether I can ask you some slightly more technical question, as I’m preparing for a 4.5 day trip to Iceland this coming Monday.( I’m a reasonably experienced but entirely self-taught amateur photographer using Canon 5D111 with L lenses and FujiXT2)).
Leaving aside the desirability of using a polariser what would your recommendations be for the following:
(1) Should one expose for the lightest areas on the basis that under-exposed areas can always be made lighter in post production whereas the reverse is usually much more difficult .
(2) Should one increase the resulting exposure by a stop or two to compensate for in-built metering systems calibrated for mid-grey ?
(3) How do (1) and (2) inter-relate ?!
(3) what’s the best white balance to use ?
Any tips would be hugely appreciated and many thanks in advance if you feel able to respond.
Kindest regards
David Godfrey
Mobile: +44(0) 7785 761 637
http://www.davidgodfreyimages.com
Instagram: @davidgodfreyimages
Hi David,
Great questions here and I think you might like my recent post! Hits on these very topics! But to answer, 1) yes indeed, always best to lighten dark areas/photos than to darken light areas/photos. But I do shoot on evaluative most of the time, as I find there is often way more variability in my camera’s exposure decisions with center, partial, or spot metering. 2) I almost always start at even exposure and adjust on the fly as needed. The only times I over expose routinely is shooting in snow, when the 18% gray rule ends up turning bright white snow “dingy and dark” vs. what it actually looks like to the eye. and 3) I nearly always start with cloudy white balance, as I like the slight warming (yellow) effect of the resulting shots. However, in snowy conditions I’ll sometimes switch to sunny, as I like to inject the cooling (blue) effect in shots. Auto white balance is a great place to start, but I find that I personally like warmer photos.
I hope this helps and I hope you have an extraordinary trip!!