My Technique for Photographing Sunsets Worldwide
If there’s one thing that’s pretty much guaranteed in mother nature, it’s the fact that the sun will rise and set each day (except, of course, for polar trips around solstice time).
Now, seeing each day’s brilliant sunset isn’t guaranteed, as the sun could be behind too many clouds, or it disappears too quickly to make for stellar colors or textures. However, no matter where you are in the world, there’s always a good chance to capturing a nice sunset while on a photo expedition. Thus, I’m sharing with you here my simple technique that will get the most out of every sunset each and every time.
First, make sure you have some good zoom/telephoto power to your camera
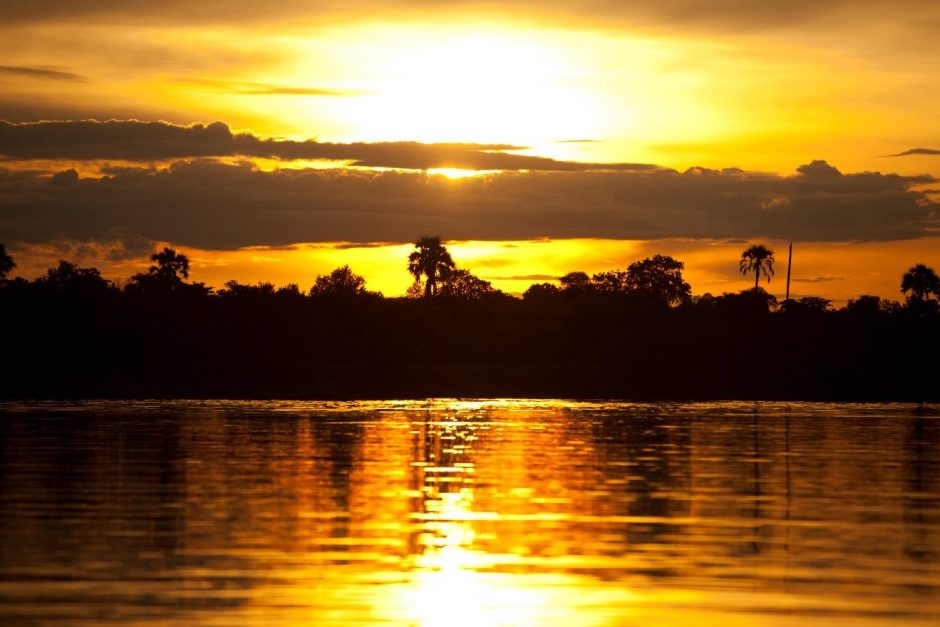
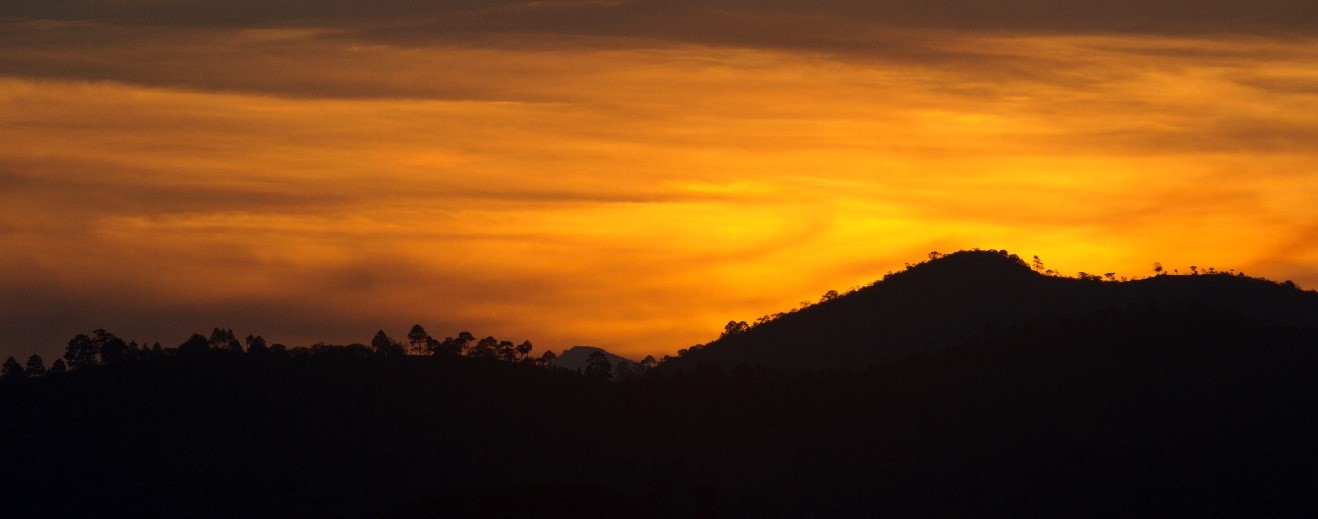
Most of the time, sunsets do not fill the sky. That is, you’ll have to willfully zero in your shot to the actual slice of the sky where the sun is going down. This is where the colors and textures will be. And often, even if the majority of the sky is relatively drab, the area where the sun is physically setting can be quite spectacular.
Second, know where to focus and meter your shot
To me, the best sunset photos involve lots of brilliant color, contrast, and texture. In order to really draw those colors and textures out of the clouds, you should expose your shot to the sunset itself. That usually results in the nice silhouetted foreground as an added bonus.
The easiest way to do this, and ensure that the sunset itself is properly exposed, is to focus on the bright clouds that seem to have the most color and texture. This will ensure that these clouds are “expressed” properly with the right balance of light and dark. Simply by focusing on this area, your camera will choose the right exposure level for that focus area.
However, where you (and your camera) will need to be adaptable is for cases when you have a foreground subject rather close to you and your camera while the sunset is of course on the distant horizon. A great example is with the sunset photos below, both taken while on a recent photo expedition in Churchill, Manitoba, where these spruce trees were right next to our vehicle. In this case, if I chose to focus on the sun/horizon, I’d get something like the first shot.
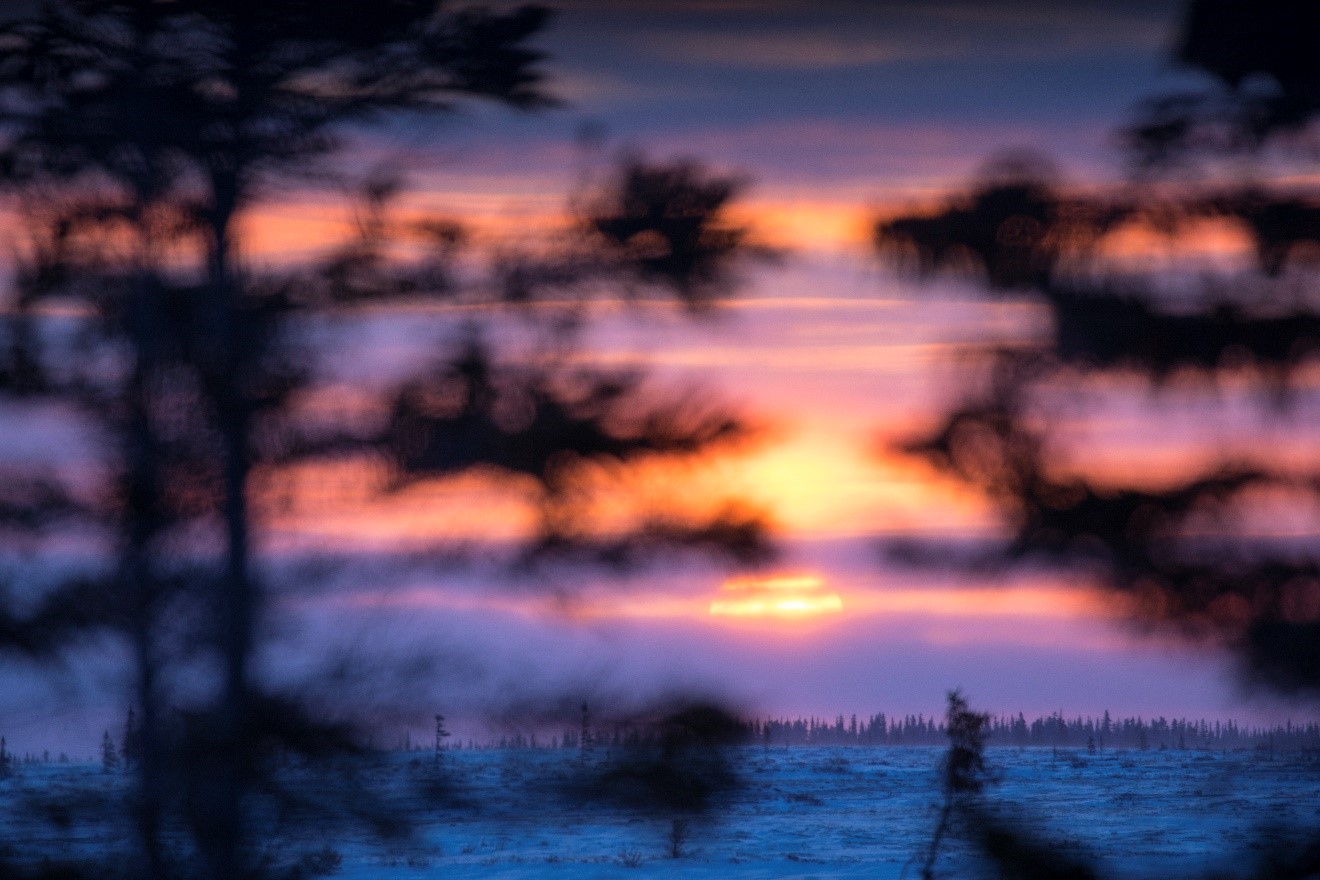
The blur of the spruce trees is quite nice, actually, and it gives the feeling that we’re peering around a stand of trees to get a glimpse of that stunning arctic sunset.
However, there are times when you’ll no doubt want your foreground element in focus, such that you’ll need to focus on the trees like below.
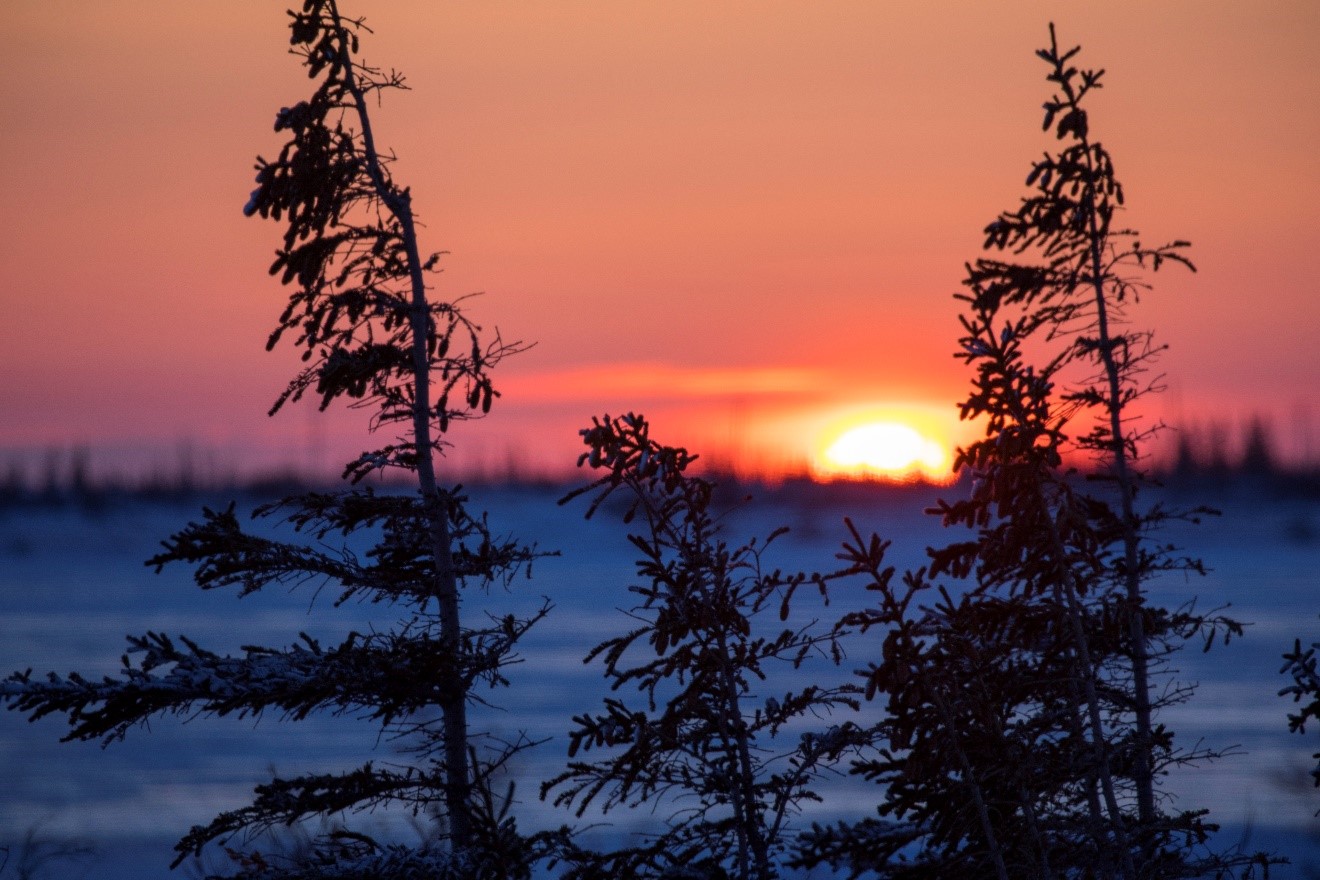
In this case, your camera will give you perfect focus on the trees, but at the same time may try to expose for the trees, which are naturally quite dark (especially on the non-sunlit side like in the above). Thus, your resulting shot may look too bright, and the sun and clouds may have zero color or definition—looking like a pure white canvas.
Thus, the trick here is to manually underexpose your shot using your exposure compensation. If you’re not familiar with how to do this, it’s well worth your time, even if you are accustomed to shooting on full auto, as it will really elevate your photography. Or, take a look at my article on the 5 Things to Learn from your Camera’s Manual before your next Photo Expedition for a more in-depth look at this topic.
Find some neat composition and fire away
Fortunately, since you’re photographing into the sun for sunset shots, you’re probably not limited on light, so you don’t have to worry about any advanced settings like aperture or shutter speed. Of course you can indeed get creative on these things, but that’s not my first knee-jerk reaction when photographing scenes like those in this article.
To me, it’s much more important to find an aesthetic composition, using framing or leading lines, and take a number of shots. If you are indeed using exposure compensation and able to increase and decrease your resulting exposure, play around with that, too, as different exposures can bring out unique colors and textures that would otherwise be missed.
Now go forward and give it a shot!
Cheers,

Court
Leave a reply