How to Take this Photo: Galapagos Tortoise
If you have a photographic expedition planned to the Galapagos Islands, the famous Galapagos Tortoise is sure to be something you’ll encounter. And it’s also something I’m sure you’re really looking forward to!
Because the tortoises are relatively sedentary, they make for amazing photographic subjects. But, because they don’t move much, you have to think in advance about things like angle, depth of field, and your own position in order to get a diversity of photos. Follow these simple steps below to get your own quintessential shot of the revered Galapagos Tortoises of The Enchanted Isles.
Get the right perspective
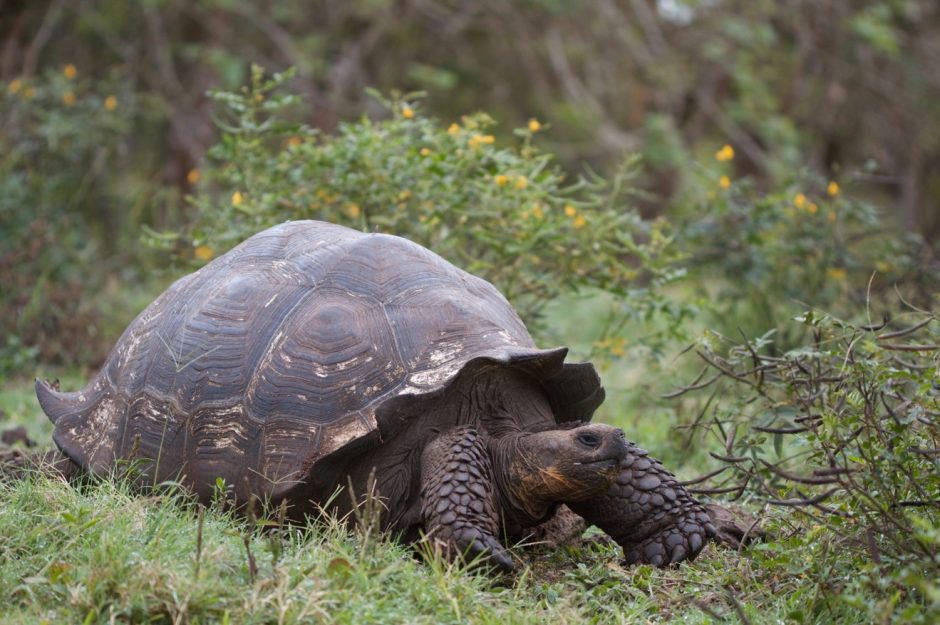
There are many many shots you’ll want of a giant tortoise. Other than the one above, you can take close up shots of their pre-historic face, the amazing textures on their legs and feet, or even the detailed patterns on their carapace. However, if you’re wanting to get a full body photo, consider getting the tortoise at a slight angle, and clear view of its face. The angle helps to show depth and the overall size of the tortoise, and the face is how your viewers will connect with the animal, which is always important on a shot like this.
Consider the composition
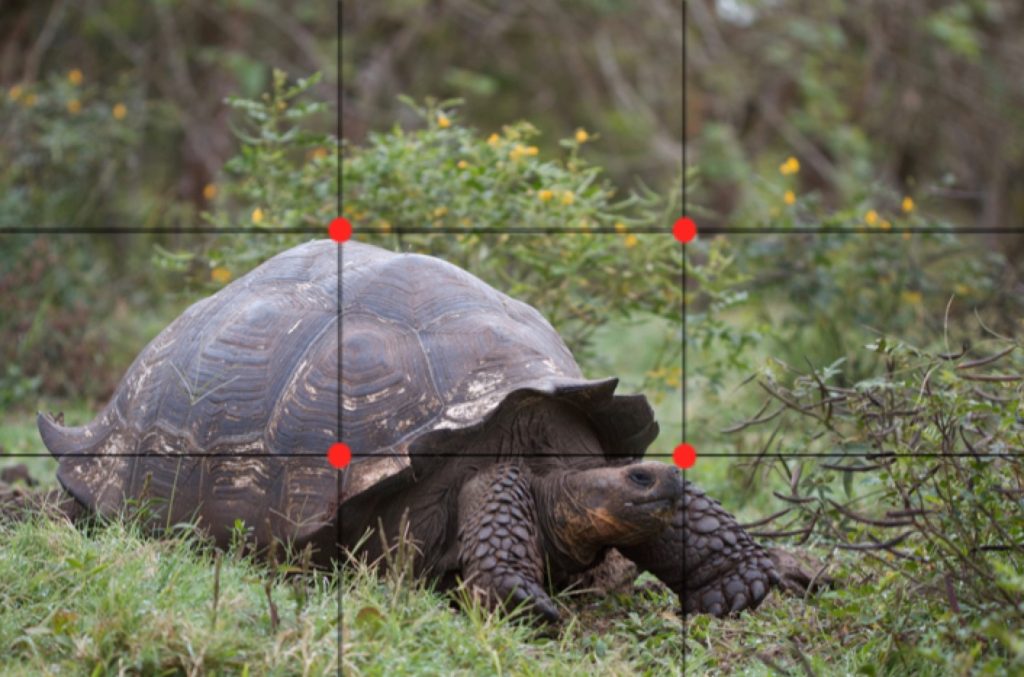
We all know about the rule of thirds, but how does it play into this type of photo? While it would be ok to position the tortoise anywhere in the frame, it is pleasing to the eye to have the face of the tortoise off-center. That is, not square in the middle of your photo.
But, should you place the tortoise in the bottom part of the photo, thus showing more landscape above the animal, or place it at the top of the photo, thus putting more ground in the photo? To me, because they are terrestrial animals, it makes sense to have them at the bottom of the photo, showing that they are indeed relatively flattened on the ground as they crawl over their environment.
Choose an appropriate depth of field
One of the things I always am changing and experimenting with is depth of field. This translates to how much of the photo is in focus, and how much of the photo has a nice blur to it. Obviously, you don’t want the main focal point to be blurred, but having certain components of the photo with a nice bokeh, as it’s called in photo-speak, really gives the photo a professional look.
In this case, the focal point of the photo is the face of the animal (which is should be nearly 100% of the time when photographing animals). However, there is a lot going on in the background with the various plants and overall vegetation. If this were all to be in crisp focus it would make the photo look too busy, potentially distracting the viewer from the main subject. Thus, I decided to shoot this photo at an f/3.5, which allows the face and most of the tortoise to be in crisp focus, but things way in front or way behind it to be slightly burred.
This functions in two ways…1) to avoid distracting the viewer from parts of the photo you aren’t trying to showcase and 2) by blurring part of the photo, the area in focus actually looks sharper, just due to comparison. Sometimes you’ll have to experiment with the exact f-stop to find that perfect spot where the animal is in focus but the background is blurred (usually in the range of f/2.8 – f/5.6).
As you can see, photographing these magnificent creatures isn’t necessarily rocket science, but there are some key things to consider.
If you have any other tips or tricks, please feel free to share in the comments below!
Go forward and give it a shot,
Court
Leave a reply