How to get this photo: The Iconic Arctic
I’m pretty sure it’s just me, but I love this shot I took last winter up in Churchill, the Polar Bear Capital of the world, and the lesser appreciated Northern Lights Capital of the World. Nevertheless, even if this photo doesn’t make the cover of a travel magazine, I love looking at it, and isn’t that what’s truly important? For the sake of instruction, though, there are several techniques of note that will help you with both general travel photography as well as photography in the arctic, should you be headed up there anytime soon on a photography expedition.
- First, get yourself a little free time during the day to explore your surroundings. This is often built into dedicated Northern Lights photography tours, but if you are on your own, be sure to save a little bit of the day to slow down, which helps you to look at things differently.
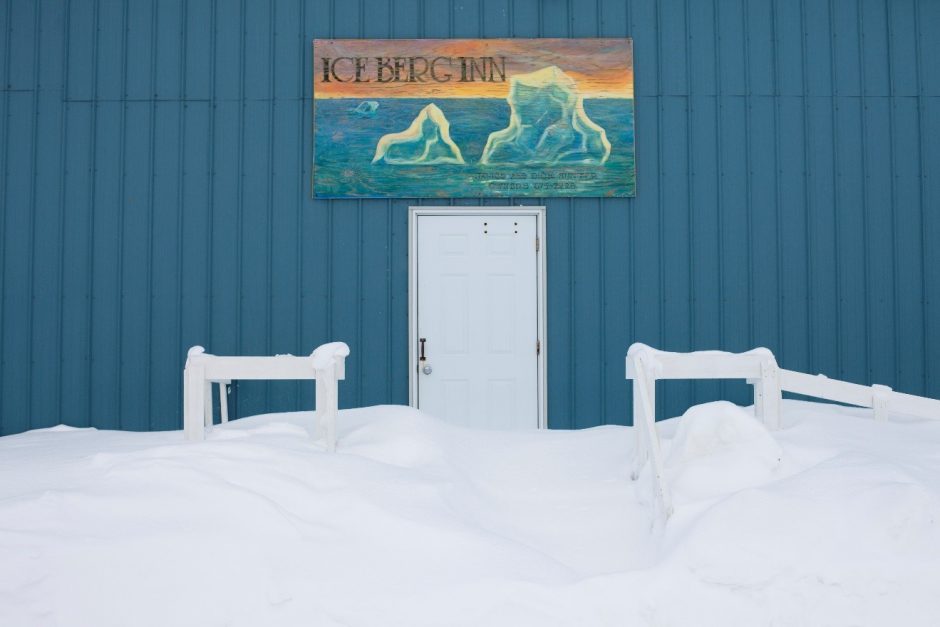
- Next, when in and around towns, villages, and other inhabited areas, no matter how sparsely, try and find things that “you’re not going to see elsewhere”. In this case, it was the uniquely simple hotel sign, seemingly nailed to the outside of an airplane hanger-style building, that called out to me and said “hey, we’re not in Kansas anymore.” The next thing here is that said entrance to “Iceberg Inn” was a bit blocked by snow, after a night of gusting winds and 12 foot snow drifts around town. The contrast between the blue siding, white snow, and interesting sign is visually appealing and also tells a great story. Definitely one of those times when a picture says a thousand words.
- Now that you’ve found your scene, it’s time to make sure you capture it right. This goes for both camera settings and general composition. Here’s where another post of mine can come into handy when trying to figure out how to meter your camera for heavy snow environments. In this case, there is a lot of white in the photo, and cameras don’t do so well with that. No matter how fancy of a camera you have, the camera thinks it’s too bright, as nearly a majority of your shot is stark white. Thus, your camera will try and darken the snow. This is fine, if you like that look, of gray snow. However, it was indeed stark white and I wanted to show that. Thus, I actually overexposed the shot so that everything was brighter than the camera might have wanted. As a result, I got what I wanted – crisp, bright, brilliant snow.
- Next to settings, the composition of your photo is key. There are many many ways I could have composed this shot. However, because of the patterns jumping out to me right away, with the prominent vertical lines and symmetrical shapes of the hand railing and door, I aimed for a symmetrical composition, such that the door and sign are in the middle, and railing on either side. This goes against one of my traditional rules of not putting your subject in the middle of the shot. However, I always say that if you can justify it, then rules are meant to be broken. Here’s a classic case of such.
- Lastly, fire away! Take a few shots at different exposures. While you can easily lighten, darken, and crop your photo after the fact, it’s always best to get the shot as close to what you want it to be in-camera. And plus, here’s one of those rare cases when the door and building aren’t going to run away from you, so you can be patient, and so will your subject, in order to get the shot you want.
Go forward and give it a shot,
Court
Leave a reply