How to Get this Shot – Mystical Water in China
China usually isn’t the first thing one thinks of when they think about verdant landscapes, pristine forest, and mystical waterfalls. However, if you are willing to go off the traditional path and get into the Wilds of China on a special photography expedition, you will encounter this and so much more of what China has to offer in the way of wild spaces.
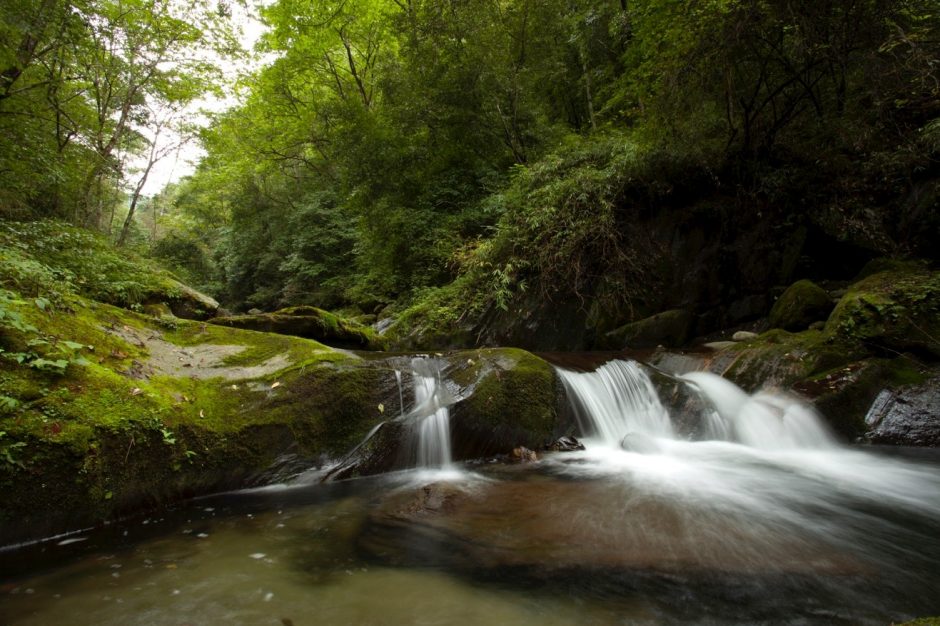
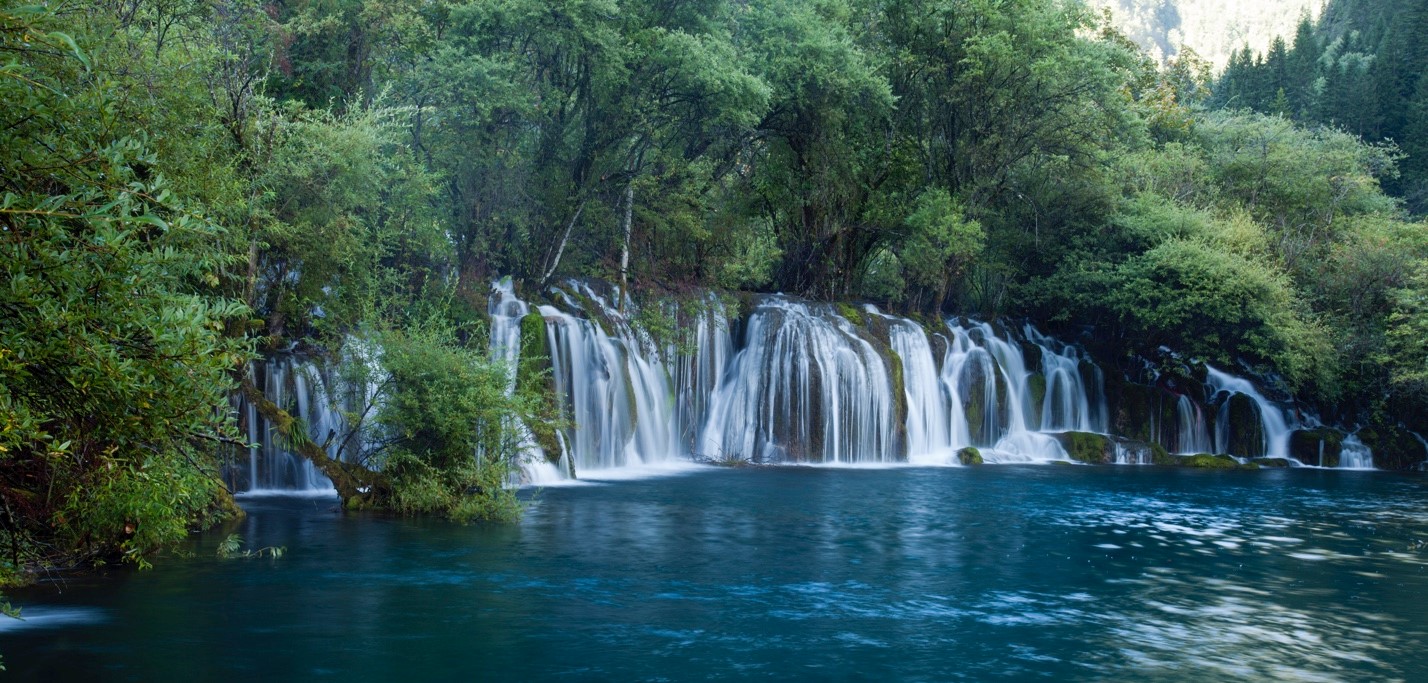
The key thing about the above photo is that it’s an intensely green scene with that iconic “flowing water” look that provides motion to an otherwise still and motionless photo. So, whether you’re headed to remote parts of China like in Tangjiahe National Park, or other places around the world where you can capture fun scenes with moving water, follow these simple tips and expand the possibilities whenever you encounter flowing water on your photo expeditions.
The first thing is you’ve got to identify the right scene
The main things to look for are 1) flowing water in 2) beautiful areas that exhibit 3) good even lighting—preferably shaded and dark. The first two aren’t all that difficult to find. But, #3 is really the key, and it will take some searching and a trained eye to recognize this lovely even, shaded lighting. The reason this is so important is that you can slow your shutter speed at variable levels. Equally important is that in shaded lighting the water isn’t overly bright in the scene…what we’d call “blown out” in photographer-speak. Not a deal-breaker, but always a bonus to have shaded, even lighting.
Camera settings
Once you’ve found that perfect little area, whether it’s a small cascading creek or a towering waterfall, the settings to start with are the same.
First, you’ll need to set your camera to Aperture Priority and dial the aperture to the biggest number you can get. On most wide-angle lenses (which is of course the go-to for landscape photographs like these) you’ll be able to get to f/22 or something similar. Set to f/22.
Then, drop your ISO to very low—preferably 100. Before taking the shot, take a quick test of what Time Value or Shutter Speed the camera will give you at these settings. Ideally you’ve chosen a dim enough area such that the camera will give you something like 1 or 2 full seconds (often shown on-screen as 1” or 2”). However, sometimes the scene is much brighter than you’d like and your camera will give you something more like 1/10thof a second. This isn’t great, but it will do. You’ll get some blur, but probably not as much as you’d like.
Or, maybe it’s SO bright that your camera is giving you 1/40thof a second. The problem is that you can’t dial your ISO lower, and you can’t increase your aperture any more to compensate. Thus, you’ll either need to just try your luck, and maybe the water is moving fast enough that you’ll still get an interesting “flow” to the scene. But more likely you’ll need to put on a Neutral Density filter to artificially darken the scene. If you don’t have one of these, it’s probably one of the only filters I really like and carry with me everywhere. Basically it allows you to deal with overly bright scenes, and use this sunglass tint to darken everything. If you’d like to learn more about this filter, check out our ND filter article HERE.
The ideal settings will be getting a time value/shutter speed somewhere around ½ of a second all the way to 4 seconds (and maybe even greater). If you’re able to achieve all this, you’re golden.
Whether to use a tripod or not
Here’s where a tripod, even a small travel tripod like a gorilla pod, will come in immensely handy. However, I’m just as guilty as anyone in that I don’t often travel with one because of the weight, size, and generally limited number of times I’m likely to use one.
One way to plan ahead is do some research and figure out if there will be ample opportunities to actually use a travel tripod. Going with a good photo tour outfitter is a great way, as you can ask them all the questions you want. But if you’re planning on your own, do some google image searches for the parks and preserves you’ll be in, and if you see a number of creeks, waterfalls, etc. in those photos, maybe it’s worth the hassle and weight to bring along a tripod.
If you don’t bring one, or just don’t have one on you for whatever reason, take a look at what you can use from the environment to stabilize your camera for a second or two. Often near creeks there are bridges or rocks that will work in a pinch. If you must use these, count on your best shots being in and around 1 second, as 4 seconds or greater might not be quite balanced enough to allow for such a long exposure. Nevertheless, a one second exposure of flowing water will surely get you a unique shot.
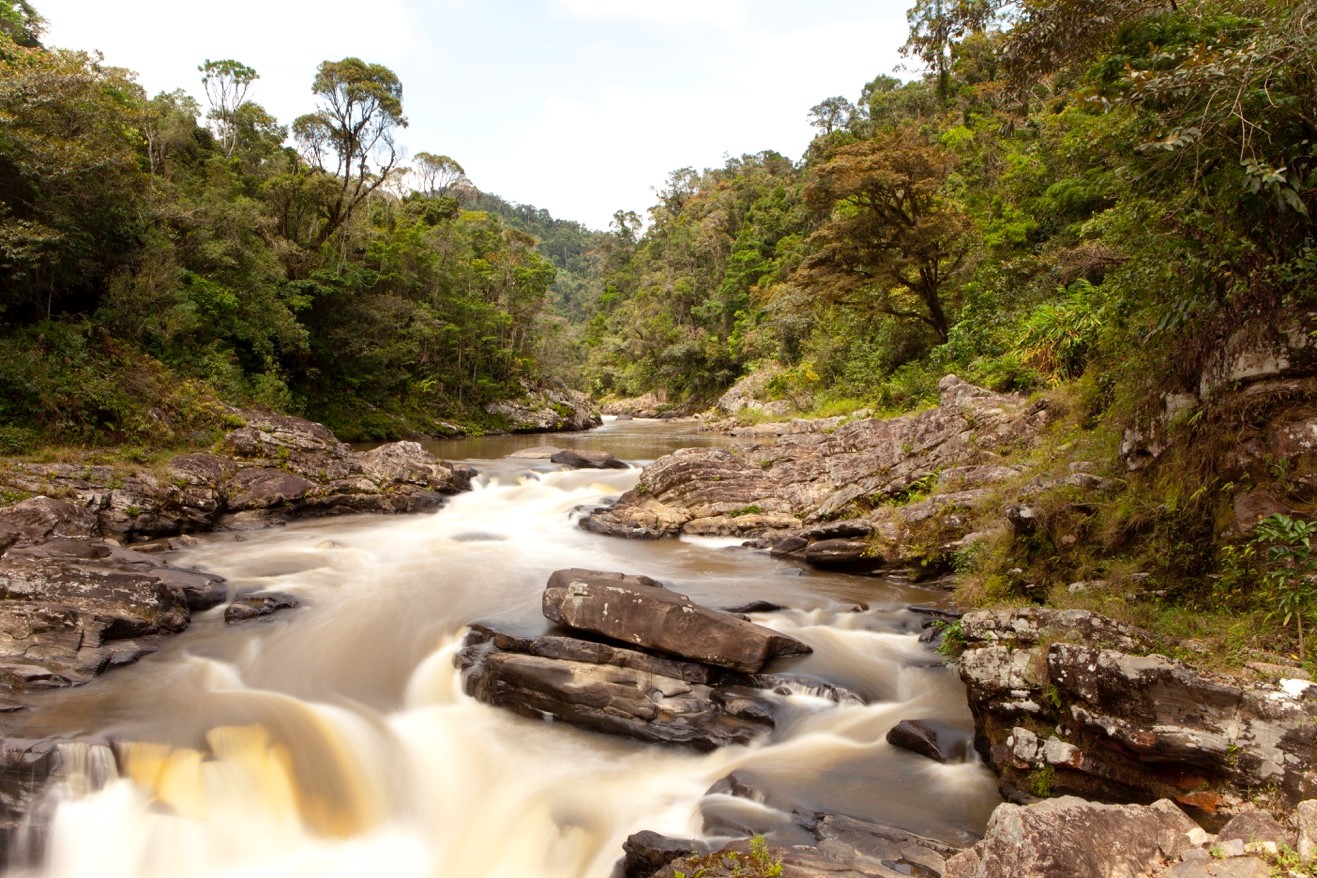
Here’s a photo below taken from a bridge in Madagascar. Because people were talking across the bridge, I had to wait for just the right moment to get a ½ second exposure without any bouncing or movement in the bridge.
Taking the shot and experimenting
This is a crucial step–experimenting. The key to this type of photography is trying different settings, particularly different shutter speeds. The look you’ll get from a 1/20th second exposure to a ½ second exposure, to a 2 second to a 10 second exposure is quite different. Not only are your own preferences for the resulting photo important, but the volume and speed of the particular water you’ve found will change the look, too. Do your best to carve out some time to experiment with a handful of shutter speeds like the spectrum I describe in this section. No need to experiment from a 4 second to a 5 second…those won’t be very different. But a 1 second to a 5 second will, just as a 1/20th of a second to 1/5th of a second. Play around!
Bring it all together and take home some amazing photos!
As I mentioned, this isn’t just limited to the wilds of China. There are many areas of the world, likely even your own backyard, where you can practice on this. Go out there and give it a shot!
Cheers,

Court
Leave a reply