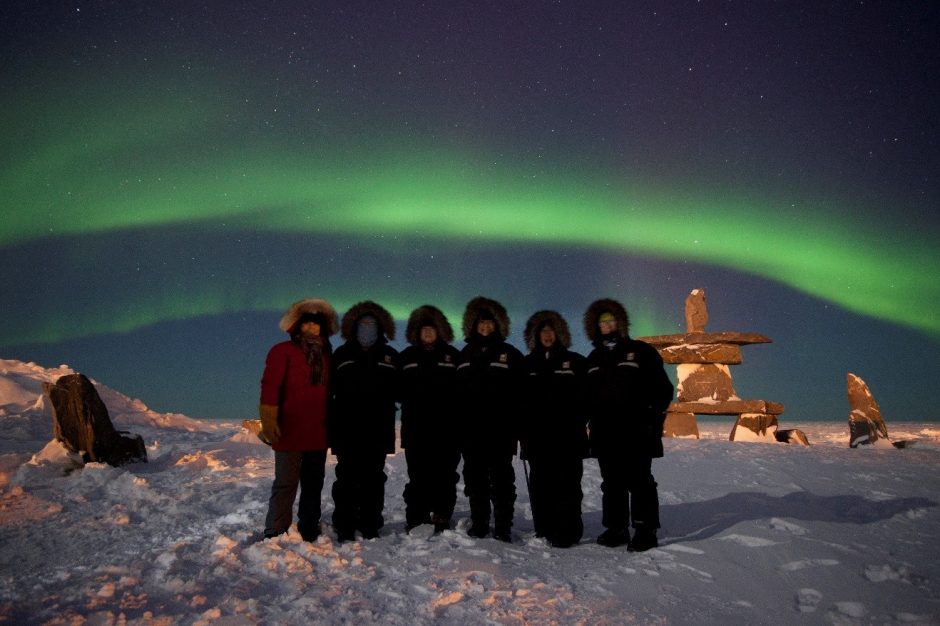
How to Get a Group Photo in Front of the Aurora Borealis
Simply put, auroras are mesmerizing, inspiring, captivating, and…very photogenic! What’s better than having a great aurora shot? A great aurora shot with you and your friends in it, of course!
Follow these simple steps to make sure you get a great shot in front of nature’s most spectacular light show.
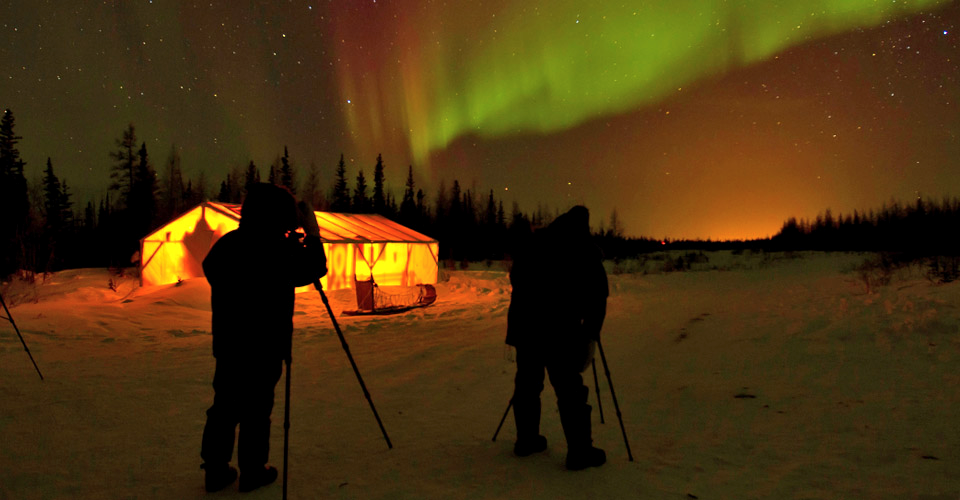
Make sure you have the right photo gear
Many cameras nowadays have capabilities to photograph in extremely low lighting conditions. However, if you have a point and shoot, you may want to do a little due diligence to make sure it’ll work. If you have a DSLR or a mirrorless camera, these will be just great!
(hint: if you have a point and shoot, make sure it can be manually set to f/4 or lower, a 25 second exposure, and ISO 1600. Oftentimes, cameras will not be able to do the last part…the ISO 1600, but this is critical)
You’ll also need a tripod, due to the long exposure.
Get your crew lined up
There are of course many ways you can position yourself when taking a photo…you can line up, you can do something silly, or you can act like the camera isn’t there for that candid look. I’ll let this be up to you.
The thing you really want to pay attention to is the lighting. We’re talking about taking photos at night, which is inherently pretty difficult when it comes to capturing light. Thus, you need to retrain your eyes to see light in even the faintest of ways. A small flood light on the side of the building 50 yards away? Great! A bright moon? Excellent! These are just two examples, but they do illustrate that you don’t need much. Since your camera will be taking a photo for upwards of 25 seconds, it pulls in even the softest of light (hence why the aurora can be photographed in the first place).
In fact, you need to be careful that you don’t have too much light on you as well. Some folks will try to shine a flashlight on themselves, acting like a camera flash, and this often results in the people being way to bright. It’s a delicate balance. Plan to be patient and take several photos.
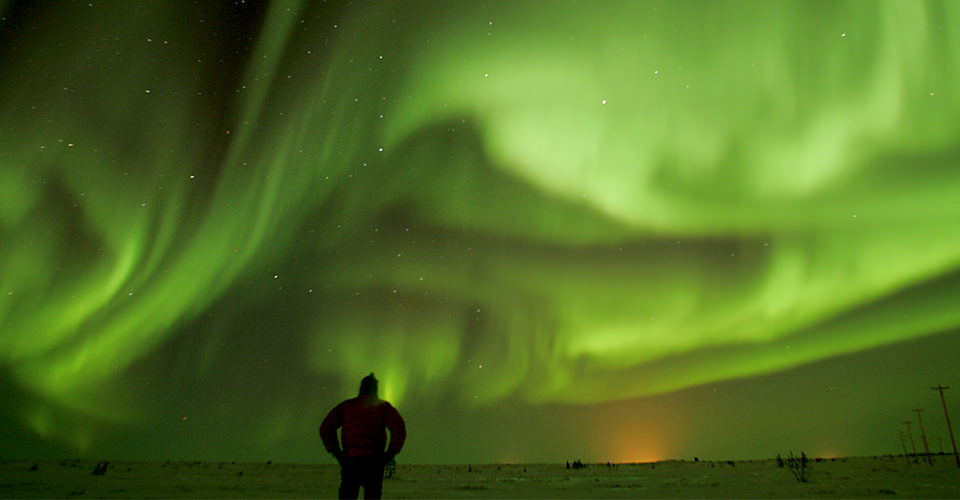
Capture that aurora!
The other half of the equation is to make sure that you get the aurora in full glory. Certainly there are numerous environmental factors that go into how strong the aurora is on any given night up in polar regions. But even weak auroras can still be captured nicely. Here’s the step by step process:
- Get your widest lens on your camera and get it on the tripod
- Set your camera to manual and dial in the following custom settings: f/2.8 (or your smallest aperture number), 25” exposure; ISO 1600
- Set your camera on auto focus. Shine a bright light on your friends. Focus on them. Now “lock in” your focus by setting your camera from auto to manual focus. Don’t touch your focus ring, and this keeps the camera focused perfectly.
- Set your camera on a timer, or use a remote control, get in with your buddies, and take the shot!
- Stay as still as possible for the entire 25 seconds. VERY still.
- When the photo is done, check it for sharpness, and repeat as necessary (I’d say at least 3 times). Yep, you’ll be cold, but the final photo will be amazing!
And last, share with friends and be proud!
No doubt when you witness the aurora you won’t be able to wait to tell friends and family how spectacular it was, and that a trip like this needs to be on their list as well. Share your stories, photos, and impressions with them. And if you’re on a Natural Habitat Adventures Northern Lights tour, share it with us, too, as we love seeing our travelers in their element. And who knows, you might end up in our next catalog!
Best,
Court
Leave a reply