Back to Basics: Tips for Point-and-Shoot Photography
Large cameras with interchangeable lenses aren’t for everyone, but that doesn’t mean that you can’t get show-stopping photos while on your photographic adventures! And the great thing about point and shoots is that their simplicity allows you to focus on the fundamentals of photography, such as composition and lighting. We’ve assembled these tips and tricks to help you make the most of your point-and-shoot cameras so you’ll return with a lifetime of memories and photos!
Composition
Simply put, composition is critical to taking great photos. While all rules are always meant to be broken, in the world of photography, there are several key rules you should at least consider when setting up for the shot. If you choose to break them, at least you’ll know you’re doing so!
Rule of Thirds
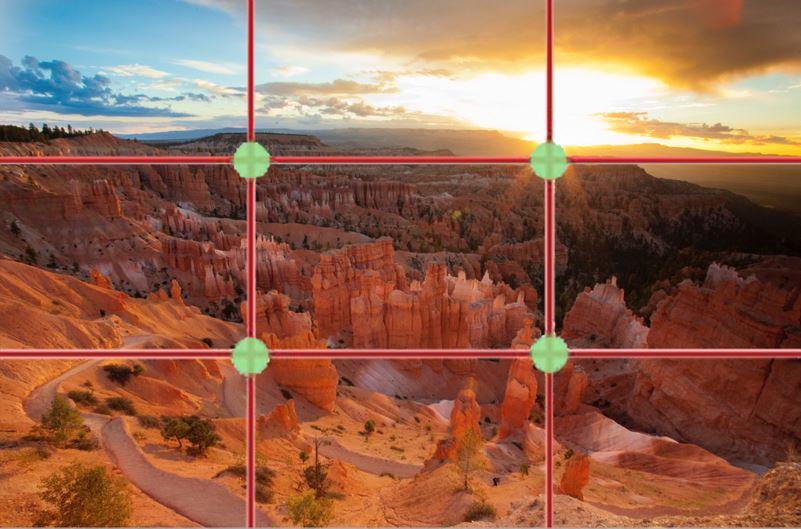
There is a fair bit of mathematics behind aesthetics of art. Symmetry, anti-symmetry, angles, leading lines, and much more. However, these could (and do) take up entire books worth of material. Instead, the most powerful way to immediately improve your composition is to imagine a grid over your viewfinder, such that the scene is broken into thirds, both vertically and horizontally. The key is to break your photo up into thirds, while also trying to ‘add significance’ to the four intersecting points.
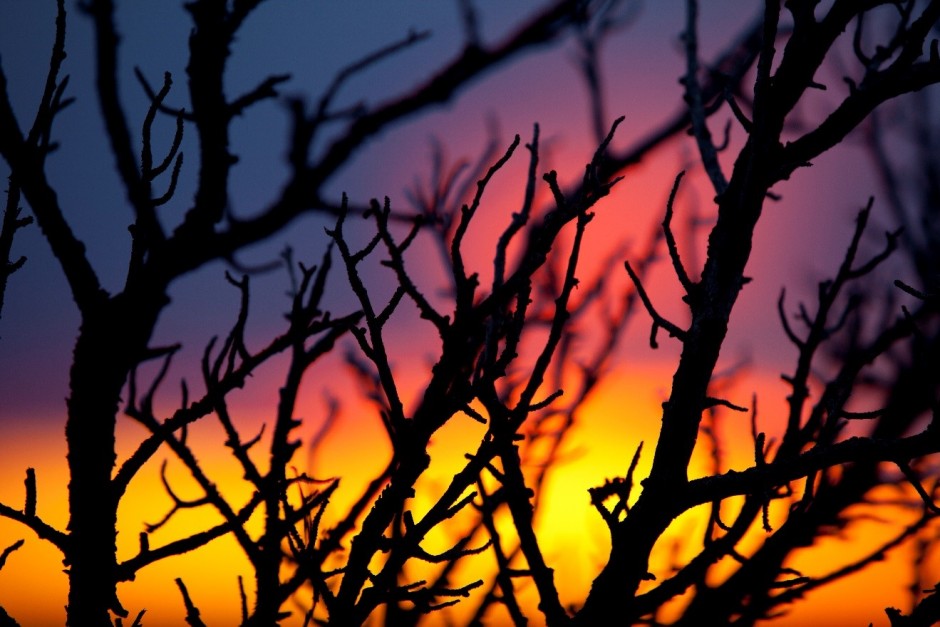
For example, instead of placing the horizon of a beautiful sunrise right in the middle, 50/50 in your frame, have the sky take up 1/3 and the ground take up 2/3s. Or, vice versa, with the sky 2/3s and ground 1/3. Lastly, see if you can position the sun (or any other dominant element of your scene) over one of the four intersecting points to add dimension to the photo.
Similarly, when there is a single subject in your photo (e.g., lion, polar bear, toucan), try and place the animal near one of the intersecting points instead of right in the middle of the photo. Often, by having the subject of the photo slightly off center, it creates a much more intriguing photo.
Lighting
When photographing natural landscapes, wildlife, and travel in general, you rarely get the perfect lighting that you’re hoping for. Mother nature always has the final say on what the day’s conditions will be like! Thus, you’ll want to know how to adjust the light entering your camera to compensate for whatever is going on around you.
The quickest and easiest way is to adjust the exposure meter, often denoted by the exposure meter below. Each camera is slightly different in terms of its menu system, so we recommend consulting your manual to get it right. However, once you become familiar with this tool, you’ll be amazed at how much more versatile your photography can be.
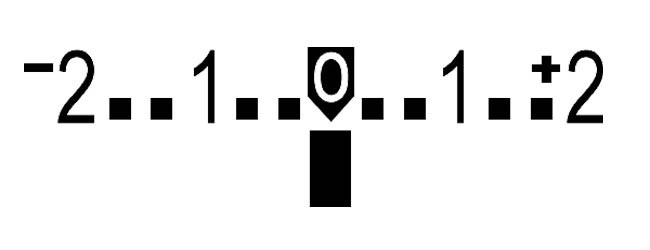
When your photos are looking too bright, adjust your exposure meter towards the negative side (to the left). If your photos are too dark, adjust towards the positive side (to the right). In general, if you want more contrast in your photo (e.g., sunsets), shift your exposure to negative. Generally when shifting negative or positive, only do so in small increments, as small changes can make a big difference to your photo.
Macro Setting
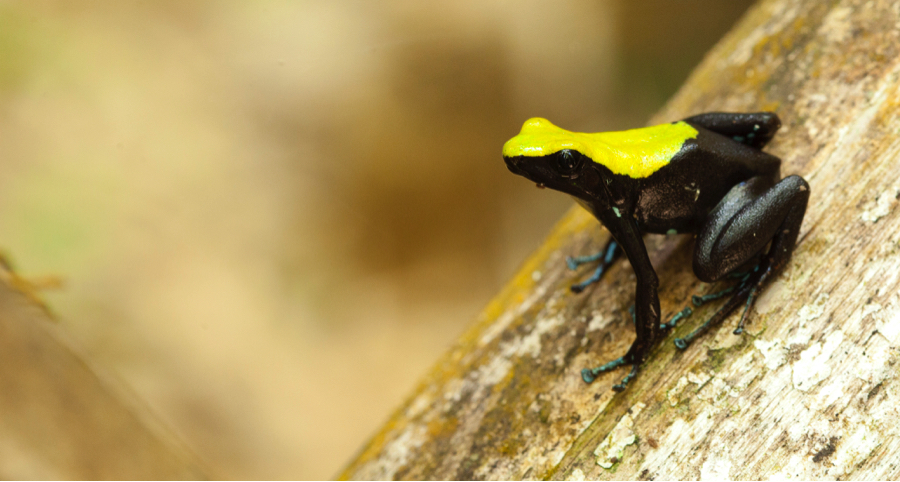
Found on nearly every point-and-shoot camera is a small flower icon like the one below. By pressing this button, you can enable “macro” mode on your camera, which allows you to get surprisingly close to your subject to capture small details. Typical instances where you’d want to use this are for photographing flowers, insects, and other small things. With this setting, you’ll be able to capture their brilliance, no matter how tiny they are!

Our Natural Photographer website covers a wide range of techniques, tips, and photographic tutorials, and much of the topics discussed pertain to all photography, from point-and-shoots all the way up to big SLRs with changeable lenses. However, we know that sometimes photography can get quite specialized depending on the style of photography you enjoy and the gear you have at your disposal. I hope that this “back to basics” article is helpful for all of you out there, and if you can think of anything we missed, please share in the comments below.
Happy photographing!
Court
2 Comments

Glenn
July 11, 2018 at 10:08 am

Court Whelan, Ph.D.
July 20, 2018 at 11:38 am
Should I shoot in Jpeg or in Raw?
generally if you plan to edit your photos at all, I’d recommend Raw. But, keep in mind that it MUST be edited and turned into JPEG, so if you’re not into that extra work, JPEG is pretty good. Just not ideal for editing in photoshop or iphoto or whatever program is your go-to. Also keep in mind that Raw takes up about 10x the harddrive space, so if you’re limited in camera or computer memory, they’re pretty massive files.
Hope this helps a little!